

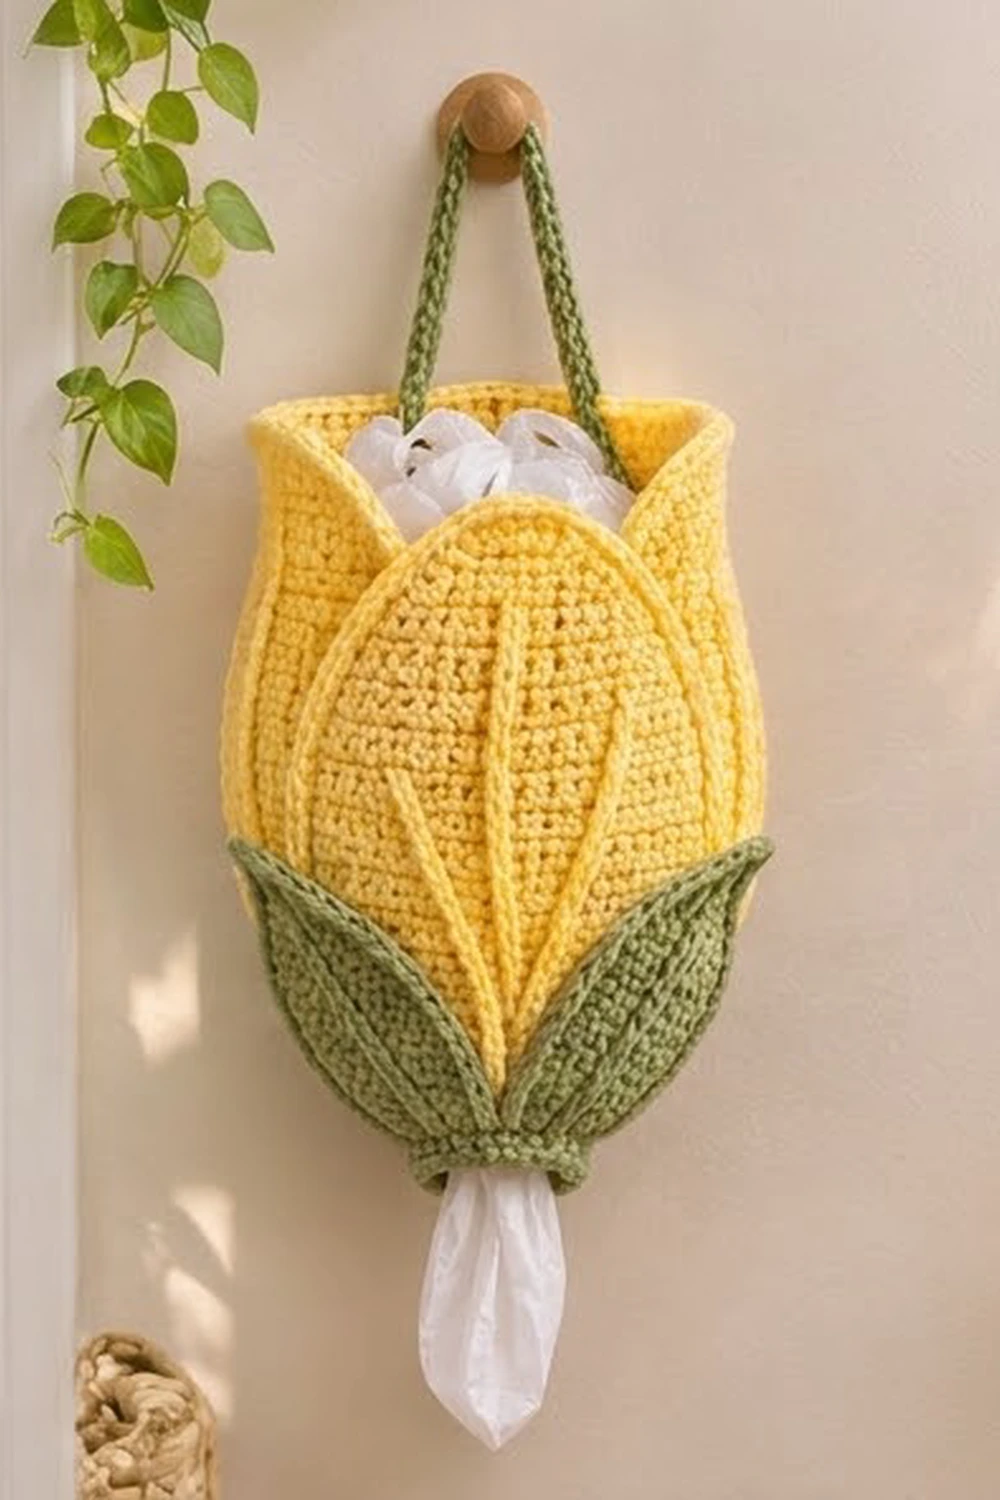
This tulip bag holder gives you a tidy place to keep plastic grocery bags. You stuff bags in through the open petal top and pull them out one at a time through the small green cuff at the bottom. The finished holder looks like a plump closed tulip bud hanging on the wall.
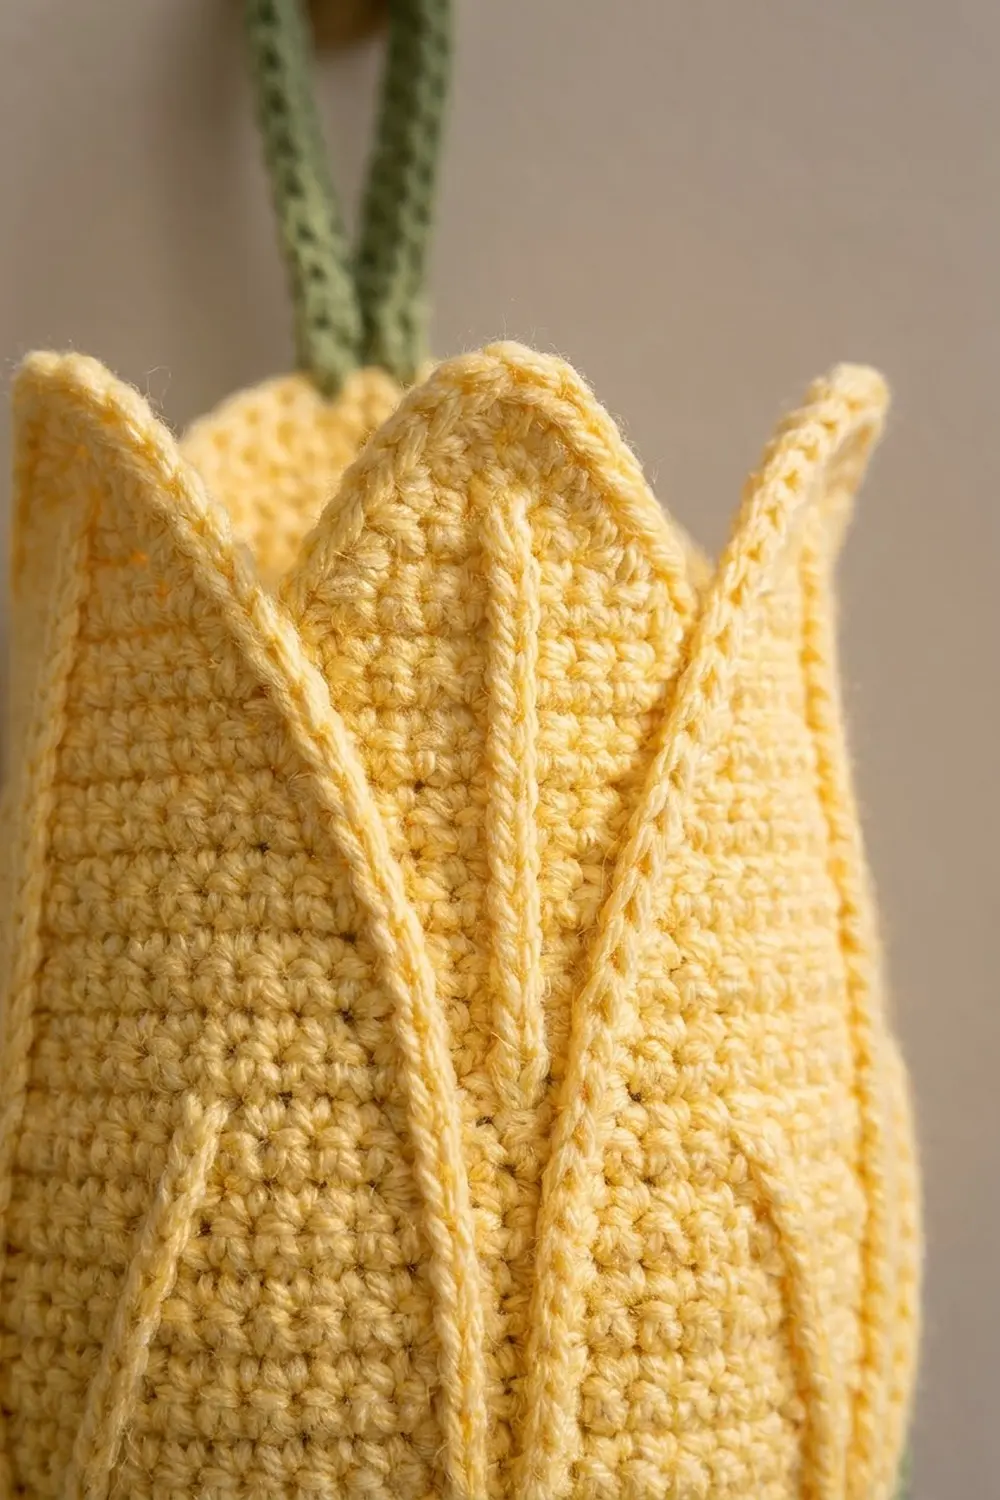
The design uses two colors: a soft butter yellow for the bloom and a muted sage green for the base, leaves, and hanging cord. The body is solid single crochet for a firm, slightly textured surface. Raised slip-stitch veins and a rolled reverse-single-crochet edge add detail without making the pattern hard.
All instructions use US crochet terms. The finished body is about 7.5 in (19.1 cm) wide when flat and 11.8 in (30.0 cm) tall from the cuff to the petal tips. With the hanging loop, it measures about 17 in (43.2 cm).
You work the body from the bottom up in joined rounds, starting at the open cuff. The top splits into three petal points worked in rows. After that you make a front and back petal appliqué, two leaves, and a cord, then sew everything in place.
Finished Size and Construction
- Finished size: 7.5 in (19.1 cm) wide flat × 11.8 in (30.0 cm) tall; about 17 in (43.2 cm) including the loop
- Skill level: Confident beginner to intermediate
- Terminology: US
- Yarn weight: Worsted (#4) cotton or cotton blend
- Hook: 4.0 mm (G-6)
- Number of pieces: 1 body plus 2 petal appliqués, 2 leaves, 1 cord (one finished item)
- Layout: Front petal centered over the round join; back petal opposite; leaves at the base of the front petal
- Body size before border: 7.5 in (19.1 cm) wide flat × 11.3 in (28.7 cm) tall
- Border depth: about 0.5 in (1.3 cm) at the petal rim
Materials
Choose a smooth worsted cotton. Cotton keeps its shape when the holder is packed with bags and does not stretch the way acrylic can. Use a tight, firm fabric so the bags don’t show through.
- Butter yellow: 120 g, about 205 m
- Sage green: 50 g, about 85 m
Tools:
- 4.0 mm (G-6) crochet hook
- Tapestry needle
- 6 stitch markers
- Rust-proof pins
- Measuring tape
- Scissors
These amounts include about a 15% margin for your gauge swatch and for undoing work.
Abbreviations (US Terms)
- ch – chain
- sl st – slip stitch
- sc – single crochet
- hdc – half double crochet
- dc – double crochet
- inc – 2 sc in the same stitch
- sc2tog – single crochet 2 together
- BLO – back loop only
- st(s) – stitch(es)
- rnd – round
Reverse sc (crab stitch): Work from left to right (right-handers). Insert the hook into the next stitch to the right, yo, pull up a loop, yo, and pull through both loops. This makes a rolled, corded edge.
Surface slip stitch: Hold the yarn behind the fabric. Insert the hook from the front between stitches, pull up a loop, then pull it through the loop on the hook. Repeat along the line you want. This makes a raised vein.
Gauge and Checkpoints
Gauge: 16 sc × 18 rnds = 4 in (10.2 cm) in joined rounds of sc.
Test the first eight rounds of the body before you commit to the whole piece. Use these checkpoints as you go:
- After Rnd 3: The cuff has a circumference of about 6 in (15.2 cm), or about 1.9 in (4.8 cm) across.
- After Rnd 7: Circumference is 12 in (30.5 cm). The green section is about 1.5 in (3.8 cm) tall measured up the side.
- After Rnd 9: Circumference is 15 in (38.1 cm), and the body is 7.5 in (19.1 cm) wide flat.
- After Rnd 34: Height is about 7.6 in (19.3 cm).
- After Rnd 40: Height is about 8.9 in (22.6 cm), and the body is 6.75 in (17.1 cm) wide flat.
- Petal points: Each is 2.4 in (6.1 cm) tall and 4.5 in (11.4 cm) wide at the base.
If your piece comes out too big, go down a hook size. If it comes out too small, go up a hook size. Don’t add or remove stitches, because the petal points need 54 stitches to divide evenly by three.
Body
The body is worked in joined rounds. Start each round with ch 1, which doesn’t count as a stitch, and join with sl st to the first sc. The round join becomes the center front, where the front petal will hide it.
Cuff and base (sage green)
Foundation: Ch 24 and join with sl st to the first ch to form a ring. Don’t twist the chain.
Rnd 1: Sc in each ch around. (24)
Rnds 2–3: Sc in each st around. (24)
Rnd 4: Sc 3, inc; repeat 6 times. (30)
Rnd 5: Sc 4, inc; repeat 6 times. (36)
Rnd 6: Sc 5, inc; repeat 6 times. (42)
Rnd 7: Sc 6, inc; repeat 6 times. (48) Change to yellow on the final sl st and fasten off green.
Six increases per round makes a cone instead of a flat disk, so the base cups upward like the green calyx of a flower.
Bloom (butter yellow)
Rnd 8: Sc 7, inc; repeat 6 times. (54)
Rnd 9: Sc 8, inc; repeat 6 times. (60)
Rnds 10–34: Sc in each st around. (60) That is 25 rounds.
Rnd 35: Sc 8, sc2tog; repeat 6 times. (54)
Rnds 36–40: Sc in each st around. (54) Don’t fasten off.
The decrease in Rnd 35 pulls the top in a little, which gives the bud its rounded “shoulder.”
Petal Points
Divide the 54 stitches of Rnd 40 into three groups of 18 and mark them: sts 1–18, 19–36, and 37–54. The point over sts 19–36 sits at center back. The other two sit at the front-left and front-right sides, and the valley between them is at the round join.
Point 1 (sts 1–18):
Row 1: Ch 1, sc in the next 18 sts, turn. (18)
Row 2: Ch 1, sc2tog, sc 14, sc2tog, turn. (16)
Row 3: Ch 1, sc 16, turn. (16)
Row 4: Ch 1, sc2tog, sc 12, sc2tog, turn. (14)
Row 5: Ch 1, sc2tog, sc 10, sc2tog, turn. (12)
Row 6: Ch 1, sc2tog, sc 8, sc2tog, turn. (10)
Row 7: Ch 1, sc2tog, sc 6, sc2tog, turn. (8)
Row 8: Ch 1, sc2tog, sc 4, sc2tog, turn. (6)
Row 9: Ch 1, sc2tog, sc 2, sc2tog, turn. (4)
Row 10: Ch 1, sc2tog twice, turn. (2)
Row 11: Ch 1, sc2tog. (1) Fasten off.
Points 2 and 3: Join yellow in st 19 and repeat Rows 1–11 over sts 19–36. Then join in st 37 and repeat over sts 37–54.
The body now measures 11.3 in (28.7 cm) tall: 40 rounds plus 11 rows, divided by 4.5 rows per inch.
Body Veins
Use yellow to work 6 vertical lines of surface slip stitch from Rnd 9 up to Rnd 30. Place them between sts 5/6, 15/16, 25/26, 35/36, 45/46, and 55/56 of Rnd 9, which is 10 stitches apart. Keep the tension relaxed so the lines don’t pucker the fabric. Some of these veins will be partly covered by the petals.
Petal Appliqués (make 2, butter yellow)
Work in rows, starting with ch 1 at the beginning of each row. The ch 1 doesn’t count as a stitch.
Foundation: Ch 7.
Row 1: Sc in the 2nd ch from the hook and in each ch across, turn. (6)
Row 2: Inc, sc 4, inc, turn. (8)
Row 3: Inc, sc 6, inc, turn. (10)
Rows 4–9: In each row, inc in the first st, sc to the last st, inc in the last st. This gives 12, 14, 16, 18, 20, and 22 sts. Row 9 has 22 sts.
Rows 10–20: Sc across. (22) That is 11 rows.
Rows 21–29: In each row, sc2tog, sc to the last 2 sts, sc2tog. This gives 20, 18, 16, 14, 12, 10, 8, 6, and 4 sts. Row 29 has 4 sts.
Row 30: Sc2tog twice. (2)
Row 31: Sc2tog. (1) Don’t fasten off.
At this point the petal measures 5.5 in (14.0 cm) wide and 6.9 in (17.5 cm) tall.
Petal veins: Using yellow, work a center line of surface slip stitch from Row 2 up to Row 24. Then work two side veins that start beside the center line at Row 6 and curve outward to end 5 sts in from each edge at Row 20.
Leaves (make 2, sage green)
Foundation: Ch 19.
Rnd 1: Working into the chain from the 2nd ch from the hook:
– Sc 1, hdc 2, dc 11, hdc 2, sc 1. That covers 17 chs.
– Work 3 sc in the last ch.
– Rotate the piece and work along the other side of the chain: sc 1, hdc 2, dc 11, hdc 2. That covers 16 chs.
– Work 2 sc in the first ch, which already holds 1 sc.
– Join to the first sc.
Count: 17 + 3 + 16 + 2 = 38 sts. Each tip now has 3 sc.
Rnd 2: Ch 1. Sc in each st around. In the center sc of each tip, work (sc, ch 2, sc) instead. Join. (40 sc and 2 ch-2 tips)
Before Rnd 2, the leaf measures 4.75 in (12.1 cm) by 1.5 in (3.8 cm). Finished, it measures 5 in (12.7 cm) by 2 in (5.1 cm).
Leaf vein: Work surface slip stitch along the foundation chain from tip to tip.
Hanging Cord (sage green)
Ch 66. Sl st in the back bump of each ch from the 2nd ch from the hook. (65 sl sts) The cord is about 13 in (33.0 cm) long. Fasten off and leave 8 in tails.
Border
Border gauge: 1 sc per row end along the diagonal edges and 1 sc per stitch elsewhere. Reverse sc is worked 1 per stitch.
Petal rim, Rnd 1 (yellow): Join at the valley between Points 3 and 1. For each point:
– Sc up the side, 1 per row end. (11)
– Work 3 sc in the tip st.
– Sc down the other side, 1 per row end. (11)
That is 25 sts per point, or 75 sts in total. Join.
Petal rim, Rnd 2: Ch 1. Reverse sc in each st around. (75) Join and fasten off.
Bottom cuff (green): Join in the foundation-chain loops. Ch 1 and reverse sc in each loop around. (24) Join and fasten off.
Petal appliqué edging (on each petal, continuing from Row 31):
– Rnd 1: Ch 1. Work 3 sc in the tip st. Sc 1 in each row end down the side. (30) Sc in each foundation loop. (6) Sc 1 in each row end up the other side. (30) Join. Count: 3 + 30 + 6 + 30 = 69.
– Rnd 2: Reverse sc in each st around. (69)
After edging, each petal measures about 6 in (15.2 cm) by 7.2 in (18.3 cm). Leave a long tail for sewing.
Why the math works: Each side of a point is 11 rows tall, so 1 sc per row end gives 11 sts per side. The extra 2 sts at each tip let the point turn sharply without cupping. The tips cup at 3 sc but lie flat at 4 or more. This is also why the leaves get (sc, ch 2, sc) at the tips. The rim edging adds about 0.5 in (1.3 cm), bringing the body from 11.3 in (28.7 cm) to 11.8 in (30.0 cm).
Assembly
- Front petal: Center the front petal over the round join. Line up its foundation edge with Rnd 8, which is the first yellow round. Pin it, then whipstitch it in place through the inner loops of edging Rnd 1. Leave the top 1.5 in (3.8 cm) of the tip free.
- Back petal: Sew the back petal the same way at center back, under Point 2.
- Leaves: Pin one leaf on each side of the front petal. The inner tip goes on Rnd 6, and the leaf angles up and outward, overlapping the petal edge. Sew around the leaf, leaving the top tip loose.
- Cord: Sew one end of the cord to the inside of the body 1 rnd below the rim at st 14 of Rnd 40. Sew the other end at st 41, which is the opposite side. Stitch through 3 rnds so the cord can carry a full load of bags.
Final Blocking
- Lightly mist the body and the appliqués with water.
- Stuff the body firmly with plastic bags or a rolled towel to round out the bud.
- Pin each petal point and leaf tip into a sharp point.
- Shape the cuff so it is round, about 1.9 in (4.8 cm) across.
- Let it dry fully, then remove the pins.
- Check the width: the body should be about 7.5 in (19.1 cm) wide flat.
Final Quality-Control Checklist
- Body round counts: 24, 30, 36, 42, 48, 54, 60, then 54 after Rnd 35.
- Each point has 11 rows and ends at 1 st.
- Rim border has 75 sts, and each petal edging has 69.
- The round join is hidden behind the front petal.
- Veins are raised and even, and they don’t pucker the fabric.
- The cord is sewn on securely at opposite sides.
- A bag pulls easily through the cuff.
Troubleshooting
- The cone ruffles: Your increases are too frequent for your tension. Use a smaller hook for the green section.
- The body leans: The joins have drifted. Place the join by sl st into the first sc, not the ch 1.
- The points curl: Block them flat, or loosen the rim sc.
- Veins pucker: Redo them with a larger hook.
- The petal bulges when sewn: Pin it first, and sew along the outer edge with the body stuffed.
- Bags drop out too freely: Work one more sc round in the cuff before the border.
Care
Hand wash in cool water and lay flat to dry, reshaping while damp. Avoid tumble drying, which can distort the points.
Final Notes
The measurement chain is simple:
– The 24-stitch cuff is 6 in (15.2 cm) around.
– The cup grows to 60 stitches, 15 in (38.1 cm) around.
– The body tapers to 54 stitches for three 18-stitch points.
– The points finish at 11.3 in (28.7 cm) tall.
– The rim adds 0.5 in (1.3 cm), for a finished height of 11.8 in (30.0 cm).
Check your gauge at each stage and the tulip will come out the right size.
Happy crocheting!