

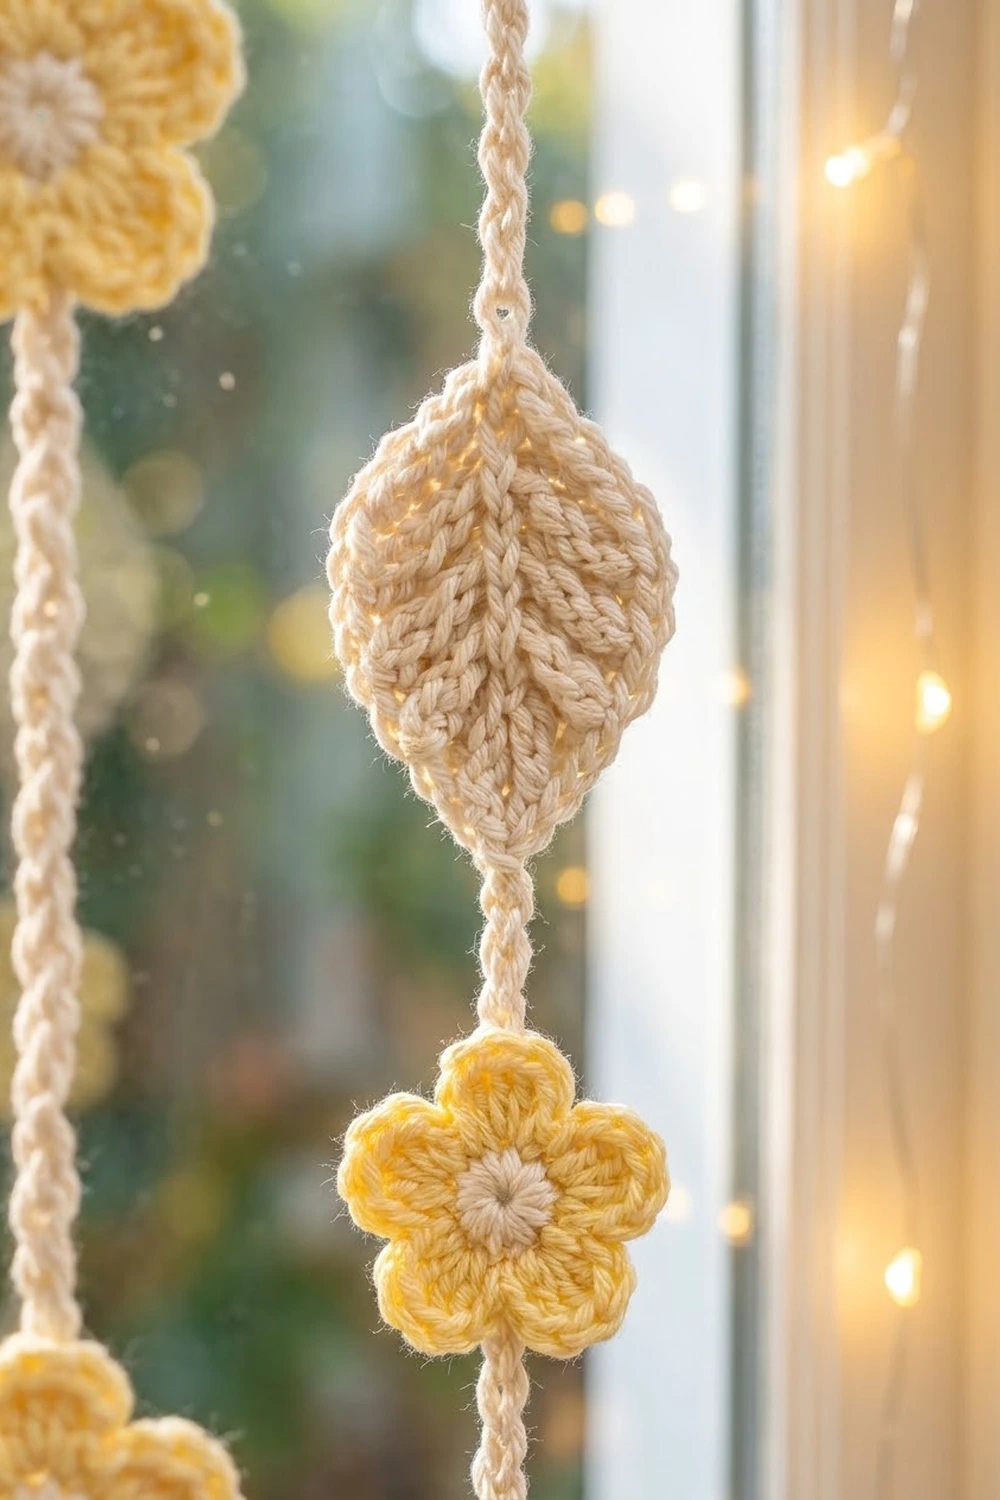
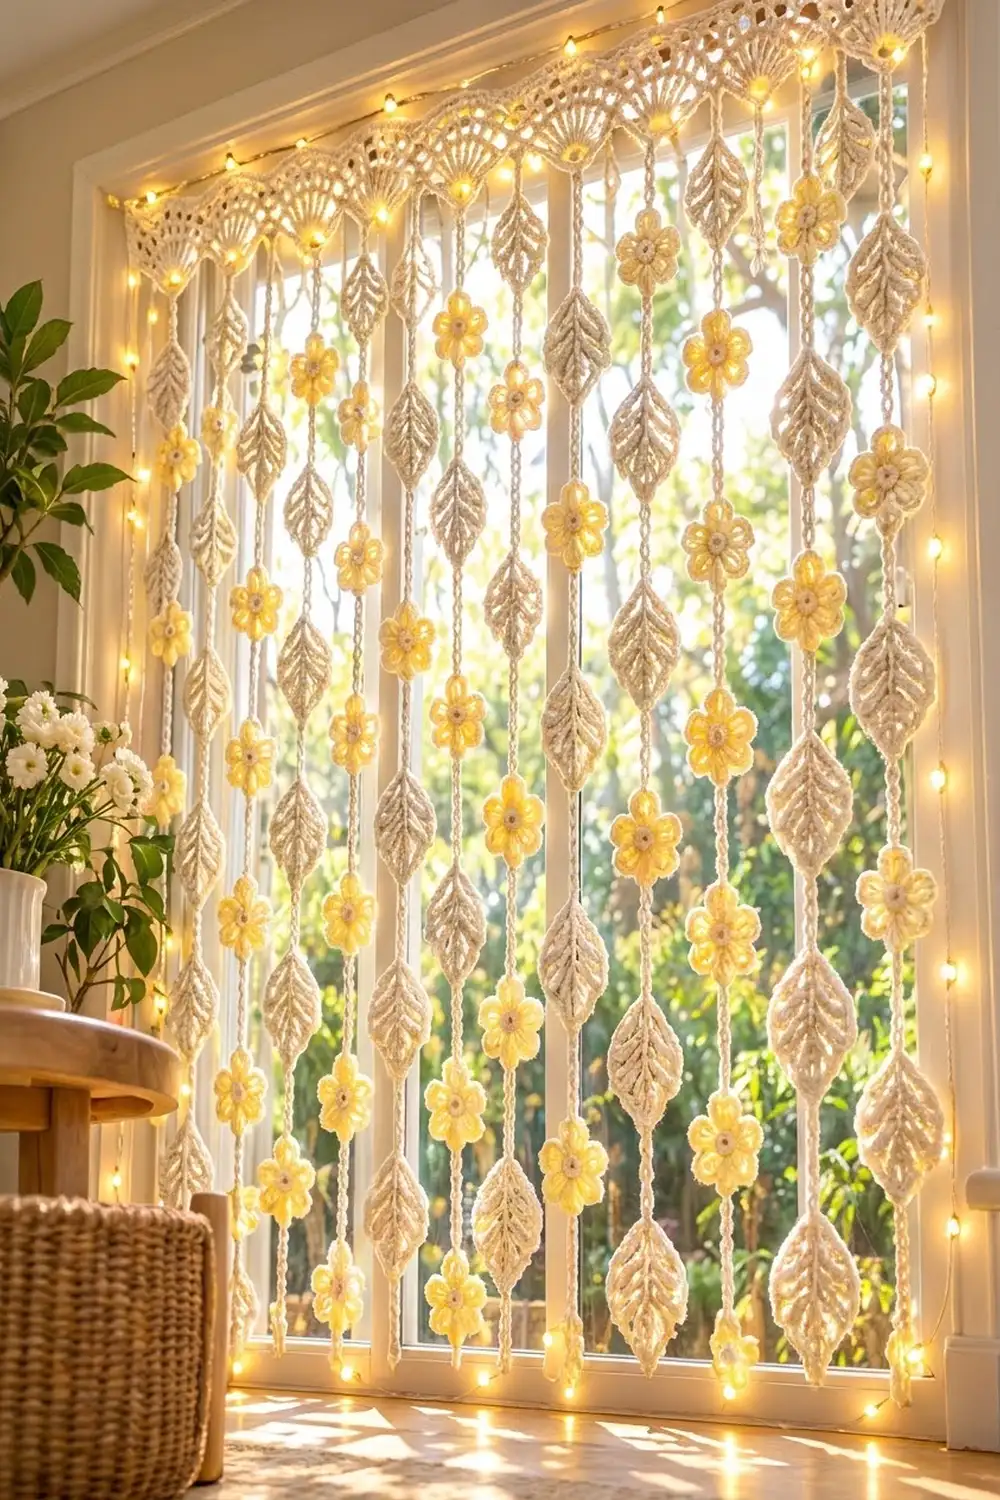
This window curtain has a lacy fan valance across the top, with 23 chain strands hanging below it. Each strand alternates ridged cream leaves with soft yellow flowers, so the light comes through in small patches, like sun through a meadow hedge.
The palette is two colors: warm cream cotton for the header, strands and leaves, and pale buttercup yellow for the petals. Each flower gets a small cream center, which ties it back to the leaves. The style is boho cottage: airy and light without looking fussy.
The pattern uses US crochet terms throughout. The finished curtain measures 37.25 in (94.6 cm) wide and 47.25 in (120.0 cm) long, including the border.
You’ll build it in four stages: a flat header worked bottom-up with 12 fans, 115 small flowers, 23 strands (leaves are worked in-line and flowers are joined as you go), and a 2-row border on the header’s top and sides.
Finished Size and Construction
- Finished size: 37.25 in × 47.25 in (94.6 cm × 120.0 cm)
- Skill level: Intermediate
- Terminology: US
- Yarn weight: DK (#3) cotton
- Hook: US 7 (4.5 mm)
- Number of pieces: 1 header, 115 flowers, 23 strands (with 115 in-line leaves)
- Layout: 23 strands, 1.5 in (3.8 cm) apart, 10 motifs each
- Header size before border: 36.25 in × 3.25 in (92.1 cm × 8.3 cm)
- Strand drop: 43.5 in (110.5 cm)
- Border depth: 0.5 in (1.3 cm), on the top and both sides of the header
Materials
Use a smooth, mercerized or combed DK cotton. Cotton holds the leaf ridges crisply and hangs straight. Avoid acrylic: it stretches on long strands.
- Color A, Cream: 300 g / 660 m (six 50 g / 110 m balls)
- Color B, Pale Yellow: 100 g / 220 m (two 50 g / 110 m balls)
Tools:
– US 7 (4.5 mm) hook
– Tapestry needle
– 25 locking stitch markers
– Tape measure
– Scissors
– Blocking mats, rust-proof pins and a spray bottle
– A 3/8 in (1.0 cm) curtain or tension rod
All quantities include a margin of about 20% for swatching and tails.
Abbreviations (US Terms)
- ch: chain
- sl st: slip stitch
- sc: single crochet
- hdc: half double crochet
- dc: double crochet
- tr: treble crochet
- BLO: back loop only
- MR: magic ring
- sp: space
- st(s): stitch(es)
- RS / WS: right side / wrong side
Special stitches:
– Fan: 9 tr worked into the same stitch.
– Reverse sc (rev sc): Working from left to right (right-handed), insert the hook in the next stitch to the right, yarn over, pull up a loop, then yarn over and pull through 2 loops. This makes a corded edge.
Gauge and Checkpoints
Gauge: 16 sc and 16 sc rows = 4 in (10.2 cm). Chain gauge is 4 ch = 1 in (2.5 cm).
Test one piece first. Make one flower and one leaf before you start the header. Note that the leaf is normally worked in-line on a strand: for the test, make 2 in (5.1 cm) of chain, work the leaf on it, then fasten off.
- The flower should measure 1.75 in (4.4 cm) across.
- The leaf should measure 2.75 in × 1.5 in (7.0 cm × 3.8 cm).
Checkpoints:
– Header Row 1: 36.25 in (92.1 cm) wide
– After Row 4: 2 in (5.1 cm) tall at the side edges
– After Row 8: 3.25 in (8.3 cm) tall
– After the border: 37.25 in × 3.75 in (94.6 cm × 9.5 cm)
– Each strand: 43.5 in (110.5 cm) when hanging
If your pieces are too big, go down 0.5 mm in hook size. If they’re too small, go up 0.5 mm. Fix this at the swatch stage. Being 0.25 in (0.6 cm) off per 4 in adds up to more than 2 in (5.1 cm) across the header.
Part 1: Header (Color A)
The header is worked flat from the bottom up. The strands later hang from the free loops of the foundation chain.
Row 1 (WS): Ch 146, sc in 2nd ch from hook and in each ch across. Turn. (145 sc)
Number the stitches 1 to 145 in your head. The fans will sit on stitch 7 and every 12th stitch after it.
Row 2 (RS): Ch 1, sc in first sc, skip 5 sc, Fan in next sc, skip 5 sc, sc in next sc; repeat from * 12 times. Turn. (121 sts: 13 sc + 12 Fans of 9 tr = 108 tr)
Row 3 (WS): Ch 4 (counts as tr), [dc in next tr, ch 1] 8 times, dc in next tr, tr in next sc; repeat from * 12 times. Turn. (217 sts: 13 tr + 108 dc + 96 ch-1 sps)
This row opens each fan into 9 spokes and fills the valleys with tr.
Row 4 (RS, leveling): Ch 4 (counts as tr), tr in next dc, dc in next ch-1 sp, dc in next dc, skip next ch-1 sp, hdc in next dc, [skip next ch-1 sp, sc in next dc] 3 times, skip next ch-1 sp, hdc in next dc, skip next ch-1 sp, dc in next dc, dc in next ch-1 sp, tr in next dc, tr in next tr; repeat from * 12 times. Turn. (145 sts: 1 + 12 repeats of 12)
In each repeat, 11 stitches go over the fan and 1 tr goes into the valley. Six ch-1 spaces are skipped per fan, which levels the top edge. The side edges should now measure 2 in (5.1 cm).
Row 5 (WS): Ch 1, sc in each st across. Turn. (145 sc)
Row 6 (RS, rod mesh): Ch 4 (counts as dc and ch 1), skip next sc, dc in next sc, [ch 1, skip next sc, dc in next sc] 71 times. Turn. (145 sts: 73 dc + 72 ch-1 sps)
Row 7 (WS): Ch 1, sc in each dc and each ch-1 sp across, ending in the 3rd ch of the turning ch. Turn. (145 sc)
Row 8 (RS): Ch 1, sc in each sc across. (145 sc) Fasten off.
The header should measure 36.25 in × 3.25 in (92.1 cm × 8.3 cm).
Part 2: Flower (Make 115)
Rnd 1 (Color A): MR, ch 1, 10 sc in ring, sl st to first sc. Fasten off. (10 sc)
Rnd 2 (Color B): Join B in any sc. Sl st in next sc, (hdc, 3 dc, hdc) in next sc; repeat from * 5 times. Sl st to the joining stitch. (30 sts: 5 petals of 5 sts + 5 sl st)
Fasten off with a 6 in (15.2 cm) tail and weave it in on the WS. The flower should measure 1.75 in (4.4 cm). The center dc of each petal is the petal tip.
Part 3: Ridged Leaf (Worked In-Line on a Strand)
You’ll make each leaf as part of a strand. With the strand in progress:
Core: Ch 10 more.
Rnd 1: Sc in 2nd ch from hook and next 7 ch, 3 sc in next ch (top tip). Working along the other side of the core, sc in next 8 ch, 3 sc in the skipped ch (bottom tip). Sl st to first sc. (22 sc)
Rnd 2: Ch 1, sc BLO in each sc around, working 3 sc in the center sc of each tip. Sl st to first sc. (26 sc)
Rnd 3: Repeat Rnd 2. (30 sc)
Don’t fasten off. Continue the strand chain from the join, which sits beside the bottom tip. The BLO rounds form raised outline ridges, and the core reads as a center vein. The leaf should measure 2.75 in × 1.5 in (7.0 cm × 3.8 cm), pointed at both ends.
Part 4: Strand Sequences
Each strand uses this sequence (F = flower join, L = leaf):
- Strand A, starts with a flower: Ch 8, F, [ch 8, L, ch 8, F] 4 times, ch 8, L, ch 4. Fasten off.
- Strand B, starts with a leaf: Ch 8, L, [ch 8, F, ch 8, L] 4 times, ch 8, F, ch 4. Fasten off.
Each strand has 10 ch-8 segments (20 in / 50.8 cm), 5 flowers (8.75 in / 22.2 cm), 5 leaves (13.75 in / 34.9 cm) and a 1 in (2.5 cm) tail, for a total of 43.5 in (110.5 cm).
Make All Pieces
- Header: 1 (Color A)
- Flowers: 115 (Color A center, Color B petals)
- Strand A: 12 (Color A, with 60 flowers and 60 leaves in total)
- Strand B: 11 (Color A, with 55 flowers and 55 leaves in total)
Layout across the curtain (left to right, 23 strands in the order A B A B … A):
LEVEL 1:  F L F L F L F L F L F L F L F L F L F L F L F
LEVEL 2:  L F L F L F L F L F L F L F L F L F L F L F L
LEVEL 3:  F L F L F L F L F L F L F L F L F L F L F L F
LEVEL 4:  L F L F L F L F L F L F L F L F L F L F L F L
LEVELS 5–10: continue alternating (Level 10 matches Level 2)
Joining
Strand placement: Work with the RS of the header facing you and the foundation edge at the bottom. Place markers in the free foundation loops below:
- Fan centers (Strand A): stitches 7, 19, 31, 43, 55, 67, 79, 91, 103, 115, 127, 139
- Valleys (Strand B): stitches 13, 25, 37, 49, 61, 73, 85, 97, 109, 121, 133
That gives 23 positions, each 6 sts apart. At the 16 sc / 4 in gauge, that’s 1.5 in (3.8 cm) between strands, and 33 in (83.8 cm) from the first strand to the last.
Join Color A with a sl st in a marked loop and work that strand’s sequence.
Flower join (F):
1. Hold a flower RS facing you, behind the working chain.
2. Sl st into the back of the top petal’s center dc.
3. Ch 6 behind the flower.
4. Sl st into the back of the sl st between the two lower petals.
5. Continue chaining.
The strand is now hidden behind the flower center, so it looks like the chain passes straight through.
Tension: Keep the ch-8 segments relaxed and even. Measure each segment against the gauge: 8 ch = 2 in (5.1 cm). Tight chains make strands shorter and stiff. Loose chains sag under the weight of the leaves.
Size checkpoint: Hang the header and finish 3 strands. Each should hang at 43.5 in (110.5 cm), and their motifs should line up level for level.
Border
Border gauge: 16 sc = 4 in (10.2 cm), the same as the header. The border goes on the top and both short sides only. The bottom edge holds the strands.
Side-edge rule: On the side edges, work 1 sc per sc row end, 2 sc per dc row end and 3 sc per tr row end. The rows are sc, sc, tr, tr, sc, dc, sc, sc, so each side gets 1 + 1 + 3 + 3 + 1 + 2 + 1 + 1 = 13 sc.
Border Row 1 (RS): Join A at the bottom corner of one side. Work 13 sc up the side, ch 2 for the corner, sc in each of the 145 Row 8 sts, ch 2 for the corner, then 13 sc down the second side. (171 sc: 13 + 145 + 13, plus 2 ch-2 corner sps) Do not turn.
The counts per side don’t include corner stitches. The corners are only the ch-2 spaces.
Border Row 2: Ch 1, rev sc in each sc and 2 rev sc in each ch-2 sp. (175 rev sc: 13 + 2 + 145 + 2 + 13) Fasten off.
Why the math works: The top edge takes 1 sc per stitch, so 145 sc stays at the header’s 36.25 in (92.1 cm). The sides follow the row heights: 13 sc at 4 sc per inch is 3.25 in (8.3 cm), which matches the header’s height. Neither edge ruffles or pulls in. The 2 border rows add 0.5 in (1.3 cm) per side, so the header becomes 37.25 in × 3.75 in (94.6 cm × 9.5 cm).
Final Blocking
- Lay the header RS up on the mats and pin it to 37.25 in × 3.75 in (94.6 cm × 9.5 cm).
- Pin each fan’s spokes into an even half-circle. Keep the valley points straight above their strands.
- Spray until damp, not soaked, and let it dry fully.
- Flatten any curled flowers with a light spray, pinning the petal tips round.
- Pin each leaf’s tips into sharp points and mist the leaves.
- Thread the rod through Row 6, going in and out of every 4th ch-1 space. Hang the curtain.
- While it hangs, mist the strands lightly and let gravity straighten them for 24 hours.
Final Quality-Control Checklist
- Header is 37.25 in (94.6 cm) wide and 3.75 in (9.5 cm) tall.
- There are 12 even fans, each with 9 spokes.
- There are 23 strands, 1.5 in (3.8 cm) apart, alternating A and B.
- Every strand is 43.5 in (110.5 cm) long.
- All 115 flowers face RS out, with the chain hidden behind them.
- All 115 leaves have sharp tips and visible ridges.
- Motif levels form a clean checkerboard across the curtain.
- All tails are woven in. None show through the mesh.
Troubleshooting
- Fans cup or ruffle: Your tr are too tall. Use a tighter yarn-over or go down 0.5 mm in hook size just for Rows 2–3.
- Header top is wavy: Recount Row 4. Each repeat must have exactly 12 sts.
- Strands are different lengths: Count your chains, and measure each ch-8 segment against 2 in (5.1 cm).
- Leaves curl: Your Rnd 1 is too tight. Work the core chain looser, then block.
- Flowers flip forward: Sl st into the back of the stitches only, and keep the ch-6 snug.
- Strands twist: Spray-block them hanging, or add a small knot at the tail.
Care
Hand-wash cold with mild soap and roll in a towel to remove the water. Reshape, then hang to dry so the strands stay straight.
Final Notes
Here’s the full measurement chain. The 16 sc / 4 in gauge gives a 145-st header 36.25 in (92.1 cm) wide. Eight rows build it to 3.25 in (8.3 cm), and the border adds 0.5 in (1.3 cm) on the top and sides, for 37.25 in × 3.75 in (94.6 cm × 9.5 cm). Twenty-three strands of 43.5 in (110.5 cm) hang from the fan centers and valleys, bringing the curtain to 47.25 in (120.0 cm). If your test flower and leaf are the right size and your chains match 4 ch = 1 in (2.5 cm), every other measurement will follow.
Happy crocheting!