

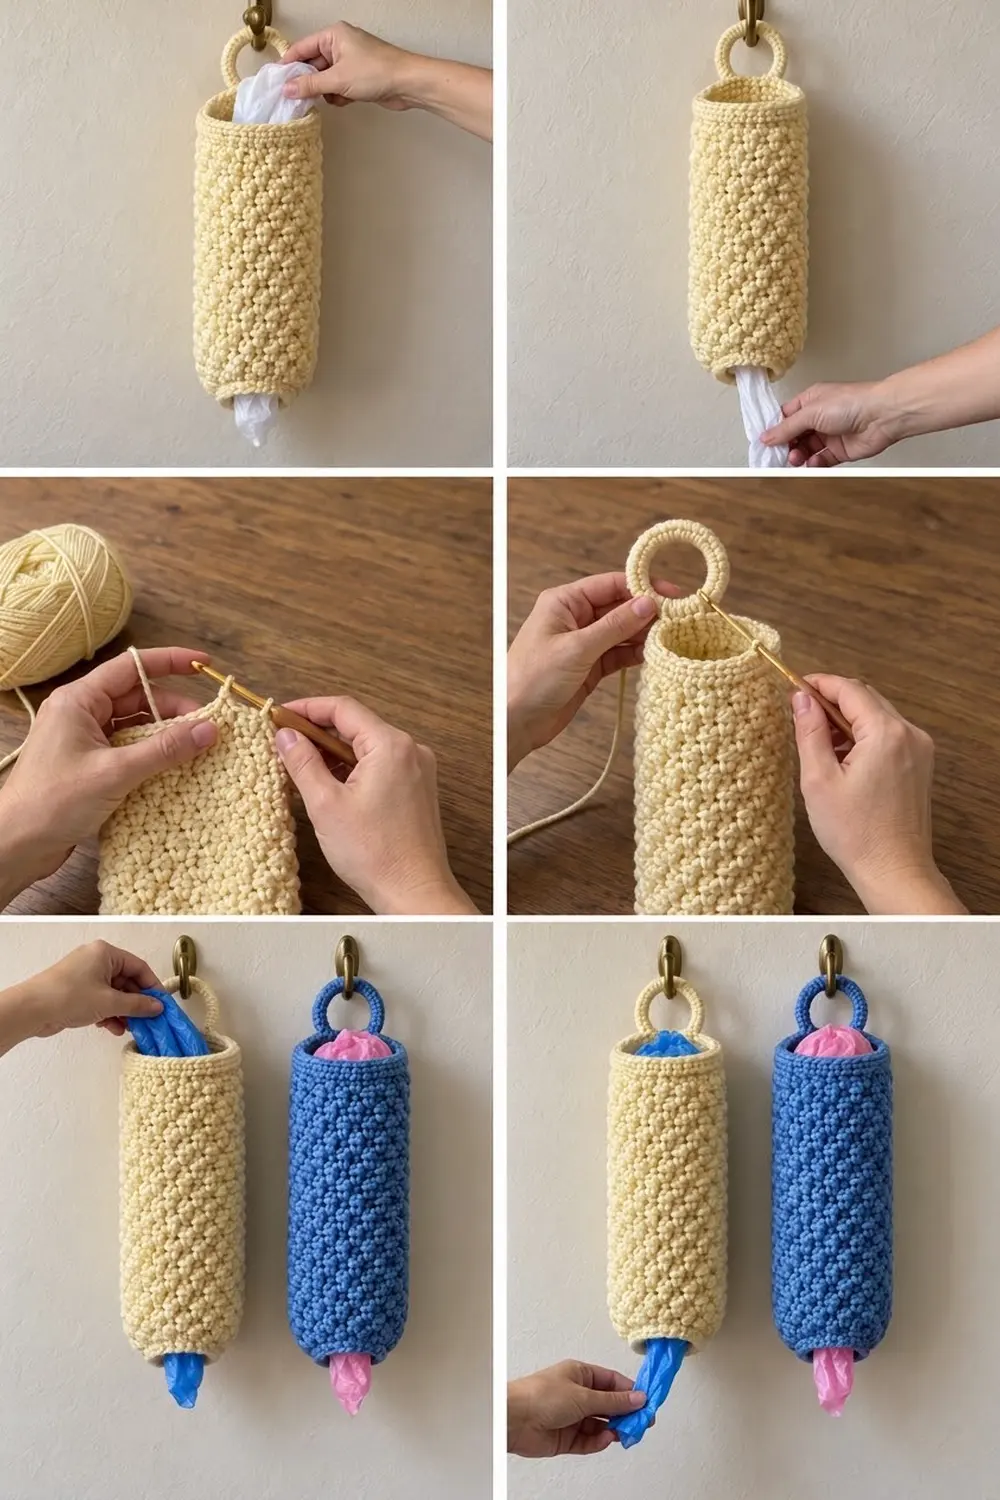
The Buttercup Pantry holder is a tall, soft tube that hangs from a hook and keeps plastic grocery bags in one tidy place. You stuff bags in through the wide top opening and pull them out one at a time through the narrower opening at the bottom.
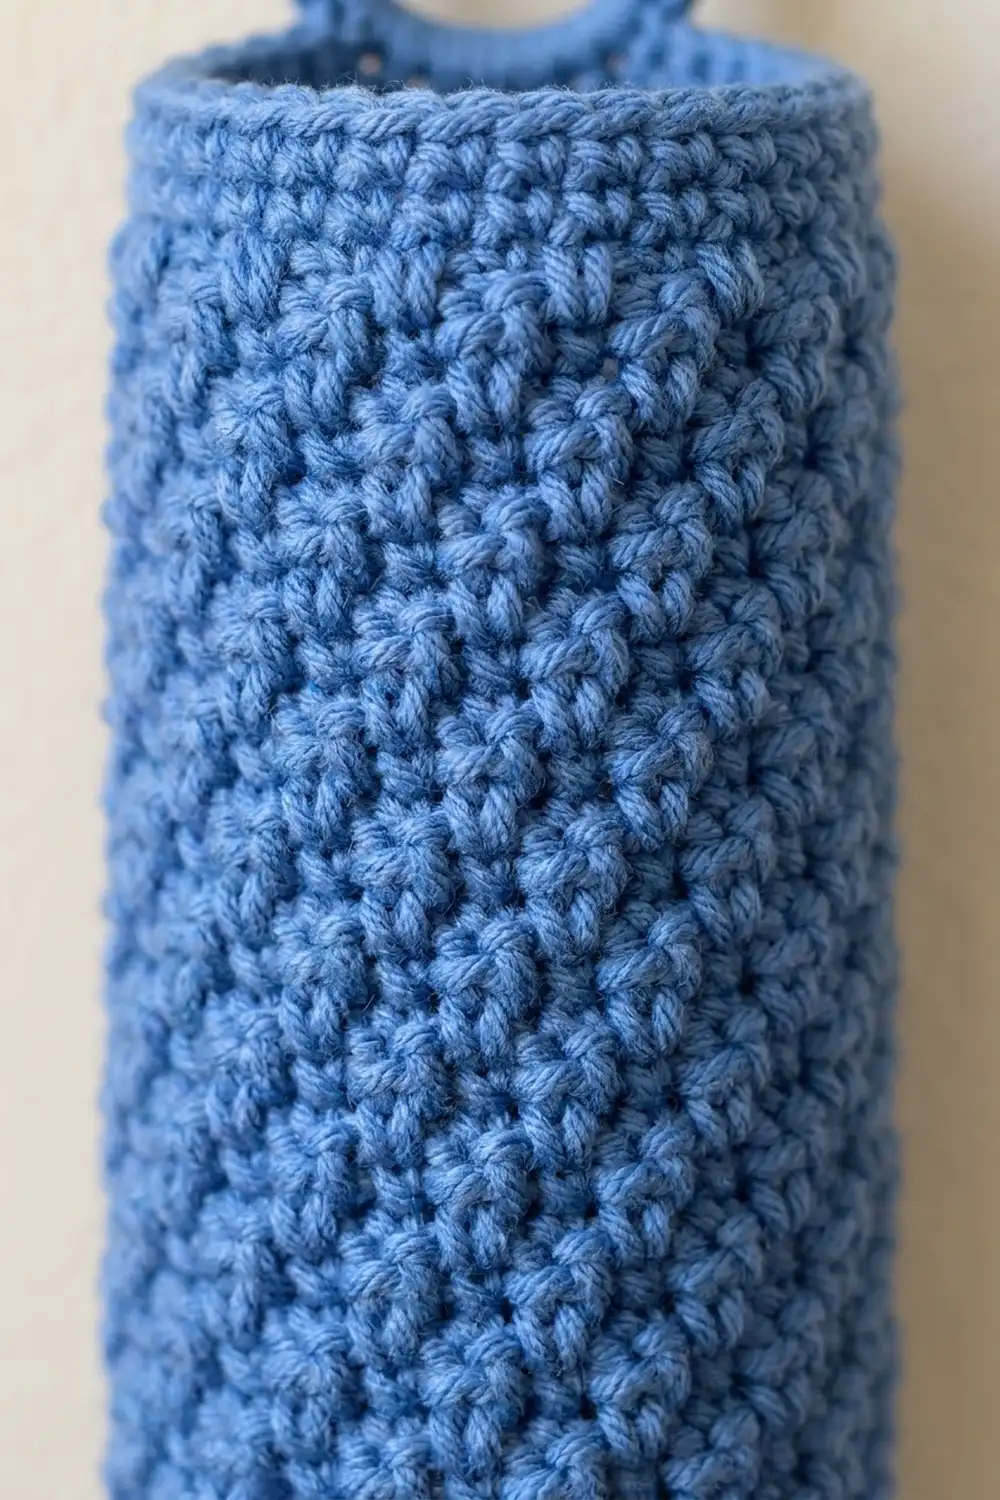
The sample is worked in pale butter yellow, with a cornflower blue version as an alternate colorway. The whole body is covered in lemon peel stitch, a simple alternation of single and double crochet that makes a dense, pebbly texture. That density matters here: it hides the bags inside and keeps the tube from sagging.
This pattern uses US crochet terms. The finished holder is 13 in (33.0 cm) tall from the bottom edge to the top rim, 4.5 in (11.4 cm) wide laid flat, with a 3 in (7.6 cm) flat-width bottom opening. A covered ring about 2.75 in (7.0 cm) across sits above the rim for hanging.
Construction is simple. You work the tube from the bottom up in joined rounds: a narrow single crochet band, three shaping rounds, a long lemon peel body, then a single crochet rim. Last, you cover a ring with single crochet, work a short tab, and sew the tab inside the back of the rim.
Finished Size and Construction
- Finished size: 13 in (33.0 cm) tall x 4.5 in (11.4 cm) wide flat, plus the hanging ring
- Skill level: Easy
- Terminology: US crochet terms
- Yarn weight: Worsted (#4)
- Hook: 5.0 mm (H-8)
- Number of pieces: 1 holder (a tubular body plus an attached hanging ring)
- Layout: Single vertical tube, open at top and bottom, ring centered at the back of the rim
- Piece size: 9 in (22.9 cm) around the body, 6 in (15.2 cm) around the bottom opening
- Size before border: 11.9 in (30.2 cm) tall
- Border depth: Top rim 1.1 in (2.8 cm), 5 rounds of single crochet
Materials
Choose a smooth worsted-weight yarn in cotton, cotton blend, or acrylic. Cotton gives the firmest tube and the clearest stitch texture. Avoid fuzzy or very stretchy yarns, which blur the lemon peel pattern and let the tube grow longer over time.
- Main color (butter yellow, or cornflower blue for the alternate): 90 g, about 165 m, based on a yarn of about 183 m per 100 g
The holder uses one color throughout. If you want a matching pair, buy the full amount for each color. The pattern doesn’t change between colorways, and soft pastels or mid-tones show the pebble texture best.
Quantities include a margin of about 15 percent for your gauge swatch and small differences in tension.
Tools:
- 5.0 mm (H-8) crochet hook
- 1 metal or plastic ring, 2 in (5.1 cm) outer diameter
- 1 stitch marker
- Tapestry needle
- Scissors
- Measuring tape
- Rolled hand towel for blocking
Abbreviations (US Terms)
- ch – chain
- sc – single crochet
- dc – double crochet
- sl st – slip stitch
- st(s) – stitch(es)
- rnd(s) – round(s)
- inc – increase
- patt – pattern
Lemon peel pattern (special stitch): Alternate sc and dc in the order sc, dc, sc, dc. On the next round, place a dc in each sc and a sc in each dc. The short and tall stitches push against each other and form the pebbly texture.
Pattern inc: Work the next 2 stitches of the sc/dc sequence into the same stitch. For example, if the next stitch due is a sc, work (sc, dc) in that stitch. This adds 1 stitch and keeps the alternation unbroken.
Gauge and Checkpoints
Lemon peel gauge: 16 sts and 16 rnds = 4 in (10.2 cm), or 4 sts and 4 rnds per 1 in (2.5 cm).
Single crochet gauge: 16 sts and 18 rnds = 4 in (10.2 cm).
Gauge controls both the width and the height of this holder. If your stitches are loose, the tube becomes floppy and lets bags slip out the bottom. If they’re tight, the tube is stiff and hard to fill.
Test one piece first. Chain 22 and work lemon peel in rows: sc in the 2nd ch from hook, then alternate dc and sc across (21 sts). Turn, ch 1, and work sc into dc and dc into sc. Work 20 rows, then measure the center 4 in (10.2 cm).
- Too many stitches per inch: Your holder will be too narrow. Go up one hook size.
- Too few stitches per inch: Your holder will be too wide and floppy. Go down one hook size.
Checkpoints:
- After Rnd 4: bottom band is 0.9 in (2.3 cm) deep and 3 in (7.6 cm) wide flat
- After Rnd 7: piece is 1.65 in (4.2 cm) tall and 4.5 in (11.4 cm) wide flat
- After Rnd 28: piece is 6.9 in (17.5 cm) tall
- After Rnd 48: piece is 11.9 in (30.2 cm) tall
- After Rnd 53: piece is 13 in (33.0 cm) tall
A difference of up to ¼ in (0.6 cm) is fine at any checkpoint. If you’re short in height, add body rounds in pairs so the texture keeps alternating evenly.
Pattern
Work in joined rounds without turning. The ch 1 at the start of each round does not count as a stitch. Place a marker in the first stitch of each round and move it up as you go. Join each round with a sl st to the first stitch.
Keep all round joins in a straight line. That line becomes the back of the holder, where the ring tab will go. If your joins drift to the right, work the joining sl st into the first stitch a little more loosely. Measure the tube flat, without stretching it, at each checkpoint.
Bottom Band
Ch 24 and join with a sl st to the first ch to form a ring. Make sure the chain is not twisted.
Rnd 1: Ch 1, sc in each ch around, join. (24 sts)
Rnds 2–4: Ch 1, sc in each st around, join. (24 sts)
The band is now about 0.9 in (2.3 cm) deep. This firm edge is the dispensing opening, so keep your tension even.
Shaping Rounds
These three rounds widen the tube from 24 to 36 stitches. Start each round with a sc and keep alternating sc and dc all the way around. Each pattern inc counts as 1 stitch worked plus 1 stitch added.
Rnd 5: Ch 1, pattern inc in next st, work 5 sts in patt; repeat from * 3 more times, join. (28 sts)
Rnd 6: Ch 1, pattern inc in next st, work 6 sts in patt; repeat from * 3 more times, join. (32 sts)
Rnd 7: Ch 1, pattern inc in next st, work 7 sts in patt; repeat from * 3 more times, join. (36 sts)
Check: Rnd 5 works 24 sts and adds 4 (24 + 4 = 28). Rnd 6 works 28 and adds 4 (28 + 4 = 32). Rnd 7 works 32 and adds 4 (32 + 4 = 36). Every total is even, so the sc/dc alternation meets itself cleanly at the join.
At 4 sts per inch, 36 sts gives a circumference of 9 in (22.9 cm), or 4.5 in (11.4 cm) laid flat.
Body
Rnd 8: Ch 1, dc in next st, sc in next st; repeat from * around, join. (36 sts)
Rnd 9: Ch 1, sc in next st, dc in next st; repeat from * around, join. (36 sts)
Rnds 10–48: Repeat Rnds 8 and 9 alternately, ending with a Rnd 8 repeat. (36 sts in every round)
That makes 41 body rounds (Rnds 8–48). At 4 rnds per inch, they add 10.25 in (26.0 cm).
Over the shaping rounds, the sc/dc stacking may drift by a stitch in places. From Rnd 8 on, just check that you place a dc on top of each sc and a sc on top of each dc. Fix it in Rnd 8 if needed, and the texture will settle.
The first dc after a ch 1 sits a little short. It disappears into the texture, and keeping it makes the joins less visible than a taller turning chain would.
Height check: 0.9 in + 0.75 in + 10.25 in = 11.9 in (2.3 cm + 1.9 cm + 26.0 cm = 30.2 cm). Do not fasten off.
Hanging Ring
Cover the ring: Make a slip knot on your hook, leaving an 8 in (20.3 cm) tail. Hold the ring and work sc around it, pushing the stitches together so no plastic or metal shows. Work 34 sc, then join with a sl st to the first sc. (34 sts)
Tab:
Row 1: Ch 1, sc in the next 6 sc of the covered ring, turn. (6 sts)
Rows 2–6: Ch 1, sc in each st across, turn. (6 sts)
Fasten off and leave a 12 in (30.5 cm) tail for sewing. The tab is 1.5 in (3.8 cm) wide and about 1.3 in (3.3 cm) long. Weave the starting tail into the covered ring.
Border
The border is the top rim, worked straight onto the last body round. A firm sc rim finishes the open top and gives you a solid place to sew the tab.
Border gauge: 16 sc and 18 rnds = 4 in (10.2 cm).
Rnds 49–53: Ch 1, sc in each st around, join. (36 sts)
When you lay the holder flat, each side shows 18 sts (36 ÷ 2 = 18). The sides have no corners, because the tube folds at the side edges. Fasten off after Rnd 53 and weave in the end.
Why the math works: The body has 36 stitches at 4 per inch. The sc rim also measures 4 sts per inch, so 36 sc gives the same 9 in (22.9 cm) circumference. Because nothing is added or lost, the rim neither flares nor pulls in. Its 5 rounds at 18 rnds per 4 in measure about 1.1 in (2.8 cm), which brings the total to 13 in (33.0 cm).
Bottom edge finish: Join yarn at the back of the foundation chain. Work 1 sl st in each of the 24 foundation loops, join (24 sts, 12 per flat side). This sl st round tightens the chain edge so it matches the band. Fasten off.
Attach the ring: Find the center back of the rim, in line with the round joins. Place the tab inside the tube so the ring stands above the rim, with 0.5 in (1.3 cm) of tab showing and 0.8 in (2.0 cm) overlapping the inside of the rim. Whipstitch all four edges of the overlap through the rim stitches. Go through only the inner half of each rim stitch so the sewing doesn’t show on the outside. Weave in the tail.
Final Blocking
- Weave in every end before blocking.
- Roll a hand towel to about 3 in (7.6 cm) thick and slide it into the tube so the body is gently filled. Don’t stretch it.
- Mist the holder evenly with water, or hold a steam iron 1 in (2.5 cm) above it. Never press the iron onto acrylic.
- Shape the body with your hands to 4.5 in (11.4 cm) wide flat and 13 in (33.0 cm) tall.
- Pinch the bottom band into an even circle and smooth the top rim level.
- Let it dry completely on the towel, then remove the towel.
Final Quality-Control Checklist
- Body measures 4.5 in (11.4 cm) flat and 13 in (33.0 cm) tall
- Bottom opening measures 3 in (7.6 cm) flat
- Every body round has 36 sts, and the lemon peel texture stacks evenly
- Top rim has 36 sts and does not flare or pucker
- Ring is fully covered with no gaps
- Tab is centered at the back and sewn securely on all four sides
- All ends are woven in on the inside
- Holder hangs straight from a hook with no twist
Troubleshooting
The tube twists as it hangs. The round joins are slanting. Turn the holder so the join line runs straight down the back, then block it again.
The bottom opening is too loose and bags fall out. Add one more sl st round around the foundation, or redo the band with a hook one size smaller.
The bottom opening is too tight to pull bags. Remove the sl st round. If it’s still tight, restart with ch 28 for a 7 in (17.8 cm) opening. Work Rnd 5 as pattern inc, 6 in patt 4 times (32 sts). Work Rnd 6 as pattern inc, 7 in patt 4 times (36 sts). Then work Rnd 7 even in pattern (36 sts).
The texture looks like ribbing, not pebbles. You’re stacking sc on sc. Make sure every dc lands on a sc.
The rim flares. Your sc is looser than your lemon peel. Work the rim with a hook one size smaller.
The holder grows longer after filling. The yarn is stretching. Switch to cotton, or go down one hook size and add body rounds in pairs to reach 11.9 in (30.2 cm).
The ring tilts forward. Sew the tab lower so more of it overlaps the rim.
Care
Hand wash in cool water, press out excess water with a towel, and dry flat over a rolled towel to keep the tube shape. Cotton versions can go through a gentle machine cycle inside a laundry bag.
Final Notes
Each stage of the measurement chain builds on the one before:
- Gauge of 4 sts per inch turns 24 sts into a 3 in (7.6 cm) flat bottom opening and 36 sts into a 4.5 in (11.4 cm) flat body.
- Height adds up as: 0.9 in (2.3 cm) band, 0.75 in (1.9 cm) shaping, 10.25 in (26.0 cm) body, and 1.1 in (2.8 cm) rim, for 13 in (33.0 cm) in total.
- The 36-stitch rim matches the body exactly, and the covered ring adds about 2.75 in (7.0 cm) on top.
If your measurements match at each checkpoint, the finished holder will match too. Make one in yellow, one in blue, and hang them side by side.
Happy crocheting!