

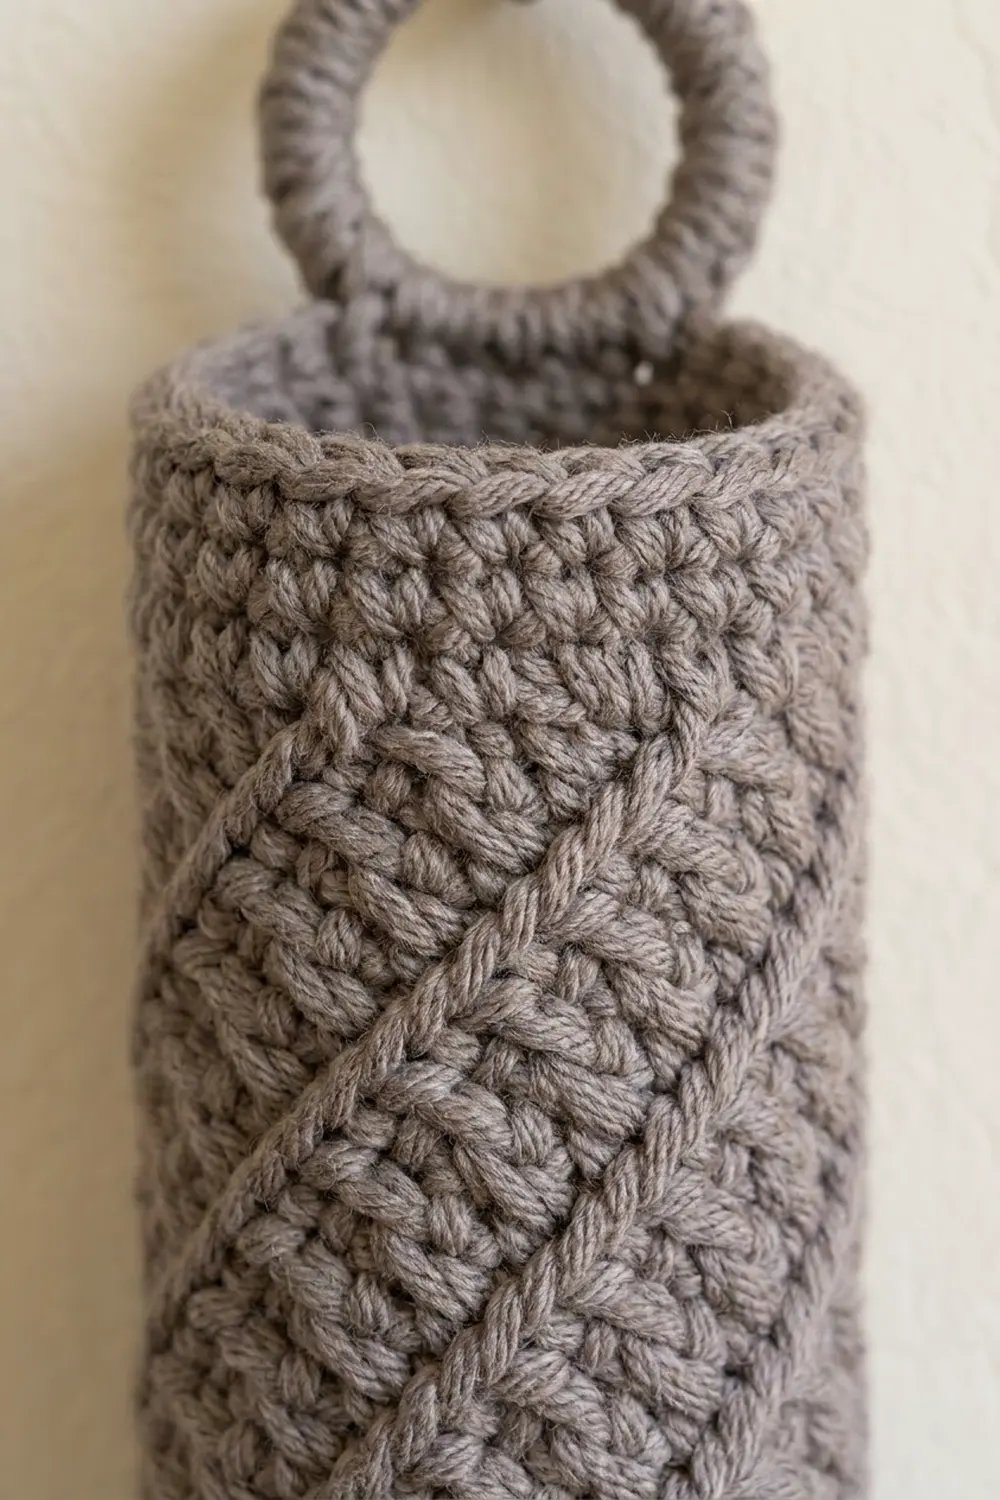
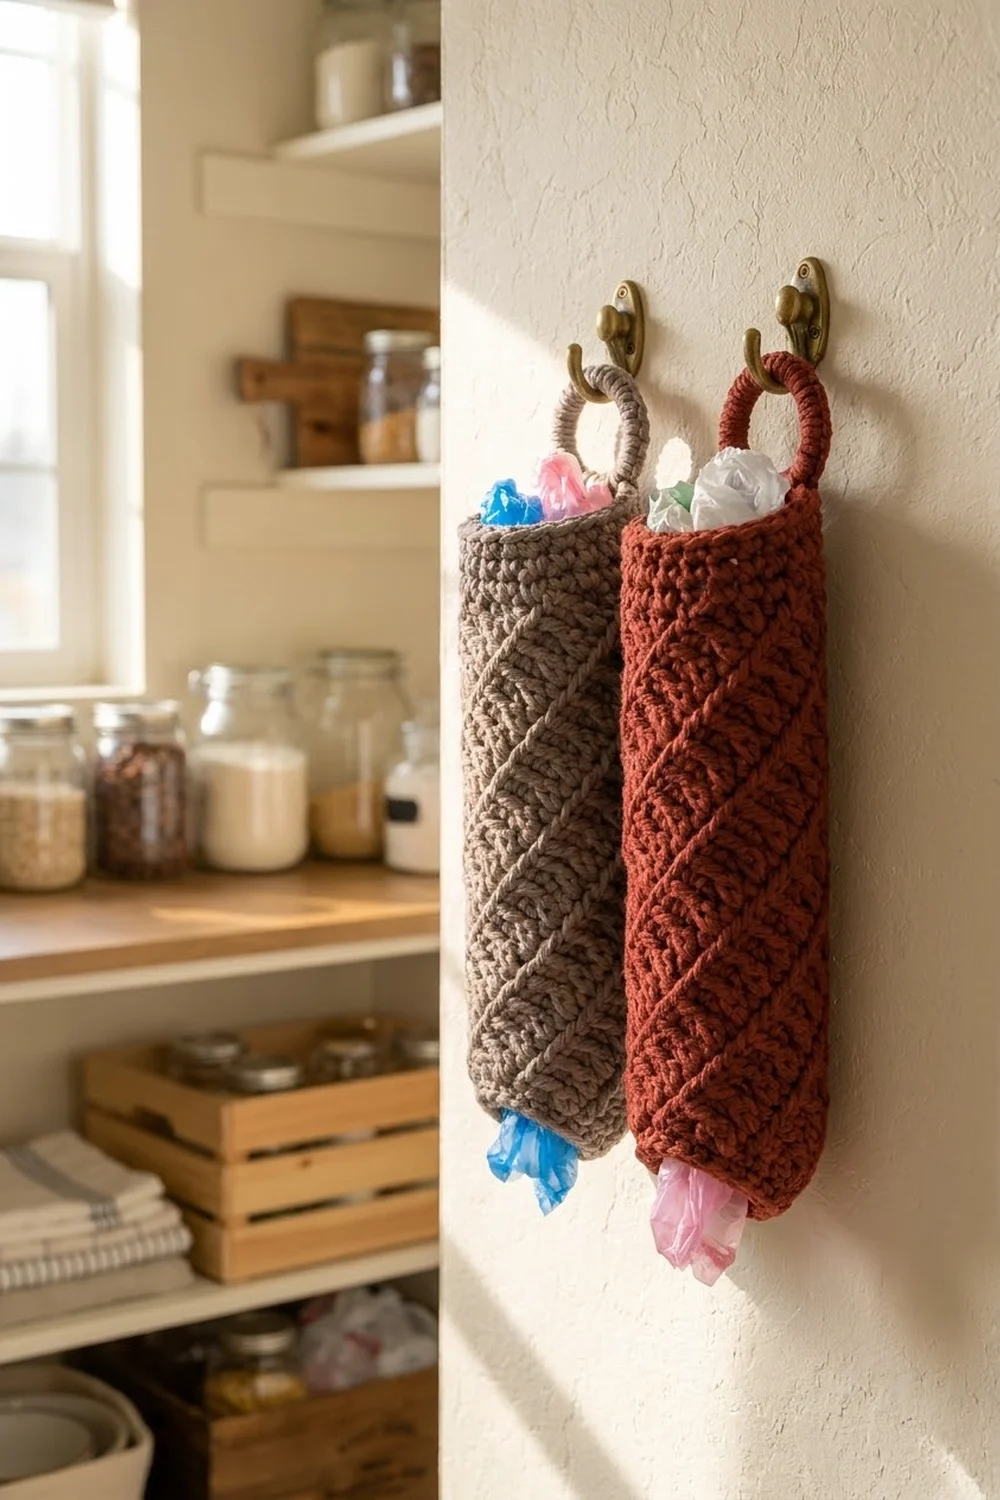
This hanging bag holder is a single seamless tube with diagonal raised ridges that spiral around it. Push loose plastic bags in at the top and pull them out one at a time through the narrower opening at the bottom. A crochet-covered ring at the back of the top rim hangs it from a wall hook.
The texture comes from front post double crochet stitches that move one stitch to the left on every round, set against a background of half double crochet. Worked in a solid color, the ridges show up clearly. I made one in warm gray and one in brick red, but any medium-to-dark solid looks good. Very pale yarns tend to wash out the ridges.
This pattern uses US crochet terms. The finished tube is 14.7 in (37.3 cm) tall, 11.4 in (29.0 cm) around, and 5.7 in (14.5 cm) wide when laid flat. With the ring attached, the holder hangs about 16.5 in (41.9 cm) long.
Construction is simple. You chain a ring and work the body upward in joined rounds. Then you add a single crochet rim at the top, cover a ring and sew it on, and finally work a tapered edging around the starting chain to narrow the bottom opening.
Finished Size and Construction
- Finished size: 14.7 in (37.3 cm) tall tube; 11.4 in (29.0 cm) circumference; 5.7 in (14.5 cm) flat width; 3.6 in (9.1 cm) diameter
- Hanging length with ring: about 16.5 in (41.9 cm)
- Skill level: Easy-Intermediate (front post stitches, working in rounds)
- Terminology: US
- Yarn weight: Worsted (#4)
- Hook: 5.0 mm (H-8)
- Number of pieces: 1 tube plus 1 covered ring, sewn together
- Layout: vertical cylinder, open at both ends
- Body height (before rims): 13.2 in (33.5 cm), 33 rounds
- Rim/edging depth: top rim 0.75 in (1.9 cm); bottom edging 0.75 in (1.9 cm)
- Bottom opening: 9.1 in (23.1 cm) around, about 2.9 in (7.4 cm) across
Materials
Pick a smooth worsted yarn with good stitch definition. Acrylic or an acrylic-cotton blend works well, since it keeps its shape and is easy to wipe clean. Avoid fuzzy or very loosely plied yarns. They hide the post-stitch ridges and can split as you work around the posts.
- Main color (Warm Gray or Brick Red): 110 g, about 210 m, for one holder. This includes the covered ring.
- Plastic or metal ring: 1, with a 2 in (5.1 cm) outer diameter
- 5.0 mm (H-8) crochet hook
- Stitch marker: 1 or 2
- Tapestry needle
- Scissors
- Measuring tape
The quantities above include a margin of roughly 15%, which covers a gauge swatch and small differences in tension. To make the two-color pair, buy this amount in each color.
Abbreviations (US Terms)
- ch – chain
- sl st – slip stitch
- sc – single crochet
- hdc – half double crochet
- sc2tog – single crochet 2 together
- FPdc – front post double crochet
- st(s) – stitch(es)
- rnd(s) – round(s)
- rep – repeat
Special stitch – FPdc: Yarn over and insert the hook from front to back to front around the post of the indicated stitch in the round below. Yarn over, pull up a loop, then [yarn over, pull through 2 loops] twice. Skip the stitch of the current round that sits behind the FPdc. Each FPdc counts as 1 stitch.
Gauge and Checkpoints
Gauge in pattern: 14 sts and 10 rnds = 4 in (10.2 cm), measured over the spiral ridge pattern.
Rim gauge: 4 rnds of sc = 1 in (2.5 cm), worked 1 sc per body stitch.
Since this is a single tube, the start of the tube is your swatch. Chain 40, join, work Rnds 1–9, and then measure.
Checkpoints:
- After Rnd 9: the tube is 3.6 in (9.1 cm) tall and lies 5.7 in (14.5 cm) wide when flattened.
- After Rnd 17: 6.8 in (17.3 cm) tall.
- After Rnd 33: 13.2 in (33.5 cm) tall. The body is complete.
- After the top rim: 13.95 in (35.4 cm).
- After the bottom edging: 14.7 in (37.3 cm).
Too big? If the flat width is more than 5.9 in (15.0 cm), go down to a 4.5 mm hook.
Too small? If the flat width is under 5.5 in (14.0 cm), go up to a 5.5 mm hook.
Height is easy to fix later by adding or removing ridge rounds. Width can’t be fixed later, so check it before you go past Rnd 9.
Tube Body
Work in joined rounds with the right side facing out the whole time. Don’t turn. The ch 1 at the start of each round does not count as a stitch. Place a marker in the first stitch of every round.
Foundation: Ch 40. Without twisting the chain, sl st into the first ch to form a ring.
Rnd 1: Ch 1, hdc in each ch around, sl st to first hdc. (40 sts)
The pattern repeats over 8 stitches. In each round, the FPdc sits one stitch to the left of the FPdc in the round below, which builds 5 diagonal ridges around the tube.
Rnd 2: Ch 1, FPdc around next st, hdc in next 7 sts; rep from * 4 more times, sl st to first st. (40 sts: 5 FPdc, 35 hdc)*
Rnd 3: Ch 1, hdc in next st, FPdc around next st, hdc in next 6 sts; rep from * 4 more times, sl st to first st. (40 sts)*
Rnd 4: Ch 1, hdc in next 2 sts, FPdc around next st, hdc in next 5 sts; rep from * 4 more times, sl st to first st. (40 sts)*
Rnd 5: Ch 1, hdc in next 3 sts, FPdc around next st, hdc in next 4 sts; rep from * 4 more times, sl st to first st. (40 sts)*
Rnd 6: Ch 1, hdc in next 4 sts, FPdc around next st, hdc in next 3 sts; rep from * 4 more times, sl st to first st. (40 sts)*
Rnd 7: Ch 1, hdc in next 5 sts, FPdc around next st, hdc in next 2 sts; rep from * 4 more times, sl st to first st. (40 sts)*
Rnd 8: Ch 1, hdc in next 6 sts, FPdc around next st, hdc in next st; rep from * 4 more times, sl st to first st. (40 sts)*
Rnd 9: Ch 1, hdc in next 7 sts, FPdc around next st; rep from * 4 more times, sl st to first st. (40 sts)*
At the end of Rnd 9, each FPdc sits in position 8 of its repeat. In the next Rnd 2, the FPdc goes into position 1 of the following repeat, which is the very next stitch to the left. This keeps the ridge continuous across the join.
Rnds 10–33: Work Rnds 2–9 three more times. (40 sts in every rnd)
At this point you have 33 rounds: 1 foundation hdc round and 4 full ridge cycles. The body measures 13.2 in (33.5 cm). Don’t fasten off.
Top Rim and Hanging Ring
Top Rim
Rnds 34–36: Ch 1, sc in each st around, sl st to first sc. (40 sts per rnd)
The rim adds 0.75 in (1.9 cm). Fasten off and weave in the end.
Covered Ring
Attach the yarn to the ring with a sl st. Ch 1, then work 32 sc over the ring, packing them tightly so no plastic or metal shows. Sl st to the first sc. (32 sc) If your ring still shows through, add 2–4 sc. If the stitches ruffle, take a few out. Fasten off, leaving a 12 in (30.5 cm) tail.
Attach the Ring
Fold the tube flat, with the round joins at the center back. Find the 6 rim stitches in the middle of the back. Hold the ring so that 0.2 in (0.5 cm) of it overlaps the inside of the rim at those 6 stitches. Using the tail, whipstitch 6 sc on the ring to the 6 rim stitches. Go through each pair twice. About 1.8 in (4.6 cm) of the ring stands above the rim. Weave in the end.
Border: Bottom Edging
The bottom edging is worked into the free loops of the foundation chain. It narrows the opening so that bags come out one at a time instead of falling through.
Border gauge: 4 rnds sc = 1 in (2.5 cm). Each sc is the same width as the body stitches, 3.5 sts per in (1.4 sts per cm).
Turn the tube upside down. Join yarn with a sl st in any free loop of the foundation chain, at the center back.
Edging Rnd 1: Ch 1, sc in each free loop around, sl st to first sc. (40 sts)
Edging Rnd 2 (trim): Ch 1, sc in next 3 sts, sc2tog; rep from * 7 more times, sl st to first sc. (32 sts = 8 repeats × [3 sc + 1 sc2tog])*
Edging Rnd 3: Ch 1, sc in each st around, sl st to first sc. (32 sts)
Fasten off and weave in the end.
Why the math works: Edging Rnd 1 works exactly 1 stitch into each of the 40 foundation chains, so the bottom starts at the full body width of 11.4 in (29.0 cm). Rnd 2 turns every 5 stitches into 4: 40 ÷ 5 = 8 repeats, and 8 × 4 = 32. At 3.5 sts per in, 32 sts ÷ 3.5 = 9.1 in (23.1 cm) around, a little under 2.9 in (7.4 cm) across. That is narrow enough to hold the bags in but wide enough to pull one out. Because the 8 decreases are spaced evenly, the bottom curves in smoothly and doesn’t pucker.
The total height is 13.2 in body + 0.75 in top rim + 0.75 in edging = 14.7 in (37.3 cm).
Final Blocking
- Fill a basin with cool water and a drop of wool wash or mild soap.
- Soak the holder for 10–15 minutes until it is completely wet.
- Gently squeeze out the water. Don’t wring it. Roll it in a towel and press to remove more.
- Slide a rolled towel or a cardboard tube about 3.6 in (9.1 cm) across into the holder.
- Smooth the ridges so they run in straight, even diagonals. Line up the round joins at the center back.
- Check the measurements: 14.7 in (37.3 cm) tall and 11.4 in (29.0 cm) around.
- Pinch the bottom edging into an even circle and nudge the ring so it stands up straight.
- Let it dry completely, standing upright, before you take out the form.
For acrylic yarn, you can steam block instead. Hold the iron 1 in (2.5 cm) above the fabric and never press down. Pressing flattens the ridges for good.
Final Quality-Control Checklist
- [ ] Every round has 40 sts (body and top rim) or 32 sts (after Edging Rnd 2).
- [ ] There are 5 diagonal ridges, evenly spaced and unbroken across the round joins.
- [ ] The body is 13.2 in (33.5 cm) before the rims.
- [ ] The tube is 14.7 in (37.3 cm) tall and 5.7 in (14.5 cm) wide flat.
- [ ] The bottom opening is about 2.9 in (7.4 cm) across.
- [ ] The ring is fully covered and sewn securely over 6 sts at center back.
- [ ] All ends are woven in on the inside.
- [ ] A full bundle of bags goes in and comes out one at a time.
Troubleshooting
Ridges go straight up instead of slanting. You’re putting the FPdc around the FPdc below. Each FPdc goes around the hdc just to the left of the previous ridge stitch.
Ridge breaks at the join. Recount the round you just finished. Each FPdc should sit at the position that round’s instructions call for. A missed or extra stitch shifts every ridge after it.
Stitch count creeps up or down. You may be working into the stitch behind an FPdc, or skipping the first stitch after the sl st. Use a marker in the first stitch of every round.
Tube leans or twists. Joined rounds can drift a little. Keep the joins stacked by always making the sl st into the top of the first stitch of the round.
Fabric is stiff and cups. The FPdc stitches are too tight. Pull up a slightly taller loop around the post.
Bags fall straight out. Add another round of sc 2, sc2tog to the bottom edging (32 to 24 sts).
Ring sags forward. Sew it over more rim stitches, or add a second line of stitches lower on the ring.
Care
Hand wash in cool water, reshape, and dry flat or on a form. Acrylic versions can go through a gentle machine cycle in a mesh bag, but always air dry them.
Final Notes
Each measurement depends on the one before. The gauge of 14 sts and 10 rnds = 4 in gives 40 sts = 11.4 in (29.0 cm) around and 5.7 in (14.5 cm) flat. Thirty-three rounds give a body of 13.2 in (33.5 cm). A 3-round rim at the top and a 3-round edging at the bottom each add 0.75 in (1.9 cm), for a tube 14.7 in (37.3 cm) tall. The bottom narrows from 40 to 32 sts, which makes a 9.1 in (23.1 cm) opening. The ring adds 1.8 in (4.6 cm) above the rim, so the holder hangs about 16.5 in (41.9 cm) long. If your gauge is right at Rnd 9, everything after that will fall into place.
Happy crocheting!