

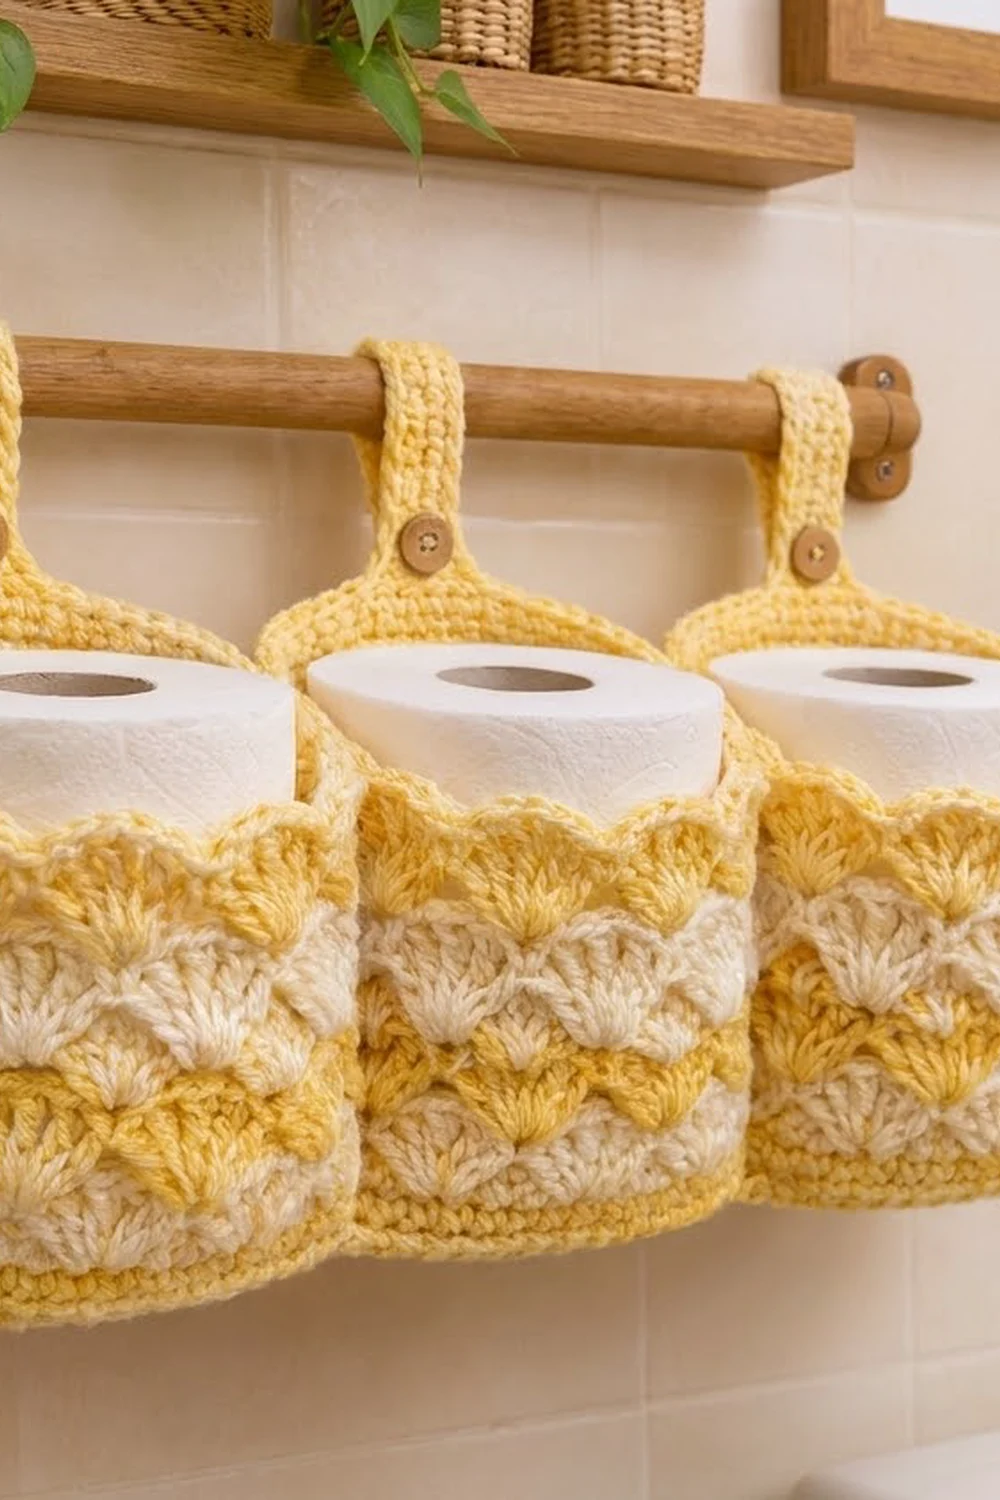
This hanging holder has three round pockets in a row. Each one holds a standard toilet roll and hangs from a towel rod on its own buttoned strap. Bands of butter-yellow and cream shells give it a soft, sunny cottage look, and a row of yellow scallops trims each front rim.
The pattern uses US crochet terms throughout. The finished holder is about 14.25 in (36.2 cm) wide. Each pocket is 4.75 in (12.1 cm) across and 4.75 in (12.1 cm) tall at the front scallops. The back flap rises to about 7.9 in (20.1 cm), and the full hanging height including the strap loop is about 11 in (27.9 cm).
Each pocket is worked from the bottom up. You make a flat round base, turn up the walls, and work six rounds of alternating-color shells. A leveling round follows, then a back flap worked in rows that narrows into a strap with a buttonhole. A scallop row finishes the front rim.
You make three pockets and sew them together side by side. Then you edge each flap and strap and sew on the buttons.
Finished Size and Construction
- Finished size: 14.25 in (36.2 cm) wide x 11 in (27.9 cm) tall when hanging
- Skill level: Intermediate
- Terminology: US crochet terms
- Yarn weight: Worsted (#4) cotton or cotton blend
- Hook: 4.5 mm (US 7)
- Number of pieces: 3 identical pockets
- Layout: 1 row of 3 pockets, side by side
- Piece size: 4.75 in (12.1 cm) across, 4.75 in (12.1 cm) tall at the front
- Size before border: each flap is 3.6 in (9.1 cm) tall and each strap is 7.1 in (18.0 cm) long
- Border depth: 1 round of sc, about 0.25 in (0.6 cm)
Materials
Use a firm worsted-weight cotton. It holds its shape, handles bathroom humidity well, and shows the shell texture clearly.
- Color A (butter yellow): 120 g, about 200 m
- Color B (cream): 40 g, about 65 m
These amounts include a margin of about 20 percent for gauge differences and swatching.
Tools:
- 4.5 mm (US 7) crochet hook
- 4 locking stitch markers
- Tapestry needle
- 3 wooden buttons, 0.75 in (1.9 cm)
- Sewing needle and matching thread
- Measuring tape
- A 4.5 in (11.4 cm) tall tub or a wrapped toilet roll, to use as a blocking form
Abbreviations (US Terms)
- ch – chain
- sl st – slip stitch
- sc – single crochet
- hdc – half double crochet
- dc – double crochet
- sc2tog – single crochet 2 together
- BLO – back loop only
- sk – skip
- st(s) – stitch(es)
- RS – right side
Shell (special stitch): 5 dc in the same stitch.
Gauge and Checkpoints
Gauge: 16 sc x 18 rows = 4 in (10.2 cm). In the shell pattern, one 6-stitch repeat is 1.5 in (3.8 cm) wide, and 2 shell rounds are 1 in (2.5 cm) tall.
Make one complete pocket first. It works as your gauge swatch, and you can test the fit with a real roll.
Checkpoints:
- After Round 10, the base measures 4.75 in (12.1 cm) across.
- After Round 14, the wall is 0.9 in (2.3 cm) tall.
- After Round 20, the wall is 3.9 in (9.9 cm) tall from the base fold.
- The finished flap is 3.6 in (9.1 cm) tall.
- The finished strap is 7.1 in (18.0 cm) long.
If the base is too big, switch to a 4 mm (US 6) hook. If it is too small, or a roll won’t fit, use a 5 mm (US H-8) hook. Keep the stitch counts the same, because every section is built on 60 stitches.
Pocket Pattern (Make 3)
Base
Work in Color A in joined rounds. Do not turn.
Round 1: Make a magic ring, ch 1, work 6 sc in the ring, join with sl st to first sc. (6)
Round 2: Ch 1, 2 sc in each st around, join. (12)
Round 3: Ch 1, sc in next st, 2 sc in next st 6 times, join. (18)
Round 4: Ch 1, sc in next 2 sts, 2 sc in next st 6 times, join. (24)
Round 5: Ch 1, sc in next 3 sts, 2 sc in next st 6 times, join. (30)
Round 6: Ch 1, sc in next 4 sts, 2 sc in next st 6 times, join. (36)
Round 7: Ch 1, sc in next 5 sts, 2 sc in next st 6 times, join. (42)
Round 8: Ch 1, sc in next 6 sts, 2 sc in next st 6 times, join. (48)
Round 9: Ch 1, sc in next 7 sts, 2 sc in next st 6 times, join. (54)
Round 10: Ch 1, sc in next 8 sts, 2 sc in next st 6 times, join. (60)
The base should lie flat and measure 4.75 in (12.1 cm) across.
Walls
Round 11: Ch 1, sc in BLO of each st around, join. (60) This makes a crisp fold between the base and the wall.
Rounds 12–14: Ch 1, sc in each st around, join. (60) Fasten off Color A.
Shell Bands
The shell rounds alternate colors, and you fasten off after each one. Join each new round at the shell nearest the previous join. That lines all the joins up in one column, which will be hidden in a side seam later.
Round 15 (Color B): Join B in any st. Ch 1, sc in same st, sk 2, shell in next st, sk 2, sc in next st 9 times, sk 2, shell in next st, sk 2, join to first sc. (10 shells; 60 sts: 10 sc + 50 dc) Fasten off.
Round 16 (Color A): Join A in the center (3rd) dc of any shell. Ch 1, sc in same st, sk 2 dc, shell in next sc, sk 2 dc, sc in center dc of next shell 9 times, sk 2 dc, shell in next sc, sk 2 dc, join to first sc. (10 shells; 60 sts) Fasten off.
Round 17 (Color B): Work as Round 16. (60)
Round 18 (Color A): Work as Round 16. (60)
Round 19 (Color B): Work as Round 16. (60)
Round 20 (Color A): Work as Round 16. (60) Do not fasten off.
This gives three cream bands and three yellow bands. Each shell sits in a valley of the round below, so the fans nest into each other.
Leveling Round
Round 21 (Color A): Ch 1, dc in next sc, hdc in next dc, sc in next 3 dc, hdc in next dc 10 times, join. (60 sts worked one per existing st + 0 added = 60) Fasten off.
The taller stitches fill the valleys, so the rim comes out level.
Flatten the pocket so the column of color joins sits at one side fold. Counting from that fold, the front half is sts 1–30 and the back half is sts 31–60. Mark st 1, st 30, st 31, and st 60.
Back Flap
Work in rows in Color A over sts 31–60.
Row 1 (RS): Join A with sc in st 31, sc in each st through st 60, turn. (30)
Rows 2–4: Ch 1, sc in each st across, turn. (30)
Rows 5–16: Ch 1, sc2tog, sc in each st to last 2 sts, sc2tog, turn. (Row 5: 28, Row 6: 26, Row 7: 24, Row 8: 22, Row 9: 20, Row 10: 18, Row 11: 16, Row 12: 14, Row 13: 12, Row 14: 10, Row 15: 8, Row 16: 6)
Twelve rows of 2 decreases take the count from 30 to 6 (30 − 24 = 6). That shapes the rounded shoulders of the flap. The flap is 3.6 in (9.1 cm) tall.
Strap
Keep working in rows on the 6 sts of Row 16.
Strap Rows 1–28: Ch 1, sc in each st across, turn. (6)
Strap Row 29: Ch 1, sc in next 2 sts, ch 2, sk 2, sc in next 2 sts, turn. (4 sc + one ch-2 space)
Strap Row 30: Ch 1, sc in next 2 sts, 2 sc in ch-2 space, sc in next 2 sts, turn. (6)
Strap Rows 31–32: Ch 1, sc in each st across, turn. (6) Fasten off.
The strap is 1.5 in (3.8 cm) wide and 7.1 in (18.0 cm) long.
Front Scallop Row
With RS facing, join A with sc in st 1. Sk 2, shell in next st, sk 2, sc in next st 4 times, sk 2, shell in next st, sk 2 (sts 29 and 30), sl st in the base of the first flap sc at st 31. Fasten off. (5 shells; 30 sts: 5 sc + 25 dc, plus 1 anchoring sl st)
This makes five scallops across the front, with both ends anchored at the flap corners.
Make All Pieces
Make 3 identical pockets.
Yarn per pocket:
- Color A: about 33 g (55 m)
- Color B: about 11 g (18 m)
Layout grid (front view):
[ Pocket 1 ][ Pocket 2 ][ Pocket 3 ]
   strap       strap       strap
Place each pocket so its column of color joins falls on a side that gets seamed.
Joining
Use Color A and a whipstitch to sew the side walls together where neighboring pockets touch.
- Set Pocket 1 and Pocket 2 side by side with the fronts facing you. Line up Pocket 1’s st 30/31 fold with Pocket 2’s st 60/1 fold.
- Sew from Round 11 (the base fold) up to Round 21.
- Stitch-to-stitch logic: Make 1 whipstitch per round in sc Rounds 11–14 (4). Make 2 per round in shell Rounds 15–20, because those dc rounds are about twice as tall (12). Finish with 1 in Round 21. That is 17 whipstitches per seam.
- Join Pocket 2’s st 30/31 fold to Pocket 3’s st 60/1 fold the same way.
Keep the seam snug but not tight, so the shells don’t pucker. Leave the flaps free.
Size checkpoint: The joined row should measure 14.25 in (36.2 cm) across, which is 3 x 4.75 in (12.1 cm).
Border
The border is one round of sc in Color A around each flap and strap. It’s worked separately on each pocket, so the seams add no stitches. The border gauge matches the body: 4 sc per 1 in (2.5 cm).
Border Round: With RS facing, join A with a sl st at the st 60 corner of flap Row 1, then ch 1.
- Flap side: sc in each row end of Rows 1–16. (16)
- Strap side: sc in each row end, but skip the row ends of Strap Rows 8, 16, 24, and 32. (32 − 4 = 28)
- Strap end: 3 sc in first st, sc in next 4 sts, 3 sc in last st. (6 worked + 4 added = 10)
- Second strap side: work as the first strap side. (28)
- Second flap side: sc in each row end of Rows 16–1. (16)
Sl st into the end of the scallop row at st 31 and fasten off. (Total: 16 + 28 + 10 + 28 + 16 = 98)
Why the math works: At this gauge, 4 in (10.2 cm) holds 18 rows but only 16 sc. So the strap’s 32 straight row ends need about 28 sc (32 x 16 / 18 = 28.4), and skipping every 8th row end gives exactly that. The flap edges slant from the decreases, which makes them longer, so 1 sc per row end lies flat there. Each strap-end corner gets 2 extra stitches so it turns cleanly.
Sew a button to the RS of each flap at the center of Row 14, about 0.5 in (1.3 cm) below the base of the strap. To hang, bring each strap forward over the rod and button it.
Final Blocking
- Weave in all ends through stitches of the same color.
- Mist the holder until it is evenly damp.
- Put a 4.5 in (11.4 cm) tub or wrapped roll in each pocket.
- Shape the scallops into even fans, and smooth the flaps and straps flat.
- Check the measurements: 4.75 in (12.1 cm) per pocket and 14.25 in (36.2 cm) overall.
- Let it dry completely before removing the forms.
Final Quality-Control Checklist
- Each base has 60 sts and lies flat.
- Each round has 10 shells, and there are 3 cream bands and 3 yellow bands.
- Round 21 is level.
- Each flap ends at 6 sts, and each strap is 32 rows.
- Each front has 5 even scallops.
- Each seam has 17 whipstitches.
- Each border has 98 sts.
- The buttons are secure, and the holder hangs level from a rod up to 1.25 in (3.2 cm) thick.
Troubleshooting
- Base ruffles: You have extra stitches. Recount each round against 6, 12, 18, and so on.
- Base cups: Your tension is too tight. Go up a hook size for the base only.
- Shells lean: You missed a “sk 2.” Each shell must sit on an sc.
- Rim dips: Use dc, not sc, over each valley in Round 21.
- Flap is lopsided: Decrease at both ends of every row from Row 5 to Row 16.
- Strap edge waves: Skip row ends in the border exactly as written.
Care
Hand wash in cool water with mild soap, roll in a towel to remove water, and dry over the blocking forms. Do not tumble dry.
Final Notes
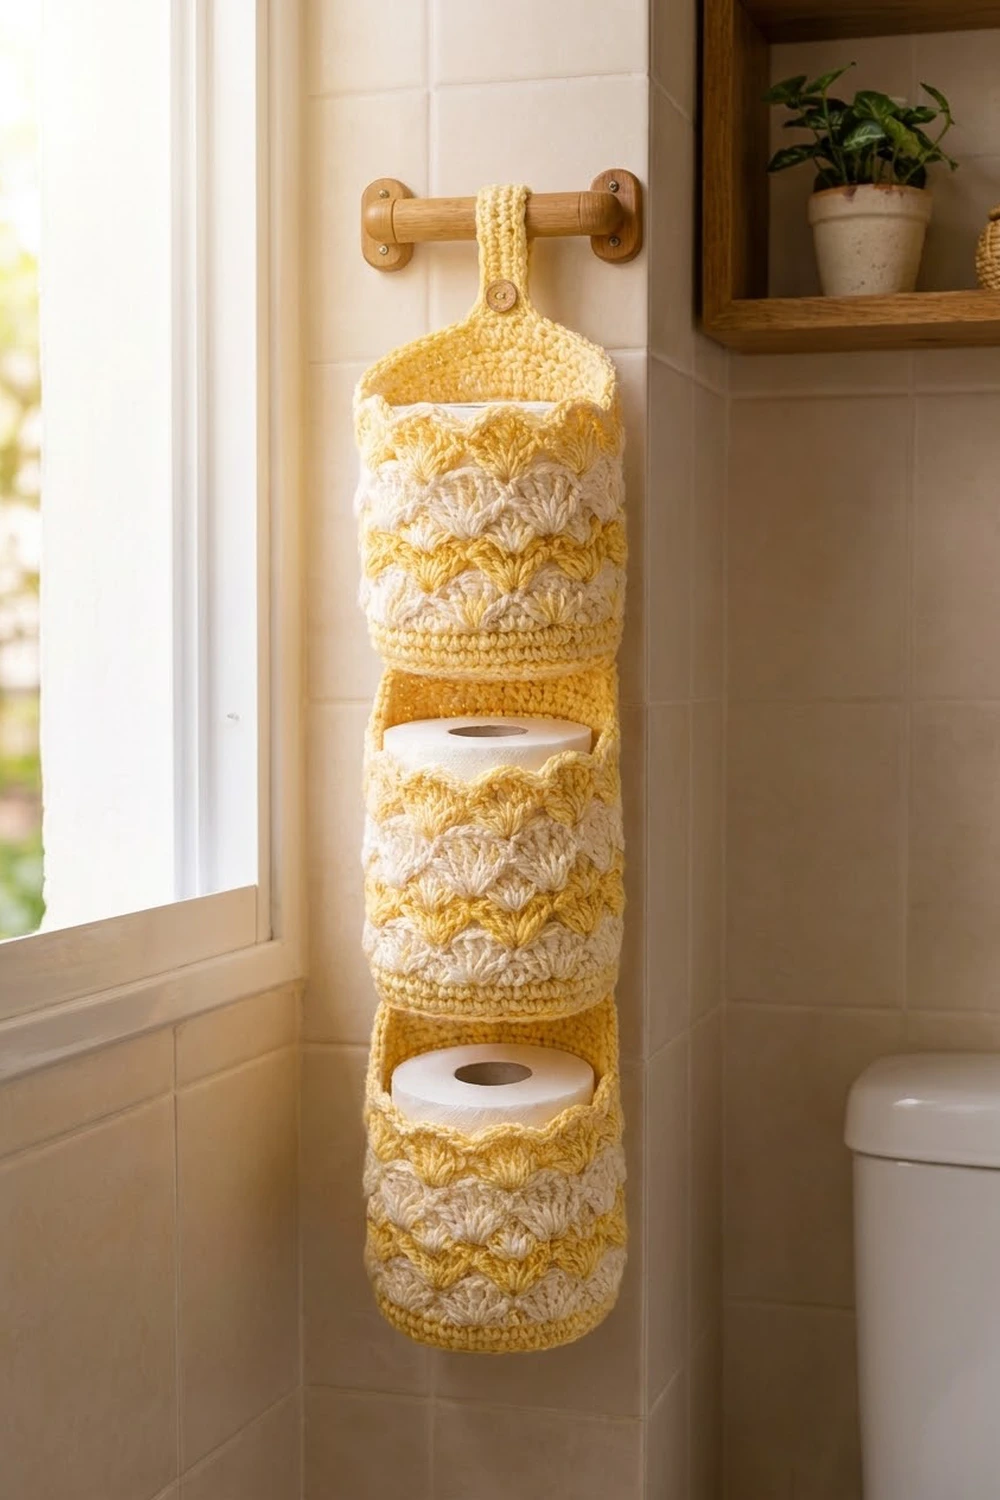
Here is how the measurements fit together. The 60-stitch base makes a 4.75 in (12.1 cm) pocket. Six shell rounds bring the wall to 3.9 in (9.9 cm). Each flap narrows from 30 to 6 stitches over 3.6 in (9.1 cm), and each 7.1 in (18.0 cm) strap buttons around the rod. Three pockets add up to 14.25 in (36.2 cm). Check each number as you go and the holder will hang straight.
Happy crocheting!