

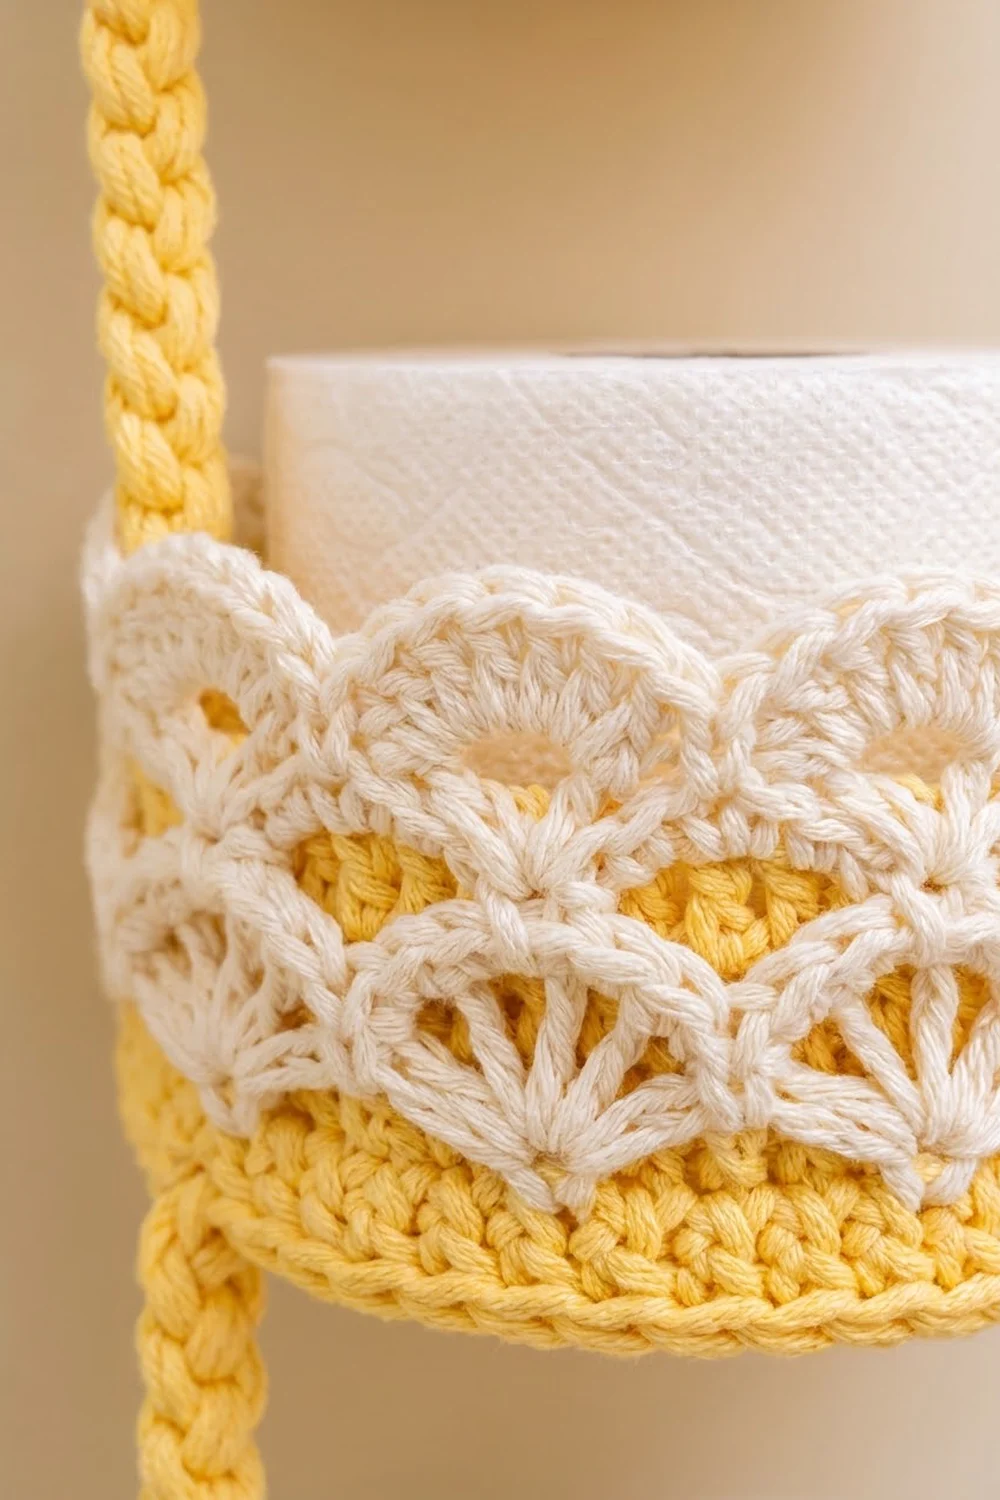
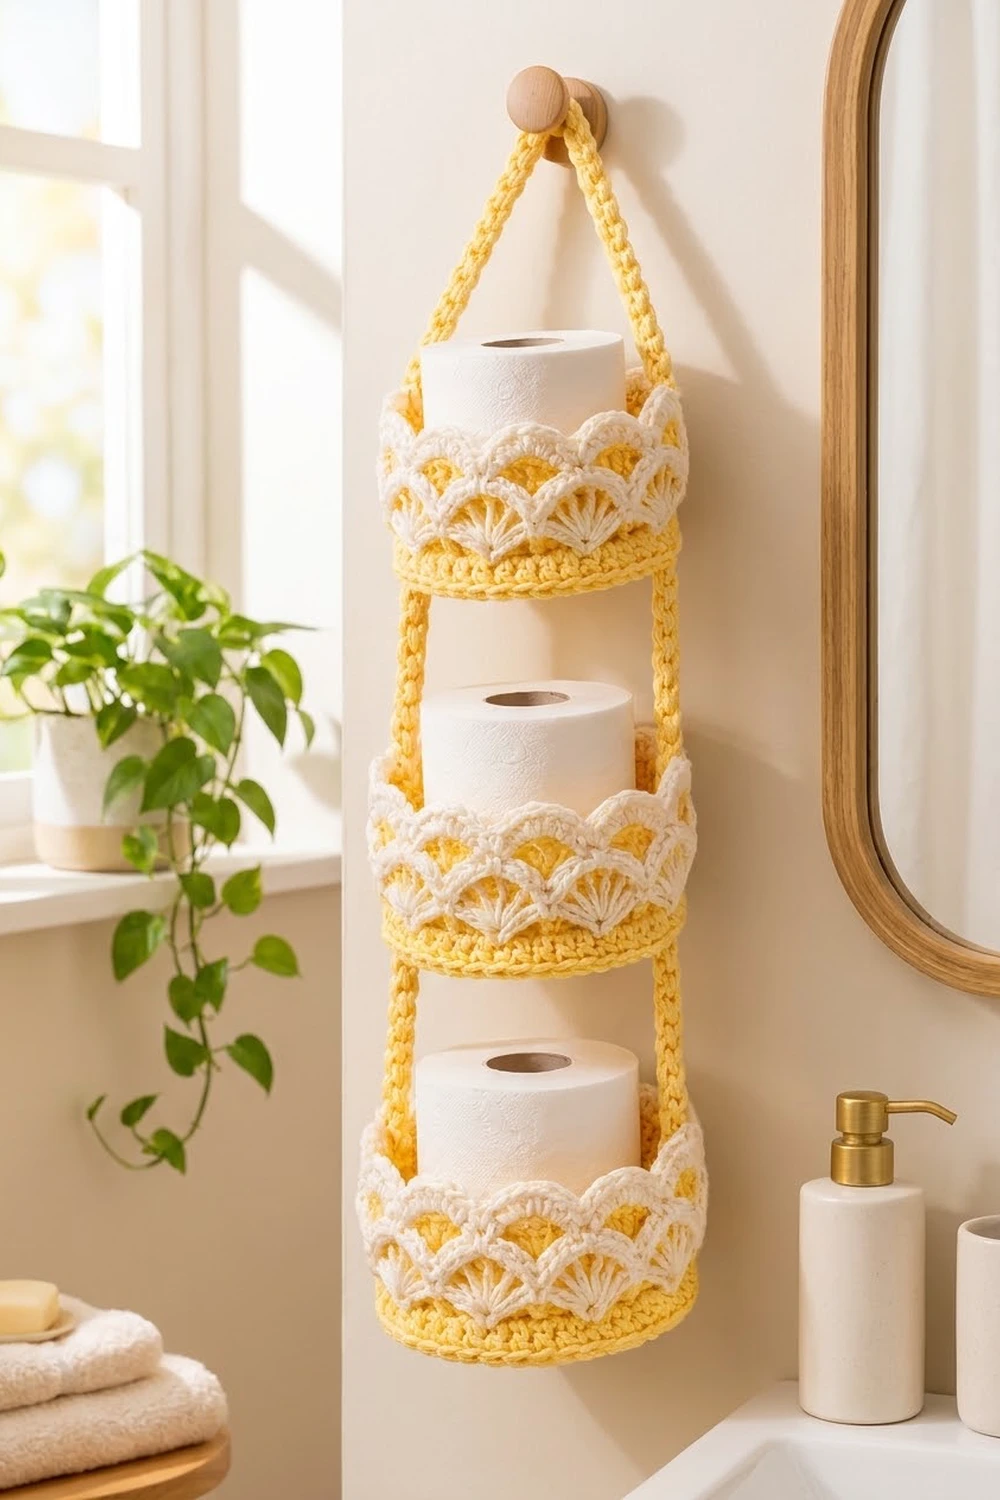
This organizer has three round baskets stacked one above the other on two braided cords. Each basket has a solid buttercup-yellow base and lower wall. Above that is a cream-white band of fan shells in two staggered tiers, finished with a soft scalloped rim. The cords meet in a peak, so the whole set hangs from one wall peg and holds a spare toilet paper roll in each tier.
The two colors keep the look calm and cheerful. The baskets are graduated, with the smallest at the top and the largest at the bottom. All three have the same shell band, so they look like a matched set.
The pattern uses US crochet terms. The baskets measure about 5¾ in (14.6 cm), 6¼ in (15.9 cm), and 6¾ in (17.1 cm) across the base. They are 2½ in (6.4 cm), 2¾ in (7.0 cm), and 3 in (7.6 cm) tall. Hung up, the organizer is about 21 in (53.3 cm) from peak to bottom.
Each base is a flat circle worked in joined rounds. A back-loop round turns the wall up. After a few yellow rounds you switch to white for the shells and the rim. Last, you make two braided straps and sew them to opposite sides of each basket.
Finished Size and Construction
- Finished size (hanging): about 21 in (53.3 cm) tall
- Skill level: Easy-intermediate
- Terminology: US
- Yarn weight: Worsted (#4) cotton
- Hook: 5.0 mm (H-8)
- Number of pieces: 5 (3 baskets, 2 straps)
- Layout: 3 baskets stacked vertically, 3 in (7.6 cm) apart, held by 2 straps on opposite sides
- Base diameter: Small 5¾ in (14.6 cm), Medium 6¼ in (15.9 cm), Large 6¾ in (17.1 cm)
- Wall height before rim: Small 2¼ in (5.7 cm), Medium 2½ in (6.4 cm), Large 2¾ in (7.0 cm)
- Rim (border) depth: ¼ in (0.6 cm)
- Strap length: 24 in (61.0 cm) each, braided
Materials
Use 100% cotton or a firm cotton blend. Cotton holds its shape in a humid bathroom and washes well. Avoid splitty or very soft yarns, because the walls must stand up on their own.
- Yellow (Color A): 105 g, about 160 m (175 yd)
- White (Color B): 45 g, about 65 m (71 yd)
These quantities include a margin of about 30%, which covers a swatch and a few redos.
Tools:
- 5.0 mm (H-8) crochet hook
- 4 locking stitch markers
- Tapestry needle and scissors
- Tape measure
- Rust-proof pins and a spray bottle
- 1 wall peg or hook
Abbreviations (US Terms)
- ch – chain
- sl st – slip stitch
- sc – single crochet
- dc – double crochet
- inc – 2 sc in the same stitch
- BLO – back loop only
- st(s) – stitch(es)
- sk – skip
- MR – magic ring
- rnd(s) – round(s)
Special stitch – Shell: 5 dc in the same stitch.
Joined rounds: End every round with a sl st into the first sc. Unless told otherwise, start the next round with ch 1, which does not count as a stitch. This keeps the seam straight and the color changes clean.
Gauge and Checkpoints
Gauge: 16 sc and 16 rnds = 4 in (10.2 cm) in sc worked in joined rounds.
Make the Small basket first and use it as your gauge test. A basket that comes out too small won’t hold a roll, so check early.
- Checkpoint 1 – Rnd 6 (36 sts): about 2¾ in (7.0 cm) across.
- Checkpoint 2 – end of base: Small 5¾ in (14.6 cm), Medium 6¼ in (15.9 cm), Large 6¾ in (17.1 cm). The base should lie flat. A slight dome is fine, but ruffling is not.
- Checkpoint 3 – yellow wall: Small 1 in (2.5 cm), Medium 1¼ in (3.2 cm), Large 1½ in (3.8 cm), including the turning ridge.
- Checkpoint 4 – white band before rim: 1¼ in (3.2 cm) tall.
If your base is too big, change to a 4.5 mm hook. If it is too small, change to a 5.5 mm hook. Don’t add or remove rounds to fix the size, because the stitch counts must stay multiples of 6 for the shells.
The Base (All Sizes)
With Color A, make a MR.
- Rnd 1: Ch 1, 6 sc in ring, join. (6)
- Rnd 2: Ch 1, inc in each st around, join. (12)
- Rnd 3: Ch 1, sc in next st, inc 6 times, join. (18)
- Rnd 4: Ch 1, sc in next st, inc, sc in next 2 sts, inc 5 times, sc in next st, join. (24)
- Rnd 5: Ch 1, sc in next 3 sts, inc 6 times, join. (30)
- Rnd 6: Ch 1, sc in next 2 sts, inc, sc in next 4 sts, inc 5 times, sc in next 2 sts, join. (36)
- Rnd 7: Ch 1, sc in next 5 sts, inc 6 times, join. (42)
- Rnd 8: Ch 1, sc in next 3 sts, inc, sc in next 6 sts, inc 5 times, sc in next 3 sts, join. (48)
- Rnd 9: Ch 1, sc in next 7 sts, inc 6 times, join. (54)
- Rnd 10: Ch 1, sc in next 4 sts, inc, sc in next 8 sts, inc 5 times, sc in next 4 sts, join. (60)
- Rnd 11: Ch 1, sc in next 9 sts, inc 6 times, join. (66)
- Rnd 12: Ch 1, sc in next 5 sts, inc, sc in next 10 sts, inc 5 times, sc in next 5 sts, join. (72)
Small basket: Stop here. The base has 72 sts and measures 5¾ in (14.6 cm).
- Rnd 13: Ch 1, sc in next 11 sts, inc 6 times, join. (78)
Medium basket: Stop here. The base has 78 sts and measures 6¼ in (15.9 cm).
- Rnd 14: Ch 1, sc in next 6 sts, inc, sc in next 12 sts, inc 5 times, sc in next 6 sts, join. (84)
Large basket: Stop here. The base has 84 sts and measures 6¾ in (17.1 cm).
On the even rounds the increases are staggered, which keeps the circle round instead of hexagonal.
The Yellow Wall
Call the final base count N: Small 72, Medium 78, Large 84. The count stays at N through the whole wall.
- Turning rnd: Ch 1, sc in BLO of each st around, join. (N) The unused front loops form a crisp ridge, and the wall turns up.
- Plain rnds: Ch 1, sc in each st around, join. (N)
Work the plain round 3 times for the Small, 4 times for the Medium, and 5 times for the Large. With the turning round, that makes 4, 5, and 6 yellow wall rounds. Check Checkpoint 3.
On the last yellow round, complete the joining sl st with Color B. Fasten off Color A.
The White Shell Band
Each shell repeat uses 6 sts, so you get 12 repeats on the Small, 13 on the Medium, and 14 on the Large.
- Rnd W1: With Color B, ch 1, sc in each st around, join. (N)
- Rnd W2 (lower fans): Ch 1, sc in next st, sk 2 sts, shell in next st, sk 2 sts around, join to first sc. Each repeat is 1 sc + 5 dc = 6 sts. Small: 12 shells, 72 sts. Medium: 13 shells, 78 sts. Large: 14 shells, 84 sts.
- Rnd W3 (upper fans): Ch 3 (counts as dc), 2 dc in same sc as join, sk 2 dc, sc in center dc of next shell, sk 2 dc, shell in next sc. Repeat from * until 1 shell of W2 remains. Sk 2 dc, sc in center dc, sk 2 dc, 2 dc in the first sc, join to top of beginning ch-3. The beginning ch-3 and 2 dc plus the last 2 dc make one shell that is split across the join. The counts match W2: (72), (78), (84).
The W3 fans sit above the W2 sc, so the two tiers are staggered like roof tiles. This offset gives the band its scalloped outline. Check Checkpoint 4.
Make All Pieces
Baskets:
- 1 Small: 12 base rnds + 4 yellow wall rnds, about 25 g yellow and 13 g white
- 1 Medium: 13 base rnds + 5 yellow wall rnds, about 30 g yellow and 15 g white
- 1 Large: 14 base rnds + 6 yellow wall rnds, about 35 g yellow and 17 g white
Straps (Color A, make 2): Both straps together use about 15 g yellow. Each strap is three cords braided together.
- Cord (make 6): Ch 112, about 28 in (71.1 cm). Sl st in the back bump of the 2nd ch from hook and in each ch across. (111 sl sts) Leave a 6 in (15.2 cm) tail at each end.
- Braid: Knot 3 cords together at one end. Braid them firmly and evenly, then knot the other end. Each strap should measure 24 in (61.0 cm) between the knots. Weave the tails back into the braid.
Layout grid (front view):
          [ PEAK ]        <- straps overlap 1 in (2.5 cm)
         |        |       <- free straps, about 8 in (20.3 cm) each
       |  SMALL   |       <- 2½ in (6.4 cm) tall
       |          |       <- gap 3 in (7.6 cm)
      |  MEDIUM    |      <- 2¾ in (7.0 cm) tall
      |            |      <- gap 3 in (7.6 cm)
     |   LARGE      |     <- 3 in (7.6 cm) tall
Joining
Sew the straps to the outside of each wall using Color A and a tapestry needle.
Placement: On each basket, place a marker in st 1 of the last yellow round. Place a second marker exactly halfway around: st 37 on the Small (72 ÷ 2 = 36 sts apart), st 40 on the Medium (78 ÷ 2 = 39), and st 43 on the Large (84 ÷ 2 = 42). The baskets only hang level if the two straps are exactly opposite each other.
Stitch-to-stitch logic: Each wall round is ¼ in (0.6 cm) tall. Whipstitch through the edge of the braid and the marked column, taking one stitch per wall round. Sew through the turning ridge, every yellow round, W1, and the W2 and W3 stitches closest to the marked column. Don’t sew into the rim.
Order of work:
- Tuck ¾ in (1.9 cm) of each strap end under the Large base and tack it to the turning ridge.
- Sew the straps up the Large wall, 3 in (7.6 cm).
- Leave a free gap of 3 in (7.6 cm). Sew the straps to the Medium wall, 2¾ in (7.0 cm).
- Leave another 3 in (7.6 cm) gap. Sew the straps to the Small wall, 2½ in (6.4 cm).
- Overlap the free ends 1 in (2.5 cm) at the peak and sew them together along both edges.
Tension: Keep each stitch snug but not tight. If you pull too hard, the wall puckers and one side of the braid ends up shorter.
Size checkpoint: Measure all four gaps. Each should be 3 in (7.6 cm), and the peak should sit about 21 in (53.3 cm) above the bottom of the Large base.
Border: Scalloped Rim
The rim is the border. Work it on each basket after W3, before joining. It outlines every upper fan.
Border gauge: 1 sc per st, plus 2 extra sts at each fan center. The rim is ¼ in (0.6 cm) deep.
- Rnd W4 (rim): Ch 1, 3 sc in same st as join (the center of the split shell), sc in next 2 dc, sl st in next sc, sc in next 2 dc, 3 sc in center dc, sc in next 2 dc, sl st in next sc around until 2 dc remain, sc in last 2 dc, join to first sc. Fasten off and weave in the ends.
Count per scallop: 2 sc + 3 sc + 2 sc + 1 sl st = 8 sts. That is 6 sts worked 1-per-stitch plus 2 extra at the fan center.
- Small: 72 + 24 extra = 96 sts (12 scallops × 8)
- Medium: 78 + 26 extra = 104 sts (13 scallops × 8)
- Large: 84 + 28 extra = 112 sts (14 scallops × 8)
Why the math works: All the extra stitches go at the fan tips, so each 6-st repeat becomes 8 sts and each tip is rounded. The sl st in each valley pulls the dips down. Because the stitches are only added at the tips, the rim doesn’t flare.
Final Blocking
- Weave in all the ends.
- Fill each basket firmly with a rolled towel so the walls stand straight.
- Mist the white band and rim until damp but not soaked.
- Shape each fan and pinch each scallop tip into a soft point.
- Press the bases flat and check the diameters against Checkpoint 2.
- Hang the organizer, straighten the braids, and let it dry fully, which takes 12–24 hours.
Final Quality-Control Checklist
- Base counts are 72, 78, and 84.
- Each base lies flat.
- The turning ridge runs evenly all the way around.
- W2 and W3 have 12, 13, and 14 shells.
- Rim counts are 96, 104, and 112.
- The straps are exactly opposite on every basket.
- All four gaps measure 3 in (7.6 cm).
- Each basket hangs level and holds a 4½ in (11.4 cm) roll.
Troubleshooting
- The base ruffles: Go down a hook size and remake it.
- The base cups: Go up a hook size.
- The shells don’t fit evenly: Recount the wall. It must be a multiple of 6.
- The seam drifts: Join into the first sc, not into the ch-1.
- A basket tilts: One strap is sewn higher than the other. Unpick it and line up the rounds.
- A roll doesn’t fit: Your gauge is too tight. Remake that basket with a 5.5 mm hook.
Care
Hand wash in cool water with mild soap, then roll in a towel to press out the water. Reshape the baskets and let them dry out of direct sun.
Final Notes
At 16 sc per 4 in (10.2 cm), base counts of 72, 78, and 84 give bases of 5¾ in (14.6 cm), 6¼ in (15.9 cm), and 6¾ in (17.1 cm). Each wall keeps its base count, which divides evenly into 12, 13, and 14 shells. The rim adds exactly 2 sts per scallop. With two 24 in (61.0 cm) braids and 3 in (7.6 cm) gaps, the organizer hangs about 21 in (53.3 cm) tall. If each stage matches its checkpoint, the next stage will fit.
Happy crocheting!