

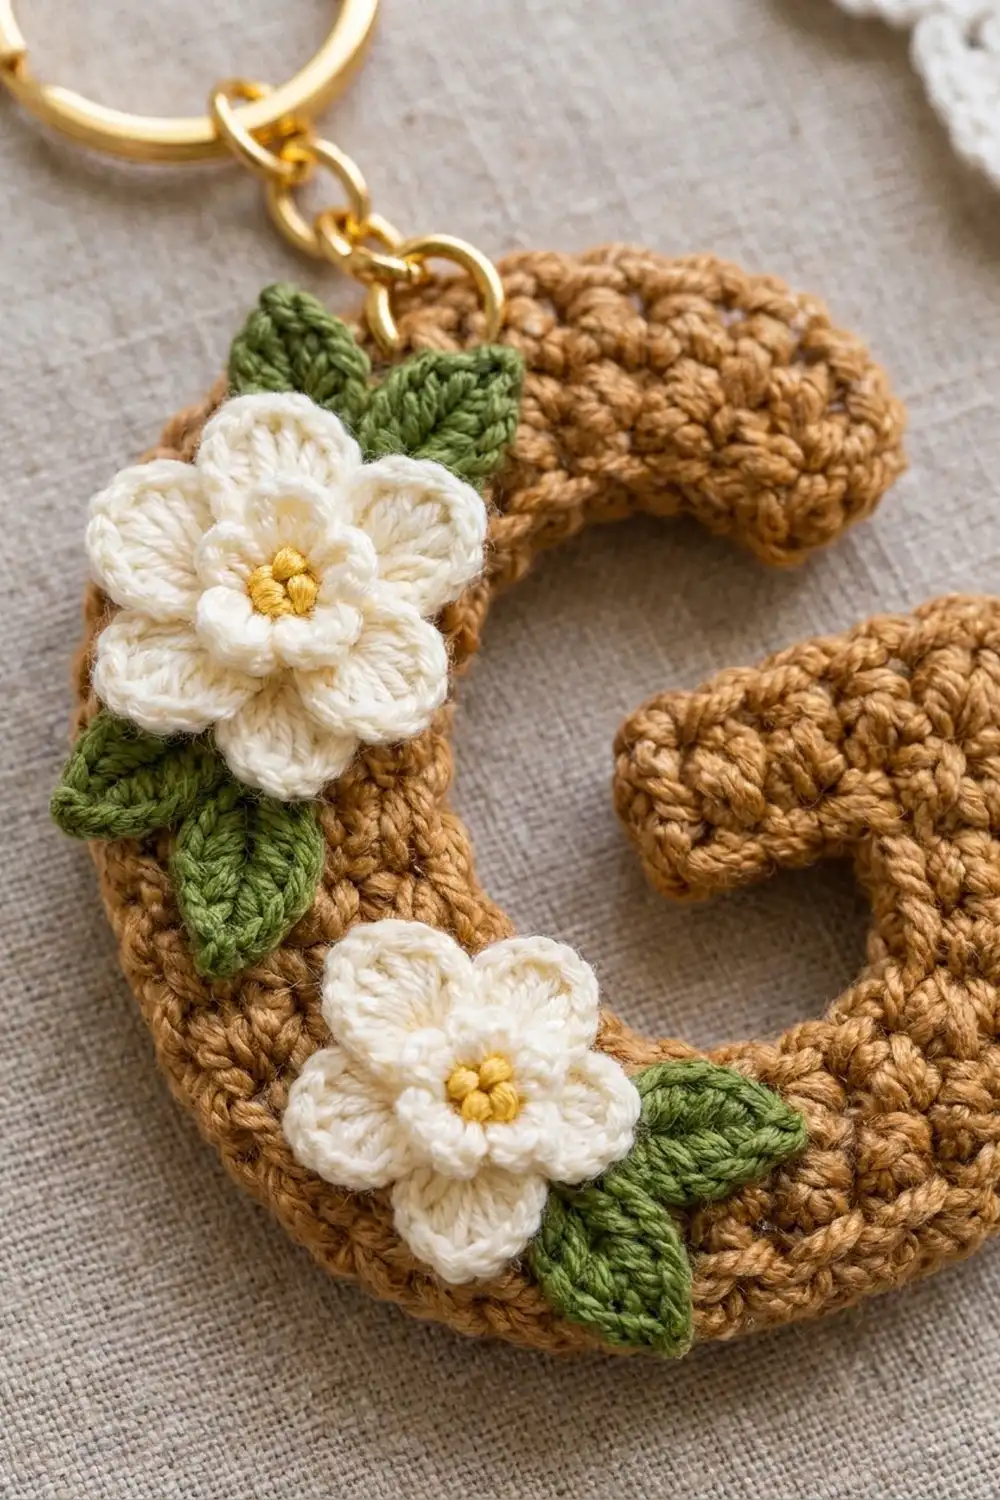
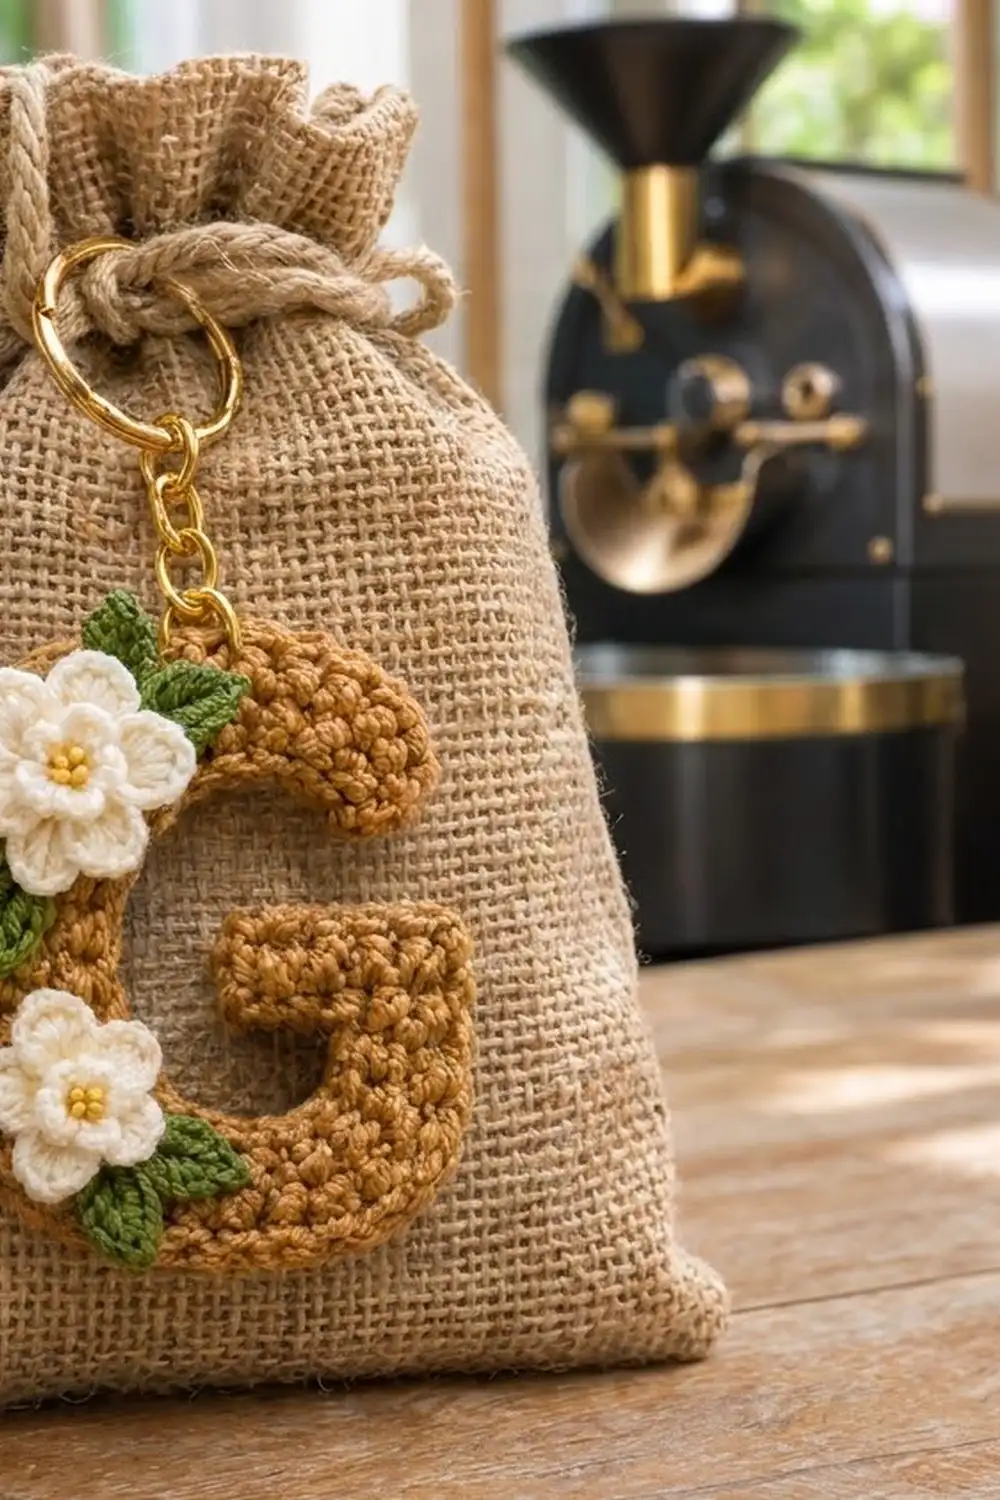
This little initial is a chunky, dense letter G in warm caramel brown, decorated with two cream five-petal flowers, sunny yellow centers, and small green leaves. It hangs from a gold split keyring and works as a keychain, a bag charm, or a gift tag for someone whose name starts with G.
The letter is worked in tight single crochet. The fabric is firm, flat, and pebbly, and it holds its shape without stuffing or stiffener. The flowers and leaves are sewn on top as small appliqués along the left curve of the G.
The pattern uses US crochet terms. The finished letter measures 3.6 in (9.1 cm) wide by 4.0 in (10.2 cm) tall, with a stroke width of 1.2 in (3.0 cm).
The G is one long strip, 4 stitches wide, worked in rows. Short-row “corner wedges” bend the strip around each curve, so the whole letter is crocheted in one continuous piece with no joins. A single round of edging smooths the outline. Then you add the flowers, leaves, and keyring.
Finished Size and Construction
- Finished size: 3.6 in (9.1 cm) wide x 4.0 in (10.2 cm) tall
- Skill level: Easy-intermediate (short rows, working into row ends)
- Terminology: US crochet terms
- Yarn weight: Worsted (#4)
- Hook: 3.5 mm (E-4)
- Number of pieces: 1 letter, plus 2 flowers and 5 leaves sewn on as appliqués
- Layout: Single motif; no letter pieces are joined
- Strip width: 4 sts = 0.8 in (2.0 cm)
- Size before border: 3.2 in (8.1 cm) wide x 3.6 in (9.1 cm) tall
- Border depth: 1 round of sc, 0.2 in (0.5 cm) on every side
Materials
Choose a smooth worsted-weight cotton or cotton blend. Cotton gives crisp stitch definition and resists stretching on a keyring. Acrylic also works but may fuzz with handling.
- Caramel brown (letter): 8 g, about 16 m
- Cream (flowers): 3 g, about 6 m
- Olive green (leaves): 2 g, about 4 m
- Yellow (flower centers): 1 g, about 2 m
These amounts include a generous margin for your gauge swatch and yarn tails.
Tools:
- 3.5 mm (E-4) crochet hook
- Tapestry needle
- Sharp scissors
- 1 gold split keyring, 1 in (2.5 cm), with a short chain
- 1 gold jump ring, 8 mm, and two pairs of flat pliers
- Stitch marker
- Rust-proof pins and a blocking board
- Spray bottle
Abbreviations (US Terms)
- ch – chain
- sl st – slip stitch
- sc – single crochet
- hdc – half double crochet
- dc – double crochet
- sc2tog – single crochet 2 together
- MR – magic ring
- st(s) – stitch(es)
- WR – wedge row
Special technique – Corner Wedge (CW): A set of 4 short rows that adds length to the outer edge of the strip only. This bends the strip about 90 degrees. Always start a wedge at the outer edge.
- WR1: Ch 1, sc in next 3 sts, turn, leaving the last st (inner edge) unworked. (3 sc)
- WR2: Ch 1, sc in each of 3 sts, turn. (3 sc)
- WR3: Ch 1, sc in next 2 sts, turn, leaving the rest unworked. (2 sc)
- WR4: Ch 1, sc in each of 2 sts, turn. (2 sc)
On the next full row, sc across the 2 wedge sts, then keep going into the next unworked st at each step. Put the hook into the top of the stitch, not into a gap, and the step closes neatly.
Gauge and Checkpoints
Gauge: 20 sc x 20 rows = 4 in (10.2 cm), which is 5 sts and 5 rows per inch. One stitch and one row each measure 0.2 in (0.5 cm).
Check your tension first. Ch 11 and work 10 rows of 10 sc. The swatch should measure 2.0 in (5.1 cm) square. You want a firm, dense fabric that you can’t see light through.
Checkpoints:
- After Row 1: strip width 0.8 in (2.0 cm)
- After Row 11: top arm is 2.2 in (5.6 cm) long
- After Row 25: left side straight section is 2.0 in (5.1 cm) long
- After Row 37: bottom straight section is 1.6 in (4.1 cm) long
- After Row 52: letter is 3.2 in (8.1 cm) wide x 3.6 in (9.1 cm) tall
- After the border: 3.6 in (9.1 cm) x 4.0 in (10.2 cm)
If your piece is too big: go down to a 3.25 mm hook or tighten your tension.
If your piece is too small: go up to a 3.75 mm hook. Don’t add rows, because the corner wedges depend on the exact row counts.
The Letter G
Work with caramel. The strip starts at the tip of the top arm and travels counterclockwise around the letter. It goes left along the top, down the left side, right along the bottom, up the right side, and finally left into the crossbar.
All four turns are left turns, so the outer edge is always the outside of the G. The turning chain does not count as a stitch.
Foundation: Ch 5. The slip-knot end of the chain is the outer (top) edge.
Row 1: Sc in 2nd ch from hook and in each ch across, turn. (4 sc) This row ends at the outer edge.
Rows 2–11: Ch 1, sc in each st across, turn. (4 sc)
Odd rows end at the outer edge and even rows end at the inner edge. Row 11 ends at the outer edge, ready for a wedge. The top arm measures 2.2 in (5.6 cm).
Rows 12–15 (Corner Wedge 1): Work CW. (3, 3, 2, 2 sc) You finish at the outer edge.
Rows 16–25: Ch 1, sc in each st across, turn. (4 sc) Row 16 picks up all 4 sts as explained above. This is the left side, 2.0 in (5.1 cm) long. Row 25 ends at the outer edge.
Rows 26–29 (Corner Wedge 2): Work CW. (3, 3, 2, 2 sc)
Rows 30–37: Ch 1, sc in each st across, turn. (4 sc) This is the bottom, 1.6 in (4.1 cm) long.
Rows 38–41 (Corner Wedge 3): Work CW. (3, 3, 2, 2 sc)
Rows 42–43: Ch 1, sc in each st across, turn. (4 sc) This short right stroke is 0.4 in (1.0 cm).
Rows 44–47 (Corner Wedge 4): Work CW. (3, 3, 2, 2 sc) This turn sends the strip left, into the center of the G.
Rows 48–52: Ch 1, sc in each st across. Turn after Rows 48–51. (4 sc) This is the crossbar, 1.0 in (2.5 cm) long. Don’t turn after Row 52 and don’t fasten off.
Stitch check: 36 full rows x 4 sc = 144 sc, plus 4 wedges x 10 sc = 40 sc. That’s 184 sc over 52 rows.
Lay the letter flat. It should measure 3.2 in (8.1 cm) wide x 3.6 in (9.1 cm) tall. On the right side, there should be a 0.8 in (2.0 cm) gap between the crossbar and the top arm.
Border
The border is one round of caramel sc. It rounds off the two strip ends, smooths the wedge curves, and tightens the inner corners. It adds 0.2 in (0.5 cm) on every side.
Border gauge: 1 sc per row end along the strip edges, and 1 sc per stitch across the two strip ends.
Rnd 1: Ch 1 and rotate the piece to work along the inner edge.
- Inner edge: Sc in each row end. At each inner corner, work sc2tog over the two row ends that meet there: Rows 48/43, 42/37, 30/25, and 16/11. You’ll have 28 sc + 4 sc2tog = 32 sts.
- Row 1 tip: Working into the free loops of the foundation chain, 3 sc in the first loop, sc in next 2, 3 sc in the last loop. 4 sts worked + 4 extra = 8 sts.
- Outer edge: Sc in each row end from Row 1 to Row 52. Work 2 sc in the row end of the 2nd row of each wedge (Rows 13, 27, 39, and 45). 52 row ends + 4 extra = 56 sts.
- Row 52 tip: 3 sc in the first st, sc in next 2, 3 sc in the last st. 4 sts worked + 4 extra = 8 sts.
Sl st to the first sc to join. Fasten off and weave in the end. (104 sts)
Why the math works: Every short row turns at the outer edge, so the outer edge has a row end for all 52 rows. The inner edge only has row ends for the 36 full rows. The 4 extra sc on the outer edge ease the curves. The 4 sc2tog on the inner edge pull in the tight corners so they don’t ruffle. The 3-sc corners at each tip turn the work cleanly. Total: 32 + 8 + 56 + 8 = 104 sts.
The letter should now measure 3.6 in (9.1 cm) wide x 4.0 in (10.2 cm) tall, with a 1.2 in (3.0 cm) stroke.
Flowers (Make 2)
Work with cream. The top flower is slightly larger than the bottom flower.
Large flower (top):
- Rnd 1: MR, 10 sc in ring, sl st to first sc to join. (10 sc)
- Rnd 2: *(Hdc, 2 dc, hdc) in next st, sl st in next st; rep from * 4 more times. (5 petals) Fasten off, leaving a 12 in (30.5 cm) tail for sewing.
The large flower is about 1.4 in (3.6 cm) across.
Small flower (bottom):
- Rnd 1: MR, 10 sc in ring, sl st to first sc to join. (10 sc)
- Rnd 2: *(Hdc, dc, hdc) in next st, sl st in next st; rep from * 4 more times. (5 petals) Fasten off, leaving a 12 in (30.5 cm) tail.
The small flower is about 1.0 in (2.5 cm) across.
Centers: With yellow, work 3 French knots close together in the middle of each flower, wrapping the needle twice for each knot. The cluster should cover about 0.25 in (0.6 cm).
Leaves (Make 5)
Work with olive green. Each leaf is worked around both sides of a short chain and ends in a point.
Ch 6. Along the first side of the chain: sc in 2nd ch from hook, hdc in next ch, dc in next ch, hdc in next ch. In the last ch, work (sc, ch 2, sl st in 2nd ch from hook, sc) to make the pointed tip. Along the other side of the chain: hdc in next ch, dc in next ch, hdc in next ch, sc in last ch. Sl st to the first sc. Fasten off, leaving an 8 in (20.3 cm) tail.
Each leaf is about 0.8 in (2.0 cm) long.
Assembly
Pick the neater side of the letter as the front.
- Top flower: Center the large flower on the upper-left curve, over Corner Wedge 1. Sew around the base of each petal with the cream tail.
- Top leaves: Tuck 1 leaf under the upper-right edge of the flower, pointing along the top arm. Tuck 2 leaves under the left side, one pointing left and one pointing down-left. Sew each leaf at its base and center.
- Bottom flower: Center the small flower on the lower-left curve, over Corner Wedge 2. Sew it on the same way.
- Bottom leaves: Tuck 1 leaf under its left edge and 1 leaf under its lower-right edge, pointing along the bottom of the G.
- Keyring: Open the jump ring by twisting it sideways with the two pliers. Pass it through the 2 sc worked into the Row 13 row end at the top-left of the letter. Add the keyring chain and close the jump ring fully.
Final Blocking
- Mist the letter lightly until it’s damp, not soaked. Go gently around the flowers.
- Lay it face up on the blocking board.
- Pin the outer edges of the top arm, left side, and bottom to 3.6 in (9.1 cm) x 4.0 in (10.2 cm).
- Pin the crossbar straight and square. The opening between the crossbar and the top arm should be about 0.4 in (1.0 cm) after the border.
- Smooth the wedge curves into even arcs with your fingertips.
- Fluff the petals and shape the leaf tips to a point.
- Let it dry completely, at least 6 hours, before you remove the pins.
Final Quality-Control Checklist
- Letter measures 3.6 in (9.1 cm) x 4.0 in (10.2 cm)
- Stroke width is an even 1.2 in (3.0 cm) all the way around
- No holes at the wedge steps
- Inner corners lie flat, with no ruffles or puckers
- Border count is 104 sts
- Flowers sit on the left curve, with the leaves tucked evenly behind them
- All ends are woven in and hidden on the back
- Jump ring is fully closed with no gap
Troubleshooting
Curves bend too much or too little: Check your wedge counts (3, 3, 2, 2). Blocking will fix small differences.
Holes at the wedge steps: On the full row after a wedge, work into the top of the next stitch, not the gap between rows. You can close a small hole with the yarn tail.
Inner corners ripple: Make sure you worked sc2tog over both row ends at each inner corner.
Outer curves cup upward: You may have skipped the extra sc in the wedge row ends. Add them, or block firmly.
Letter feels floppy: Your tension is too loose for a keychain. Go down a hook size.
Petals curl forward: Pin them flat while damp and let them dry.
Care
Spot clean with a damp cloth and mild soap, then press flat and let it air dry. Don’t soak it, because the gold hardware may tarnish.
Final Notes
Here is the measurement chain. At 5 sts and 5 rows per inch, 4 sts make a 0.8 in (2.0 cm) strip. Fifty-two rows with four corner wedges build a 3.2 in (8.1 cm) x 3.6 in (9.1 cm) letter. A 104-stitch border round adds 0.2 in (0.5 cm) per side, for a finished G of 3.6 in (9.1 cm) x 4.0 in (10.2 cm). Once you know the wedge technique, you can bend the same strip into other letters and make a whole set of initials.
Happy crocheting!