

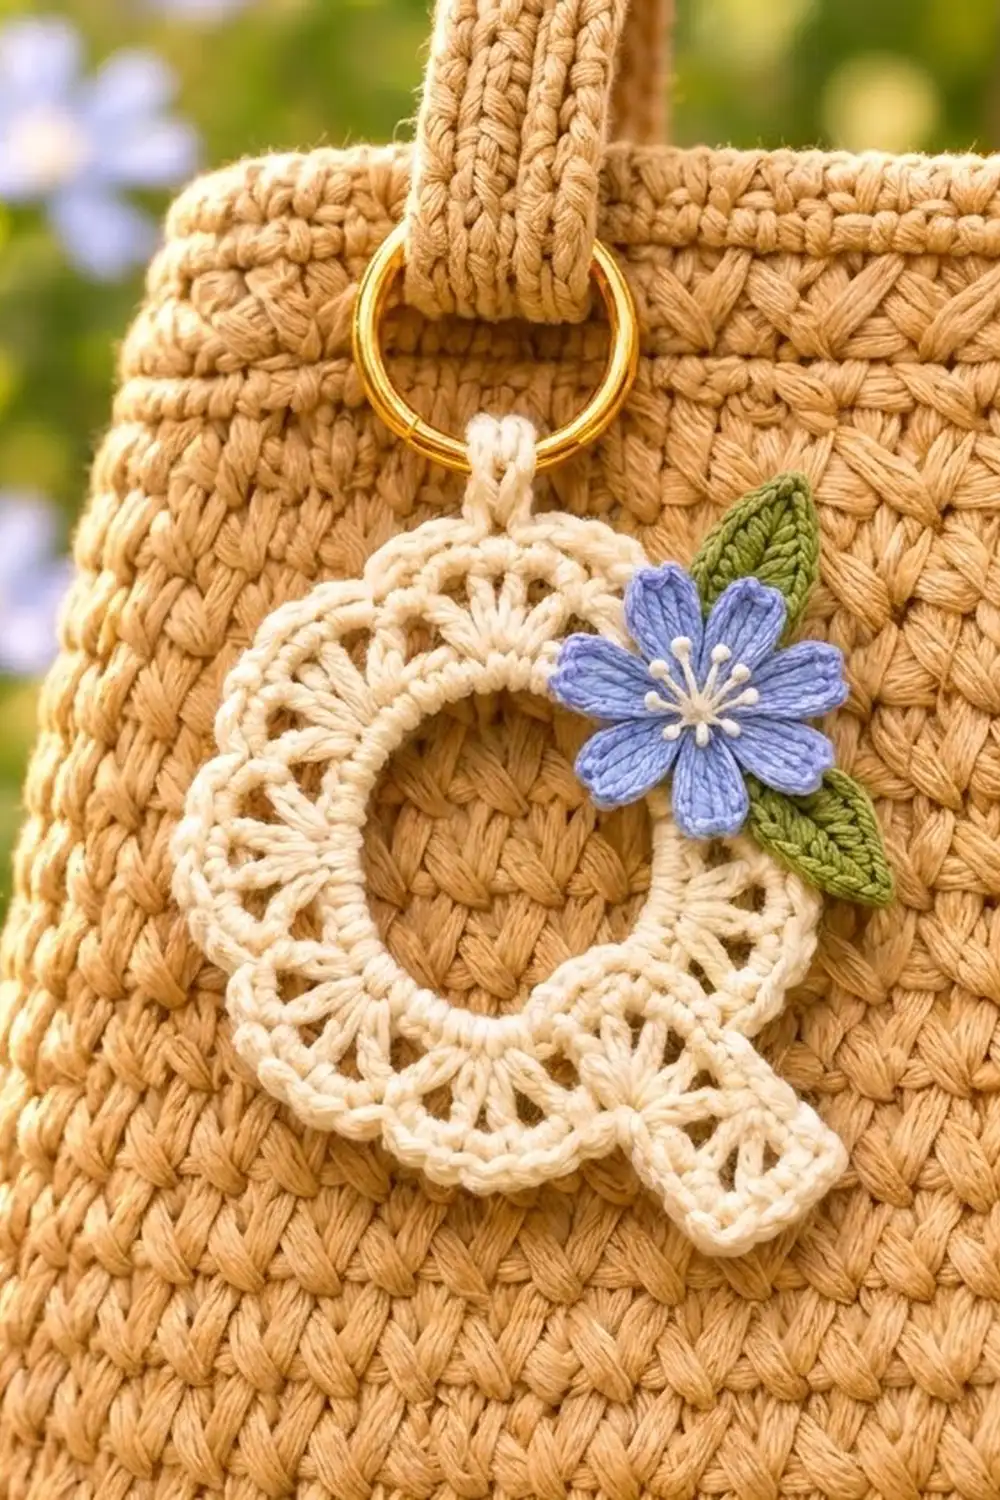
This letter Q charm is made for a tote handle, a key ring, or a zipper pull. The letter is a cream lace ring with a solid center band, a circle of airy shell fans, and a soft scalloped edge. A mesh tail crosses the lower right to finish the Q shape.
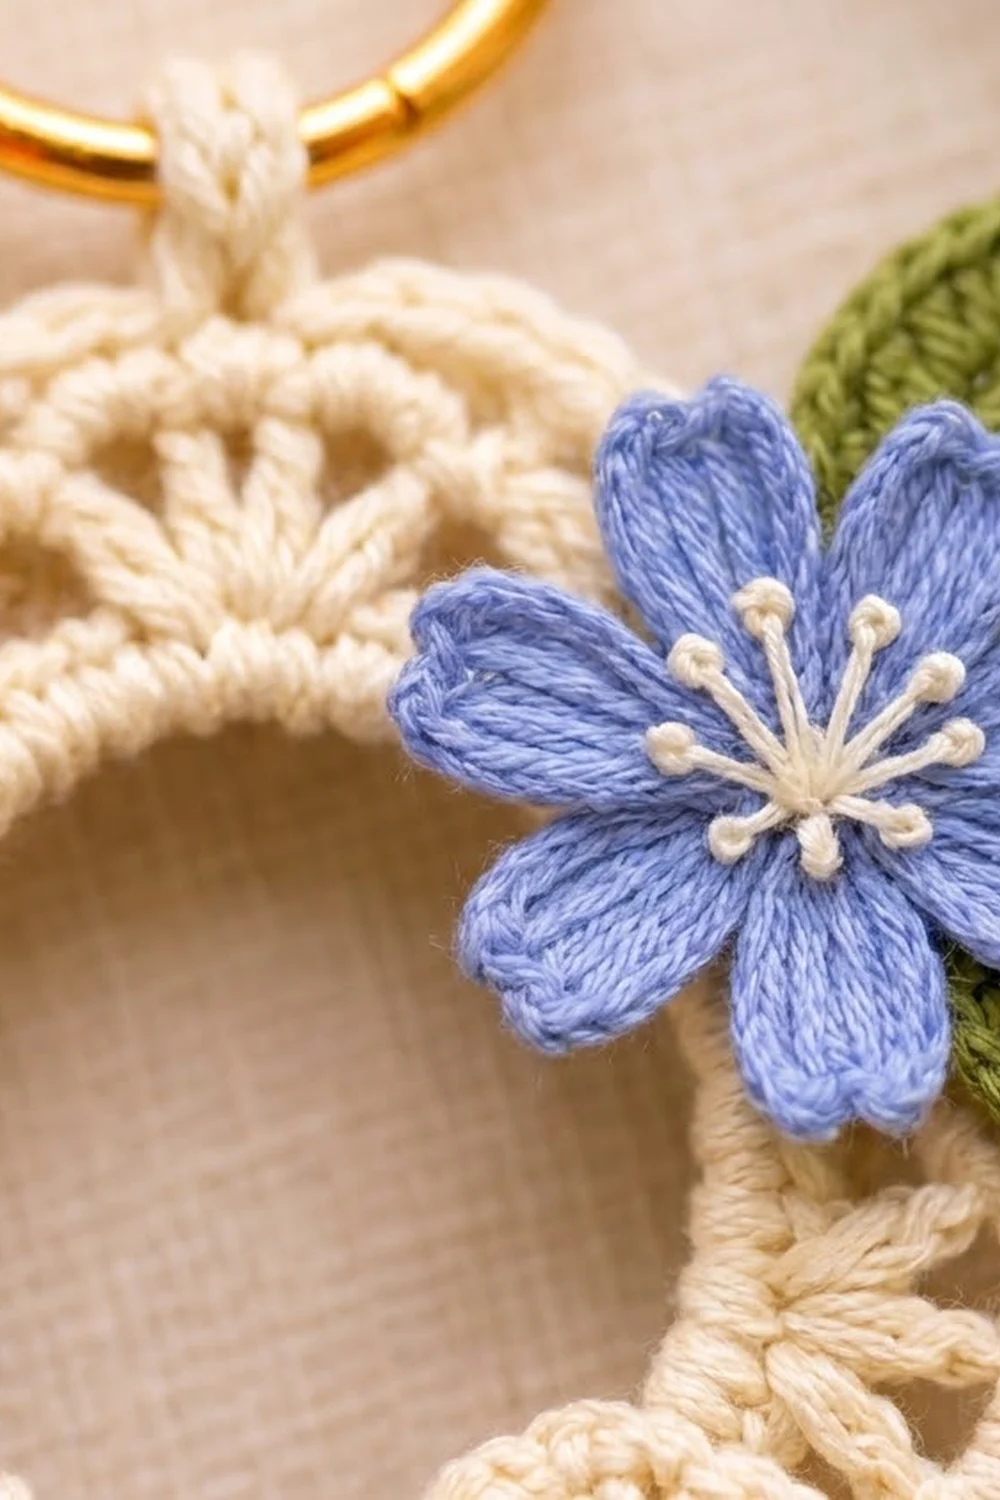
A small periwinkle flower with white embroidered stamens sits at the upper right on two olive-green leaves. A gold split ring at the top makes it easy to clip on. The style is cottage lace: light, crisp, and a little vintage.
The pattern uses US crochet terms. The finished charm measures about 3.5 in (8.9 cm) wide and 3.75 in (9.5 cm) tall, not counting the loop. The lace ring alone is 3 in (7.6 cm) across.
You’ll work the ring in joined rounds from a foundation chain, then crochet a short hanging loop straight off the top scallop. The tail is worked flat in rows with a single-crochet frame. The flower and leaves are separate small pieces that you sew on after blocking.
Finished Size and Construction
- Finished size: 3.5 in (8.9 cm) wide × 3.75 in (9.5 cm) tall; 4.25 in (10.8 cm) tall with the loop
- Skill level: Easy-intermediate
- Terminology: US crochet terms
- Yarn weight: Fingering weight (#1 super fine) mercerized cotton
- Hook: 2.25 mm (US B-1)
- Number of pieces: One finished charm, built from five small components (ring with loop, tail, flower, 2 leaves)
- Layout: A single letter Q motif, with the flower appliqué at the upper right
- Ring size: 3 in (7.6 cm) across, with a center opening of 1.5 in (3.8 cm)
- Size before border: 2.75 in (7.0 cm) across after Round 3
- Border depth: about 0.125 in (0.3 cm)
Materials
Pick a smooth, mercerized cotton. It shows the shell spokes clearly and blocks crisp. A fuzzy or loosely plied yarn will blur the lace. These amounts assume about 3.4 m per gram, which is typical for fingering-weight cotton.
- Cream (main color): 10 g, about 34 m
- Periwinkle blue (flower): 3 g, about 10 m
- Olive green (leaves): 2 g, about 7 m
- White (stamens): 1 m of six-strand embroidery floss, or the same cotton
All quantities include a small safety margin, so leftovers are normal.
Tools:
- 2.25 mm (US B-1) crochet hook
- Gold split ring, 1.25 in (3.2 cm) across
- Tapestry needle and a sharp embroidery needle
- Rustproof pins and a blocking mat or felt board
- Spray bottle with cool water
- Stitch marker
- Small scissors and a ruler
Abbreviations (US Terms)
- ch – chain
- sl st – slip stitch
- sc – single crochet
- hdc – half double crochet
- dc – double crochet
- tr – treble crochet
- sp(s) – space(s)
- st(s) – stitch(es)
- RS – right side
Special stitch – Shell: 5 dc worked into the same stitch.
Gauge and Checkpoints
Gauge: 7 sc and 8 sc rows = 1 in (2.5 cm) with a 2.25 mm hook.
Make the ring first as your test piece. It is small, it uses most of the cream, and it shows right away whether your tension matches. Measure flat, without stretching.
- After Round 2: 2 in (5.1 cm) across
- After Round 3: 2.75 in (7.0 cm) across
- After Round 4: 3 in (7.6 cm) across
- Tail: 1 in (2.5 cm) wide × 1.75 in (4.4 cm) long
- Flower: 1 in (2.5 cm) across
- Each leaf: 0.9 in (2.3 cm) long
If your ring comes out more than 0.25 in (0.6 cm) too big, go down to a 2 mm hook. If it’s that much too small, go up to a 2.5 mm hook. If the shells ruffle while the size is right, your dc are too loose compared with your sc. Shorten each dc a little rather than changing hooks.
Letter Q Ring
The ring is worked in joined rounds with the RS facing. Don’t turn.
Foundation: With cream, ch 32. Sl st in the first ch to form a ring, making sure the chain isn’t twisted.
Round 1: Ch 1, sc in each ch around. Join with a sl st to the first sc. (32 sc)
The solid band around the opening starts here. The 32-chain foundation sets the opening at 1.5 in (3.8 cm).
Round 2 (growth round): Ch 1, sc in next st, 2 sc in next st; repeat from * 16 times. Join. (48 sc)*
This round completes the solid inner band. Check the 2 in (5.1 cm) measurement now.
Round 3 (shell round): Ch 1, sc in first st, skip next st, shell in next st, skip next st, sc in next st; repeat from * 11 more times, ending the last repeat at . Join with a sl st to the first sc. (12 shells and 12 sc = 72 sts)*
Each shell starts from a single stitch, so its five dc spread out like spokes. That gives the ring its open fan look. Each 4-stitch repeat makes one shell, so 48 ÷ 4 = 12 shells.
Round 4 (trim round – scalloped edge): Ch 1, sl st in next sc, sc in next 2 dc, 2 sc in next dc, sc in next 2 dc; repeat from * 12 times. The first sl st goes into the sc you just joined to. Join. (72 sts worked once + 12 extra sts = 84 sts)*
The sl st sinks into the dip between shells, and the 2 sc at each shell’s center rounds the top of the scallop. Fasten off and weave in the starting tail.
Hanging Loop
With RS facing, find the scallop at the top center of the ring. Join cream in the first of its 2 center sc.
Row 1: Ch 1, sc in the same st and in next 2 sts, turn. (3 sc)
Rows 2–8: Ch 1, sc in each st, turn. (3 sc)
The strip measures 1 in (2.5 cm) long. Fasten off and leave a 6 in (15.2 cm) tail. Slip the strip through the split ring and fold it toward the back of the ring. Whipstitch the last row to the base of Row 1 on the wrong side. The folded loop stands about 0.5 in (1.3 cm) above the scallop.
Tail
The tail is worked flat in rows, with a solid–mesh–solid layout.
Foundation: With cream, ch 7.
Row 1 (RS): Dc in 4th ch from hook and in each of the next 3 ch, turn. (5 dc; the skipped ch-3 counts as the first dc)
Row 2 (mesh): Ch 4 (counts as dc + ch 1), skip next dc, dc in next dc, ch 1, skip next dc, dc in top of turning ch, turn. (3 dc and 2 ch-1 sps)
Row 3 (solid): Ch 3 (counts as dc), dc in next ch-1 sp, dc in next dc, dc in next ch-1 sp, dc in 3rd ch of turning ch, turn. (5 dc)
Row 4 (mesh): Repeat Row 2. (3 dc and 2 ch-1 sps)
Row 5 (solid): Repeat Row 3. (5 dc)
Don’t fasten off. Go straight on to the tail edging in the Border section.
Flower
Round 1: With periwinkle, make a magic ring. Ch 1, work 5 sc in the ring and pull it closed. Join. (5 sc)
Round 2 (petals): In next sc work (ch 2, dc, tr, ch 1, tr, dc, ch 2, sl st); repeat from * 4 more times. (5 petals)*
The ch-1 between the two tr gives each petal its soft point. Fasten off and leave a 10 in (25.4 cm) tail for sewing.
Stamens: With white, work 7 straight stitches from the center outward, each about 0.25 in (0.6 cm) long. Make a small French knot at the outer end of each one. Keep the knots inside the base of the petals.
Leaves (Make 2)
Foundation: With olive green, ch 7.
Side 1: Working in back bumps, sl st in 2nd ch from hook, sc in next ch, hdc in next ch, dc in next ch, hdc in next ch, sc in last ch. (6 sts)
Side 2: Ch 1. Rotate and work along the other side of the chain: sc in first ch, hdc in next ch, dc in next ch, hdc in next ch, sc in next ch, sl st in last ch. (6 sts)
Tip: Ch 2, sl st in the first sl st of Side 1. (12 sts plus a ch-2 tip)
The ch-2 makes the point, and the shaped stitches make the leaf widest in the middle. Fasten off and leave a 6 in (15.2 cm) tail. If you like, backstitch a center vein with the same green.
Border
Border gauge: 7 sc = 1 in (2.5 cm), the same as the main gauge. On the ring, Round 4 is the border. Its count per shell repeat is exact: 1 sl st + 6 sc = 7 sts, and 12 repeats = 84 sts.
Tail edging (1 round): Keep the RS facing after Row 5. Ch 1, then:
- Top edge (across Row 5): 3 sc in first st, sc in next 3 sts, 3 sc in last st. (9 sc, both corners included)
- Long side: 2 sc in each of the 5 row ends. (10 sc)
- Bottom edge (across the foundation ch): 3 sc in first ch, sc in next 3 ch, 3 sc in last ch. (9 sc, both corners included)
- Long side: 2 sc in each of the 5 row ends. (10 sc)
Join to the first sc. (9 + 10 + 9 + 10 = 38 sc) Fasten off and leave a 12 in (30.5 cm) tail for sewing.
Why the math works: Each short edge has 5 dc. One sc per stitch plus 2 extra at each corner gives 5 + 4 = 9, and the corners are counted once, inside those 9. Each dc row is about 0.3 in (0.8 cm) tall. Two sc at 7 per inch cover about 0.29 in (0.7 cm), so 2 sc per row end keeps the long sides flat. The tail ends up 1 in (2.5 cm) wide and 1.75 in (4.4 cm) long.
Attaching the tail: Lay the ring RS up with the loop at 12 o’clock. Place the tail diagonally across the 4–5 o’clock area, angled down and to the right. Its inner short end should touch the solid band at the edge of the opening. About 0.75 in (1.9 cm) of the tail lies over the lace, since that is the full width of the ring band from opening to edge. The other 1 in (2.5 cm) sticks out past the scallops. Pin it, then whipstitch all around the overlap from the back, catching only the back loops so nothing shows on the front.
Final Blocking
- Weave in all ends except the flower and leaf sewing tails.
- Pin the Q RS up on a blocking mat or felt board. Put one pin through the opening and one at the tail tip.
- Measure the ring at 3 in (7.6 cm) across and the opening at 1.5 in (3.8 cm).
- Pin the top of each scallop so the 12 points are even and the shells sit open.
- Square the tail to 1 in (2.5 cm) wide.
- Mist with cool water until damp, not soaked.
- Let it dry completely, at least 4 hours.
- Unpin it. Place the flower at the 1–2 o’clock position so its petals overlap the scallop edge. Tuck one leaf behind the flower angled up and right, and the other angled down and right. Sew the leaves first, then the flower, stitching only through the back loops of the ring.
Final Quality-Control Checklist
- Ring measures 3 in (7.6 cm) and lies flat with no ruffling
- Opening measures 1.5 in (3.8 cm) and is round
- 12 even shells, each with 5 dc
- 84 border sts, with each sl st sitting in a dip between scallops
- Tail is 1 in × 1.75 in (2.5 cm × 4.4 cm) with 38 edging sc
- Tail reaches the solid inner band and sticks out 1 in (2.5 cm)
- Loop is centered at the top and firmly stitched around the split ring
- Flower has 5 pointed petals and 7 knotted stamens
- Both leaves show from behind the flower
- No sewing stitches show on the front
Troubleshooting
Shells ruffle: Your dc are too tall or loose. Make them snugger, or try 4-dc shells while keeping the same 4-stitch repeat.
Ring cups into a bowl: Round 2 is too tight. Rework it with a looser tension, keeping 48 sc.
Opening twisted or puckered: The foundation chain twisted when you joined it. Start again and lay the chain flat before the sl st.
Tail sides wavy: Use 2 sc per row end, not 3. If the sides pull in, loosen up rather than adding stitches.
Petals floppy: Use a smaller hook for the flower only, or spray it with a little starch.
Charm spins on the bag: Tighten the fold of the loop strip so it hugs the split ring.
Care
Hand wash in cool water with mild soap, press out the water in a towel, and dry flat. Take the charm off the bag first and re-pin the scallops if they lose their shape.
Final Notes
The measurement chain is simple. A 32-chain foundation gives a 1.5 in (3.8 cm) opening. Round 2 brings the ring to 2 in (5.1 cm), the shells bring it to 2.75 in (7.0 cm), and the scalloped border finishes it at 3 in (7.6 cm). A 1 in × 1.75 in (2.5 cm × 4.4 cm) tail completes the letter, giving a finished charm of 3.5 in × 3.75 in (8.9 cm × 9.5 cm). If each checkpoint matches, the finished charm will too.
Happy crocheting!