

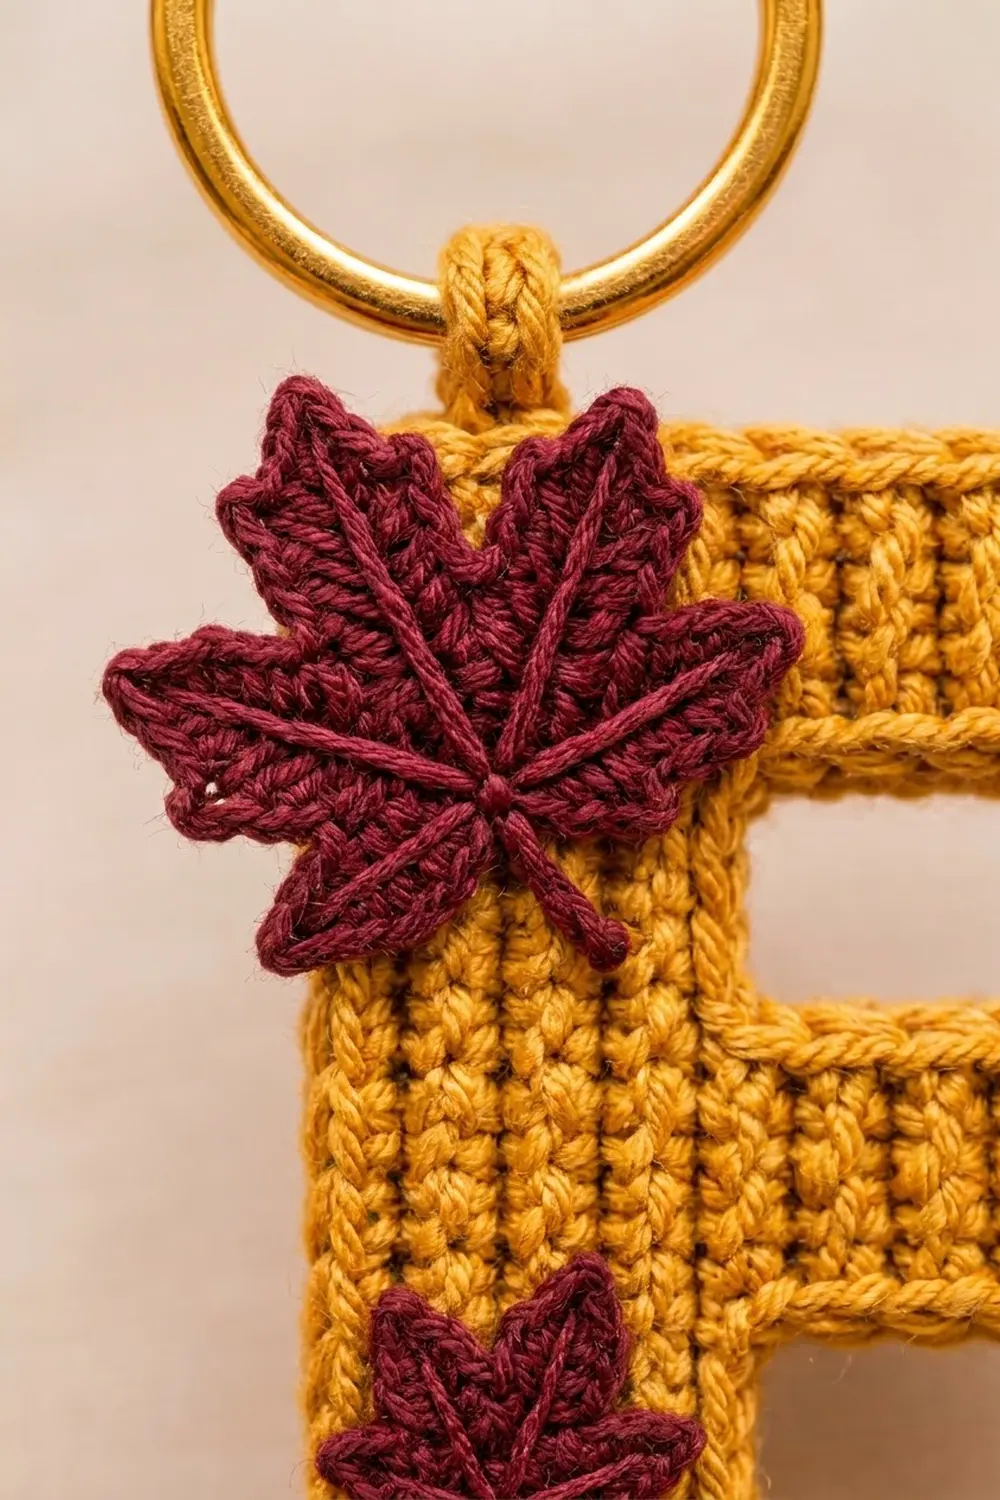
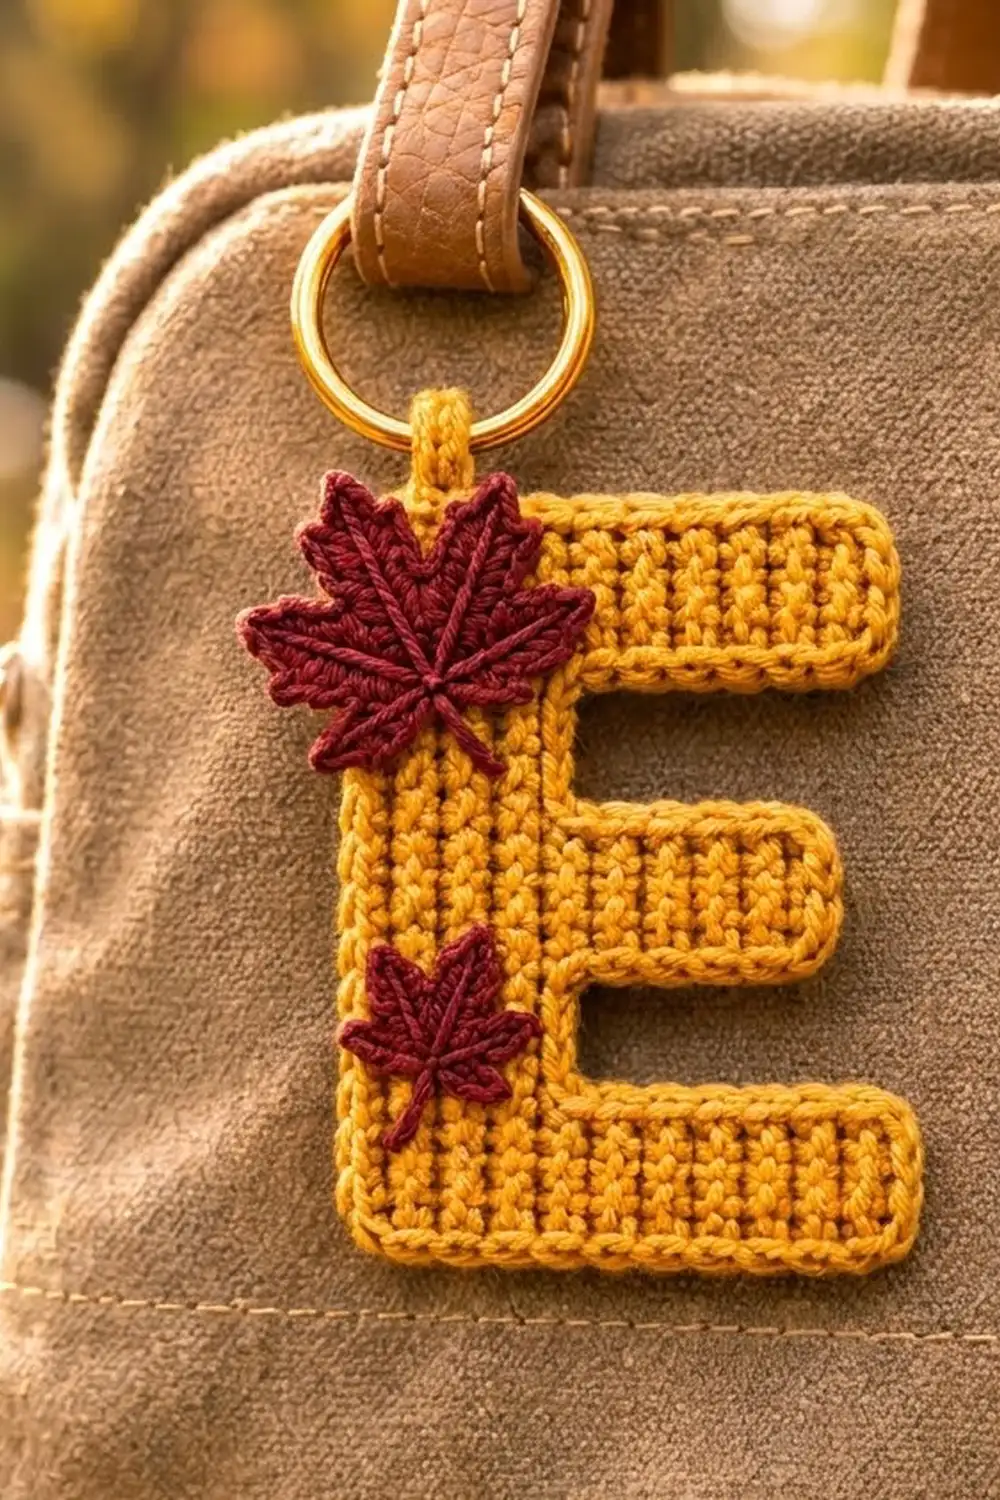
This little letter E keychain is a warm autumn accessory. It’s a solid, ribbed capital E in mustard gold with two burgundy maple leaves sewn on, and it hangs from a gold key ring. Clip it to a bag, a zipper pull or a set of keys.
The colors suit fall: golden mustard for the letter and deep wine burgundy for the leaves. Half double crochet stacks into neat vertical ribs that look almost knitted. A smooth single crochet outline gives the letter clean, rounded edges.
This pattern uses US crochet terms. The finished letter is 3 in (7.6 cm) wide and 4.25 in (10.8 cm) tall. With the tab and ring it hangs about 6 in (15.2 cm) long.
The letter is worked flat in rows from the bottom up, all as one piece. The arms are added with extended stitches, so there are no seams. One round of border goes all the way around the E. Then you add a hanging tab, crochet two maple leaves, embroider their veins and sew them in place.
Finished Size and Construction
- Finished size: 3 in x 4.25 in (7.6 cm x 10.8 cm), without the tab and ring
- Skill level: Easy to intermediate
- Terminology: US crochet terms
- Yarn weight: DK (light, #3)
- Hook: 3.5 mm (E-4)
- Number of pieces: 1 letter, plus 2 leaf appliqués and 1 tab
- Layout: a single letter, no assembly grid
- Letter size before border: 2.75 in x 4 in (7.0 cm x 10.2 cm)
- Border depth: 1 round of sc, about 1/8 in (0.3 cm) per side
- Leaves: large leaf 1.5 in (3.8 cm), small leaf 1 in (2.5 cm)
Materials
Use a smooth DK yarn so the ribs show clearly. Cotton or a cotton blend holds its shape well on a keychain. Acrylic works too but is a little softer. Avoid fuzzy or very splitty yarns.
- Color A, mustard gold: 8 g / 20 m (22 yd), for the letter, border and tab
- Color B, burgundy: 3 g / 7 m (8 yd), for both leaves, the vein embroidery and sewing
These quantities include a small safety margin.
Tools:
– 3.5 mm (E-4) crochet hook
– Tapestry needle (a sharp one for the embroidery is helpful)
– 1.25 in (3.2 cm) gold split key ring
– Scissors
– Stitch marker
– Blocking mat and rust-proof pins
– Spray bottle with water
Abbreviations (US Terms)
- ch – chain
- sl st – slip stitch
- sc – single crochet
- hdc – half double crochet
- dc – double crochet
- tr – treble crochet
- st(s) – stitch(es)
- rnd – round
- RS / WS – right side / wrong side
- MR – magic ring
Special stitch – extended hdc (ext-hdc): Yarn over and insert your hook into the “chain” at the base of the last stitch you made. Yarn over and pull up a loop (3 loops on hook). Yarn over and pull through 1 loop only (this makes the base chain). Yarn over and pull through all 3 loops. Each ext-hdc adds 1 stitch to the end of a row with its own base, so you don’t need a separate foundation chain.
Picot tips: These are written inside the leaf instructions, for example “ch 3, sl st in 3rd ch from hook.”
Gauge and Checkpoints
Gauge: 16 hdc x 12 rows = 4 in (10.2 cm), which is 4 sts and 3 rows per inch.
You don’t need a separate swatch. Rows 1–3 of the letter are your test piece.
- After Row 3: 2.75 in wide x 1 in tall (7.0 cm x 2.5 cm)
- After Row 7: about 2.33 in tall (5.9 cm)
- After Row 12: 2.75 in x 4 in (7.0 cm x 10.2 cm)
- After the border: 3 in x 4.25 in (7.6 cm x 10.8 cm)
If your piece is too big, go down to a 3.25 mm hook. If it’s too small, go up to a 3.75 mm hook. If only the height is off, change your hdc habit: pull the first loop up a little taller or shorter. Keep the stitch counts the same, because the border math depends on them.
Letter E
The beginning ch-2 never counts as a stitch. Rows are worked back and forth. Row 1 is the RS.
Foundation: With Color A, ch 13.
Row 1 (RS): Hdc in 3rd ch from hook and in each ch across. (11 hdc)
Row 2 (WS): Ch 2, turn, hdc in each st across. (11 hdc)
Row 3: Ch 2, turn, hdc in each st across. (11 hdc)
Checkpoint: 2.75 in x 1 in (7.0 cm x 2.5 cm). That completes the bottom bar.
Row 4 (WS): Ch 2, turn, hdc in first 4 sts. Leave the other 7 sts unworked. (4 hdc)
This row starts at the left edge as you see it from the RS, so these 4 sts become the spine.
Row 5: Ch 2, turn, hdc in each st across. (4 hdc)
Row 6 (WS): Ch 2, turn, hdc in each of the 4 sts. Then work 5 ext-hdc, starting the first one in the base of the last hdc. (9 sts: 4 hdc + 5 ext-hdc)
Row 7: Ch 2, turn, hdc in each st across. (9 hdc)
That completes the middle arm. It is 2.25 in (5.7 cm) long, 0.5 in (1.3 cm) shorter than the bars.
Row 8 (WS): Ch 2, turn, hdc in first 4 sts. Leave the other 5 sts unworked. (4 hdc)
Row 9: Ch 2, turn, hdc in each st across. (4 hdc)
Row 10 (WS): Ch 2, turn, hdc in each of the 4 sts. Then work 7 ext-hdc. (11 sts: 4 hdc + 7 ext-hdc)
Row 11: Ch 2, turn, hdc in each st across. (11 hdc)
Row 12: Ch 2, turn, hdc in each st across. (11 hdc)
Don’t fasten off. Turn so the RS faces you, ready for the border.
Checkpoint: 2.75 in x 4 in (7.0 cm x 10.2 cm). The spine is 1 in (2.5 cm) wide. The top and bottom bars stick out 1.75 in (4.4 cm) past the spine, and each gap is about 0.67 in (1.7 cm) tall.
Border
Border gauge: 4 sc per inch along the edges. Along row-ends, work 4 sc over every 3 rows. Along 2-row edges, work 3 sc.
At each of the 8 outer corners, work 3 sc in the corner stitch. At the 4 inner corners, add nothing. Just pull the yarn firmly as you turn the corner.
Rnd 1 (RS): Ch 1. Work the sections in this order:
- Top edge (Row 12): 3 sc in the first st (top-right corner), sc in next 9 sts, 3 sc in last st (top-left corner). (15 sc)
- Left edge, Rows 12–1: [sc in next 2 row-ends, 2 sc in next row-end] 4 times. (16 sc)
- Bottom edge (in the free loops of the foundation chain): 3 sc in first ch (bottom-left corner), sc in next 9 ch, 3 sc in last ch (bottom-right corner). (15 sc)
- Bottom bar end, Rows 1–3: sc, 2 sc, sc in the 3 row-ends. (4 sc)
- Top of bottom bar (the 7 unworked sts of Row 3): 3 sc in the outer st, sc in next 6 sts. (9 sc) Inner corner.
- Spine, Rows 4–5: sc in the Row 4 end, 2 sc in the Row 5 end. (3 sc) Inner corner.
- Underside of middle arm (the bases of the 5 ext-hdc in Row 6): sc in next 4 bases, 3 sc in the last base. (7 sc)
- Middle arm end, Rows 6–7: sc in first row-end, 2 sc in next. (3 sc)
- Top of middle arm (the 5 unworked sts of Row 7): 3 sc in the outer st, sc in next 4 sts. (7 sc) Inner corner.
- Spine, Rows 8–9: sc, 2 sc. (3 sc) Inner corner.
- Underside of top bar (the bases of the 7 ext-hdc in Row 10): sc in next 6 bases, 3 sc in the last base. (9 sc)
- Top bar end, Rows 10–12: sc, 2 sc, sc. (4 sc)
Sl st to the first sc. (95 sc)
Why the math works: The letter has 46 exposed stitch tops and bases: 11 + 7 + 5 + 5 + 7 + 11. It has 33 row-end sc: 16 + 4 + 3 + 3 + 3 + 4. The 8 outer corners add 2 extra sc each, which is 16. That gives 46 + 33 + 16 = 95, the same as the sum of the sections. Each corner’s 3 sc are counted once, inside its own section.
The border adds 1/8 in (0.3 cm) to every side. That takes 2.75 in to 3 in (7.0 cm to 7.6 cm) wide, and 4 in to 4.25 in (10.2 cm to 10.8 cm) tall.
Hanging Tab
Count along the top border, starting after the 3 sc of the top-left corner. Join Color A in the 2nd sc after the corner group.
Row 1: Ch 1, sc in same st and next 2 sts. (3 sc)
Rows 2–6: Ch 1, turn, sc in each st. (3 sc)
Fasten off and leave a 6 in (15.2 cm) tail. The tab is about 0.75 in (1.9 cm) wide and 1.25 in (3.2 cm) long. Thread it through the key ring and fold it to the back. Whipstitch Row 6 to the back of the top edge. This leaves about 5/8 in (1.6 cm) of tab showing above the letter.
Maple Leaves
Large Leaf (1.5 in / 3.8 cm)
With Color B:
Rnd 1: MR, 8 sc in ring, sl st to first sc. (8 sc)
Rnd 2: Ch 1, 2 sc in each st, sl st to first sc. (16 sc)
Rnd 3 (points): The stitches are numbered 1–16 from the join.
- St 1: sl st, ch 6, sl st in 2nd ch from hook and next 4 ch (this makes the stem), sl st in same st 1.
- St 2: sl st (valley).
- Sts 3–4, small point: (hdc, dc) in st 3, ch 2, sl st in 2nd ch from hook, (dc, hdc) in st 4.
- St 5: sl st.
- Sts 6–7, large point: (dc, tr) in st 6, ch 3, sl st in 3rd ch from hook, (tr, dc) in st 7.
- St 8: sl st.
- Sts 9–10: large point (this is the top lobe).
- St 11: sl st.
- Sts 12–13: large point.
- St 14: sl st.
- Sts 15–16: small point.
Sl st in st 1 and fasten off. (5 points, 4 valleys, 1 stem)
Small Leaf (1 in / 2.5 cm)
Rnd 1: MR, 10 sc in ring, sl st to first sc. (10 sc)
Rnd 2: The stitches are numbered 1–10.
- St 1: sl st, ch 4, sl st in 2nd ch from hook and next 2 ch (stem), sl st in same st.
- St 2, mini small point: (sc, ch 2, sl st in 2nd ch from hook, sc).
- St 3: sl st.
- St 4, mini large point: (hdc, ch 3, sl st in 3rd ch from hook, hdc).
- St 5: sl st.
- St 6: mini large point (this is the top lobe).
- St 7: sl st.
- St 8: mini large point.
- St 9: sl st.
- St 10: mini small point.
Sl st in st 1 and fasten off. (5 points, 4 valleys, 1 stem)
Veins
Split a length of Color B down to 1 or 2 plies. Using straight stitches, make a center vein from the stem to the top point. Then make 1 vein from the center out to each side point.
Final Blocking
- Weave in all ends on the letter except the tab tail, which you already used.
- Pin the letter face up on a blocking mat at 3 in x 4.25 in (7.6 cm x 10.8 cm).
- Put 1 pin at each outer corner. Check that the gaps are even and the ribs run straight.
- Mist it until it’s damp, not soaked.
- Pin the leaves out separately, opening up each point.
- Leave everything to dry completely, which usually takes a few hours.
- Unpin. Sew the large leaf at the top left of the letter, tilted, covering the top of the spine and letting one point overlap the left edge slightly. Sew the small leaf onto the spine just above the bottom bar. Use small hidden stitches through the leaf centers and points.
Final Quality-Control Checklist
- The letter measures 3 in x 4.25 in (7.6 cm x 10.8 cm).
- The border has 95 sc, with 3 sc at each of the 8 outer corners.
- The inner corners are tight, with no holes.
- The middle arm is 0.5 in (1.3 cm) shorter than the bars.
- The ribs run straight up and down.
- Each leaf has 5 clear points and a stem.
- The veins are visible but not puckered.
- The tab is firmly sewn and the ring turns freely.
- All ends are woven in on the back.
Troubleshooting
- The arms slant or curve: Your ext-hdc are tighter than your regular hdc. Loosen the “chain” step.
- There are holes at the inner corners: Pull the yarn firmly, or close the gap with a small stitch from the back.
- The border ruffles: You’ve put in too many row-end stitches. Work exactly the counts given for each section.
- The border pulls in: Use a hook 0.25 mm larger for the border round only.
- The leaf points curl: Block them flat and pin each picot.
- The letter is too floppy for a keychain: Go down a hook size, or line the back with felt.
Care
Hand wash in cool water, press out the water gently and dry flat. Don’t use a dryer, because it can distort the leaves and the ring.
Final Notes
Here is the measurement chain. Rows 1–3 measure 2.75 in x 1 in (7.0 cm x 2.5 cm). All 12 rows make a letter of 2.75 in x 4 in (7.0 cm x 10.2 cm). The 95-stitch border brings it to 3 in x 4.25 in (7.6 cm x 10.8 cm). With the tab and ring it hangs about 6 in (15.2 cm) long. If each checkpoint matches, the finished keychain will too. The same row-and-extension method also works for other block letters.
Happy crocheting!