

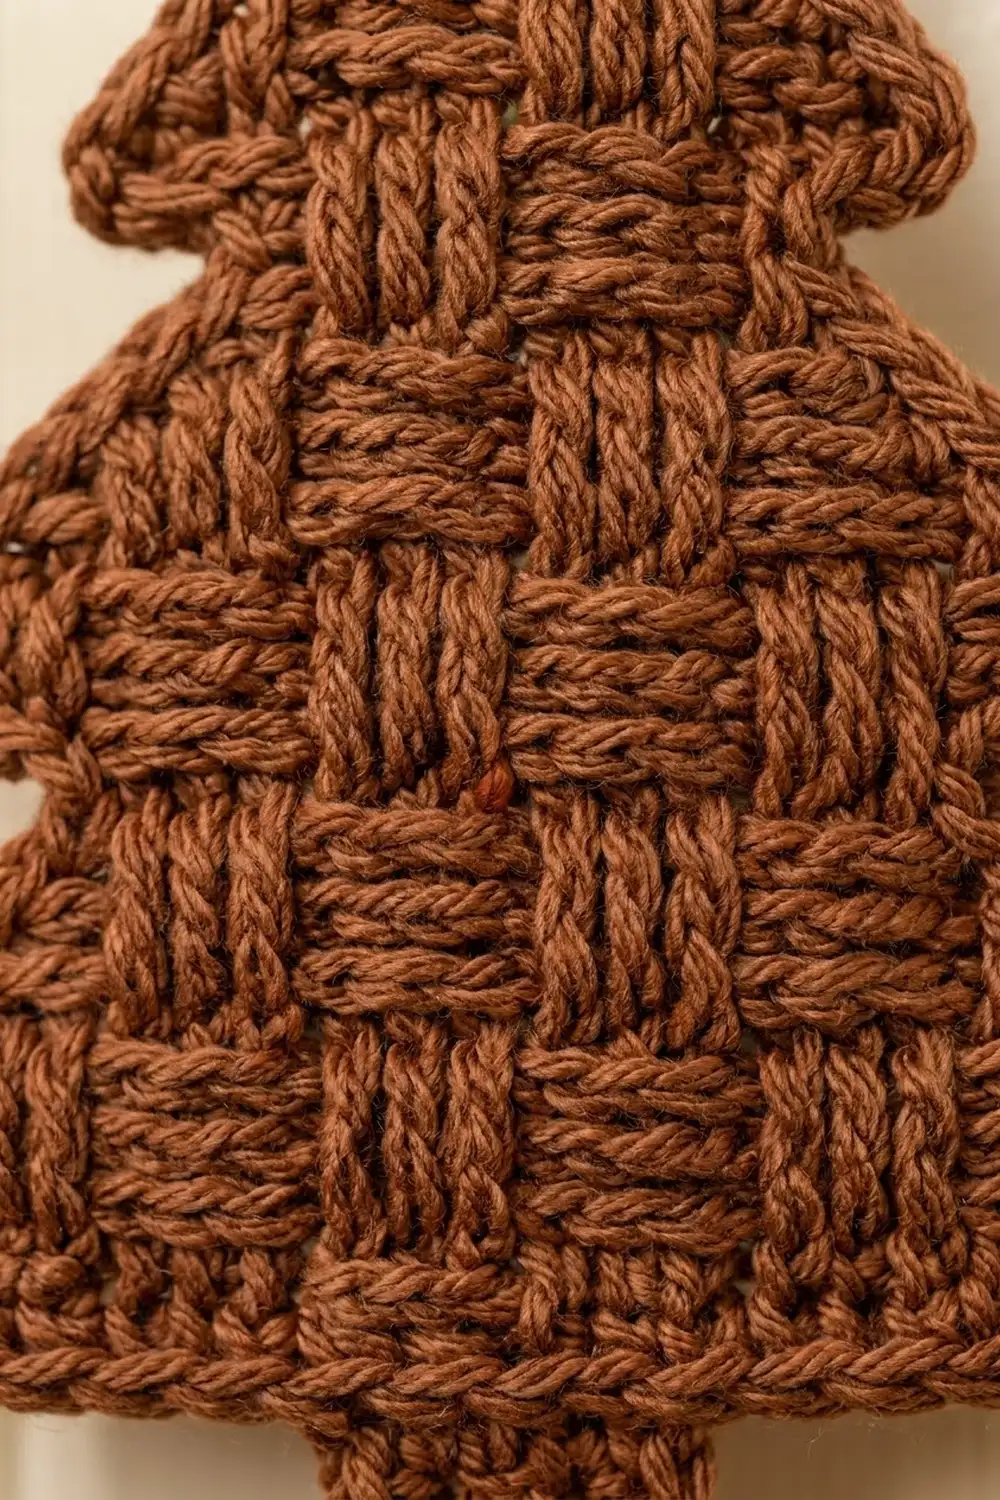
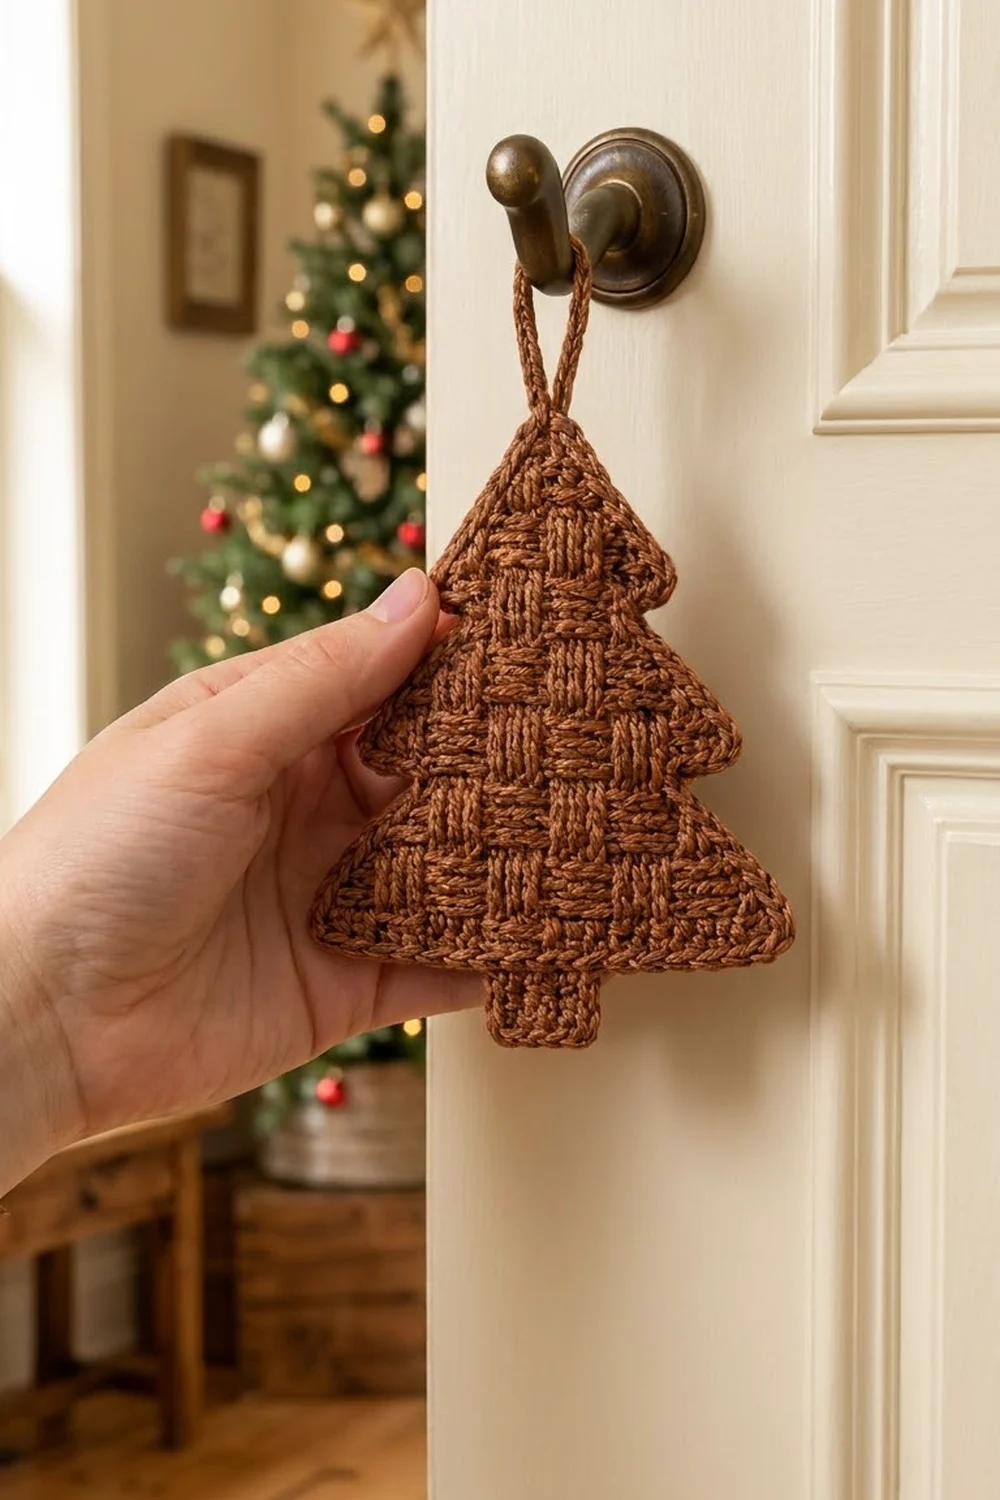
This little tree is all about texture. A basketweave of raised and sunken post stitches covers three stepped tiers, so the ornament looks woven even though it is one flat crochet piece. A plain trunk and a single crochet edge keep the outline crisp.
The sample is worked in one warm cinnamon brown, which gives it a rustic, gingerbread feel. Forest green, cream, or a soft heather would look just as good. A solid or very lightly heathered shade shows the woven blocks best. Variegated yarn tends to hide them.
The pattern uses US crochet terms. The finished ornament is about 5.1 in (13.0 cm) wide and 6.25 in (15.9 cm) tall, not counting the hanging loop, which adds about 2 in (5.1 cm).
You work the tree top-down in rows, starting at the tip. Each tier grows with increases at both edges. Then a short step row pulls the edges in to make the notch. You work the trunk from the center of the last row, and one border round and a loop finish the piece.
Finished Size and Construction
- Finished size: 5.1 in (13.0 cm) wide x 6.25 in (15.9 cm) tall, plus a 2 in (5.1 cm) loop
- Skill level: Intermediate (front and back post stitches)
- Terminology: US
- Yarn weight: Worsted (#4)
- Hook: 5.0 mm (H-8)
- Number of pieces: 1
- Layout: Single flat piece, worked top-down in rows
- Piece size before border: 4.9 in (12.4 cm) wide x 6 in (15.2 cm) tall
- Border depth: about 1/8 in (0.3 cm) on every edge
Materials
- Yarn: Worsted-weight yarn in cinnamon brown, about 20 g / 40 m. A smooth, plied cotton or cotton blend shows the post stitches best. Acrylic also works, but the texture comes out a little softer.
- 5.0 mm (H-8) crochet hook
- Tapestry needle
- 1 stitch marker
- Scissors
- Blocking mat, rust-proof pins, and a spray bottle
The yarn amount includes a margin of about 25 percent. Post stitches use more yarn than plain stitches, so don’t cut it close. One 50 g ball makes two ornaments with plenty to spare.
Abbreviations (US Terms)
- ch: chain
- sl st: slip stitch
- sc: single crochet
- dc: double crochet
- FPdc: front post double crochet
- BPdc: back post double crochet
- st(s): stitch(es)
- RS / WS: right side / wrong side
- tch: turning chain
Special stitches
- FPdc: Yarn over, insert the hook from front to back to front around the post of the stitch below, yarn over and pull up a loop, then finish as a dc.
- BPdc: Yarn over, insert the hook from back to front to back around the post of the stitch below, then finish as a dc.
- R (raised): A post stitch that sits forward on the RS. On RS rows, work R as FPdc. On WS rows, work R as BPdc.
- S (sunken): A post stitch that sits back on the RS. On RS rows, work S as BPdc. On WS rows, work S as FPdc.
Odd-numbered rows are RS rows and even-numbered rows are WS rows. The ch-3 at the start of each row counts as a dc.
Gauge and Checkpoints
Gauge: 14 sts and 10 rows = 4 in (10.2 cm) in the basketweave post pattern.
Since the tree is a single piece, the top tier is your gauge test. Work Rows 1–4, lay the piece flat without stretching it, and measure across the widest row before you go on. Measure height from the foundation chain to the top edge of the last row.
- After Row 4: 9 sts, about 2.6 in (6.6 cm) wide and 1.6 in (4.1 cm) tall.
- After Row 8: 13 sts, about 3.7 in (9.4 cm) wide and 3.2 in (8.1 cm) tall.
- After Row 12: 17 sts, about 4.9 in (12.4 cm) wide and 4.8 in (12.2 cm) tall.
- After the trunk: the trunk is about 1.4 in (3.6 cm) wide and 1.2 in (3.0 cm) tall, and the whole piece is 6 in (15.2 cm) tall.
If the top tier is wider than 2.6 in (6.6 cm), go down half a hook size. If it is narrower, go up half a size. Post stitches tend to tighten as your hands warm up, so check again after Row 8.
Pattern
The post stitches in each row form 3-stitch blocks, counted out from the center stitch. Blocks switch between raised and sunken every 2 rows, which creates the woven look. Partial blocks at the edges are normal.
Before you start: Each post stitch wraps around the stitch directly below it, including the plain dc stitches at the edges of the row before. Never skip a stitch behind a post stitch. Put a marker in the RS of Row 1 so you always know which way the blocks should face.
Increase rows follow this frame: ch 3 (counts as dc), dc in first st (at the base of the ch), [post sts as listed, around each st across to the last st], 2 dc in top of tch. This adds 1 st at each edge.
Step rows follow this frame: sl st in first 2 sts, ch 3 (counts as dc), [post sts as listed, around each st across to the last 2 sts], dc in next st, leave last st unworked. This removes 1 st at each edge and makes the tier notch.
Top Tier
Row 1 (RS): Ch 5, dc in 4th ch from hook and in next ch. Turn. (3 sts)
Row 2 (WS, increase): Ch 3, dc in first st, R1, 2 dc in tch. Turn. (5 sts: 4 dc, 1 post st)
Row 3 (RS, increase): Ch 3, dc in first st, R3, 2 dc in tch. Turn. (7 sts)
Row 4 (WS, increase): Ch 3, dc in first st, R1, S3, R1, 2 dc in tch. Turn. (9 sts)
Checkpoint: about 2.6 in (6.6 cm) wide.
Middle Tier
Row 5 (RS, step): Sl st in first 2 sts, ch 3, R1, S3, R1, dc in next st, leave last st unworked. Turn. (7 sts: 2 dc, 5 post sts)
Row 6 (WS, increase): Ch 3, dc in first st, S1, R3, S1, 2 dc in tch. Turn. (9 sts)
Row 7 (RS, increase): Ch 3, dc in first st, S2, R3, S2, 2 dc in tch. Turn. (11 sts)
Row 8 (WS, increase): Ch 3, dc in first st, R3, S3, R3, 2 dc in tch. Turn. (13 sts)
Checkpoint: about 3.7 in (9.4 cm) wide.
Bottom Tier
Row 9 (RS, step): Sl st in first 2 sts, ch 3, R3, S3, R3, dc in next st, leave last st unworked. Turn. (11 sts: 2 dc, 9 post sts)
Row 10 (WS, increase): Ch 3, dc in first st, S3, R3, S3, 2 dc in tch. Turn. (13 sts)
Row 11 (RS, increase): Ch 3, dc in first st, R1, S3, R3, S3, R1, 2 dc in tch. Turn. (15 sts)
Row 12 (WS, increase): Ch 3, dc in first st, S2, R3, S3, R3, S2, 2 dc in tch. (17 sts: 4 dc, 13 post sts)
Fasten off. Checkpoint: about 4.9 in (12.4 cm) wide and 4.8 in (12.2 cm) tall.
In every row, the number of post stitches is the previous row’s total minus 2 on increase rows and minus 4 on step rows. That keeps the blocks centered all the way down.
Trunk
Row 13 (RS): With RS facing, skip the first 6 sts of Row 12 and join yarn in the 7th st. Ch 3 (counts as dc), dc in next 4 sts. Leave the last 6 sts unworked. Turn. (5 sts)
Rows 14–15: Ch 3, dc in each st across. Turn. (5 sts)
Fasten off. Checkpoint: the trunk is about 1.4 in (3.6 cm) wide, and the whole piece is 6 in (15.2 cm) tall. The 6 unworked sts on each side form the ledge under the bottom tier: 6 + 5 + 6 = 17.
Border
Border gauge: about 4.5 sc per inch (2.5 cm) along the edge.
Round 1 (RS): With RS facing, join yarn in the center foundation ch at the tip. Ch 1, 2 sc in same ch, sc in next ch. Then work down the first side:
- Top tier side: 2 sc in the end of each of Rows 1–4 (8 sc), then 1 sc in the exposed top of the outer st of Row 4 (1 sc).
- Middle tier side: 2 sc in the end of each of Rows 5–8 (8 sc), then 1 sc in the exposed outer st of Row 8 (1 sc).
- Bottom tier side: 2 sc in the end of each of Rows 9–12 (8 sc).
- Bottom ledge: 3 sc in the outer unworked st of Row 12, then sc in the next 5 unworked sts (8 sc).
- Trunk side: 2 sc in the end of each of Rows 13–15 (6 sc).
That makes 40 sc for this side. Across the trunk bottom, work 3 sc in the first st, sc in the next 3 sts, and 3 sc in the last st (9 sc).
Work the second side as a mirror of the first:
- 6 sc up the trunk.
- 8 sc along the ledge (sc in 5 sts, 3 sc in the outer st).
- 8 sc up Rows 12–9, then 1 sc in the exposed outer st of Row 8.
- 8 sc up Rows 8–5, then 1 sc in the exposed outer st of Row 4.
- 8 sc up Rows 4–1.
That is another 40 sc. Sc in the last foundation ch, then sc in the center ch where you began. Sl st to the first sc.
Total: 5 sc at the tip + 40 + 9 + 40 = 94 sc.
Why the math works: Each tier side is a diagonal about 1.8 in (4.6 cm) long. Eight sc over that length is about 4.4 sc per inch, which matches the border gauge, so the edge lies flat. The single sc at each tier point and the 3-sc corners turn the sharp angles without cupping.
Hanging loop: From the center tip sc, ch 16 and sl st in the same sc. Ch 1, work 22 sc into the ch-16 loop, then sl st in the tip sc. Fasten off. The loop stands about 2 in (5.1 cm) tall.
Weave in all ends on the WS, running them along the post-stitch ridges so they stay hidden.
Final Blocking
- Spray the ornament until it is damp, or soak it briefly and press out the extra water in a towel.
- Lay it RS up on the blocking mat.
- Pin the tip first, then the three tier points on each side, keeping the matching points level.
- Pin the trunk corners so the trunk is square and centered.
- Check the width at the bottom tier, 5.1 in (13.0 cm), and the height, 6.25 in (15.9 cm).
- Press the raised blocks lightly with your fingertips to even them out. Don’t flatten them with an iron.
- Let the ornament dry completely before you unpin it.
Final Quality-Control Checklist
- Stitch counts match each row: 3, 5, 7, 9, 7, 9, 11, 13, 11, 13, 15, 17, then 5, 5, 5.
- Raised and sunken blocks switch every 2 rows across the whole tree.
- Both tier notches are the same depth on the left and right.
- The trunk is centered, with 6 sts of ledge on each side.
- The border has 94 sc and lies flat without ruffling.
- The loop is firmly anchored at the very tip.
- All ends are secure and can’t be seen from the RS.
Troubleshooting
The blocks look muddled. Remember that R and S switch stitch types on WS rows. Check Rows 3 and 4 against the frame before you go on.
The edges curl inward. Your post stitches are too tight. Go up half a hook size or loosen your yarn overs.
The tree leans. You may have worked into the tch on one side and skipped it on the other. Count both edge dc on every row.
The border ruffles on the diagonals. Work 7 sc instead of 8 along each tier side, and adjust the total.
The border pulls tight. Use a hook half a size larger for the border round only.
The trunk is off-center. Recount the 6 skipped sts before you join for Row 13.
The notches are hard to see. Make sure you slip stitch across the first 2 sts of each step row and leave the last st unworked.
Care
Hand wash in cool water with mild soap, press out the water, and dry flat. Reshape the tier points while the ornament is still damp.
Final Notes
The measurements build step by step. The top tier sets your gauge at 2.6 in (6.6 cm) wide. The middle tier reaches 3.7 in (9.4 cm), and the bottom tier finishes at 4.9 in (12.4 cm). The trunk brings the height to 6 in (15.2 cm), and the 94-sc border adds 1/8 in (0.3 cm) all around, for a final size of 5.1 x 6.25 in (13.0 x 15.9 cm). If each checkpoint matches, the finished tree will too.
Happy crocheting!