

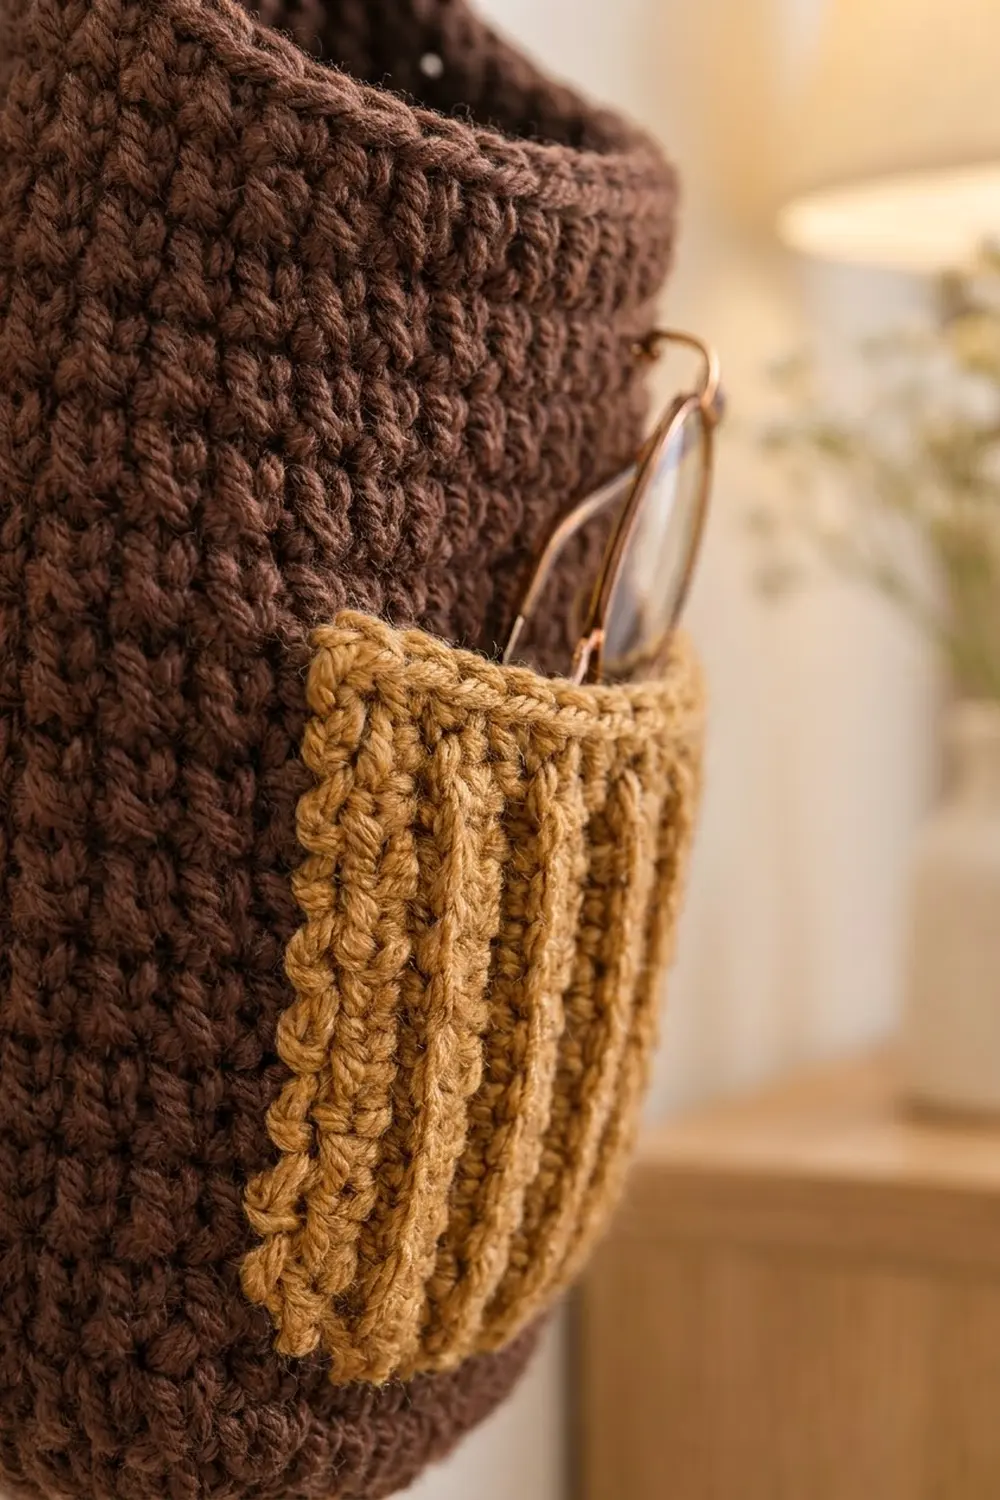
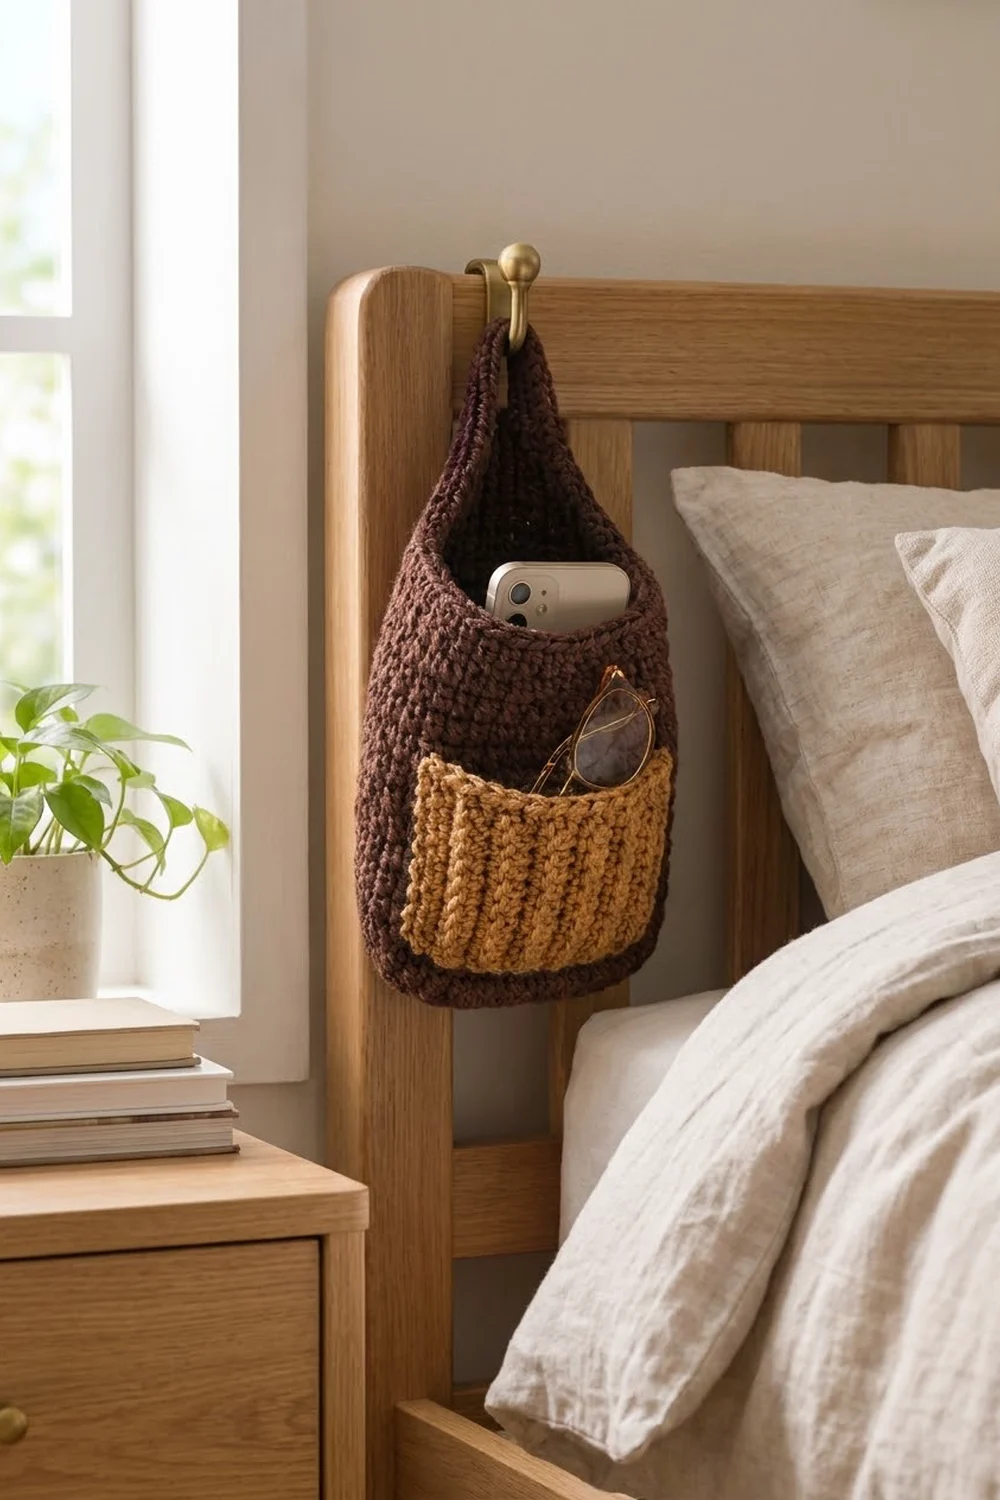
The Cocoa Nook Bedside Caddy is a small hanging basket that keeps your phone, glasses, and other small things within reach of the bed. The deep chocolate body is dense and sturdy. A mustard-gold ribbed pocket on the front gives you a second compartment, plus a warm, cozy contrast.
The style is simple and practical. The body is worked in single crochet, and the pocket gets its vertical texture from back-loop-only rows. The back of the body rises into a tapered tab and strap, finished with a loop that slips over a wall hook, bedpost, or drawer knob.
This pattern uses US crochet terms. Laid flat, the finished body measures about 6 in (15.2 cm) wide and 8 in (20.3 cm) tall. The hanger adds about 5.25 in (13.3 cm), for a total hanging height of about 13.25 in (33.7 cm).
Here is how it’s built. You crochet a flat circle for the base, then work joined rounds up to make the walls. Next you work the back tab and strap in rows, and edge the whole opening in one round. Finally, you crochet a sideways ribbed pocket, edge it, and sew it to the front.
Finished Size and Construction
- Finished size (flat): 6 in × 8 in (15.2 × 20.3 cm) body; 13.25 in (33.7 cm) total height including the loop
- Skill level: Easy
- Terminology: US crochet terms
- Yarn weight: Worsted (#4)
- Hook: 5.0 mm (H-8)
- Number of pieces: 2 (1 body, 1 pocket)
- Layout: Pocket centered on the front, 1 in (2.5 cm) above the base fold
- Pocket size before border: 4.8 in × 3.5 in (12.2 × 8.9 cm)
- Pocket size after border: 5.3 in × 4 in (13.5 × 10.2 cm)
- Border depth: 1 sc round, about 0.25 in (0.6 cm)
Materials
Pick a smooth worsted yarn that holds its shape. A cotton blend or a sturdy acrylic works well. Very soft, drapey yarn can make the basket slump when there’s a phone inside.
- Color A (Chocolate Brown): 80 g / about 160 m (175 yd)
- Color B (Mustard Gold): 25 g / about 50 m (55 yd)
The quantities include a safety margin of about 30%.
Tools:
– 5.0 mm (H-8) crochet hook
– Tapestry needle
– 2 locking stitch markers
– Rust-proof pins
– Measuring tape
– Scissors
– Spray bottle and a blocking surface
Abbreviations (US Terms)
- ch – chain
- sc – single crochet
- inc – 2 sc in the same stitch
- sc2tog – single crochet 2 together
- sl st – slip stitch
- BLO – back loop only
- MR – magic ring
- st(s) – stitch(es)
- rnd(s) – round(s)
- RS / WS – right side / wrong side
Special stitch – BLO sc: Work a single crochet into the back loop only of the stitch. When you work it in turned rows, every 2 rows make one raised ridge. On the pocket, these ridges run vertically.
Gauge and Checkpoints
Body gauge: 16 sc and 18 rnds = 4 in (10.2 cm), worked firmly with the 5.0 mm hook.
Pocket gauge: 16 BLO sc and 20 rows = 4 in (10.2 cm).
Make the pocket first. It’s small, so it works as your gauge swatch. Before you add the border it should measure 4.8 in × 3.5 in (12.2 × 8.9 cm).
Checkpoints:
– Base after Rnd 8: 3.5 in (8.9 cm) across, lying flat
– Walls after Rnd 26: 4 in (10.2 cm) tall from the base ridge
– Body after Rnd 44: 8 in (20.3 cm) tall and 6 in (15.2 cm) wide when flattened
– Tab after Row 10: about 2.2 in (5.6 cm) tall, narrowed to 1.5 in (3.8 cm)
If your piece is too big, go down to a 4.5 mm hook. If it’s too small, go up to a 5.5 mm hook. Keep the fabric tight: the basket needs to stand up and keep its shape.
Body (Color A)
Join every round with a sl st to the first sc, then ch 1. The ch 1 does not count as a stitch. The joins form a seam, and that seam marks one side of the basket.
Base
Rnd 1: Make a MR, then work 6 sc into the ring. (6 sts)
Rnd 2: Inc in each st around. (12 sts)
Rnd 3: (Sc 1, inc) 6 times. (18 sts)
Rnd 4: (Sc 2, inc) 6 times. (24 sts)
Rnd 5: (Sc 3, inc) 6 times. (30 sts)
Rnd 6: (Sc 4, inc) 6 times. (36 sts)
Rnd 7: (Sc 5, inc) 6 times. (42 sts)
Rnd 8: (Sc 6, inc) 6 times. (48 sts)
Checkpoint: The base should lie flat and measure 3.5 in (8.9 cm) across. If it ruffles, your hook is too large. If it cups, your hook is too small.
Walls
Rnd 9: Sc in the BLO of each st around. (48 sts) This makes a crisp fold line where the base meets the walls.
Rnds 10–44: Sc in each st around. (48 sts per rnd)
There are no increases in the walls, so you work 36 wall rounds in total (Rnds 9–44). At 18 rnds per 4 in, that gives you 8 in (20.3 cm) of height.
Checkpoint: Flattened, the body is 6 in (15.2 cm) wide, which is half of the 12 in (30.5 cm) circumference. Do not fasten off.
Back Tab and Strap
Flatten the body so the round seam sits at one side edge. The first 24 sts after the join are the back, and the other 24 sts are the front. Place a marker at each end of the back half.
Row 1 (RS): Ch 1, sc in the next 24 sts. Turn and leave the front 24 sts unworked. (24 sts)
Row 2: Ch 1, sc2tog, sc to the last 2 sts, sc2tog. Turn. (22 sts)
Rows 3–10: Repeat Row 2. Each row has 2 fewer sts than the row before it: Row 3 = 20, Row 4 = 18, Row 5 = 16, Row 6 = 14, Row 7 = 12, Row 8 = 10, Row 9 = 8, Row 10 = 6.
Rows 11–34: Ch 1, sc in each st across. Turn. (6 sts per row)
Checkpoint: The strap is 1.5 in (3.8 cm) wide and about 5.3 in (13.5 cm) long. Do not fasten off. Go straight on to the opening edge in the Border section.
Pocket (Color B)
The pocket is worked sideways. Each row runs from the bottom of the pocket to the top, so the BLO ridges stand up vertically once the pocket is sewn on.
Foundation: Ch 15.
Row 1: Sc in the 2nd ch from the hook and in each ch across. Turn. (14 sts)
Rows 2–24: Ch 1, BLO sc in each st across. Turn. (14 sts per row)
You now have 24 rows, which make 12 vertical ridges. The pocket should measure 4.8 in (12.2 cm) wide across the rows and 3.5 in (8.9 cm) tall along the stitches. Do not fasten off.
Make All Pieces
- Color A: 1 body (with the tab and strap)
- Color B: 1 pocket
Placement (front view):
        [ loop ]
        [strap ]
      /  back tab  \
 |----- rim edge -----|
 |                    |
 |  [ ribbed pocket ] |
 |  [ ribbed pocket ] |
 |____________________|
      base fold
Joining
Use Color A to sew the pocket on, and work after both border rounds are done.
- Flatten the body with the front facing up. Center the bordered pocket from side to side, and line its bottom edge up 1 in (2.5 cm) above the base fold.
- Pin the bottom and both short sides. Leave the top edge open.
- Whipstitch through the outer loop of each pocket border stitch and a matching stitch on the body. Go stitch to stitch: the bottom side has 28 border sts and each short side has 16, so make one whipstitch per border stitch.
- Keep only one wall layer on your needle. Slip a piece of cardboard inside the body so you can’t catch the back wall by accident.
- Pull each stitch just until it’s snug. If you pull too hard, the pocket puckers. If you sew too loosely, the edge gapes.
Size checkpoint: The pocket still lies flat at 5.3 in × 4 in (13.5 × 10.2 cm) once it’s sewn on.
Hanging loop: Fold the strap toward the WS so that Row 34 lies on the WS of Row 15. Whipstitch the 6 sts of Row 34 to Row 15. This makes a loop about 2.2 in (5.6 cm) tall.
Border
Border gauge: 4 sc = 1 in (2.5 cm) along stitch edges. Along row ends, work 1 sc per row.
Body Opening Edge (Color A, 1 rnd)
Continue from the last strap row. Ch 1 and work along the left side of the strap and tab: 1 sc in each row end from Row 34 down to Row 1. (34 sts) Then sc in each of the 24 front sts. (24 sts) Work up the right side of the tab and strap with 1 sc in each row end from Row 1 to Row 34. (34 sts) Finish with 1 sc in each of the 6 sts of Row 34. (6 sts) Join with a sl st.
Total: 34 + 24 + 34 + 6 = 98 sts, all worked 1 per existing stitch or row end, with no extras.
Why the math works: Each sc row is about the height of one sc stitch, so working 1 sc per row end keeps the edge flat. The front 24 sts are exactly half of the 48-st round, so the rim neither stretches nor gathers.
Fasten off, leaving a 20 in (50.8 cm) tail. Use it to sew the strap loop.
Pocket Border (Color B, 1 rnd)
Continue from Row 24. Ch 1, then go around the pocket like this:
- First corner: 3 sc in the first st.
- Last-row side: Sc in the next 12 sts, then 3 sc in the last st (corner).
- Top side: Sc in each of the 24 row ends.
- Foundation side: 3 sc in the first foundation ch (corner), sc in the next 12 ch, 3 sc in the last ch (corner).
- Bottom side: Sc in each of the 24 row ends.
- Join with a sl st.
Total: 76 sts worked 1 per existing stitch or row end (24 + 24 + 14 + 14), plus 8 extra corner sts (2 extra at each of the 4 corners) = 84 sts.
Counting each side with both of its corner center stitches:
- Long sides: 1 + 1 + 24 + 1 + 1 = 28 sts
- Short sides: 1 + 1 + 12 + 1 + 1 = 16 sts
Check: (28 + 16) × 2 = 88. Subtract the 4 corner stitches that were each counted on two sides, and you get 84.
Why the math works: The 3-sc corners turn the edge without cupping. Working 1 sc per row end matches the pocket’s row height. The border adds about 0.25 in (0.6 cm) on every side, which takes the pocket from 4.8 × 3.5 in to 5.3 × 4 in (13.5 × 10.2 cm).
Fasten off and leave a 30 in (76.2 cm) tail. You can sew with this tail, or use Color A for invisible stitches.
Final Blocking
- Weave in all the ends except the sewing tails. Do the sewing (see Joining).
- Weave in the remaining ends along stitch columns, on the inside.
- Mist the whole caddy lightly with water until it’s damp but not wet.
- Stuff the body with a rolled towel to shape it into a smooth cylinder 6 in (15.2 cm) wide when flattened.
- Press the pocket ridges straight with your fingers, and pin the pocket corners square.
- Lay the strap flat and pin it straight up from the tab.
- Let it dry completely, which takes at least 12 hours.
Final Quality-Control Checklist
- The base is flat and the BLO fold line is clean.
- The body measures 6 in × 8 in (15.2 × 20.3 cm) when flattened.
- The tab narrows evenly to 6 sts, with matching slopes on both sides.
- The opening edge has 98 sts and doesn’t flare.
- The pocket has 84 border sts and square corners.
- The pocket sits 1 in (2.5 cm) above the base and is centered.
- The pocket top is open, and its seams go through the front wall only.
- The loop is secure and about 2.2 in (5.6 cm) tall.
- All ends are hidden on the inside.
Troubleshooting
- Base curls up: Your tension is tight or the hook is too small. Redo the base with a hook one size larger.
- Walls lean or flare: Count to make sure every wall round has 48 sts. Unplanned increases usually happen at the join.
- Tab is crooked: Work the sc2tog right at both ends of every decrease row, from Row 2 through Row 10.
- Pocket ridges run horizontally: The pocket has been turned 90 degrees. The row ends belong at the top and bottom.
- Pocket border ruffles: Count your corners. Use only 3 sc per corner, and only 1 sc per row end.
- Caddy sags when full: Go down a hook size for the body, or switch to a firmer yarn.
Care
Hand wash in cool water and press out the water gently. Reshape the caddy over a towel and lay it flat to dry.
Final Notes
Here is the measurement chain:
- The 3.5 in (8.9 cm) base gives you 48 sts.
- 36 wall rounds build an 8 in (20.3 cm) body that is 6 in (15.2 cm) wide flattened.
- The 24-st back half narrows to a 6-st strap 1.5 in (3.8 cm) wide.
- The 14 × 24 ribbed pocket measures 4.8 × 3.5 in (12.2 × 8.9 cm), and its 84-st border brings it to 5.3 × 4 in (13.5 × 10.2 cm).
If you check each of these numbers as you go, the finished caddy will hang straight and hold its shape.
Happy crocheting!