

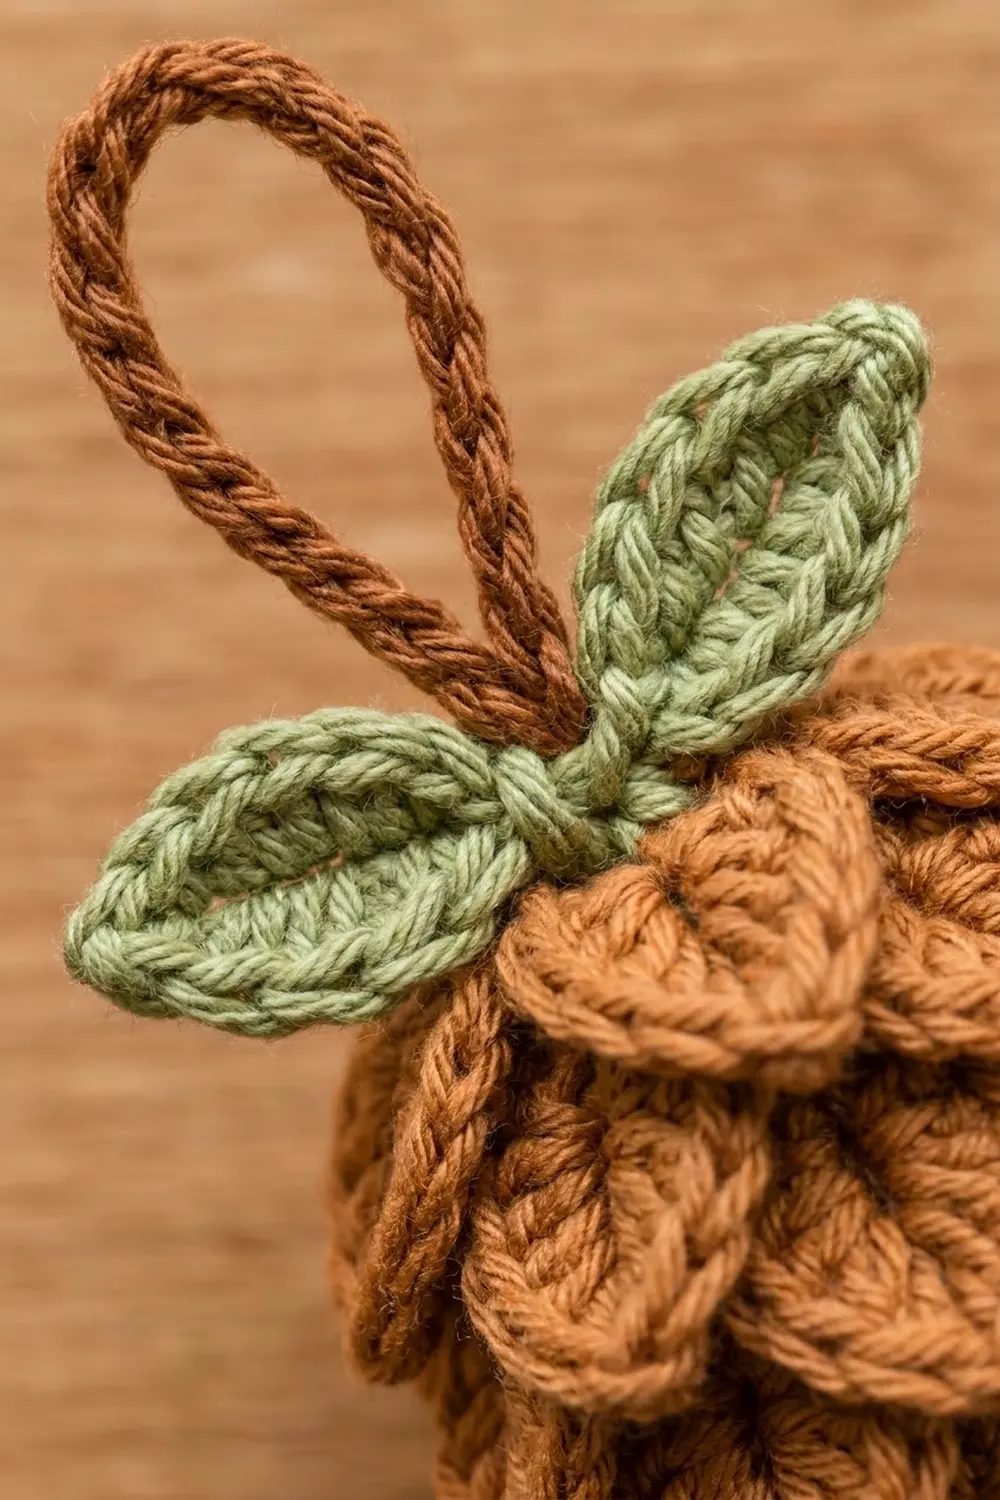
This little pinecone is a flat, shingled ornament that looks carved from warm wood. Overlapping pointed scales cover a teardrop-shaped body, and a pair of sage green leaves with a chestnut hanging loop finish the top.
The palette is simple: golden caramel brown for the cone, sage green for the leaves, and a darker chestnut brown for the loop. Together they look rustic and natural, which suits a farmhouse or woodland tree.
The pattern uses US crochet terms. The finished body measures 2.75 in (7.0 cm) wide and 3.75 in (9.5 cm) tall, or about 5.25 in (13.3 cm) tall including the loop.
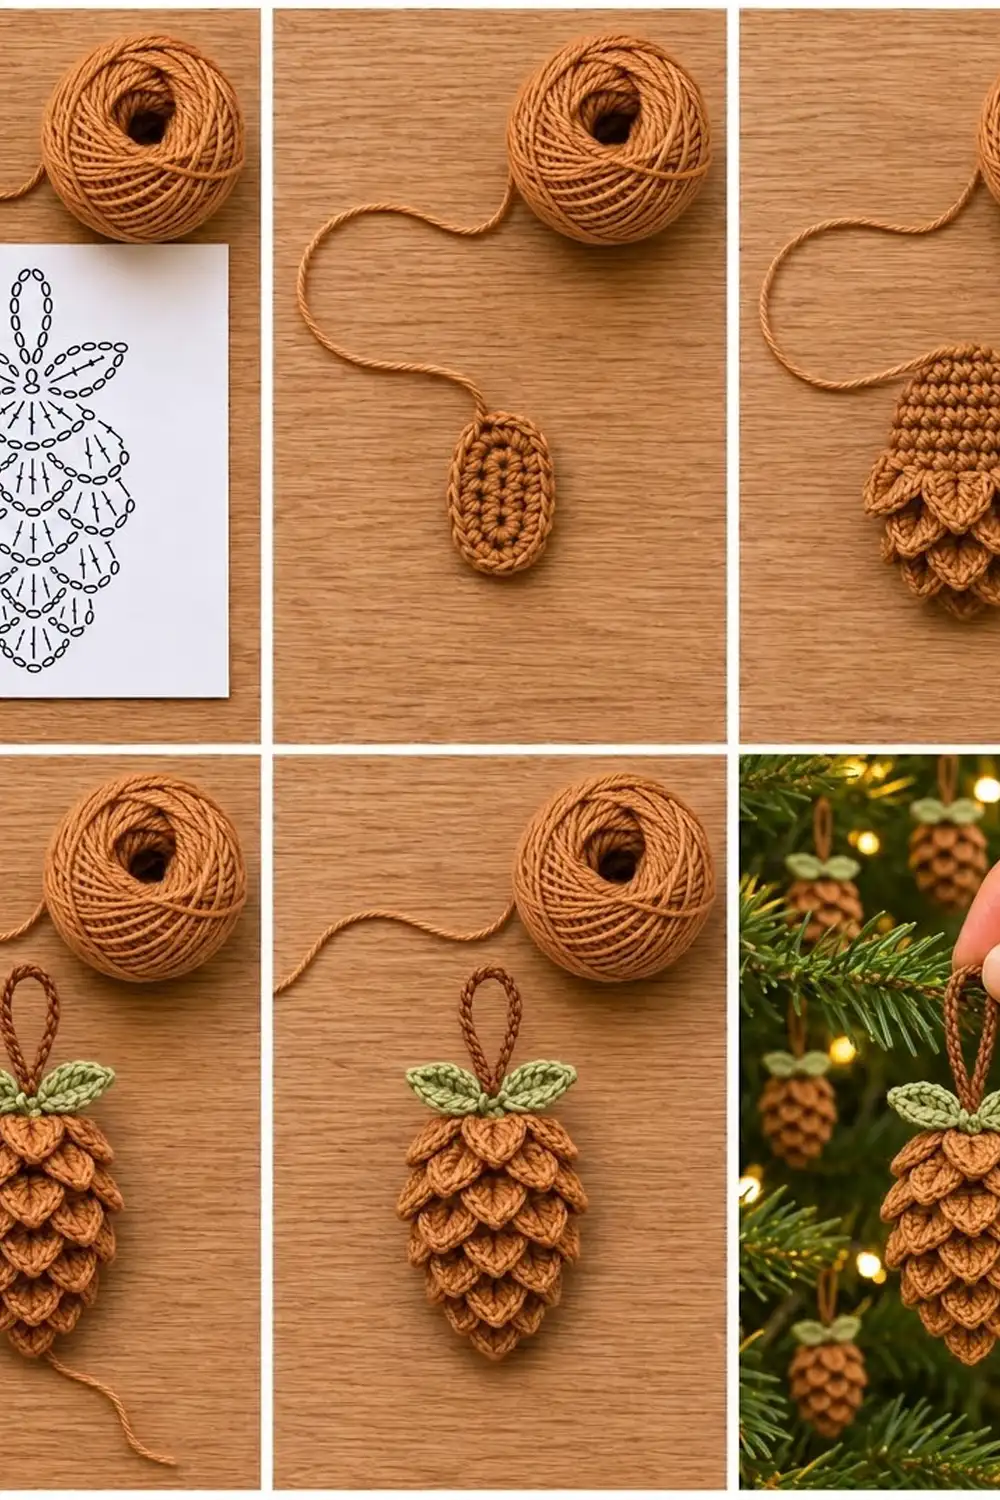
You crochet one flat single crochet panel from the bottom tip up, leaving rows of free loops as you go. A one-round border tidies the outline. Then you turn the panel upside down and work six tiers of scales into those free loops, starting with the bottom tier. Finally you add two leaves and a cord loop.
Finished Size and Construction
- Finished size: 2.75 in (7.0 cm) wide x 3.75 in (9.5 cm) tall, body only
- Height with loop: about 5.25 in (13.3 cm)
- Skill level: Easy-intermediate
- Terminology: US crochet terms
- Yarn weight: DK (light, #3) cotton or cotton blend
- Hook: 3.25 mm (US D/3)
- Number of pieces: one ornament made of 1 main panel, 2 leaves and 1 hanging cord
- Layout: single panel; no motifs to join
- Panel size before border: 2.5 in (6.4 cm) wide at the widest row x 3.5 in (8.9 cm) tall
- Border depth: about 1/8 in (0.3 cm) on every edge
Materials
Choose a smooth, tightly plied DK cotton. Cotton gives crisp scale points and holds its shape on the tree. Avoid fuzzy or very loose yarns, because the scale tips will lose their definition.
- Golden caramel brown (Color A): 12 g, about 27 m (30 yd)
- Sage green (Color B): 3 g, about 7 m (8 yd)
- Chestnut brown (Color C): 2 g, about 5 m (6 yd)
These quantities include a margin of about 20 percent for your gauge swatch and for weaving in ends.
Tools:
- 3.25 mm (US D/3) crochet hook
- Tapestry needle
- Scissors
- 2 stitch markers
- Ruler or tape measure
- Pins and a foam blocking mat
- Spray bottle with cool water
Abbreviations (US Terms)
- ch – chain
- sl st – slip stitch
- sc – single crochet
- hdc – half double crochet
- dc – double crochet
- tr – treble crochet
- sc2tog – single crochet 2 together
- FLO / BLO – front loop only / back loop only
- st(s) – stitch(es)
- RS / WS – right side / wrong side
Special stitch – Scale (worked over 3 free loops): (hdc, dc) in the next loop; (tr, ch 3, sl st in 3rd ch from hook, tr) in the next loop; (dc, hdc) in the next loop. The ch-3 picot forms the pointed tip, and the center of the scale sits over the middle loop.
Ridge row: a row worked only in the loop that lies on the WS of the fabric. On WS rows, work in FLO. On RS rows, work in BLO. Either way, the unused loops of the previous row stay free on the RS.
Gauge and Checkpoints
Gauge: 12 sc and 12 rows = 2 in (5.1 cm) in sc rows. Because the gauge is square (6 sts and 6 rows per inch), the border can use exactly 1 sc per row end.
Test first. Work a 2 in (5.1 cm) square of sc before you start the panel. If you have more than 12 sts, go up a hook size. If you have fewer, go down a size.
Checkpoints:
- After Row 6: 9 sts wide = 1.5 in (3.8 cm); height 1 in (2.5 cm)
- After Row 12: 15 sts wide = 2.5 in (6.4 cm); height 2 in (5.1 cm)
- After Row 21: height 3.5 in (8.9 cm)
- After the border: 2.75 in (7.0 cm) x 3.75 in (9.5 cm)
Too big: your tension is loose and the scales will look floppy. Go down half a hook size and rework.
Too small: the panel will curl and the scales will crowd. Go up half a hook size.
Main Panel
Use Color A. Turn at the end of every row. The ch 1 at the start of each row does not count as a stitch. Row 1 is the RS; place a marker on it.
Row 1 (RS): Ch 4, sc in 2nd ch from hook and in each of next 2 ch. (3 sts)
Row 2: Ch 1, 2 sc in first st, sc in next st, 2 sc in last st. (5 sts)
Row 3: Ch 1, sc in each st across. (5 sts)
Row 4 (WS, ridge row): Ch 1, working in FLO: 2 sc in first st, sc in next 3 sts, 2 sc in last st. (7 sts) The back loops of Row 3 are now free on the RS.
Row 5: Ch 1, sc in each st across. (7 sts)
Row 6: Ch 1, 2 sc in first st, sc in next 5 sts, 2 sc in last st. (9 sts)
Row 7 (RS, ridge row): Ch 1, working in BLO: sc in each st across. (9 sts) The front loops of Row 6 are now free.
Row 8: Ch 1, 2 sc in first st, sc in next 7 sts, 2 sc in last st. (11 sts)
Row 9: Ch 1, sc in each st across. (11 sts)
Row 10 (WS, ridge row): Ch 1, working in FLO: 2 sc in first st, sc in next 9 sts, 2 sc in last st. (13 sts) The Row 9 loops are now free.
Row 11: Ch 1, sc in each st across. (13 sts)
Row 12: Ch 1, 2 sc in first st, sc in next 11 sts, 2 sc in last st. (15 sts)
Row 13 (RS, ridge row): Ch 1, working in BLO: sc in each st across. (15 sts) The Row 12 loops are now free.
Row 14: Ch 1, sc in each st across. (15 sts)
Row 15: Ch 1, sc2tog, sc in next 11 sts, sc2tog. (13 sts)
Row 16 (WS, ridge row): Ch 1, working in FLO: sc in each st across. (13 sts) The Row 15 loops are now free.
Row 17: Ch 1, sc2tog, sc in next 9 sts, sc2tog. (11 sts)
Row 18: Ch 1, sc2tog, sc in next 7 sts, sc2tog. (9 sts)
Row 19 (RS, ridge row): Ch 1, working in BLO: sc2tog, sc in next 5 sts, sc2tog. (7 sts) The Row 18 loops are now free.
Row 20: Ch 1, sc2tog, sc in next 3 sts, sc2tog. (5 sts)
Row 21: Ch 1, sc in each st across. (5 sts) Do not fasten off; continue to the border.
You now have six rows of free loops on the RS. Rows 3, 6, 9, 12, 15 and 18 hold 5, 9, 11, 15, 13 and 9 loops.
Border
Work the border before the scales so the outline underneath them is smooth.
Border gauge: 1 sc per row end along the sides and 1 sc per stitch along the top and bottom, to match the gauge of 6 sts and 6 rows per inch.
Border Round (RS): Ch 1, turn so the RS faces you.
- Top: 2 sc in first st, sc in next 3 sts, 2 sc in last st. (7 sc)
- Left side: sc in the end of each row down to Row 1. (21 sc)
- Bottom: working into the free loops of the foundation ch: 2 sc in first ch, sc in next ch, 2 sc in last ch. (5 sc)
- Right side: sc in the end of each row up to Row 21. (21 sc)
Sl st to the first sc. (54 sc) Fasten off and weave in the ends.
Why the math works: The panel has 21 rows. At square gauge, 21 row ends are as long as 21 stitches, or 3.5 in (8.9 cm), so the sides lie flat with no ruffling. The top has 5 sts and the bottom has 3 foundation ch. Each gets 1 extra sc at each end to turn the curve, which gives 7 and 5. These per-side counts already include the corner increases, so nothing is counted twice: 7 + 21 + 5 + 21 = 54.
Scale Tiers
Turn the panel upside down so the tip points up and the RS faces you. Worked this way, the scales grow toward the tip. When you turn the panel upright again, they hang down over the tier below.
Work the tiers in order, starting with the Row 3 loops near the tip. Work each tier from right to left, then fasten off.
Joining: If a tier starts with a sl st, join Color A with a sl st in the first loop; that join counts as the sl st. If a tier starts with a Scale, join with a sl st in the first loop, then begin the Scale in that same loop. In that case the joining sl st is not counted.
Tier 1 (Row 3, 5 loops): Sl st, Scale, sl st. (1 scale, 2 sl st)
Tier 2 (Row 6, 9 loops): Sl st, Scale, sl st, Scale, sl st. (2 scales, 3 sl st)
Tier 3 (Row 9, 11 loops): Scale, sl st, Scale, sl st, Scale. (3 scales, 2 sl st)
Tier 4 (Row 12, 15 loops): Scale, [sl st, Scale] 3 times. (4 scales, 3 sl st)
Tier 5 (Row 15, 13 loops): Sl st, [Scale, sl st] 3 times. (3 scales, 4 sl st)
Tier 6 (Row 18, 9 loops): Sl st, Scale, sl st, Scale, sl st. (2 scales, 3 sl st)
Check each tier: (scales x 3) + sl sts = loops in that row. For example, Tier 4 is (4 x 3) + 3 = 15.
Stagger check: Measured from the panel’s center column, the scales in Tiers 1, 3 and 5 are centered at 0 and 4 sts out. The scales in Tiers 2, 4 and 6 are centered 2 and 6 sts out. Each tier therefore sits halfway between the scales below it. You will have 15 scales in total.
Leaves (Make 2)
Use Color B.
Leaf: Ch 7. Sc in 2nd ch from hook, hdc in next ch, dc in each of next 2 ch, hdc in next ch, 3 sc in last ch. Rotate and work along the other side of the chain: hdc in next ch, dc in each of next 2 ch, hdc in next ch, sc in last ch. Sl st to the first sc. (13 sts)
The foundation chain forms the center vein. Each leaf measures about 1 in (2.5 cm) long and 0.5 in (1.3 cm) wide. Fasten off, leaving an 8 in (20.3 cm) tail.
Hanging Cord
Use Color C.
Cord: Ch 26, leaving a 6 in (15.2 cm) starting tail. Sl st in the back bump of the 2nd ch from hook and of each ch across. (25 sl st) Fasten off, leaving a 6 in (15.2 cm) tail.
The cord measures about 3.5 in (8.9 cm). The sl sts firm it up and give it the twisted look of the loop in the photo.
Assembly
Fold the cord in half. Sew both ends to the WS at the top center of the panel, behind Row 21, so that a loop 1.5 in (3.8 cm) tall stands above the top edge.
Place the leaves on the RS at the top, with their bases meeting at the center and the leaves angled up and out to the left and right. Use each leaf’s tail to sew its base down over Rows 19 to 21, so the leaves cover the plain top rows. Weave in all ends on the WS.
Final Blocking
- Mist the ornament lightly until it is damp, not soaked.
- Lay it RS up on the blocking mat.
- Pin the outline to 2.75 in (7.0 cm) wide and 3.75 in (9.5 cm) tall.
- Smooth each tier so every scale lies flat and points straight down toward the tip.
- Pinch each picot to a sharp point.
- Pin each leaf flat, with its tip pointing up and out.
- Let it dry completely, then unpin.
Final Quality-Control Checklist
- The body measures 2.75 in (7.0 cm) x 3.75 in (9.5 cm).
- The border has 54 sc and the sides lie flat.
- There are six tiers and 15 scales, and each tier is staggered from the one below.
- Every scale points down and has a defined picot tip.
- The leaves are symmetrical and sewn on firmly.
- The loop is centered and stands 1.5 in (3.8 cm) above the top.
- No ends show on the RS.
Troubleshooting
The scales point up instead of down. The panel was not upside down while you worked that tier. Pull out the tier and rework it with the tip pointing up.
The free loops are on the wrong side. A ridge row was worked in the wrong loop. Remember the rule: FLO on WS rows, BLO on RS rows.
The sides ruffle after the border. Your rows are taller than your stitches are wide. Skip 1 row end every 7 rows, so each side has 18 sc and the round has 48 sc in total.
The scales overlap too little. Your tension is tight. Add an extra ch to each picot, or use a hook half a size larger for the tiers only.
The ornament curls. Block it again, pinning firmly, and let it dry fully before unpinning.
Care
Hand wash in cool water with mild soap, press out the water in a towel and dry flat. Reshape the scales while the ornament is still damp.
Final Notes
The measurement chain is simple. A gauge of 6 sts and 6 rows per inch gives a panel 15 sts wide and 21 rows tall, which measures 2.5 in (6.4 cm) by 3.5 in (8.9 cm). A one-round border of 54 sc adds 1/8 in (0.3 cm) on every edge, bringing the body to 2.75 in (7.0 cm) by 3.75 in (9.5 cm). Six staggered tiers holding 15 scales cover the front, and the leaves and loop bring the total height to about 5.25 in (13.3 cm).
Make one for a gift tag or a whole basket for the tree. Happy crocheting!