

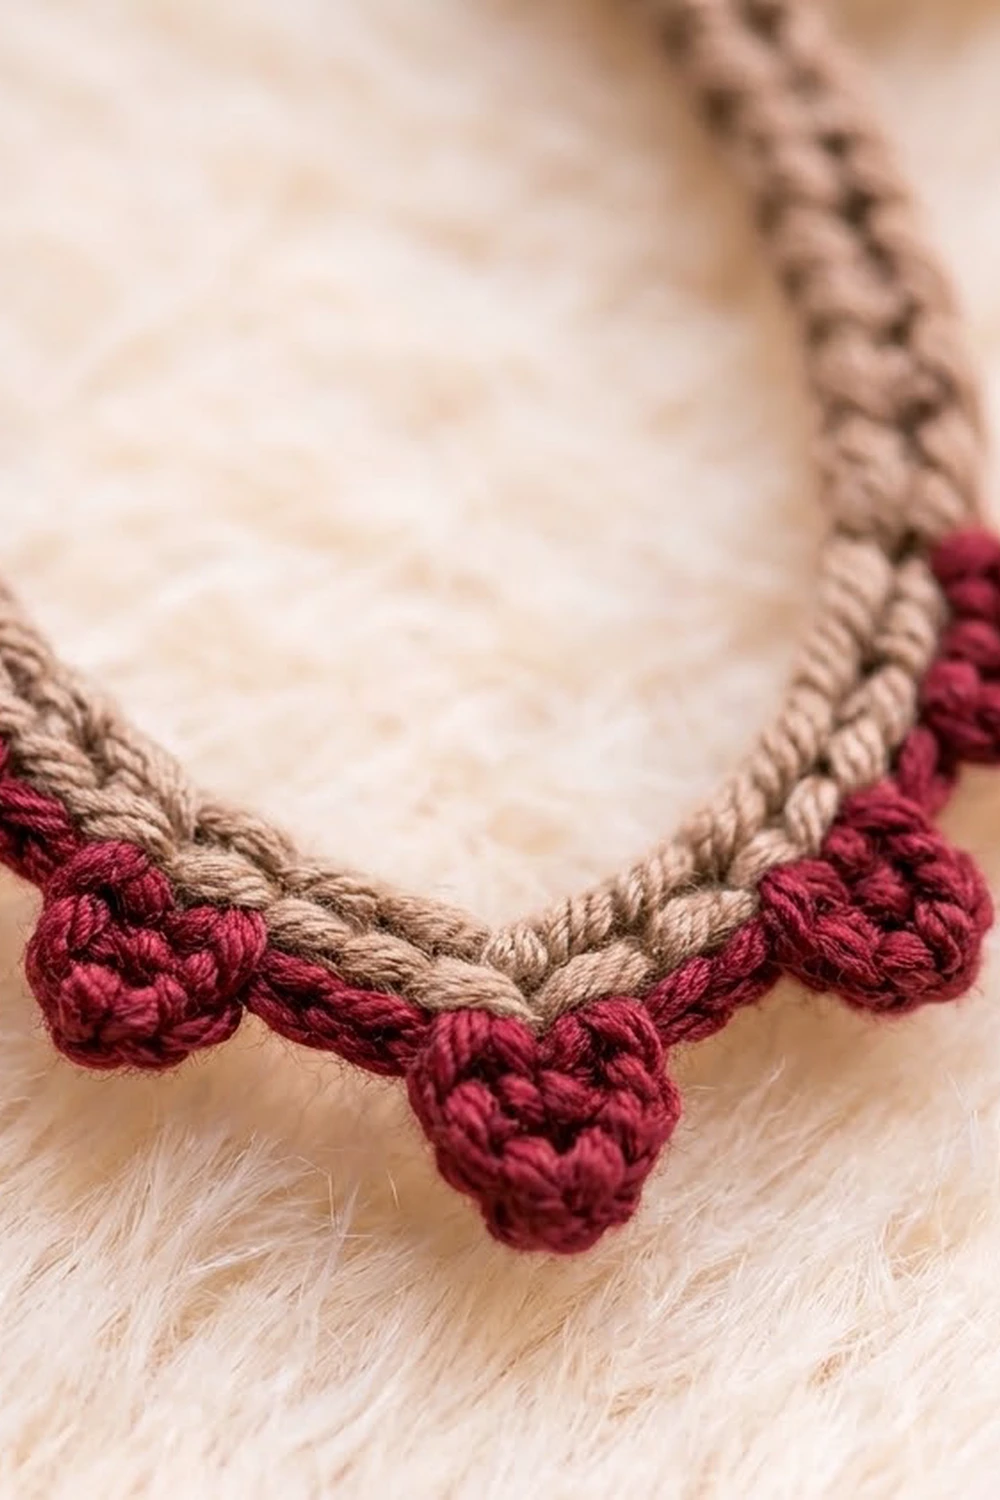
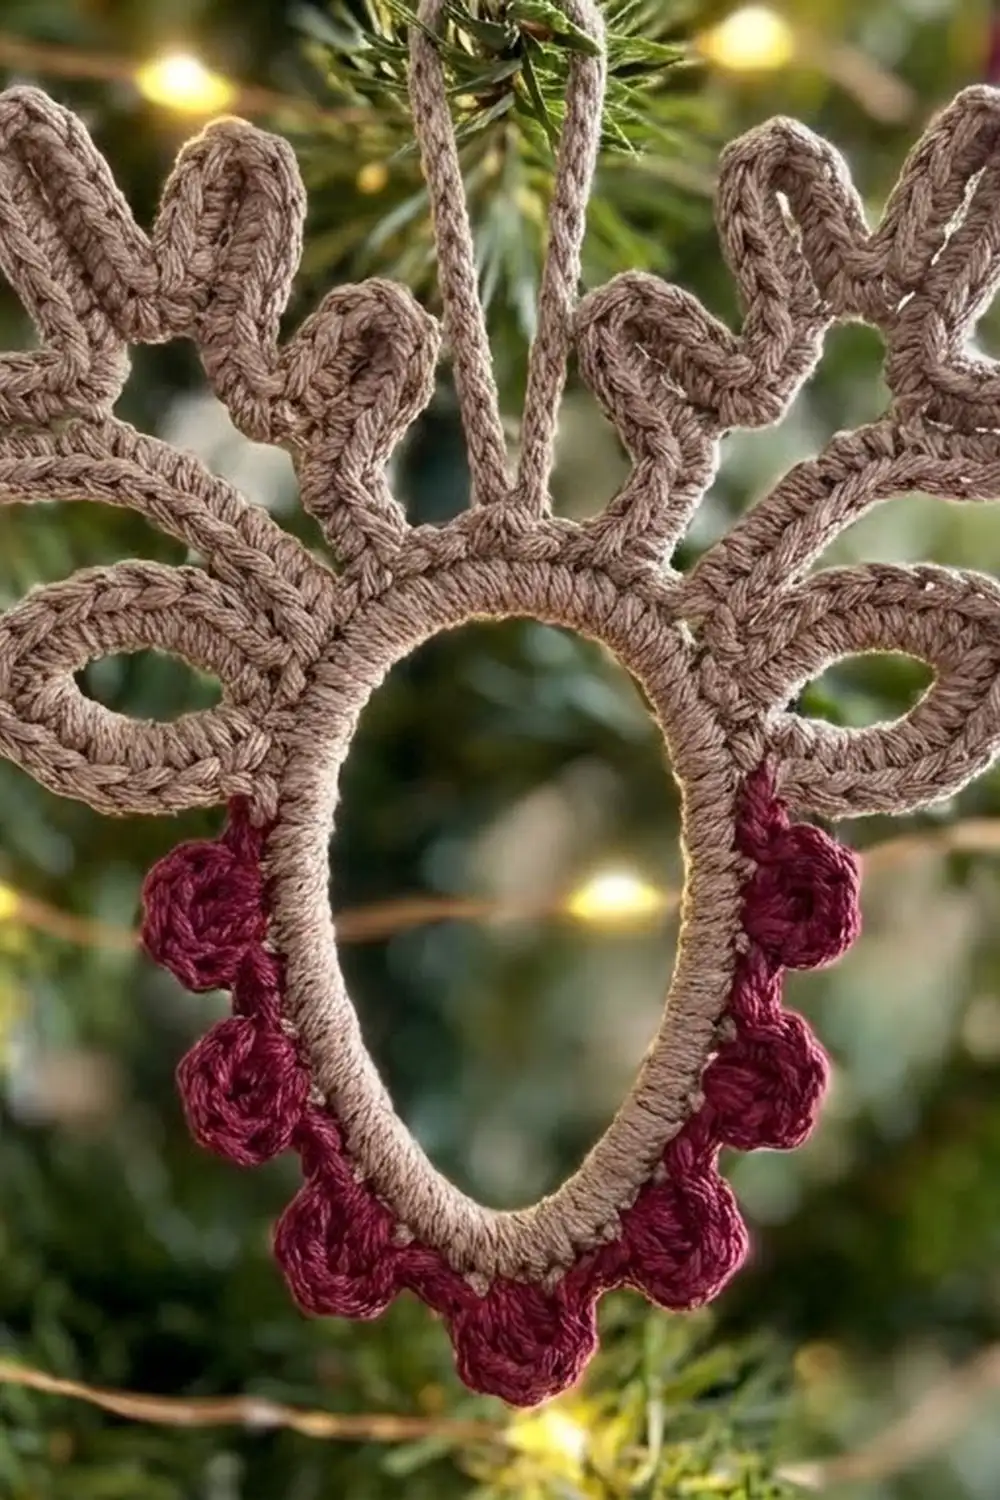
This little reindeer is drawn in yarn. It has an oval face with a pointed chin, two teardrop ears, branching antlers and a neat hanging loop, all made from one smooth, rounded cord. A row of cranberry picots finishes the chin like a festive collar.
The main color is a soft taupe that reads as natural and rustic. The burgundy accent adds just enough Christmas color. It looks lovely on a tree, tied to a gift, or hung in a window, where the open outline lets light through.
The pattern uses US crochet terms. The finished ornament measures 4.75 in (12.1 cm) wide across the ears and 5.5 in (14.0 cm) tall from the bottom picot to the top of the hanging loop.
You make it in one continuous piece. First you work a chain ring into a single-crochet face cord. A slip-stitch round then firms up that cord, and the ears, antlers and hanging loop grow out of it as chain loops covered with single crochet. A short burgundy trim adds the picots. Blocking with stiffener sets the shape.
Finished Size and Construction
- Finished size: 4.75 in (12.1 cm) wide × 5.5 in (14.0 cm) tall
- Skill level: Easy-intermediate (you need to count carefully)
- Terminology: US crochet terms
- Yarn weight: Sport weight (2) mercerized cotton
- Hook: 3.0 mm
- Number of pieces: 1 (worked continuously)
- Layout: Single motif, symmetrical left to right
- Piece size before border: 4.75 in (12.1 cm) wide × 5.25 in (13.3 cm) tall
- Border depth: 0.25 in (0.6 cm) of picots below the chin
- Cord width: about 0.25 in (0.6 cm)
Materials
Choose a smooth mercerized cotton or cotton blend in sport weight. Cotton holds a crisp outline and takes stiffener well. Fuzzy or very soft yarns blur the loops and will not keep a sharp chin point.
- Color A – Taupe (mushroom brown): 7 g / 20 m
- Color B – Cranberry burgundy: 2 g / 6 m
These quantities include a margin for your gauge swatch and weaving in ends.
Tools:
- 3.0 mm crochet hook
- Tapestry needle
- 4 locking stitch markers
- Scissors
- Blocking mat with a printed grid
- 6 rustproof pins
- Fabric stiffener or heavy spray starch
Abbreviations (US Terms)
- ch – chain
- sl st – slip stitch
- sc – single crochet
- st(s) – stitch(es)
- rnd – round
- J1, J2 – junction chains (marked points where loops meet a stem)
Special stitch: Berry Picot (BP). [Ch 3, sl st in 3rd ch from hook] 3 times, then sl st in the same st where you started. This makes three tiny chain rings in a cluster about 0.25 in (0.6 cm) across.
Covered loop. Make the stated number of chains, then sl st into the base to close the loop. When the instructions tell you to cover it, work 1 sc in each ch of that loop, then sl st back into the base. You end up with one sc per ch.
Gauge and Checkpoints
Cord gauge: 5 sc worked into a foundation chain = 1 in (2.5 cm). 10 sc = 2 in (5.1 cm).
Before you start, chain 11 and work 1 sc in the 2nd ch from the hook and in each ch across (10 sc). The strip should measure 2 in (5.1 cm). This one strip tells you everything, because every part of the ornament is chains covered with sc.
Checkpoints as you go:
- After Rnd 1: The face ring has a perimeter of 8 in (20.3 cm). When pinched into an oval, it is about 2 in (5.1 cm) wide × 3 in (7.6 cm) tall.
- After each ear: Laid flat, the teardrop is about 1.4 in (3.6 cm) long × 0.6 in (1.5 cm) high.
- After each antler: About 2.2 in (5.6 cm) from the face to the tip loops. Each petal loop is about 0.6 in (1.5 cm) long.
- After the hanging loop: The stem is 1.2 in (3.0 cm) and the loop is 1.1 in (2.8 cm) tall.
If your strip is too long, go down to a 2.75 mm hook. If it is too short, go up to a 3.25 mm hook. A difference of only 0.25 in (0.6 cm) over 10 sc adds up quickly around the 40-stitch face. Check the strip again before you begin.
Pattern
Rnd 1 – Face Cord (Conversion Round)
With Color A, ch 40. Sl st in the 1st ch to form a ring, taking care not to twist.
Rnd 1: Ch 1 (does not count as a st). Work 1 sc in each ch around. Join with a sl st in the 1st sc.
Count: 40 ch × 1 sc each + 0 extra = 40 sc.
Number the stitches 1 to 40 in working order. St 1 is the chin. Place markers in st 1, st 21 (the top center), st 15 and st 27 (the ear positions). The antlers sit at sts 18 and 24.
Check the symmetry: sts 15 and 27 are both 6 sts from st 21, and sts 18 and 24 are both 3 sts from it. St 1 is 20 sts from st 21 in each direction.
Rnd 2 – Slip-Stitch Round with Features
This round puts 1 sl st into every Rnd 1 sc. That firms the face into a rounded cord. Each feature is worked from the sl st just made, and closes with a sl st back into that same face stitch.
Chin point: Ch 1 (this ch-1 forms the chin point). Sl st in st 1.
Sl st in each of sts 2–14.
Right ear (st 15): Sl st in st 15. Ch 16, then sl st in st 15 again to close a loop of 16 ch. Cover the loop: 1 sc in each of the 16 ch, then sl st in st 15. Ear: 16 sc.
Sl st in sts 16 and 17.
Right antler (st 18): Sl st in st 18, then work the antler as follows.
- Lower stem: Ch 5. Mark the 5th ch as J1.
- Outer loop: Ch 7, then sl st in the 8th ch from the hook (J1).
- Upper stem: Ch 3. Mark the 3rd ch as J2.
- Tip loop 1: Ch 7, then sl st in the 8th ch from the hook (J2).
- Tip loop 2: Ch 7, then sl st into J2 again.
- Cover back down:
- 1 sc in each ch of tip loop 2 (7 sc), sl st in J2.
- 1 sc in each ch of tip loop 1 (7 sc), sl st in J2.
- 1 sc in each of the upper stem chs 2 and 1 (2 sc), sl st in J1.
- 1 sc in each ch of the outer loop (7 sc), sl st in J1.
- 1 sc in each of the lower stem chs 4, 3, 2 and 1 (4 sc).
- Sl st in st 18.
Antler counts: 5 + 7 + 3 + 7 + 7 = 29 ch. 7 + 7 + 2 + 7 + 4 = 27 sc.
Sl st in sts 19 and 20.
Hanging loop (st 21): Sl st in st 21. Ch 6 and mark the 6th ch as J. Ch 12, then sl st in the 13th ch from the hook (J). Cover the loop with 1 sc in each of the 12 ch, then sl st in J. Work 1 sc in each of stem chs 5 to 1 (5 sc), then sl st in st 21.
Hanging count: 18 ch. 12 + 5 = 17 sc.
Sl st in sts 22 and 23.
Left antler (st 24): Sl st in st 24. Work steps 1–7 exactly as for the right antler, ending with a sl st in st 24. You will place the outer loop on the outside edge when blocking. Counts: 29 ch, 27 sc.
Sl st in sts 25 and 26.
Left ear (st 27): Sl st in st 27. Work it exactly as the right ear. Count: 16 sc.
Sl st in each of sts 28–40. Join with a sl st in the 1st sl st of the round. Fasten off and weave in the ends.
Rnd 2 face count: 40 sl st (1 per Rnd 1 sc) + 1 chin ch. The feature sl sts are not counted.
Feature totals: 2 ears × 16 sc + 2 antlers × 27 sc + 17 sc for the hanging loop = 103 sc.
Shaping Check
Lay the piece flat. Pinch st 1 into a point at the bottom and ease the face into an oval 2 in (5.1 cm) wide × 3 in (7.6 cm) tall. The ears should reach outward horizontally, the antlers up and out, and the hanging stem straight up.
Before the border, the piece should measure 4.75 in (12.1 cm) wide × 5.25 in (13.3 cm) tall.
Border – Cranberry Collar
Border gauge: You work 1 burgundy sl st into each Rnd 2 sl st, so the trim follows the face gauge of 5 sts = 1 in (2.5 cm). Each Berry Picot adds about 0.25 in (0.6 cm) of depth below the edge.
The trim runs along the lower face only, from st 34 up the right side of the chin to st 8. That is 15 sts: sts 34–40 (7) plus sts 1–8 (8). The picots fall at sts 35, 38, 1, 4 and 7, with 2 plain sts between each pair.
Border Rnd (Color B): Insert the hook through the outer loop of the Rnd 2 sl st in st 34. Join Color B with a sl st. Then work:
Left side of the chin (sts 35–40):
- Sl st in st 35, BP.
- Sl st in sts 36 and 37.
- Sl st in st 38, BP.
- Sl st in sts 39 and 40.
Chin (st 1): Sl st into the chin ch-1 point, BP.
Right side of the chin (sts 2–8):
- Sl st in sts 2 and 3.
- Sl st in st 4, BP.
- Sl st in sts 5 and 6.
- Sl st in st 7, BP.
- Sl st in st 8.
Fasten off.
Count per side:
- Left side: sts 34–40 = 7 sl st, 2 BP
- Chin: 1 sl st, 1 BP
- Right side: sts 2–8 = 7 sl st, 2 BP
- Total: 15 sl st and 5 BP
Why the math works: St 1 is the exact chin center. Sts 34 and 8 are each 7 sts away from it (40 − 34 + 1 = 7, and 8 − 1 = 7), so the trim is perfectly symmetrical. The picots sit every 3 sts (1, 4, 7 on one side and 1, 38, 35 on the other). Three stitches equal 0.6 in (1.5 cm) at gauge, so the collar spans about 3 in (7.6 cm) around the lower curve.
Final Blocking
- Weave in all ends along the back of the cord, following the stitches, and trim them close.
- Soak the ornament in fabric stiffener, or mist it heavily with starch. Squeeze out the excess gently.
- Lay it face up on the grid mat. Pin the chin point first, through the burgundy chin picot.
- Measure 5.5 in (14.0 cm) straight up the grid line and pin the top of the hanging loop.
- Pin each ear tip 2.375 in (6.0 cm) out from the center line, so the ears span 4.75 in (12.1 cm).
- Pin each antler’s tip pair up and outward, at mirror positions. Swing each outer loop to the outside.
- Shape the face oval with your fingers to 2 in (5.1 cm) wide, and open every petal loop round.
- Let it dry completely, at least 12 hours, before you unpin it.
Final Quality-Control Checklist
- The face has 40 sc in Rnd 1 and 40 sl st in Rnd 2.
- Both ears have 16 sc and match in size.
- Both antlers have 27 sc, with their outer loops on the outside.
- The hanging loop has 17 sc and stands centered above st 21.
- There are five Berry Picots, evenly spaced and symmetrical around the chin.
- The ornament measures 4.75 in (12.1 cm) × 5.5 in (14.0 cm).
- No ends are visible and the piece lies flat.
Troubleshooting
The face ring is twisted. Undo it and rejoin the chain, checking that every ch bump faces the same way.
The ears or loops look floppy. Your chains are too loose compared with your sc. Chain more firmly, or use a 0.25 mm smaller hook for the chains only.
The antlers lean toward the center. Re-wet the piece and pin the outer loops wider. The stiffener sets the angle.
The chin is rounded instead of pointed. Check that you made the ch-1 at the start of Rnd 2, and pin firmly through the chin picot.
The picots look lopsided. Count again. There should be 2 plain sl sts between picots on both sides.
The piece is too large overall. Remake it with a smaller hook. Stitch counts should not change.
Care
Spot clean only, using a damp cloth. Store the ornament flat between tissue so the stiffened shape stays crisp from one season to the next.
Final Notes
The measurement chain is simple. Five sc to the inch (2.5 cm) gives a 40-stitch face ring with an 8 in (20.3 cm) perimeter, which shapes into an oval 2 in (5.1 cm) × 3 in (7.6 cm). The 16-stitch ears bring the width to 4.75 in (12.1 cm). The 6-chain stem and 12-chain loop make the piece 5.25 in (13.3 cm) tall, and the Berry Picot collar adds the last 0.25 in (0.6 cm) for a finished height of 5.5 in (14.0 cm). Check your gauge strip, count each feature, and block carefully.
Happy crocheting!