

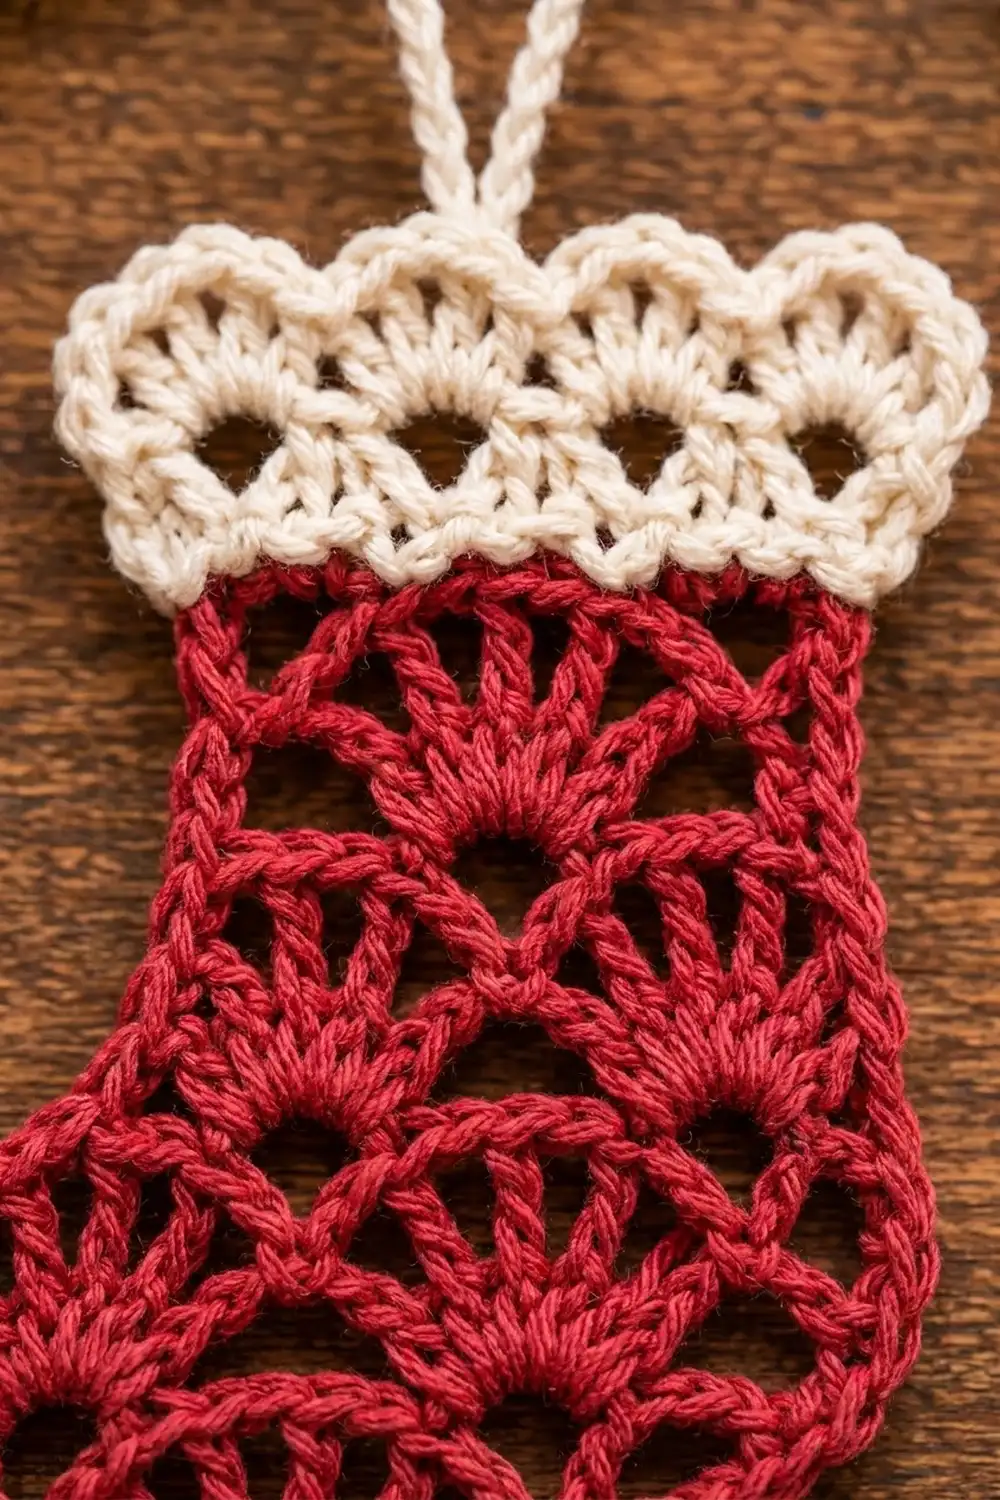
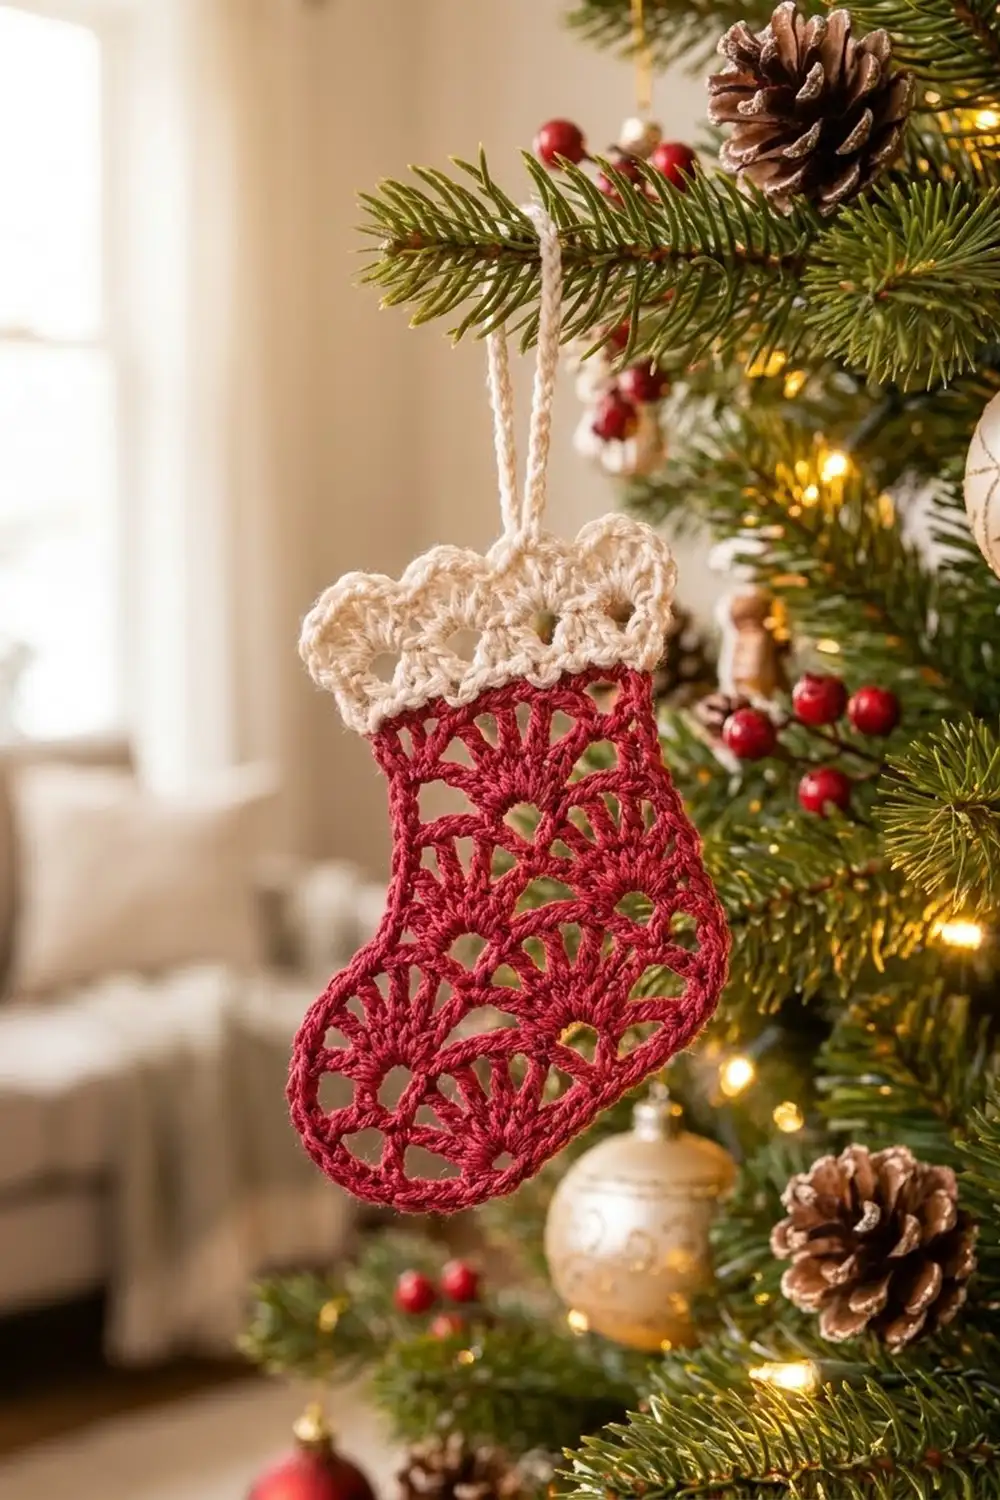
This little stocking is a flat, lacy ornament for the tree. The body is cranberry red and worked in staggered rows of open fans, so every fan looks like a small sunburst of spokes. The edge is a firm red outline, and a cream cuff with eyelets and three scallops finishes the top.
The style is classic Christmas: red, ivory and a bit of vintage lace. It works on a tree, a gift package, a wreath, or as an Advent garland charm. This pattern covers one ornament. Make as many as you like, but each one stands alone.
The pattern uses US crochet terms. The finished stocking measures 3.25 in (8.3 cm) wide across the foot and 4.5 in (11.4 cm) tall from sole to cuff scallops. The hanging loop adds about 2 in (5.1 cm).
You start at the sole and work the foot in rows across the full width. Then you work the leg over the heel half only, add one round of single crochet around the whole shape, work the cuff in rows on the top edge, and finish with the hanging loop.
Finished Size and Construction
- Finished size: 3.25 in (8.3 cm) wide × 4.5 in (11.4 cm) tall, plus a 2 in (5.1 cm) loop
- Skill level: Easy-intermediate
- Terminology: US crochet terms
- Yarn weight: DK (#3), cotton or cotton blend
- Hook: 3.5 mm (E-4)
- Number of pieces: 1
- Layout: single flat stocking, toe pointing left when viewed from the right side
- Body size before border: 3 in (7.6 cm) wide at the foot × 3 in (7.6 cm) tall; leg 2 in (5.1 cm) wide
- Border depth: 0.125 in (0.3 cm) on each edge
- Cuff depth: 1.25 in (3.2 cm)
Materials
Use a smooth, mercerized cotton or cotton blend in DK weight. Cotton shows off the fan spokes and blocks flat, which is what you want in a hanging ornament. Fuzzy or very soft acrylic will blur the lace.
- Color A, cranberry red: 8 g (about 18 m)
- Color B, cream / ivory: 4 g (about 9 m)
These quantities include a margin for swatching and weaving in ends.
Tools
- 3.5 mm (E-4) crochet hook
- Tapestry needle
- Scissors
- Rust-proof pins and a foam blocking mat
- Spray bottle with clean water
- Ruler or tape measure
Abbreviations (US Terms)
- ch – chain
- sl st – slip stitch
- sc – single crochet
- dc – double crochet
- sp(s) – space(s)
- st(s) – stitch(es)
- sk – skip
- RS / WS – right side / wrong side
Special stitches
- Fan: (dc, ch 1, dc, ch 1, dc, ch 1, dc, ch 1, dc) all in the same stitch. That’s 5 dc and 4 ch-1 spaces, or 9 stitches. The 3rd dc is the center dc.
- Half fan: (dc, ch 1, dc, ch 1, dc) in the same stitch, or 5 stitches. At the start of a row, ch 4 counts as the first dc and ch-1.
- Standing sc: start with a slip knot on the hook, insert the hook into the stitch, and complete a sc.
Count every ch-1 inside a fan as a stitch. That’s how the row totals below are calculated.
Gauge and Checkpoints
Body gauge: 6 foundation ch = 1 in (2.5 cm), and 4 pattern rows = 1.5 in (3.8 cm), after light blocking. Each 6-stitch repeat (one fan plus one sc) is 1 in (2.5 cm) wide.
Treat your first stocking as the test piece, and check it at each stage:
- After Row 1: the foot is 3 in (7.6 cm) wide.
- After Row 4: the foot is 3 in × 1.5 in (7.6 × 3.8 cm).
- After Row 8: the body is 3 in (7.6 cm) tall and the leg is 2 in (5.1 cm) wide.
- After the border: 3.25 in (8.3 cm) wide and 3.25 in (8.3 cm) tall.
- After the cuff: 4.5 in (11.4 cm) tall and about 2.75 in (7.0 cm) wide across the scallops.
If your piece is too big, go down to a 3.25 mm hook. If it’s too small, go up to a 3.75 mm hook. Don’t change the stitch counts, because the outline and cuff math depends on them. If only the height is off, look at your dc. Pulling the first loop up taller or shorter will correct it.
Body (Color A)
The foot is worked across its full width first.
Foundation: With A, ch 20.
Row 1 (RS): Sc in 2nd ch from hook, sk 2 ch, fan in next ch, sk 2 ch, sc in next ch; repeat from * 2 more times. Turn.
(3 fans, 4 sc = 31 sts)*
The sc at the start of this row sits at the heel end and the last sc sits at the toe end.
Row 2 (WS): Ch 4 (counts as dc and ch-1), (dc, ch 1, dc) in first sc to complete a half fan, sc in center dc of next fan, fan in next sc; repeat from * once more, sc in center dc of last fan, half fan in last sc. Turn.
(2 half fans, 2 fans, 3 sc = 5 + 1 + 9 + 1 + 9 + 1 + 5 = 31 sts)*
Row 3 (RS): Ch 1, sc in first dc, fan in next sc, sc in center dc of next fan; repeat from * once more, fan in next sc, sc in 3rd ch of turning ch-4. Turn.
(3 fans, 4 sc = 31 sts)*
Row 4 (WS): Repeat Row 2. (31 sts)
Checkpoint: 3 in × 1.5 in (7.6 × 3.8 cm). The fans now stagger like fish scales.
Leg
The leg is worked over the two repeats at the heel end. The toe-end repeat stays unworked, and that forms the instep step.
Row 5 (RS): Ch 1, sc in first dc, fan in next sc, sc in center dc of next fan, fan in next sc, sc in center dc of next fan. Turn and leave the rest of the row unworked.
(2 fans, 3 sc = 21 sts)
Row 6 (WS): Ch 4, (dc, ch 1, dc) in first sc, sc in center dc of next fan, fan in next sc, sc in center dc of next fan, half fan in last sc. Turn.
(2 half fans, 1 fan, 2 sc = 5 + 1 + 9 + 1 + 5 = 21 sts)
Row 7 (RS): Ch 1, sc in first dc, fan in next sc, sc in center dc of next fan, fan in next sc, sc in 3rd ch of turning ch-4. Turn.
(2 fans, 3 sc = 21 sts)
Row 8 (WS): Repeat Row 6. (21 sts) Do not fasten off yet. Pull up a long loop and remove the hook if you want to check the size first.
Checkpoint: the body is 3 in (7.6 cm) tall, the leg is 2 in (5.1 cm) wide, and the instep step is 1 in (2.5 cm) wide by 1.5 in (3.8 cm) deep.
Fasten off A and weave in the end.
Border (Color A)
Border gauge: 6 sc = 1 in (2.5 cm) along the foundation and top edges. Along the row ends it’s 3 sc per 2 rows, or 4 sc per inch (2.5 cm). Single crochet worked into row ends lies sideways and sits wider, so the edges need fewer stitches to stay flat.
The side counts below do not include the corner groups. Each of the 5 outer corners gets its own 3-sc group, worked into the end stitch of that edge. The inner corner at the instep gets no extra stitches, so it stays crisp.
Round 1 (RS): With RS facing, work counterclockwise around the stocking:
- Toe-bottom corner: Join A with a standing sc in the foundation ch at the toe end (the ch holding the last sc of Row 1). Work 2 more sc in the same ch. (3-sc corner)
- Sole: Sc in each of next 17 foundation ch. (17 sc)
- Heel-bottom corner: 3 sc in last foundation ch.
- Heel side: Work 12 sc up the row ends of Rows 1–8: 1 sc in each sc-row end (Rows 1, 3, 5, 7) and 2 sc in each dc-row end (Rows 2, 4, 6, 8). (12 sc)
- Top-right corner: 3 sc in last dc of Row 8.
- Leg top: Sc in each dc and sc across Row 8, skipping the ch-1 sps, for 11 sc, stopping before the turning ch. (11 sc)
- Top-left corner: 3 sc in 3rd ch of turning ch-4.
- Leg front: Work 6 sc down the row ends of Rows 8–5 (2 sc in each dc-row end, 1 sc in each sc-row end). (6 sc)
- Toe top: Continue across the unworked part of Row 4 without a corner: sc in next 2 dc, sc in next sc, sc in next 2 dc, skipping the ch-1 sps. (5 sc)
- Toe-top corner: 3 sc in 3rd ch of turning ch-4 of Row 4.
- Toe side: Work 6 sc down the row ends of Rows 4–1. (6 sc)
Sl st to first sc. Fasten off and weave in.
Round total: 17 + 12 + 11 + 6 + 5 + 6 = 57 side sc, plus 5 corners × 3 = 15 corner sc, for 72 sc.
Why the math works: The sole is worked across the 19 used foundation ch, so 1 corner ch at each end plus 17 between. The leg top has 13 dc/sc posts (3 + 1 + 5 + 1 + 3). Both end posts become corners, which leaves 11. Each side gets 3 sc per 2 rows, so 8 rows give 12 sc and 4 rows give 6 sc. The 3-sc corners round off the toe and heel, and the plain instep corner keeps the stocking outline clear.
Checkpoint: 3.25 in (8.3 cm) wide and 3.25 in (8.3 cm) tall.
Cuff (Color B)
The cuff is worked in rows into the 17 border sc along the top of the leg: the right corner group (3), the leg top (11) and the left corner group (3).
Row 1 (RS): With RS facing, join B with a standing sc in the first sc of the top-right corner group, then sc in each of the next 16 sc. Turn.
(17 sc)
Row 2 (WS): Ch 1, 2 sc in first sc, sc in next 15 sc, 2 sc in last sc. Turn.
(15 worked 1-per-stitch + 2 increase sc in the end sts = 17 + 2 = 19 sc)
Row 3 (RS): Ch 1, sc in first sc, sk 2 sc, 5 dc in next sc, sk 2 sc, sc in next sc; repeat from * 2 more times. Turn.
(3 shells, 4 sc = 15 + 4 = 19 sts)*
Row 4 (WS): Ch 5 (counts as dc and ch-2), sc in center dc of first shell, ch 2, dc in next sc, ch 2, sc in center dc of next shell, ch 2, dc in next sc; repeat from * once more. Turn.
(4 dc, 3 sc, 6 ch-2 sps = 4 + 3 + 12 = 19 sts)*
The ch-2 spaces form the small eyelets you see in the cuff.
Row 5 (RS): Ch 1, sc in first dc, sk ch-2 sp, 7 dc in next sc, sk ch-2 sp, sc in next dc; repeat from * 2 more times, working the last sc in the 3rd ch of the ch-5.
(3 scallops of 7 dc, 4 sc = 21 + 4 = 25 sts)*
Don’t fasten off.
Checkpoint: the cuff is 1.25 in (3.2 cm) deep and about 2.75 in (7.0 cm) across the scallops. It flares slightly past the leg. The stocking is 4.5 in (11.4 cm) tall.
Hanging Loop (Color B)
You should be at the left end of Row 5. Fasten off, leaving a 4 in (10.2 cm) tail.
Join B with a sl st in the 4th dc of the center scallop. Ch 30, then sl st in the same dc to form the loop. Turn and sl st in the back bump of each of the 30 ch, then sl st in the starting dc. The second pass twists and firms the cord.
Fasten off, leaving a 6 in (15.2 cm) tail. Weave it down through the center scallop and the cuff and secure it on the WS, so the loop can’t pull loose.
Checkpoint: the loop stands about 2 in (5.1 cm) above the scallops.
Final Blocking
- Weave in all remaining ends on the WS, going through stitches of the matching color.
- Lay the stocking RS up on the blocking mat.
- Spray it evenly until damp but not dripping.
- Pin the sole straight: 3.25 in (8.3 cm) wide, outer edge to outer edge.
- Pin the heel side and leg front straight: total height to the top of the red border is 3.25 in (8.3 cm).
- Shape the toe and heel corners into smooth curves with your fingers. Don’t pin them into points.
- Pin each of the 3 cuff scallops at its highest dc so the top edge measures 4.5 in (11.4 cm) from the sole.
- Open every fan with a pin tip so the spokes fan out evenly and the ch-1 gaps show.
- Lay the loop straight up and leave everything to dry completely.
- For extra stiffness, mist lightly with spray starch once dry.
Final Quality-Control Checklist
- [ ] Rows 1–4 each have 31 stitches; Rows 5–8 each have 21.
- [ ] Fans stagger neatly, each centered over a sc from the row below.
- [ ] The toe points left when the RS faces you.
- [ ] The border has 72 sc, with 3-sc groups at the 5 outer corners and none at the instep.
- [ ] The cuff starts on 17 sc and ends with 3 scallops.
- [ ] The eyelets in cuff Row 4 are open and even.
- [ ] Final size is 3.25 in × 4.5 in (8.3 × 11.4 cm).
- [ ] The loop is centered and firmly anchored.
- [ ] No tails show on the RS.
Troubleshooting
Fans ruffle or cup. Your ch-1 spaces are too loose, or your hook is too big. Tighten the ch-1s or go down a hook size.
The foot is narrower than 3 in (7.6 cm). Your foundation chain is tight. Make the chain with a hook one size larger, then switch back.
The leg leans or slants. Check that Row 5 ends with a sc in the center dc of the second fan, not in the sc after it.
The border waves along the sides. Too many row-end stitches. Keep strictly to 1 sc per sc-row end and 2 sc per dc-row end.
The border pulls the corners inward. Make sure all 3 sc of each corner group go into the same stitch.
The cuff is narrower than the leg. Row 2 needs both end increases. Count 19 sc before you start the shells.
The loop twists to one side. Work the second pass into the back bumps only and keep your tension even.
Care
Hand wash in cool water with mild soap, roll it in a towel, and reshape it flat to dry. Store flat or hanging, away from damp, so the cream cuff stays bright.
Final Notes
Here is the full measurement chain from start to finish. A 6-ch repeat measures 1 in (2.5 cm), so the 3-repeat foot is 3 in (7.6 cm) wide. Four rows give 1.5 in (3.8 cm), so 8 rows make a body 3 in (7.6 cm) tall with a 2 in (5.1 cm) leg. The 72-sc border adds 0.125 in (0.3 cm) on each edge, for 3.25 in (8.3 cm) square at the foot. Finally, the 1.25 in (3.2 cm) cuff brings the stocking to 4.5 in (11.4 cm) tall. If each checkpoint matches, the ornament will match too. Make one for every branch, or one for every name on your gift list.
Happy crocheting!