

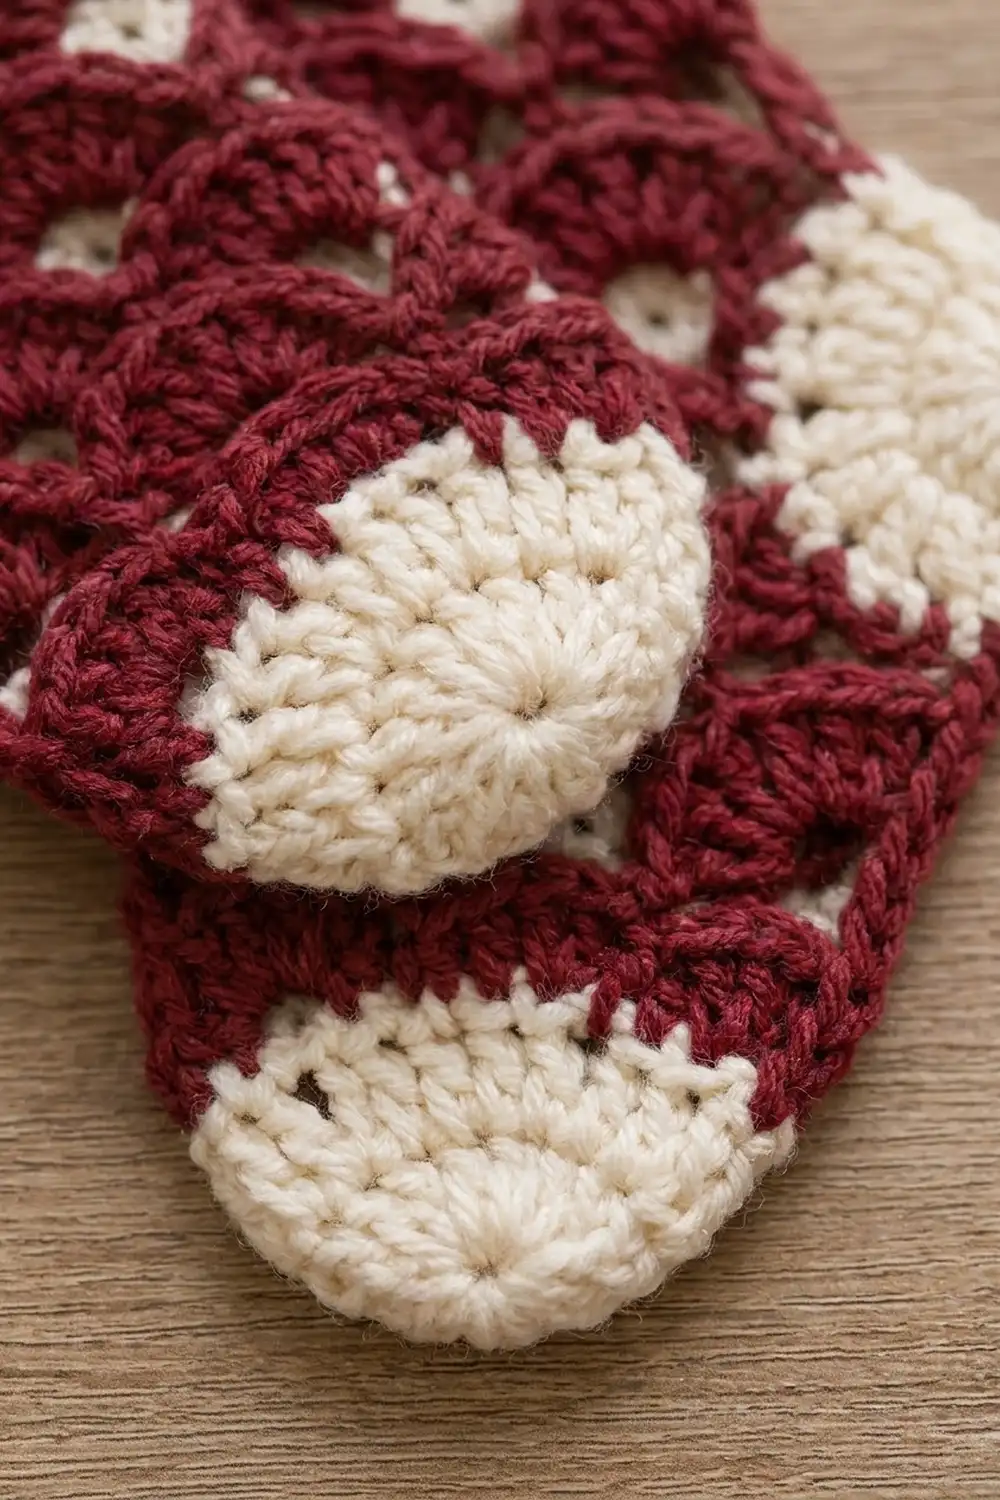
This little stocking has a cranberry-red body covered in shell stitches. The shells stack into soft scallops, and a tiny eyelet opens between each pair. A ridged cream cuff, a round cream heel and a half-round cream toe give it the cozy look of a knitted Christmas stocking.
The palette is just two colors: deep cranberry and warm cream. That makes it easy to coordinate with tree ornaments, mantel garlands or gift wrap. The pattern uses US crochet terms throughout.
The finished stocking measures about 5.8 in (14.7 cm) wide from heel to toe tip and 6.3 in (16.0 cm) tall from the top of the cuff to the bottom of the heel. The hanging loop isn’t included in those measurements.
You’ll work the body flat in rows, from the top of the leg down. A short chain extends the foot, then one round of single crochet tidies the whole outline. Next, the cuff is worked straight off the top edge. Finally, you’ll make a cream heel and toe and sew them on top of the lower corners.
Finished Size and Construction
- Finished size: 5.8 in × 6.3 in (14.7 cm × 16.0 cm), loop not included
- Skill level: Advanced beginner
- Terminology: US crochet terms
- Yarn weight: DK (#3)
- Hook: 3.5 mm (E-4)
- Number of pieces: 1 stocking, made from 3 crocheted parts (body with cuff, heel, toe)
- Layout: Single ornament. The heel and toe are layered on top of the body.
- Body before border: 4.2 in (10.7 cm) at the foot × 4.2 in (10.7 cm) tall; the leg is 3.2 in (8.1 cm) wide
- Body after border: 4.6 in (11.7 cm) at the foot × 4.6 in (11.7 cm) tall; the leg is 3.6 in (9.1 cm) wide
- Border depth: 0.2 in (0.5 cm) on every edge
Materials
Pick a smooth DK yarn so the shells look crisp. Cotton or a cotton blend shows off the eyelets best. Soft acrylic also works well and is lighter on a tree branch.
- Cranberry (Color A): 12 g, about 27 m
- Cream (Color B): 8 g, about 18 m
- 3.5 mm (E-4) crochet hook
- Tapestry needle
- Scissors
- Stitch markers (2)
- Rust-proof pins and a blocking mat
- Spray bottle
The yarn amounts include a safety margin of about 30%, which covers your gauge swatch and the sewing tails.
Abbreviations (US Terms)
- ch – chain
- sl st – slip stitch
- sc – single crochet
- hdc – half double crochet
- dc – double crochet
- sc2tog – single crochet 2 together
- BLO – back loop only
- sk – skip
- st(s) – stitch(es)
- tch – turning chain
- RS – right side
Shell: 5 dc in the same stitch. The 3rd dc of a shell is its center dc.
Half shell: 3 dc at the start or end of a row. At the start of a row, the ch-3 counts as the first dc.
Gauge and Checkpoints
Gauge: In the shell pattern, 18 sts (3 shell repeats) = 3 in (7.6 cm). Four pattern rows = 1.6 in (4.1 cm). One sc row is about 0.2 in (0.5 cm) tall.
Make one complete body before you buy extra yarn for a set. It works as your gauge swatch. Check these measurements along the way:
- After Row 7 (leg): 3.2 in (8.1 cm) wide × 2.6 in (6.6 cm) tall
- After Row 12 (foot): 4.2 in (10.7 cm) wide × 4.2 in (10.7 cm) tall
- After the border: 4.6 in (11.7 cm) × 4.6 in (11.7 cm), leg 3.6 in (9.1 cm) wide
- After the cuff: the cuff is 3.8 in (9.7 cm) wide × 1.4 in (3.6 cm) tall
If your leg comes out wider than 3.4 in (8.6 cm), go down half a hook size. If it’s narrower than 3.0 in (7.6 cm), go up half a hook size. Don’t add or remove stitches to fix the size. The shell math depends on multiples of 6 plus 1.
Body (Color A)
Foundation: With Color A, ch 20.
Row 1: Sc in the 2nd ch from the hook and in each ch across. (19 sc)
Row 2 (set-up shell row): Ch 1, turn. Sc in the first sc, sk 2, shell in the next sc, sk 2, sc in the next sc; repeat from * 2 more times. (3 shells + 4 sc = 19 sts)
Row 3 (offset row): Ch 3 (counts as dc), turn. Work 2 dc in the first sc (half shell). Sc in the center dc of the next shell, shell in the next sc; repeat from * once more. Sc in the center dc of the last shell, then 3 dc in the last sc (half shell). (3 + 6 + 6 + 1 + 3 = 19 sts)
Row 4 (shell row): Ch 1, turn. Sc in the first dc. Shell in the next sc, sc in the center dc of the next shell; repeat from * once more. Shell in the next sc, then sc in the top of the tch. (1 + 6 + 6 + 5 + 1 = 19 sts; 3 shells)
Rows 5 and 7: Repeat Row 3. (19 sts each)
Row 6: Repeat Row 4. (19 sts)
Leg checkpoint: 3.2 in (8.1 cm) wide × 2.6 in (6.6 cm) tall. Row 7 ends at the front of the leg, and the foot will grow from that side.
Row 8 (foot extension): At the end of Row 7, ch 7, then turn. Sc in the 2nd ch from the hook and in the next 5 ch, which gives you 6 sc. Then sc in each of the 19 sts of Row 7, working the last sc in the top of the tch. (6 + 19 = 25 sc)
Row 9: Ch 1, turn. Sc in the first sc, sk 2, shell in the next sc, sk 2, sc in the next sc; repeat from * 3 more times. (4 shells + 5 sc = 25 sts)
Row 10: Ch 3 (counts as dc), turn. Work 2 dc in the first sc. Sc in the center dc of the next shell, shell in the next sc; repeat from * 2 more times. Sc in the center dc of the last shell, then 3 dc in the last sc. (3 + 18 + 1 + 3 = 25 sts)
Row 11: Ch 1, turn. Sc in the first dc. Shell in the next sc, sc in the center dc of the next shell; repeat from * 2 more times. Shell in the next sc, then sc in the top of the tch. (1 + 18 + 5 + 1 = 25 sts; 4 shells)
Row 12: Ch 1, turn. Sc in each st across. (25 sc)
Don’t fasten off. Body checkpoint: 4.2 in (10.7 cm) × 4.2 in (10.7 cm), with the leg 3.2 in (8.1 cm) wide.
Border (Color A)
Border gauge: One round of sc adds 0.2 in (0.5 cm) to every edge. Along the side edges, work 1 sc into the end of each sc row and 2 sc into the end of each shell row. A shell row is 0.4 in (1.0 cm) tall, the height of two sc rows, so this spacing keeps the edges flat.
Turn the piece so the toe points left. This face is the RS, and the corner on your hook is the heel corner.
Border Round: Ch 1. Then work around the stocking in this order:
- Heel corner: 3 sc in the last sc of Row 12. (3)
- Back edge: Work up the row ends: 2 sc each for Rows 11, 10 and 9, 1 sc for Row 8, 2 sc each for Rows 7 to 2, and 1 sc for Row 1. (20 sc)
- Top-back corner: 3 sc in the free loop of the foundation ch at the back corner. (3)
- Top edge: 1 sc in each of the next 17 free loops. (17 sc)
- Top-front corner: 3 sc in the last free loop. (3)
- Front leg edge: 1 sc for Row 1, 2 sc each for Rows 2 to 6, and 1 sc for Row 7. (12 sc)
- Inner instep corner: Sc2tog. Insert the hook once in the remaining space at the end of Row 7, then once in the innermost free loop of the foot chain. (1 st)
- Foot top: 1 sc in each of the next 4 free chain loops. (4 sc)
- Toe-top corner: 3 sc in the outermost free chain loop. (3)
- Toe edge: 2 sc each in the row ends of Rows 9, 10 and 11. (6 sc)
- Toe-bottom corner: 3 sc in the first sc of Row 12. (3)
- Bottom edge: 1 sc in each of the next 23 sc. (23 sc)
Join with a sl st to the first sc. Fasten off.
Round total: Five outer corners use 3 sc each, for 15 sts. The edges add 20 + 17 + 12 + 1 + 4 + 6 + 23 = 83 sts. The round has 98 sts in total.
Why the math works: Each 3-sc corner turns a flat 90 degrees. The bottom count is the 25 sts of Row 12 minus the 2 corner sts, which leaves 23. The top count is the 19 foundation loops minus 2 corner loops, which leaves 17. The single sc2tog keeps the inner corner from bunching.
Cuff (Color B)
Row 1: With the RS facing, join Color B in the center sc of the top-back corner. Ch 1, then sc in the same st. Sc in the next 19 sts: the 3rd corner sc, the 17 top sc and the 1st sc of the top-front corner. Finish with 1 sc in the center sc of the top-front corner. (1 + 19 + 1 = 21 sc)
Row 2: Ch 1, turn. Work 2 sc in the first st, sc in the next 19 sts, then 2 sc in the last st. (21 worked + 2 added = 23 sc)
Rows 3–6: Ch 2 (doesn’t count as a stitch), turn. Hdc in the BLO of each st across. (23 hdc per row)
Working in the back loop leaves a ridge on each row. That gives the cuff its ribbed texture. Fasten off.
Cuff checkpoint: 3.8 in (9.7 cm) wide × 1.4 in (3.6 cm) tall. It hangs over the 3.6 in (9.1 cm) leg by 0.1 in (0.3 cm) on each side.
Hanging loop: Join Color B in the 12th (center) st of Row 6. Ch 24, then sl st in the same st. This makes a loop about 2 in (5.1 cm) tall. Fasten off.
Heel (Color B)
Rnd 1: Make a magic ring. Ch 3 (counts as dc), then work 11 dc in the ring. Pull the ring closed and sl st to the top of the ch-3. (12 dc)
Rnd 2: Ch 1. Work 2 sc in each st around, then sl st to the first sc. (24 sc)
Fasten off and leave a 12 in (30.5 cm) tail. The heel should measure 1.4 in (3.6 cm) across.
Toe (Color B)
Row 1: Make a magic ring. Ch 3 (counts as dc), then work 6 dc in the ring. Pull the ring closed. (7 sts)
Row 2: Ch 2 (doesn’t count), turn. Work 2 hdc in each st across. (14 hdc)
Row 3: Ch 1, turn. Sc in the first st, 2 sc in the next st, sc in the next 2 sts; repeat from * 3 more times. Sc in the last st. (14 worked + 4 added = 18 sc)
Row 4: Ch 1, turn. Sc in the first st, 2 sc in the next st, sc in the next 3 sts; repeat from * 3 more times. Sc in the last st. (18 worked + 4 added = 22 sc)
Fasten off and leave a 12 in (30.5 cm) tail. The toe is a half-circle 2.2 in (5.6 cm) across its straight edge and 1.1 in (2.8 cm) deep.
Attaching the Heel and Toe
Heel: Center the disc 0.4 in (1.0 cm) in from both the back edge and the bottom edge. The disc then extends 0.3 in (0.8 cm) past each edge and fully covers the square burgundy corner. Whipstitch through the back loops of Rnd 2 into the body.
Toe: Lay the straight edge vertically, 0.2 in (0.5 cm) inside the toe edge, with the curve pointing outward. Center it on the 2.0 in (5.1 cm) foot height, so it extends 0.1 in (0.3 cm) above and below the foot. The curve reaches 0.9 in (2.3 cm) past the toe edge. Whipstitch the straight edge to the body, then tack the curve to the body where they overlap.
Final Blocking
- Weave in all the ends behind same-color stitches.
- Lightly mist the stocking until it’s damp but not wet.
- Lay it RS up on the blocking mat.
- Pin the body border to 4.6 in (11.7 cm) × 4.6 in (11.7 cm), with the leg at 3.6 in (9.1 cm).
- Pin the cuff square at 3.8 in (9.7 cm) wide.
- Shape the heel and toe curves smoothly with your fingertips.
- Check the overall size: 5.8 in (14.7 cm) × 6.3 in (16.0 cm).
- Let it dry completely before you unpin.
Final Quality-Control Checklist
- Rows 1–7 have 19 sts each, and Rows 8–12 have 25 sts each.
- The leg shows 3 shells on Rows 2, 4 and 6, and the foot shows 4 shells on Rows 9 and 11.
- The border has 98 sts and lies flat at all five corners.
- The cuff has 23 sts per row with a ridge on each hdc row.
- The heel has 24 sc and the toe has 22 sc.
- The heel covers the burgundy corner.
- The loop sits at the center of the cuff.
- All ends are woven in securely.
Troubleshooting
- Shells lean or the count drifts: Make sure you skip exactly 2 sts on each side of every shell in Rows 2 and 9. Also check that every sc in an offset row goes into a center dc.
- Back edge ripples: You worked too many sc into the row ends. Use 2 per shell row and 1 per sc row.
- Front edge pulls in: Loosen your tension on the row-end sc.
- Heel cups: Your Rnd 2 sc are too tight. Go up half a hook size for the heel only.
- Toe ruffles: Work Rows 3 and 4 with slightly firmer tension.
- Cuff flares: Work the cuff with a 3.25 mm hook.
Care
Hand wash in cool water, press out the water in a towel, and dry flat. Re-block if the corners curl.

Final Notes
The measurement chain for this stocking is short. The leg is 3.2 in (8.1 cm) after Row 7, and the body is 4.2 in (10.7 cm) square after Row 12. The border brings it to 4.6 in (11.7 cm). The cuff adds 1.4 in (3.6 cm) of height, and the heel and toe add their curves for a finished stocking of 5.8 in × 6.3 in (14.7 cm × 16.0 cm). If you hit each checkpoint, every stocking in your set will match.
Happy crocheting!