

Crochet Christmas Tree Ornament Pattern – A Festive Handmade Decoration
This crochet Christmas tree ornament pattern is a beautiful little project for the holiday season. The finished tree is small, detailed, and full of Christmas charm, making it perfect for decorating a Christmas tree, adding to a gift package, or creating a handmade holiday garland.
The design uses dark green yarn for the tree, small gold flower/star-like details as ornaments, a brown trunk, and a gold loop at the top. The result is a delicate Christmas tree that looks especially beautiful when several are made in different sizes or colors.
The video tutorial accompanying this pattern shows the process from the finished Christmas tree to the final crochet stitches. If you are a visual learner, follow the eight images in order while working through the instructions below.
Crochet Christmas Tree Ornament Pattern
This pattern is designed as a small decorative Christmas tree. You can make it with leftover yarn, which makes it a great scrap yarn crochet project for December.
The tree has three main triangular sections that become progressively wider toward the bottom. Small decorative stitches are then added to create the festive ornaments.
Materials
For one small crochet Christmas tree ornament, you will need:
- Dark green crochet yarn
- Small amount of brown yarn
- Small amount of gold or yellow yarn
- Crochet hook appropriate for your yarn
- Yarn needle
- Scissors
- Stitch marker, if desired
A smooth cotton or acrylic yarn works particularly well because it keeps the shape of the tree crisp and makes the small decorative stitches easier to see.
You can also experiment with different colors. Green and gold create a classic Christmas appearance, while white, red, burgundy, or even pastel colors can give the ornament a completely different look.
Abbreviations
- ch – chain
- sc – single crochet
- sl st – slip stitch
- st – stitch
- inc – increase
- FO – fasten off
The exact size of your finished tree will depend on the yarn weight, hook size, and your crochet tension.
How to Crochet the Christmas Tree
Step 1: Start the Top of the Tree
Begin with your green yarn and create a small starting loop.
Chain a few stitches to establish the center of the tree. Work your first stitches into the chain or starting ring, depending on the technique you prefer.
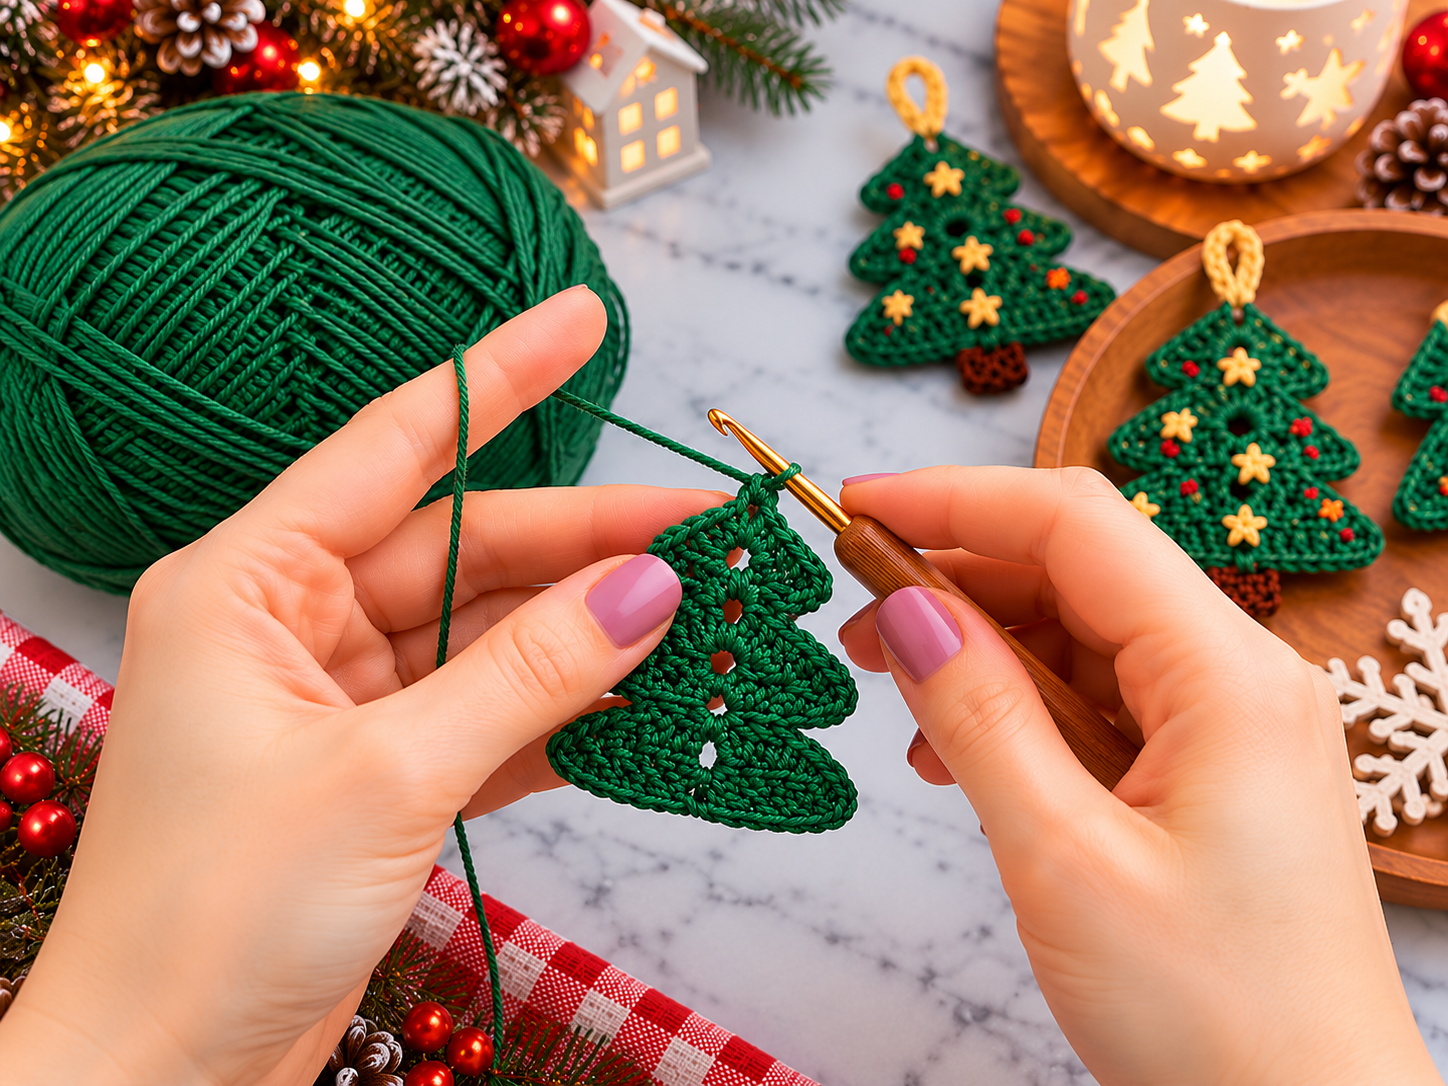
The first section should be narrow at the top. As you work downward, gradually increase the number of stitches so that the piece begins to form a triangular Christmas-tree shape.
Keep your stitches fairly tight. This helps the finished tree maintain its shape and gives the crochet texture a neat appearance.
Step 2: Build the Tree Shape
Continue working rows of green crochet, increasing where necessary to make each section wider than the one above it.
The important feature of this design is the layered triangular silhouette. Instead of making one completely flat triangle, the crochet creates several slightly separated branches or tiers.
This gives the finished Christmas tree more dimension.
As you work, compare your piece with the finished example. The top should remain narrow while the lower branches gradually become wider.
Do not worry if your tree looks slightly different during the first few rows. Once the lower sections are completed, the Christmas-tree shape becomes much more obvious.
Step 3: Create the Lower Branches
Continue crocheting the green section until you have three distinct branch levels.
The bottom branch should be the widest part of the tree. You can create the stepped appearance by changing where you increase and by working additional stitches around the lower edges.
The finished piece should resemble a small stylized Christmas tree:
narrow top → middle branch → wider lower branch
Try to keep both sides symmetrical. If one side becomes larger than the other, gently adjust your tension on the following stitches.
The beauty of this ornament is that it does not need to be perfectly identical to the example. Handmade variations are part of its charm.
Adding the Christmas Decorations
Once the green tree is finished, it is time to add the small decorative details.
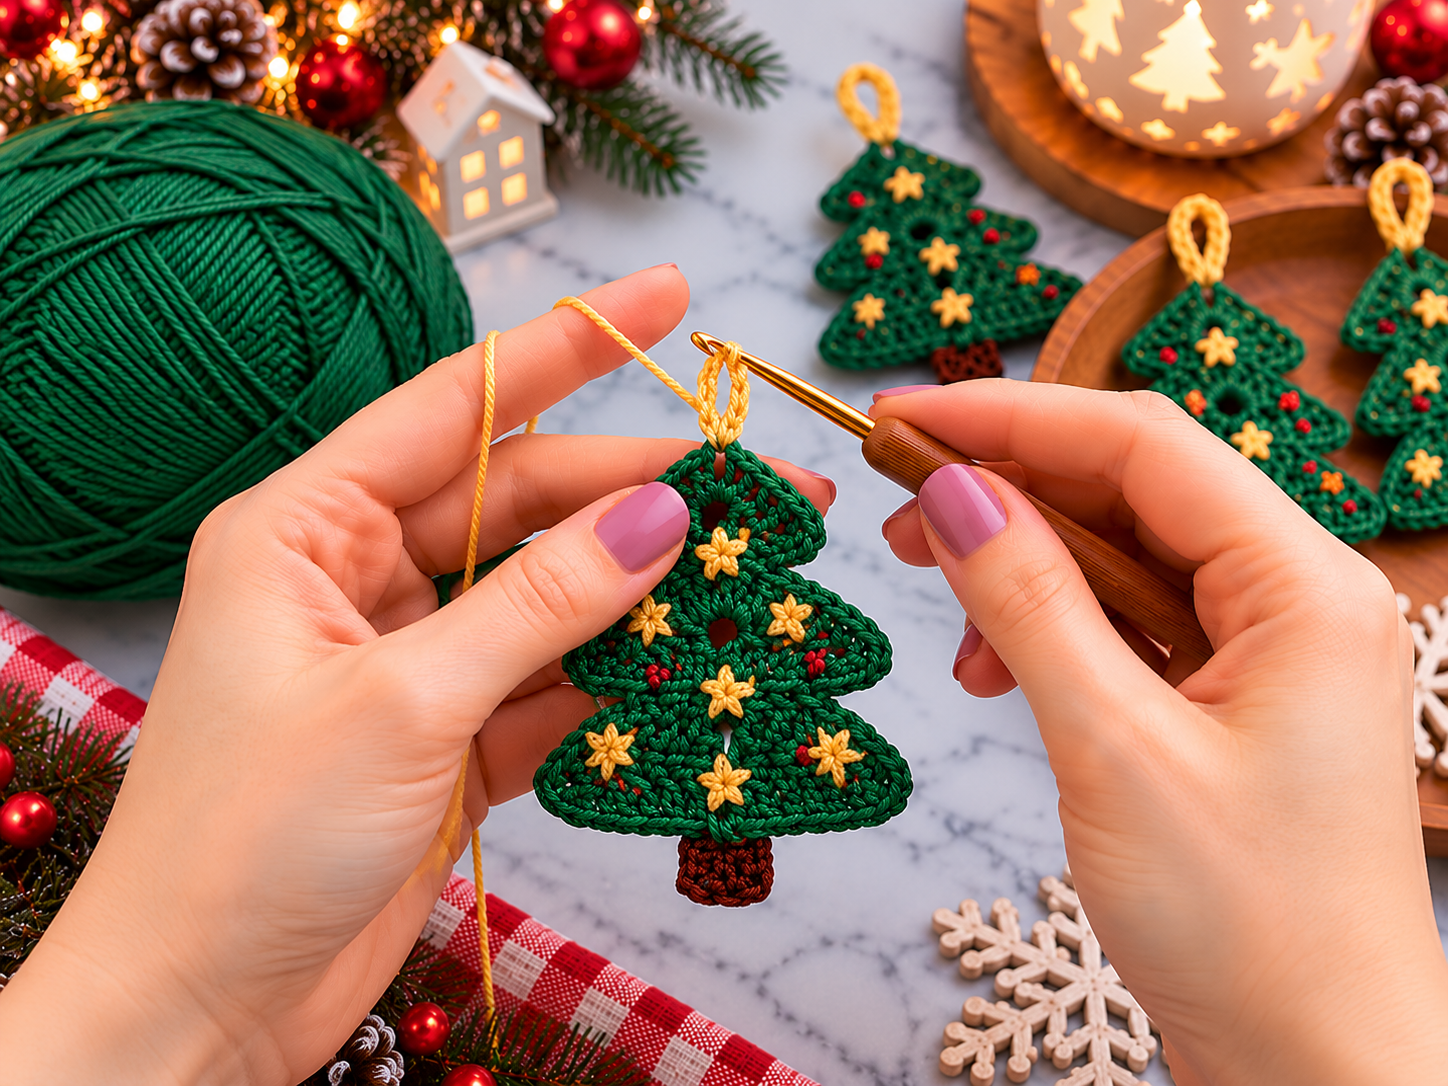
The example uses tiny gold motifs scattered across the branches. These look like little stars, flowers, or Christmas lights and create the festive appearance seen in the finished design.
Step 4: Add the Gold Decorations
Using gold or yellow yarn, make several tiny decorative stitches on the green tree.
The decorations can be made as small star-like or flower-like motifs. Keep them relatively small so they do not overwhelm the tree.
Place them across different levels of the branches.
For example, you can add:
- One decoration near the upper section
- Two or three in the middle
- Several across the widest bottom branch
Try not to place every decoration in a perfectly straight line. A slightly irregular arrangement gives the tree a more natural Christmas-decoration appearance.
Secure the yarn carefully on the back of the piece after adding each motif.
Creating the Trunk
Step 5: Crochet the Brown Trunk
At the bottom center of the tree, attach your brown yarn.
Work a few small stitches to create a short trunk.
The trunk should be noticeably narrower than the bottom branch. A small rectangular or rounded section works well for this design.
The brown trunk adds an important contrast to the green tree and makes the ornament immediately recognizable as a Christmas tree.
Once the trunk is the desired length, fasten off and weave in the ends securely.
Make the Hanging Loop
Step 6: Add the Golden Top
The final detail is the hanging loop at the top.
Attach your gold yarn to the upper point of the Christmas tree. Chain enough stitches to form a small loop that can easily fit over a Christmas tree branch.
Join the chain back to the tree with a slip stitch or secure it firmly with your yarn needle.
This small loop allows the finished crochet Christmas tree to be used as an actual Christmas tree ornament.
Pull the loop gently to make sure it is secure before hanging the decoration.
Finishing the Crochet Christmas Tree
Before displaying your ornament, take a few minutes to inspect the back.
Trim any excess yarn and weave all loose ends into the stitches. If necessary, gently shape the branches with your fingers.
Because this is a small crochet project, blocking is usually optional. However, if the tree has curled slightly, lightly dampen it and shape it flat until it dries.
Avoid using too much water, especially if you are working with yarn that changes shape when wet.
The finished ornament should have a compact triangular shape with three decorative branch levels, tiny gold accents, a brown trunk, and a gold hanging loop.
Tips for Making This Christmas Tree Pattern
Use leftover yarn
This is an excellent scrap yarn crochet pattern. You only need a small amount of each color, making it perfect for using leftover green, gold, brown, red, or white yarn from previous projects.
Experiment with the colors
You don’t have to use traditional Christmas green.
Try:
- Forest green with gold
- White with silver
- Red with white
- Sage green with gold
- Burgundy with cream
- Emerald green with red
You can even make a collection of trees using different color combinations.
Make different sizes
Changing your yarn weight and crochet hook size will give you different-sized ornaments.
Use finer yarn for tiny ornaments and thicker yarn for larger Christmas decorations.
You can also continue adding additional branch sections if you want a taller tree.
Add beads
For an extra festive effect, replace some of the tiny crochet decorations with small beads.
Red, gold, white, and silver beads look especially attractive against dark green yarn.
Just make sure any added decorations are securely attached.
What Can You Make With These Crochet Trees?
Once you learn this pattern, there are many ways to use the finished pieces.
The obvious choice is a Christmas tree ornament, but you can also use these little crochet trees for other holiday projects.
Make several and connect them together to create a festive crochet garland.
You can also sew one onto a Christmas stocking, attach one to a gift bag, use it as a gift topper, or add it to a holiday wreath.
Another fun idea is to make a set of small trees in different shades of green and use them as Christmas table decorations.
They are also wonderful handmade gifts because they are lightweight, inexpensive to make, and easy to personalize.
A Simple Handmade Christmas Project
What makes this crochet Christmas tree pattern especially appealing is its combination of simplicity and detail.
At first glance, the finished piece looks intricate because of the tiny gold decorations and layered branches. However, the basic shape is relatively simple, making it a satisfying project for crocheters who want to create handmade Christmas decorations without committing to a large project.
The small size also means you can make several trees in one evening once you become familiar with the construction.
If you are preparing handmade decorations for Christmas, this is a project worth adding to your holiday crochet list.
Make one for your own Christmas tree, create a whole collection for a garland, or personalize several as handmade gifts for family and friends.
Save this crochet Christmas tree pattern and follow the step-by-step video above to make your own festive little tree.