

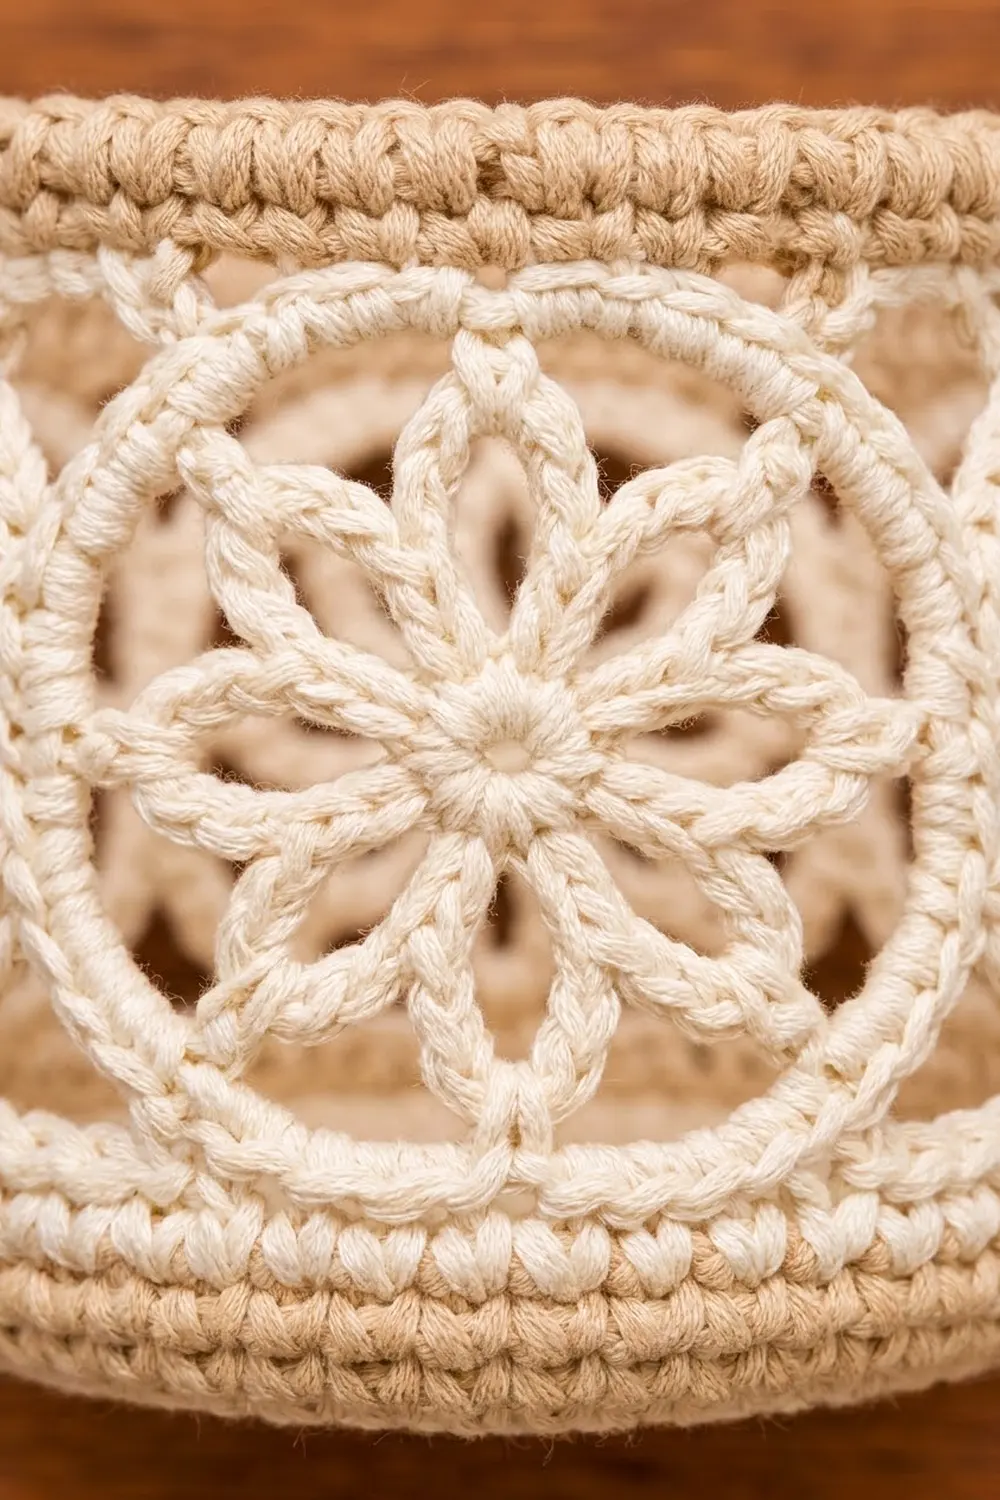
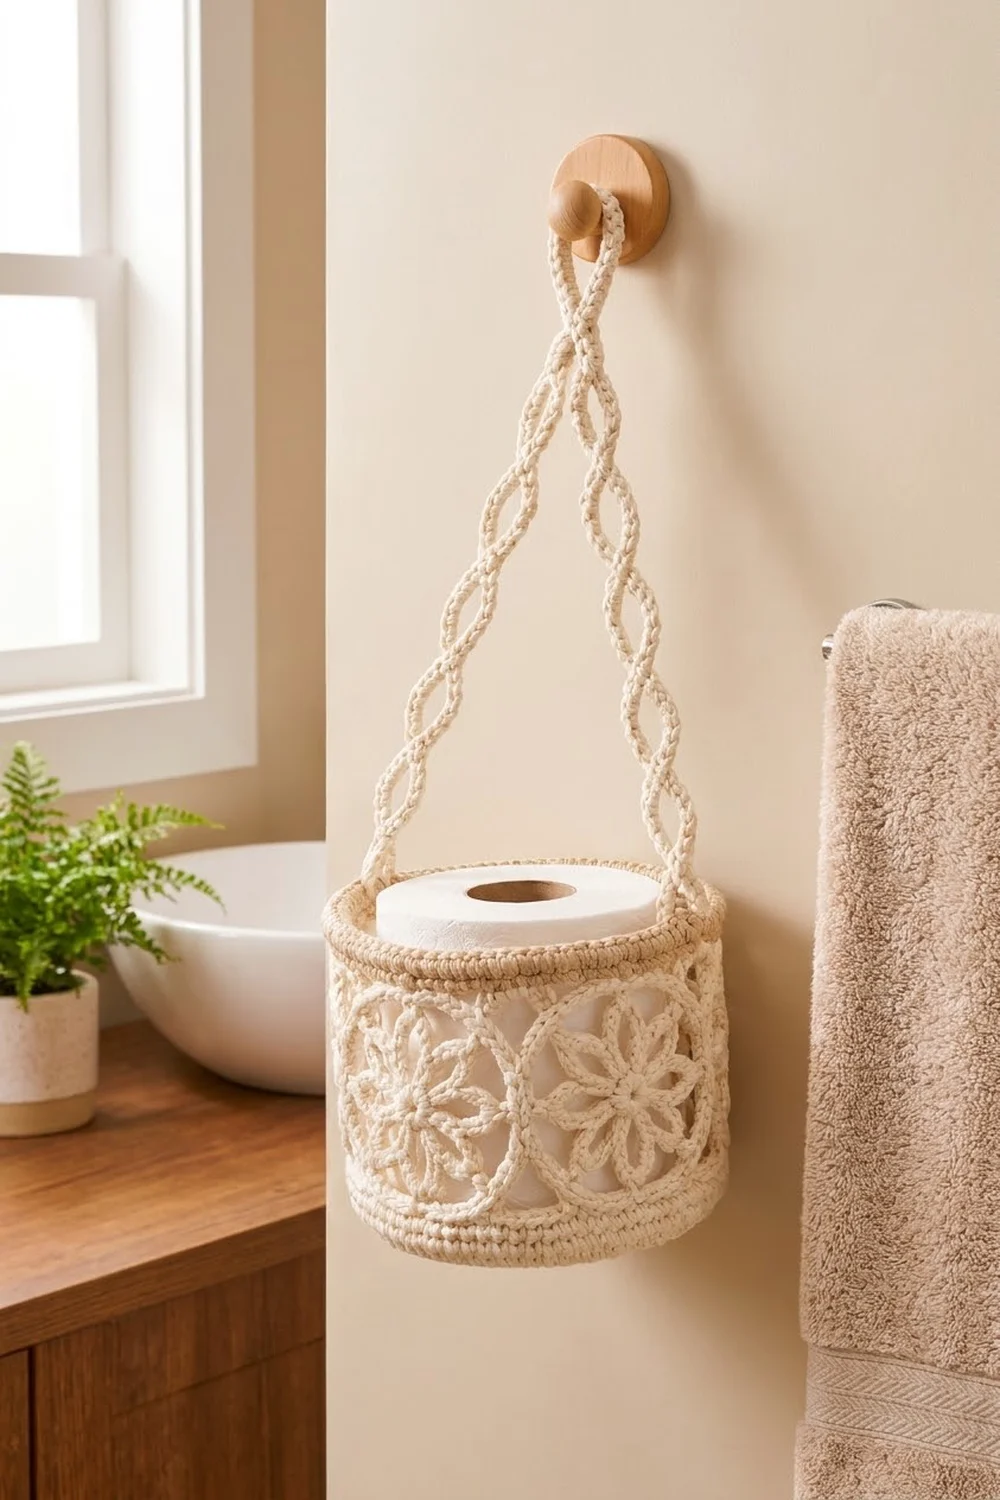
The Daisy Lattice basket is a small hanging holder for a spare toilet roll. Its wall is a ring of round flower medallions, so it reads as lace, but the solid base and rims keep it sturdy enough to hold a roll.
The palette is soft and neutral: cream for the base, the medallions, and the strap, plus a beige rim around the top. It suits a bathroom with natural wood, plants, and white towels.
This pattern uses US crochet terms. The finished basket measures 6 in (15.2 cm) across and 5¼ in (13.3 cm) tall. The strap adds about 16 in (40.6 cm) of hanging length.
Construction is simple and stays measurable. You crochet a flat base, turn it up into a short band, make six medallions, and join them into a ring. A joining round then fixes the ring to the band, and the beige rim closes the top. Last, you twine two cords into a strap and sew it on.
Finished Size and Construction
- Finished size: 6 in (15.2 cm) diameter × 5¼ in (13.3 cm) tall
- Skill level: Intermediate (adventurous beginner)
- Terminology: US
- Yarn weight: Worsted (#4) cotton
- Hook: 4.0 mm (G-6)
- Number of pieces: 1 base-and-band body, 6 medallions, 2 strap cords
- Layout: 6 medallions in a single ring (1 × 6)
- Medallion size: 3 in (7.6 cm) diameter
- Height before top rim: 4¼ in (10.8 cm)
- Top rim depth: 1 in (2.5 cm), 4 rounds
Materials
Use a smooth, firm, 100% cotton or cotton-blend worsted yarn. Cotton holds the basket’s shape and shows the medallion texture clearly. Avoid fuzzy or very stretchy yarns, because the base will sag.
- Cream (main color): 150 g, about 285 m
- Beige (rim): 30 g, about 57 m
Both quantities include a margin of about 20% for gauge swatches and tension differences.
Tools:
– 4.0 mm (G-6) crochet hook
– Tapestry needle
– 6 locking stitch markers
– Scissors
– Rust-proof pins and a blocking mat
– A 6 in (15.2 cm) jar or a rolled towel to block over
Abbreviations (US Terms)
- ch – chain
- sl st – slip stitch
- sc – single crochet
- BLO – back loop only
- sp – space
- st(s) – stitch(es)
- rnd – round
- rev sc – reverse single crochet (crab stitch)
Reverse single crochet (rev sc): Work from left to right (right to left if you crochet left-handed). Insert the hook into the next stitch to the right, yarn over, and pull up a loop. Yarn over and pull through both loops on the hook. The result is a twisted, rope-like edge.
Gauge and Checkpoints
Gauge: 15 sc and 16 rnds = 4 in (10.2 cm) in sc worked in spiral rounds.
At this gauge, one sc is about 0.27 in (0.7 cm) wide, and each base round adds ½ in (1.3 cm) to the diameter.
Test one medallion first. Make a single medallion before anything else and measure it after Rnd 4. It should be 3 in (7.6 cm) across.
Checkpoints:
– Base after Rnd 4: 2 in (5.1 cm)
– Base after Rnd 8: 4 in (10.2 cm)
– Base after Rnd 12: 6 in (15.2 cm)
– Band (Rnds 13–16): 1 in (2.5 cm) tall
– Medallion: 3 in (7.6 cm)
– Body before rim: 4¼ in (10.8 cm) tall
Too big? Go down to a 3.75 mm hook. Too small? Go up to a 4.5 mm hook. Change only the hook, not the stitch counts, because all of the joining math depends on those counts.
Base and Band (Cream)
Work in a continuous spiral. Place a marker in the first stitch of each round and move it up as you go.
Rnd 1: Make a magic ring, ch 1, and work 6 sc in the ring. (6)
Rnd 2: 2 sc in each st around. (12)
Rnd 3: [sc in next st, 2 sc in next st] 6 times. (18)
Rnd 4: [sc in next 2 sts, 2 sc in next st] 6 times. (24) Checkpoint: 2 in (5.1 cm).
Rnd 5: [sc in next 3 sts, 2 sc in next st] 6 times. (30)
Rnd 6: [sc in next 4 sts, 2 sc in next st] 6 times. (36)
Rnd 7: [sc in next 5 sts, 2 sc in next st] 6 times. (42)
Rnd 8: [sc in next 6 sts, 2 sc in next st] 6 times. (48) Checkpoint: 4 in (10.2 cm).
Rnd 9: [sc in next 7 sts, 2 sc in next st] 6 times. (54)
Rnd 10: [sc in next 8 sts, 2 sc in next st] 6 times. (60)
Rnd 11: [sc in next 9 sts, 2 sc in next st] 6 times. (66)
Rnd 12: [sc in next 10 sts, 2 sc in next st] 6 times. (72) Checkpoint: 6 in (15.2 cm).
To keep the circle from forming visible corners, stagger the increases. On even rounds, put the increase partway through the repeat instead of at the end.
Rnd 13 (turning round): sc in BLO of each st around. (72) The unused front loops form a crisp ridge, and the work begins to rise.
Rnds 14–16: sc in each st around. (72)
At the end of Rnd 16, sl st into the next st and do not fasten off. Place the live loop on a locking marker. The band should be 1 in (2.5 cm) tall and 6 in (15.2 cm) across, with a circumference of 19.2 in (48.8 cm).
Flower Medallions (Make 6, Cream)
Rnd 1: Make a magic ring, ch 1, and work 8 sc in the ring. Join with a sl st to the first sc. (8 sc)
Rnd 2 (petals): Ch 1, then work [sc in next st, ch 6] 8 times. Join to the first sc. (8 sc, 8 ch-6 loops) These loops are the eight petals.
Rnd 3 (frame chain): Sl st into the next 3 ch so you reach the tip of the first loop. Ch 1, sc in the same loop, ch 5, then work [sc in next ch-6 loop, ch 5] 7 times. Join to the first sc. (8 sc, 8 ch-5 sps) Each sc anchors one petal tip to the frame.
Rnd 4 (solid frame): Ch 1, then work 5 sc in each ch-5 sp around, skipping the Rnd 3 sc. Join to the first sc. (40 sc)
The medallion should measure 3 in (7.6 cm). Fasten off and leave a 12 in (30.5 cm) tail.
Mark the 40 stitches with the medallion’s right side facing you. Start with the first sc of Rnd 4 at the top center of the medallion.
– Sts 1–7: top (rim attachment)
– Sts 8–12: free
– Sts 13–15: right side (joining)
– Sts 16–20: free
– Sts 21–27: bottom (band attachment)
– Sts 28–32: free
– Sts 33–35: left side (joining)
– Sts 36–40: free
Check: 7 + 5 + 3 + 5 + 7 + 5 + 3 + 5 = 40.
Make All Pieces
- Cream: 1 base-and-band body, 6 medallions, 2 strap cords
- Beige: top rim only, worked directly onto the body
Layout (ring of 6, seen flat before closing):
[M1]-[M2]-[M3]-[M4]-[M5]-[M6]-(back to M1)
Each “-” is a 3-stitch side join. M1 and M4 sit opposite each other, and the strap attaches above them.
Joining
Medallions into a ring. Place two medallions right side up, side by side. Use the tail to whipstitch the right side of one (sts 13–15) to the left side of the next (sts 35–33), matching the stitches mirror-wise: 13 to 35, 14 to 34, and 15 to 33.
Work through the back loops only. Pull each stitch snug but not tight, so the frames meet edge to edge without puckering. Join M1 to M2, M2 to M3, and so on through M6 to M1, which closes the ring.
Ring checkpoint: Lay the ring flat (folded in half). It should measure about 9½ in (24.1 cm) across the fold, which gives a circumference of about 19 in (48.3 cm). That is a near match for the band’s 19.2 in (48.8 cm).
Rnd 17 (joining round): Slide the ring over the band so the medallions’ right side faces out and their bottom stitches (21–27) sit just above Rnd 16. Return the live loop to your hook. Ch 1, then repeat the following 6 times:
– Work 7 sc through both a band st and a medallion bottom st together.
– Work 5 sc in the next 5 band sts only.
Join with a sl st. (72) The count is 6 × (7 + 5) = 72, so the band count is unchanged and the wall stays straight. The 5 band-only stitches sit under the open V-gaps between medallions. Fasten off.
Body checkpoint: The body should be 4¼ in (10.8 cm) tall: 1 in (2.5 cm) of band, ¼ in (0.6 cm) for the joining round, and 3 in (7.6 cm) of medallions.
Top Rim (Border, Beige)
Border gauge: The rim uses the same 15 sc = 4 in (10.2 cm). Its 72 stitches match the base’s 72, so the top opening is also 6 in (15.2 cm) across.
Rnd 1 (conversion round): Join beige in st 1 of M1’s top. Ch 1, then repeat the following 6 times:
– Work 1 sc in each of the medallion’s 7 top sts (sts 1–7).
– Ch 5 across the gap to the next medallion.
Join to the first sc.
Count: 42 sc worked 1-per-existing-stitch + 30 ch added = 72 sts.
Each medallion section is 7 + 5 = 12 sts, and 6 × 12 = 72. No extra stitches are added at the seams, because each chain-5 already spans one gap. Keep the chains taut enough to bridge each gap without sagging.
Rnd 2: sc in each sc and each ch around. (72)
Rnd 3: sc in each st around. (72)
Rnd 4: rev sc in each st around. (72) Join with a sl st and fasten off.
The rim is 1 in (2.5 cm) deep, which brings the total height to 4¼ + 1 = 5¼ in (13.3 cm).
Why the math works: The base, band, joining round, and rim all hold exactly 72 stitches. A constant count means a straight cylinder, with no flare and no pull-in.
Hanging Strap (Cream)
Cords (make 2): Ch 136. Sc in the 2nd ch from the hook and in each ch across. (135 sc) Each cord measures 36 in (91.4 cm). Fasten off and leave 12 in (30.5 cm) tails.
Twining: Lay the two cords side by side with the stitch numbers matching. Number the stitches 1 to 135 and mark every 9th stitch.
Tack the cords together with a single sewn stitch at these points:
– Sts 9, 18, 27, 36, 45, and 54 (first leg)
– Sts 81, 90, 99, 108, 117, and 126 (second leg)
Between tack points, cross the left cord over the right, always in the same direction. That makes each section between tacks one diamond opening, 2.4 in (6.1 cm) long before twining.
Leave sts 55–80 untacked and uncrossed. These 26 stitches, about 6.9 in (17.5 cm), open into the teardrop hanging eye.
Each leg runs from st 1 to st 54, which is 14.4 in (36.6 cm) flat and shortens to about 13 in (33.0 cm) once twined.
Attaching: Sew both cords’ st 1 ends together over Rnds 2–3 of the rim, centered above M1. Sew both st 135 ends above M4, which is 36 rim stitches away and exactly opposite. Stitch through both rim rounds so the roll’s weight spreads across them.
Final Blocking
- Weave in all ends along stitches of the same color.
- Wet the basket and strap in cool water, then press out the excess in a towel. Do not wring.
- Slide the basket over a 6 in (15.2 cm) jar or a firmly rolled towel.
- Shape each medallion with your fingers. Open the petal loops evenly and round out the frames.
- Check that the base lies flat and measures 6 in (15.2 cm).
- Pin the strap straight and open each diamond. Pin the eye into a teardrop.
- Let everything dry completely, which takes about 24 hours.
- For a stiffer basket, mist with a diluted fabric stiffener before drying.
Final Quality-Control Checklist
- Base measures 6 in (15.2 cm) and lies flat.
- Every round from 12 onward holds 72 stitches.
- All 6 medallions measure 3 in (7.6 cm) and have 8 evenly opened petals.
- Side joins are 3 stitches each and evenly tensioned.
- Medallion bottoms sit level on the band.
- Rim Rnd 1 chains are straight and not sagging.
- Total height is 5¼ in (13.3 cm).
- The strap has 6 diamonds per leg and an open eye.
- The strap ends sit exactly opposite each other.
- All ends are woven in securely.
Troubleshooting
Base cups or ruffles: Cupping means your tension is tight, so go up a hook size. Ruffling means you have extra increases, so recount each round.
Medallion curls: Rnd 4 is tight. Loosen your tension or go up half a hook size for that round only.
Ring doesn’t fit the band: Check the medallion size first. If the ring is slightly loose, ease the medallions in during Rnd 17. If it is tight, re-join the sides with looser whipstitches.
Gaps sag at the rim: Shorten the chain-5 to a chain-4. To keep the count at 72, work 1 extra sc in Rnd 2 at each gap.
Basket tilts when hung: The strap ends are not opposite each other. Re-sew them exactly 36 rim stitches apart.
Strap twists unevenly: Cross the cords in the same direction every time.
Care
Hand wash in cool water with a mild detergent. Reshape the basket and dry it flat or over a jar.
Final Notes
Every measurement in this pattern builds on the one before it. The 15-stitch gauge produces a 72-stitch base that is 6 in (15.2 cm) across. That 72-stitch count carries through the band, the joining round, and the rim, so the wall stays straight. Six medallions of 40 stitches each meet the band at 12 stitches per medallion, and the rim’s 7 + 5 sections return the count to exactly 72. The finished basket stands 5¼ in (13.3 cm) tall, and the twined strap adds about 16 in (40.6 cm) for hanging. If you check each measurement as you go, the pieces fit together without fudging.
Happy crocheting!