

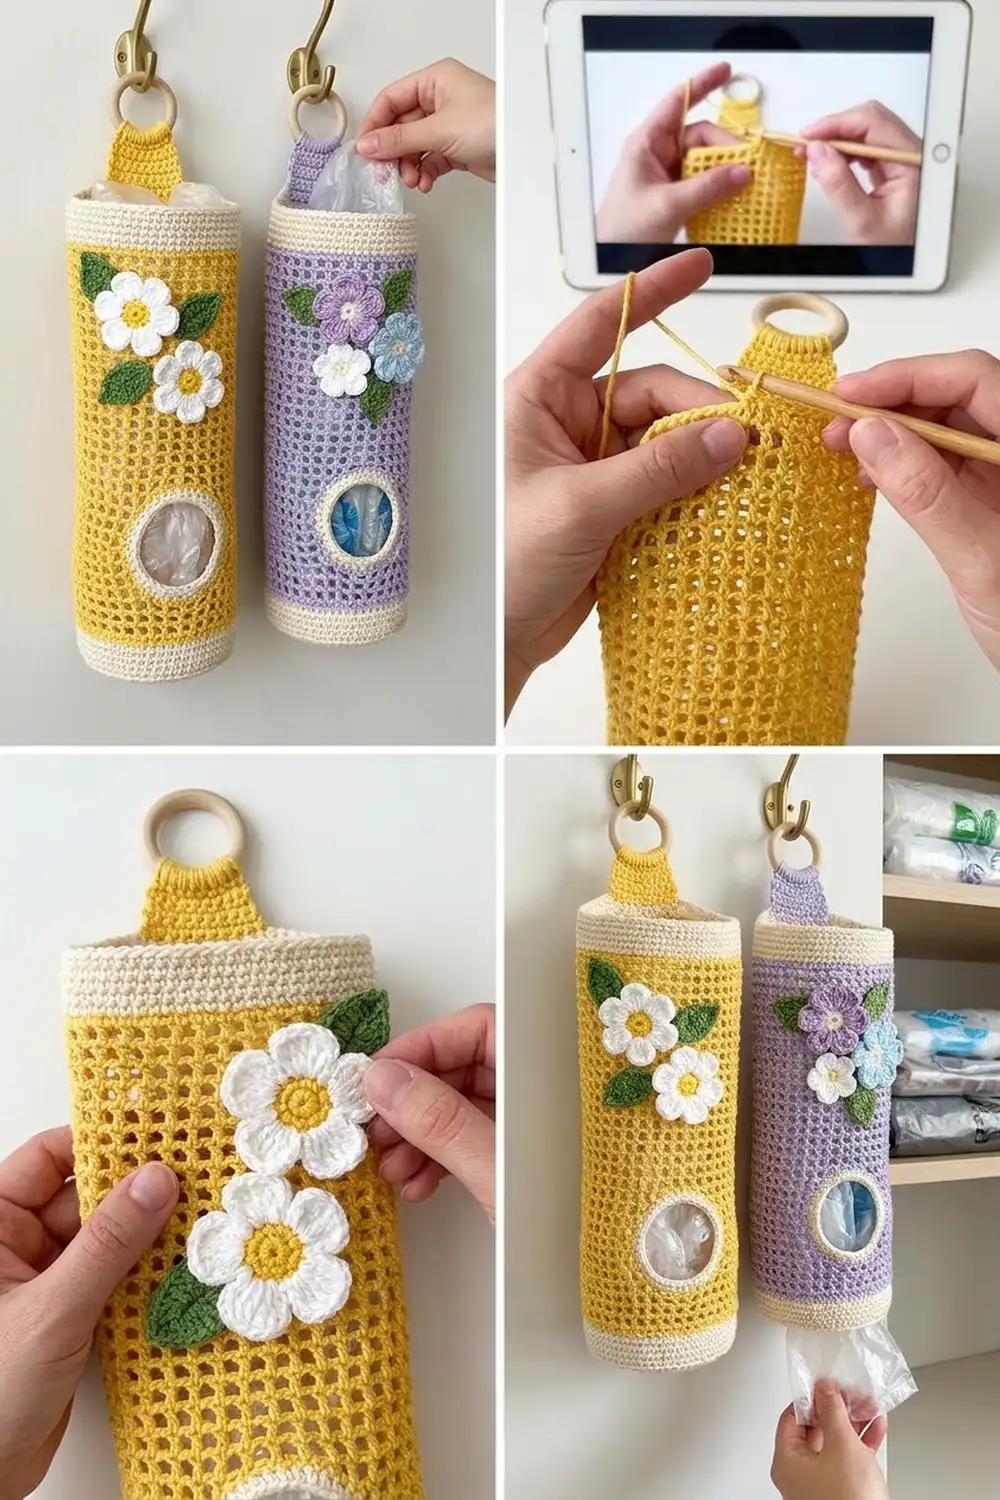
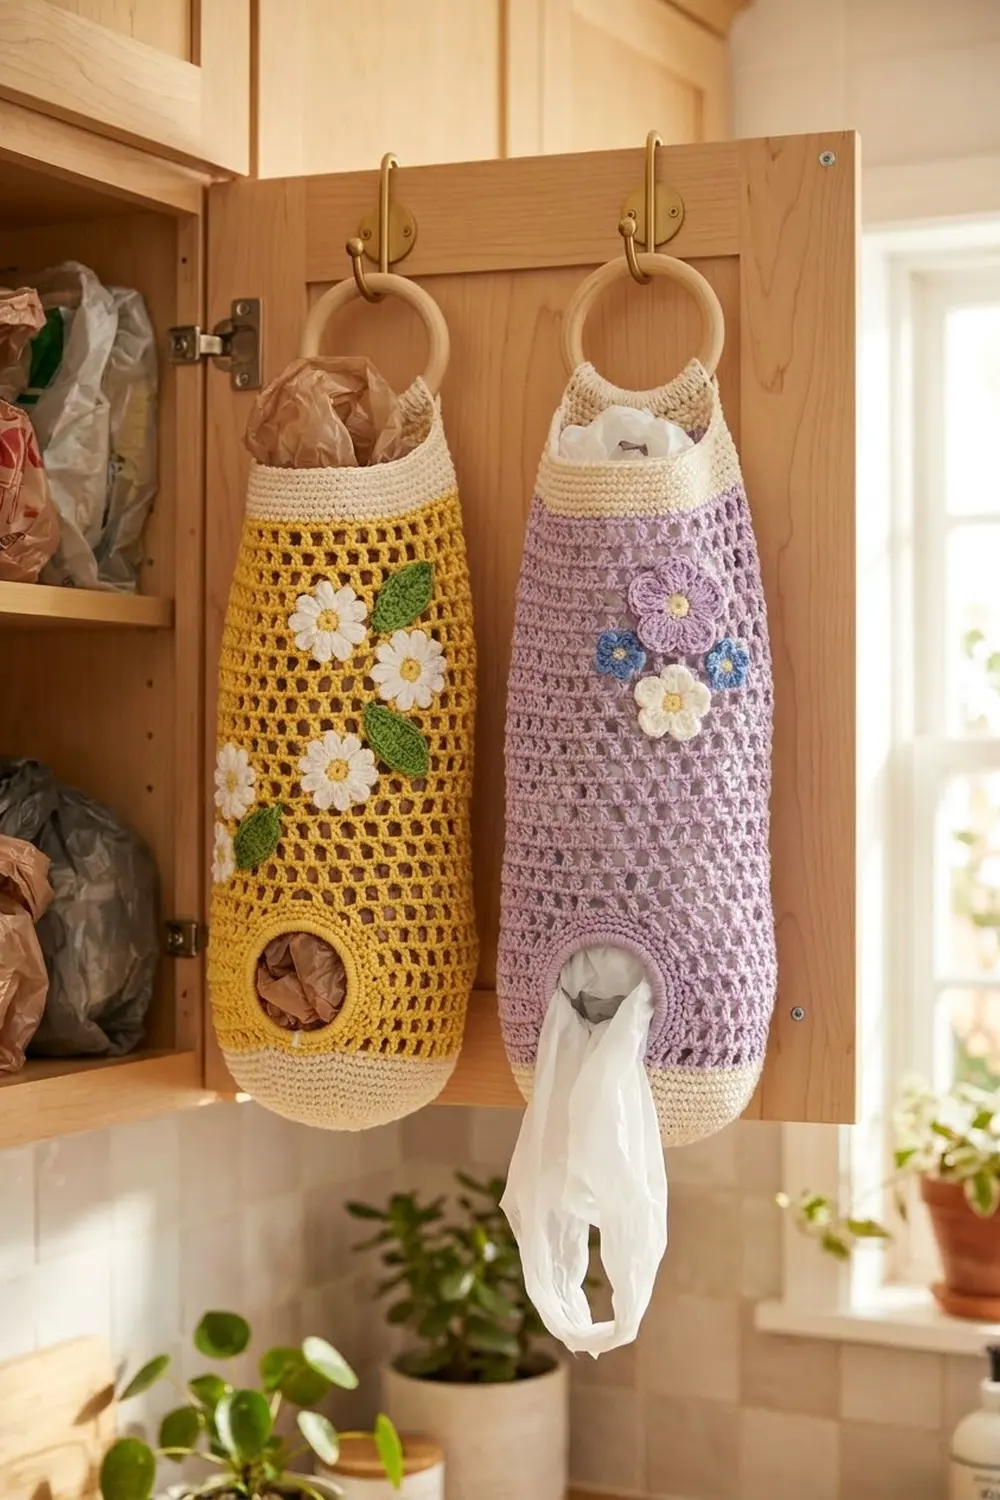
This hanging plastic bag holder is a tall mesh tube with cream bands at the top and bottom and a cluster of daisies stitched on the front. Stuff bags in at the top and pull them out one at a time through a round opening near the base. It turns a messy pile of bags into something you’ll be happy to hang by the pantry door.
The sample uses buttery yellow for the mesh, cream for the bands, white daisies with yellow centers, and soft green leaves. A lavender colorway, with one lilac flower, one white flower and a tiny blue blossom, is given at the end of the flower section. The look is cottage-style and cheerful, and the open mesh lets you see at a glance how many bags are left.
The pattern uses US crochet terms. The finished tube measures 5 in (12.7 cm) wide when laid flat and 15 in (38.1 cm) tall. A sturdy tab adds about 2 in (5.1 cm) above the top band and loops around a 3 in (7.6 cm) wooden ring.
You work the holder in one piece from the bottom up. Start with a cream base circle and short cream walls. Then comes the filet-style yellow mesh, with the dispenser opening shaped by a few turned rows, and finally a cream top band. A yellow tab is worked off the back of the band, and the flowers and leaves are made separately and sewn on.
Finished Size and Construction
- Finished size: 5 in (12.7 cm) wide flat x 15 in (38.1 cm) tall, plus a 2 in (5.1 cm) tab; 17 in (43.2 cm) from base to top of tab
- Skill level: Easy-Intermediate
- Terminology: US
- Yarn weight: Worsted (#4) cotton
- Hook: US H-8 (5 mm) for the tube; US G-6 (4 mm) for appliqués
- Number of pieces: 1 tube worked in one piece, plus sewn-on appliqués (3 large flowers, 5 small flowers, 8 leaves)
- Layout: cream base band, 18 mesh rounds/rows with an opening at the front bottom, cream top band, tab centered on the back
- Circumference: 40 stitches = 10 in (25.4 cm)
- Size before top band: 5 in (12.7 cm) flat x 13.5 in (34.3 cm) tall
- Top band depth: 1.5 in (3.8 cm)
Materials
Pick a smooth worsted-weight cotton or cotton blend at about 85 m per 50 g. Cotton holds its shape when the tube is stuffed full, and the flowers stay crisp. Acrylic works too, but it stretches more under weight.
- Color A, Yellow (mesh, tab, flower centers): 60 g / 102 m
- Color B, Cream (base and top bands): 35 g / 60 m
- Color C, White (petals): 10 g / 17 m
- Color D, Green (leaves): 8 g / 14 m
For the lavender version, use 60 g / 102 m of lavender for Color A. You’ll also need scraps of deep lilac (3 g / 5 m) and light blue (2 g / 3 m).
Tools:
– US H-8 (5 mm) and US G-6 (4 mm) crochet hooks
– Wooden ring, 3 in (7.6 cm) outer diameter
– Tapestry needle
– 4 stitch markers
– Scissors and a measuring tape
All quantities include a margin of about 15 percent.
Abbreviations (US Terms)
- ch – chain
- sl st – slip stitch
- sc – single crochet
- hdc – half double crochet
- dc – double crochet
- sc2tog – single crochet 2 together
- MR – magic ring
- sp(s) – space(s)
- st(s) – stitch(es)
- RS / WS – right side / wrong side
Mesh unit: one dc plus one ch-1 sp. Each unit counts as 2 sts. In this pattern, each dc is called a “post.”
Gauge and Checkpoints
With the H-8 (5 mm) hook:
– Sc: 16 sts and 16 rounds = 4 in (10.2 cm)
– Mesh: 8 mesh units (16 sts) and 6 rounds = 4 in (10.2 cm), so each mesh round is about 0.67 in (1.7 cm) tall
Work the base and the first 3 mesh rounds, then measure them as your test piece before you go further.
Checkpoints:
1. After the base circle (Rnd 5): about 3 in (7.6 cm) across. A slight cup is normal and gives the rounded bottom.
2. After the cream walls: the tube is 5 in (12.7 cm) wide flat and the walls are 1.5 in (3.8 cm) tall.
3. After 6 mesh rounds: the mesh is 4 in (10.2 cm) tall and the tube is still 5 in (12.7 cm) wide.
4. After all 18 mesh rounds: 13.5 in (34.3 cm) from the base fold.
5. After the top band: 15 in (38.1 cm) tall in total.
Too big? Go down half a hook size. Too small? Go up half a hook size. If only the height is off, keep the width and add or remove mesh rounds above Rnd 6. Each round changes the height by about 0.67 in (1.7 cm).
Main Pattern
Base (Color B, H-8 hook)
Work in continuous rounds and mark the first stitch of each round.
Rnd 1: 8 sc in MR. (8 sts)
Rnd 2: 2 sc in each st around. (16 sts)
Rnd 3: Sc in next st, 2 sc in next st 8 times. (24 sts)
Rnd 4: Sc in next 2 sts, 2 sc in next st 8 times. (32 sts)
Rnd 5: Sc in next 3 sts, 2 sc in next st 8 times. (40 sts)
Rnds 6–11: Sc in each st around. (40 sts each round)
The walls rise from the base without a hard edge, which gives the soft, rounded bottom. They measure 1.5 in (3.8 cm). Sl st in the next st and fasten off Color B.
Mesh Body (Color A)
Mesh Rnd 1: Join Color A with a sl st in any st. Ch 4 (counts as dc and ch 1), skip next st, dc in next st, ch 1, skip next st 19 times. Join with a sl st to the 3rd ch of the beginning ch-4. (20 posts, 20 ch-1 sps = 40 sts)
The join post is Post 1. Number the other posts 2 to 20, going around in working direction.
Dispenser Opening (Rows 2–4)
These rows are worked flat over Posts 1–15. Posts 16–20 and the sps around them stay unworked.
Row 2 (RS): Ch 4 (counts as dc and ch 1), dc in next dc (Post 2), ch 1, dc in next dc 13 times (Post 15). Do not join. Turn. (15 posts, 14 sps = 29 sts)
Row 3 (WS): Ch 4 (counts as dc and ch 1), skip ch-1 sp, dc in next dc, ch 1, dc in next dc 12 times, ch 1, dc in 3rd ch of turning ch. Turn. (15 posts, 14 sps = 29 sts)
Row 4 (RS): Repeat Row 3. Do not turn. (29 sts)
Bridge: Ch 11, then join with a sl st to the 3rd ch of the turning ch at the start of Row 4. The tube is closed again. The gap is 11 sts wide, or 2.75 in (7.0 cm), and 3 rows tall, or 2 in (5.1 cm).
Mesh Rnd 5: Ch 4 (counts as dc and ch 1). Dc in next dc, ch 1 13 times, then dc in last dc (Post 15). Across the bridge: ch 1, skip 1 ch, dc in next ch 5 times, ch 1, skip last ch. Join with a sl st to the 3rd ch of the beginning ch-4. Count: 15 posts + 5 new posts = 20 posts, and 14 sps + 6 sps = 20 sps (40 sts).
Mesh Rnds 6–18: Ch 4 (counts as dc and ch 1), dc in next dc, ch 1 19 times. Join to the 3rd ch of the beginning ch-4. (20 posts, 20 sps = 40 sts each round)
At Checkpoint 4 the tube should be 13.5 in (34.3 cm) tall: 1.5 in (3.8 cm) of base plus 12 in (30.5 cm) of mesh. Fasten off Color A.
Opening Edging (Color A)
Join Color A at a bottom corner of the opening and work 1 round of sc around it:
– Bottom edge: 11 sc, one in each dc and ch-1 sp of Mesh Rnd 1 across the gap.
– Side: 9 sc, 3 in each row end.
– Top edge: 11 sc in the underside of the bridge chains.
– Other side: 9 sc.
Join. (40 sc) Fasten off. The sc edging rounds off the corners so the opening looks oval and bags slide out smoothly.
Top Band (Border)
Border gauge: 16 sc = 4 in (10.2 cm). That is the same width per stitch as the mesh, so the band doesn’t pull in or flare.
Lay the tube flat with the opening centered on the front. Mark the 2 side folds so that each half, front and back, has 10 posts and 10 sps.
Rnd 1 (conversion): Join Color B. Sc in each dc and each ch-1 sp around: 20 sc in posts + 20 sc in sps = 40 sc. That is 20 sc for the front and 20 sc for the back.
Rnds 2–6: Sc in each st around. (40 sts each round; 20 per side)
Sl st in the next st and fasten off. The band measures 1.5 in (3.8 cm).
Why the math works: 20 sts per flat side at 4 sts per in gives 5 in (12.7 cm) for the mesh, the base walls and the top band alike. Every section of the tube has the same 40-st circumference, so the tube hangs straight.
Hanging Tab (Color A)
Count off the center 10 sts of the back half, directly opposite the opening.
Row 1: Join Color A in the first of those 10 sts. Sc in each of the 10 sts. Turn. (10 sts)
Row 2: Ch 1, sc2tog, sc in next 6 sts, sc2tog. Turn. (8 sts)
Rows 3–14: Ch 1, sc in each st across. Turn. (8 sts each row)
The tab is 2 in (5.1 cm) wide and 3.5 in (8.9 cm) long. Fold the top 1.5 in (3.8 cm) over the wooden ring to the WS and whipstitch the last row down. That leaves 2 in (5.1 cm) of tab showing above the band.
Appliqués (G-6 hook)
Large Flower (make 3), 1.75 in (4.4 cm):
Rnd 1: With Color A, 10 sc in MR. Join. Fasten off. (10 sts)
Rnd 2: With Color C, sl st in next st, (hdc, 3 dc, hdc) in next st 5 times. Join. (5 petals) Leave a 12 in (30.5 cm) tail.
Small Flower (make 5), 1 in (2.5 cm): With Color C, MR, ch 2, dc, ch 2, sl st in ring 5 times. Pull the ring closed. Stitch a French knot in Color A at the center. (5 petals)
Leaf (make 8), 1.5 in (3.8 cm): With Color D, ch 7. Starting in the 2nd ch from hook: sc, hdc, 2 dc, hdc, sc. Ch 1, then work along the other side of the chain: sc, hdc, 2 dc, hdc, sc. Sl st to the tip. (12 sts plus tip)
Lavender colorway: Make 1 large flower with a deep lilac center and lavender petals, and 1 large flower with a lavender center and white petals. Add 1 small flower in light blue and 5 leaves.
Placement: Sew the pieces to the front of the tube with whipstitch through the mesh posts. Don’t sew through the other side of the tube.
– Upper cluster: starts 0.5 in (1.3 cm) below the top band. Use 2 large flowers side by side and slightly staggered, 3 small flowers and 5 leaves.
– Lower sprig: sits 0.5 in (1.3 cm) above the opening. Use 1 large flower, 2 small flowers and 3 leaves.
Final Blocking
- Weave in all ends before blocking. Leave the appliqué tails until the flowers are sewn on.
- Spritz the tube lightly with water until it’s damp but not soaked.
- Slide a rolled towel or a 3.2 in (8.1 cm) bottle inside to hold the tube round.
- Square up the mesh by hand so the posts line up vertically.
- Shape the opening into a smooth oval.
- Pat each flower flat and open out the petals.
- Let everything dry completely, then hang the holder from the ring.
Final Quality-Control Checklist
- Every round has 40 sts and every mesh round has 20 posts.
- The tube is 5 in (12.7 cm) wide flat and 15 in (38.1 cm) tall.
- The opening is centered on the front, and the tab is centered on the back.
- The opening edging lies flat, with no ripples.
- The top band doesn’t flare.
- The tab is securely sewn, and the ring sits snugly in it.
- No flower stitching shows through on the back.
- All ends are woven in and invisible.
Troubleshooting
- Tube twists: The join line is drifting. Make sure each round ends at the 3rd ch of the beginning ch-4.
- Opening looks slanted: You skipped a turn in Rows 2–4. Each row must end at Post 15 or Post 1.
- Mesh holes look uneven: Keep your ch-1 the same height as your dc loops. Try a tighter chain.
- Top band ruffles: You have more than 40 sts. Count your stitches, or work the band with a hook half a size smaller.
- Tab stretches: Use cotton, and work the tab more tightly than the tube.
- Flowers curl: Block them flat, or work Rnd 1 with a slightly looser tension.
Care
Hand wash in cool water and lay flat to dry, reshaping the tube over a bottle. Don’t tumble dry, because heat can shrink the cotton and pull the flowers out of shape.
Final Notes
Every part of the holder follows one simple measurement chain. The 40-st base sets a circumference of 10 in (25.4 cm), which the 1.5 in (3.8 cm) cream walls hold. The 18 mesh rounds add 12 in (30.5 cm), and the 3-row opening sits at the front bottom. The 40-st top band adds another 1.5 in (3.8 cm), for a 15 in (38.1 cm) tube. Finally, the 2 in (5.1 cm) tab carries it from the ring.
Happy crocheting!