

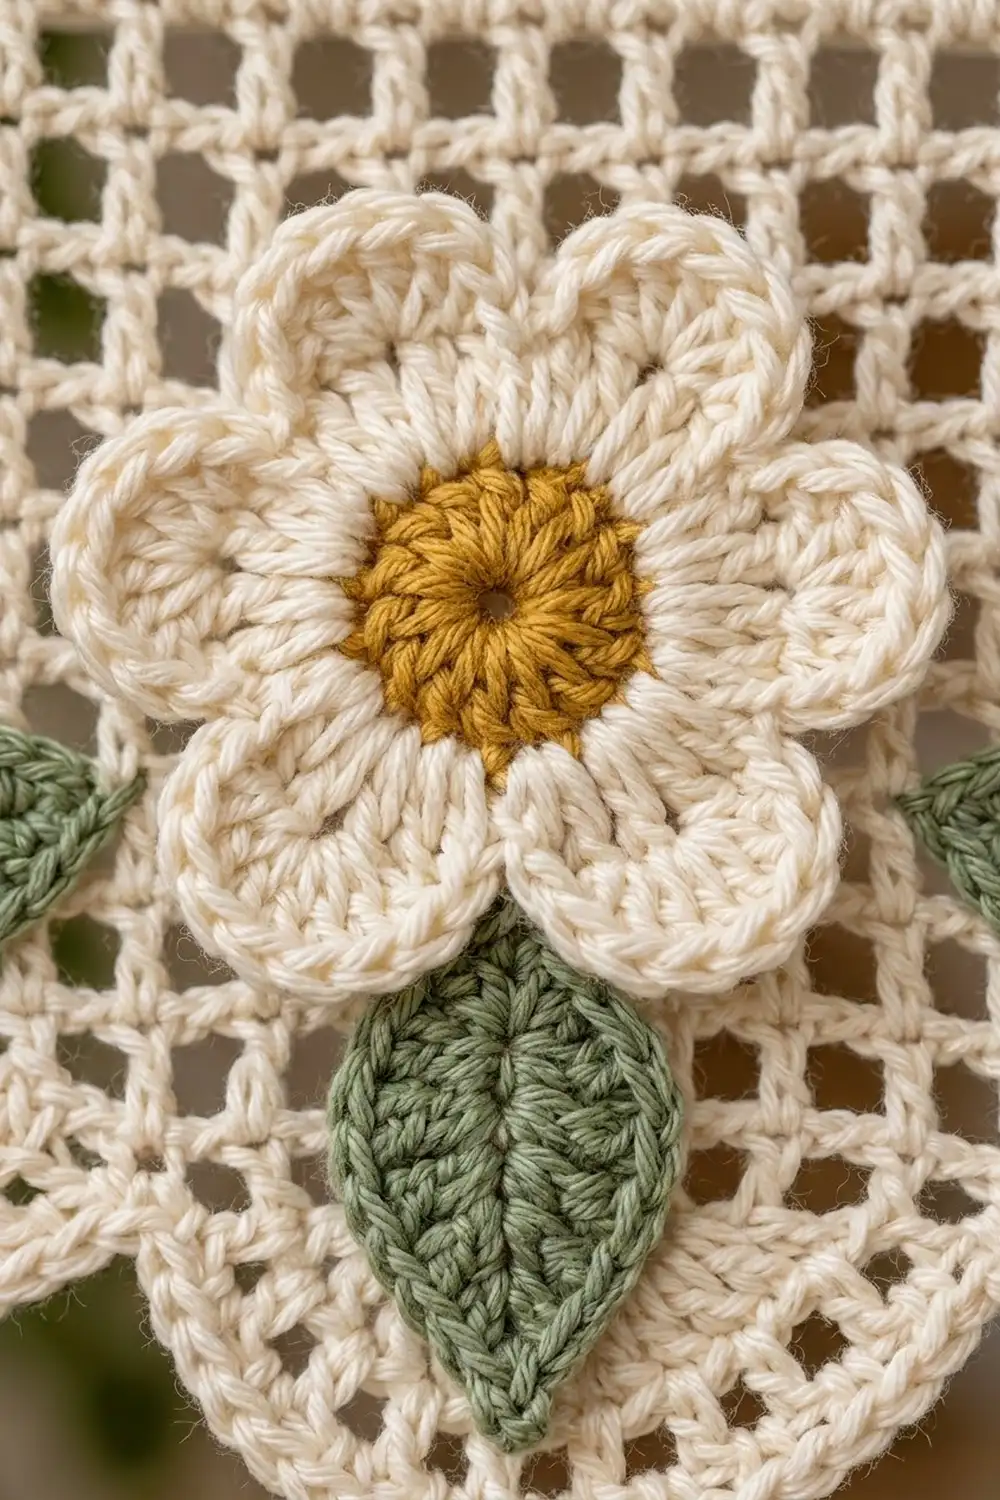
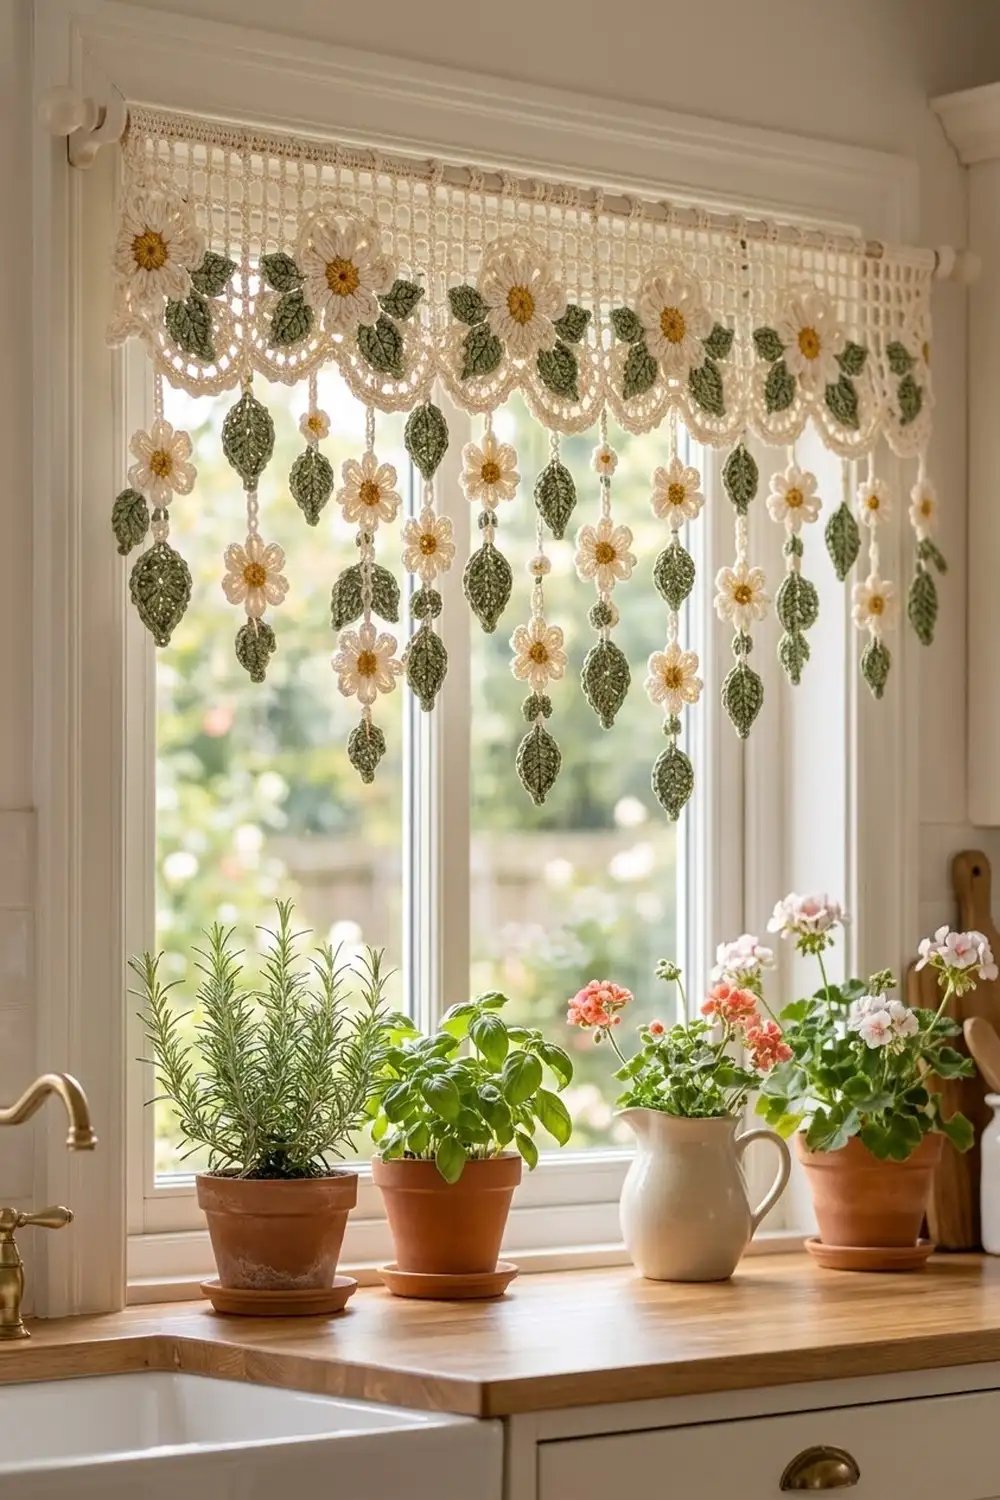
The Daisy Meadow Window Valance is a light, lacy kitchen valance. It looks like a row of wildflowers growing along the top of your window. A cream filet mesh band runs across the top, and soft scallops finish its lower edge. Large gold-centered daisies with small sage leaves are sewn across the mesh.
Below the scallops, 17 strands of small daisies and larger sage-green leaves hang in alternating long and short lengths. The colors are cream, warm mustard gold, and muted sage green. The style is fresh and cottage-like, and the open mesh lets plenty of light through.
This pattern uses US crochet terms. The finished header measures 36.75 in x 5.25 in (93.3 cm x 13.3 cm). The long strands bring the total drop to 17.25 in (43.8 cm).
Here is the order of work. You crochet the mesh band in rows, then add the scallops and an edging along the top and sides. You make the daisies and leaves separately. Finally, you sew on the flowers and leaves and crochet the hanging strands directly onto the scallops.
Finished Size and Construction
- Finished header size: 36.75 in x 5.25 in (93.3 cm x 13.3 cm)
- Total drop with long strands: 17.25 in (43.8 cm)
- Skill level: Intermediate
- Terminology: US crochet terms
- Yarn weight: DK (weight 3) cotton
- Hook: 3.5 mm (US E-4)
- Number of pieces: 1 header band, 9 large daisies, 36 small leaves, 26 small daisies, and 34 large leaves, all joined into one valance
- Layout: 9 scallop repeats; 9 long strands and 8 short strands
- Piece size: each repeat is 4 in (10.2 cm) wide; large daisy 2.5 in (6.4 cm); small daisy 1.5 in (3.8 cm)
- Size before border: 36.25 in x 5 in (92.1 cm x 12.7 cm)
- Border depth: 0.25 in (0.6 cm) on the top and both sides
Materials
Choose a smooth DK-weight cotton with about 115 m per 50 g. Cotton keeps the mesh crisp, blocks well, and handles kitchen humidity.
- Cream: 150 g (345 m) for the band, scallops, petals, and strand chains
- Mustard gold: 25 g (58 m) for all daisy centers
- Sage green: 100 g (230 m) for all leaves
Tools:
- 3.5 mm (US E-4) crochet hook
- Tapestry needle
- Stitch markers (at least 20)
- Measuring tape
- Rust-proof pins and a blocking surface at least 38 in (96.5 cm) long
- Scissors
- Tension rod or curtain rod
All quantities include about 30 percent extra for swatching and for remaking a few motifs.
Abbreviations (US Terms)
- ch – chain
- sl st – slip stitch
- sc – single crochet
- hdc – half double crochet
- dc – double crochet
- tr – treble crochet
- sp – space
- st(s) – stitch(es)
- MR – magic ring
- RS / WS – right side / wrong side
Mesh square: one dc plus one ch-1 sp, worked as dc, ch 1, skip 1 st.
Strand pass-through: on the WS of a motif, sl st through the back loops or back bumps from where the strand enters to where it leaves. This carries the strand yarn behind the motif so it doesn’t show on the front.
Gauge and Checkpoints
Gauge: 16 sts and 8 rows of dc or mesh = 4 in (10.2 cm). Chain gauge: 5 ch = 1 in (2.5 cm).
Make a test swatch first. Ch 23, dc in 4th ch from hook and in each ch across (21 sts). Then work 7 mesh rows as in the band. Block the swatch and measure it. Also make one of each daisy and one of each leaf.
Checkpoints:
- Small daisy: 1.5 in (3.8 cm) across
- Large daisy: 2.5 in (6.4 cm) across
- Small leaf: 1.5 in x 0.75 in (3.8 cm x 1.9 cm)
- Large leaf: 2 in x 1 in (5.1 cm x 2.5 cm)
- Band after Row 8: 36.25 in x 4 in (92.1 cm x 10.2 cm)
- After scallops: 36.25 in x 5 in (92.1 cm x 12.7 cm)
- After edging: 36.75 in x 5.25 in (93.3 cm x 13.3 cm)
If your swatch is too big, go down 0.25 mm in hook size. If it is too small, go up 0.25 mm. If only the row height is off, keep the same hook and change how tall you pull up your dc loops.
Header Band
Work in rows with cream. Turn at the end of every row.
Foundation: Ch 147.
Row 1 (solid): Dc in 4th ch from hook and in each ch across. Turn. (144 dc + turning ch = 145 sts)
Row 2 (mesh): Ch 4 (counts as dc + ch 1), skip next st, dc in next st, ch 1, skip next st, dc in next st; repeat from * across, working the last dc in the top of the turning ch. Turn. (73 dc + 72 ch-1 sps = 145 sts; 72 mesh squares)
Rows 3–7 (mesh): Ch 4 (counts as dc + ch 1), skip ch-1 sp, dc in next dc, ch 1, skip ch-1 sp, dc in next dc; repeat from * across, ending with dc in 3rd ch of turning ch. Turn. (145 sts; 72 mesh squares)
Row 8 (solid): Ch 3 (counts as dc), dc in next ch-1 sp, dc in next dc; repeat from * across. Turn. (145 dc)
Checkpoint: 36.25 in x 4 in (92.1 cm x 10.2 cm). Row 2 is your rod channel: the rod weaves in and out through its squares.
Scallop Edge
Continue with cream.
Row 9 (scallop base): Ch 1, sc in first st, ch 3, skip 3 sts, sc in next st, ch 7, skip 7 sts, sc in next st, ch 3, skip 3 sts, sc in next st; repeat from * 8 more times. Turn. (28 sc; 9 repeats of ch-3, ch-7, ch-3)
Each repeat uses 16 sts (3 + 1 + 7 + 1 + 3 + 1), and 9 x 16 + 1 = 145.
Row 10 (scallop fans): Ch 1, sc in first sc, 3 sc in ch-3 sp, sc in next sc, 15 dc in ch-7 sp, sc in next sc, 3 sc in ch-3 sp, sc in next sc; repeat from * 8 more times. Turn. (24 sts per repeat; 1 + 9 x 24 = 217 sts)
The 15 dc in each ch-7 sp make a rounded scallop. The flat sc sections between them are the bridges.
Row 11 (scallop trim): Ch 1, sc in first sc, sc in next 4 sts, (sc in next dc, ch 1) 14 times, sc in next dc, sc in next 5 sts; repeat from * 8 more times. Do not turn or fasten off. (217 sc worked one per existing st + 126 ch-1 sps added = 343 sts)
The ch-1 spaces spread out the scallop edge so it lies flat instead of cupping.
Checkpoint: 36.25 in x 5 in (92.1 cm x 12.7 cm). Put the working loop on a stitch marker while you make the motifs.
Large Daisy (make 9)
Rnd 1 (gold): MR, ch 1, 8 sc in ring; join with sl st to first sc. (8 sc)
Rnd 2 (gold): Ch 1, 2 sc in each sc around; join. Fasten off. (16 sc)
Rnd 3 (cream): Join cream in any st, sl st in next st, (hdc, dc, tr, dc, hdc) in next st; repeat from * 7 more times; join. Fasten off, leaving a 12 in (30.5 cm) tail. (8 petals; 48 sts)
Small Daisy (make 26)
Rnd 1 (gold): MR, ch 1, 8 sc in ring; join with sl st to first sc. Fasten off. (8 sc)
Rnd 2 (cream): Join cream in any sc, (ch 2, 2 dc, ch 2, sl st) in same sc, sl st in next sc; repeat from * 7 more times, leaving off the final sl st. Fasten off and weave in. (8 petals; 16 dc)
Small Leaf (make 36)
With green, ch 7. Sc in 2nd ch from hook, hdc in next ch, dc in next ch, hdc in next ch, sc in next ch, (sc, ch 2, sc) in last ch for the tip. Working along the other side of the foundation: sc in next ch, hdc in next ch, dc in next ch, hdc in next ch, sc in next ch, sl st in the skipped first ch. Fasten off, leaving an 8 in (20.3 cm) tail. (12 sts + ch-2 tip)
Large Leaf (make 34)
With green, ch 10. Sc in 2nd ch from hook, hdc in next ch, dc in next 4 chs, hdc in next ch, sc in next ch, (sc, ch 2, sc) in last ch for the tip. Working along the other side: sc in next ch, hdc in next ch, dc in next 4 chs, hdc in next ch, sc in next ch, sl st in the skipped first ch. Fasten off and weave in. (18 sts + ch-2 tip)
On both leaf sizes, the foundation chain runs down the middle and forms the center vein.
Make All Pieces
| Piece | Color(s) | Quantity |
|---|---|---|
| Header band | Cream | 1 |
| Large daisy | Gold + cream | 9 |
| Small leaf | Green | 36 |
| Small daisy | Gold + cream | 26 |
| Large leaf | Green | 34 |
Each long strand (Strand A) uses 2 small daisies and 2 large leaves; you need 9 of them. Each short strand (Strand B) uses 1 small daisy and 2 large leaves; you need 8. That adds up to 18 + 8 = 26 small daisies and 18 + 16 = 34 large leaves.
Layout grid, right to left:
BAND:     LL DAISY LL | LL DAISY LL | ... (9 repeats)
STRANDS:  A B A B A B A B A B A B A B A B A
Joining
Appliqués. Row 7 has 73 dc posts. Counting from the right edge, mark posts 5, 13, 21, 29, 37, 45, 53, 61, and 69. Each marked post sits directly above the center of a scallop. Post 37 is the exact center of the valance.
Center a large daisy on each marked post, with its gold center on Row 5. The petals cover Rows 3–7 and reach the top of Row 8. With the cream tail, whipstitch around the outer edge of Rnd 2, then tack down each petal tip.
Place 2 small leaves on each side of the daisy, with their stems tucked under the petals at 3 and 9 o’clock. Angle one leaf up and out and the other down and out, at about 45 degrees. With the green tail, backstitch along each vein, then tack down the tip.
Keep your sewing loose. After each daisy, lay the band flat and check that the mesh doesn’t pucker.
Strand A (from each scallop center, 9 places). With cream, sl st into the 8th of the 15 sc over a scallop in Row 11. Ch 10, sl st into a petal tip of a small daisy, then pass through to the opposite petal tip. Ch 5, sl st into a large leaf stem, then pass through along the vein to the tip. Ch 5 and add a second small daisy the same way. Ch 5, sl st into the stem of a large leaf. Fasten off. (12 in / 30.5 cm)
Strand B (from each inner bridge, 8 places). Join cream into the last sc of a repeat in Row 11, where two repeats meet. Ch 5, add a leaf and pass through. Ch 5, add a small daisy and pass through. Ch 5, sl st into the stem of a second leaf. Fasten off. (8.5 in / 21.6 cm)
Size checkpoint: the header should still be 36.25 in (92.1 cm) wide, and the strands should hang straight without twisting.
Border (Top and Side Edging)
Border gauge: 2 sc per dc row-end, 1 sc per sc row-end, 1 sc per foundation ch.
Put the working loop from Row 11 back on your hook, ch 1, and work up the side:
- Side 1: 1 sc in each row-end of Rows 11, 10, and 9, then 2 sc in each dc row-end of Rows 8–1. (3 + 16 = 19 sc)
- Top: Working into the other side of the foundation chain (145 sts), 3 sc in the first st, sc in each of the next 143 sts, 3 sc in the last st. (149 sc, including both corner groups)
- Side 2: 2 sc in each dc row-end of Rows 1–8, then 1 sc in each row-end of Rows 9, 10, and 11. (19 sc)
Fasten off. (19 + 149 + 19 = 187 sc)
Why the math works: 145 sts divide as 9 x 16 + 1, so all scallops are the same and the pattern ends on the last st. Row 10 grows to 1 + 9 x 24 = 217, and Row 11 adds exactly 14 ch-1 sps per repeat. The top gets one sc per foundation st (145) plus 2 extra in each corner, for 149. Each dc row is 0.5 in (1.3 cm) tall, so 2 sc per row matches the gauge of 4 sts per inch and the sides stay flat. The edging adds 0.25 in (0.6 cm) on each side, bringing the header to 36.75 in x 5.25 in (93.3 cm x 13.3 cm).
Final Blocking
- Weave in every end on the WS.
- Soak the valance in cool water for 15 minutes.
- Roll it in a towel and press out the water; do not wring.
- Pin the header to 36.75 in x 5.25 in (93.3 cm x 13.3 cm), keeping the top edge straight.
- Pin each scallop into a smooth curve and straighten the mesh squares.
- Lay the strands straight, pin each daisy open, and pin each leaf tip to a point.
- Let it dry completely, at least 24 hours.
Final Quality-Control Checklist
- The header measures 36.75 in x 5.25 in (93.3 cm x 13.3 cm).
- All 9 scallops match in size and curve.
- Each large daisy sits centered above its scallop.
- All 36 small leaves are angled evenly on both sides.
- Long strands are 12 in (30.5 cm); short strands are 8.5 in (21.6 cm).
- Strands alternate A, B, A across, starting and ending with A.
- No pass-through yarn shows on the RS.
- All ends are woven in and trimmed.
Troubleshooting
- Band wider than 36.25 in (92.1 cm): Your ch-1 sps are loose. Go down a hook size for the mesh rows.
- Scallops ruffle: Your dc are too tall. Pull the loops shorter in Row 10, or redo Row 10 with a smaller hook.
- Scallops cup: Work the ch-1 sps in Row 11 more loosely.
- Mesh puckers under a daisy: Snip the whipstitch, sew it again more loosely, and re-block.
- Strands twist: Keep every motif RS facing when you join it, then block the strands pinned straight.
- Leaves curl: Steam-block them before sewing.
Care
Hand wash in cool water with mild detergent, then pin to shape to dry. Don’t wring it, or the strands may stretch out of length.
Final Notes
Here is how the measurements build. A gauge of 16 sts per 4 in (10.2 cm) gives a 145-st band of 36.25 in (92.1 cm). Eight rows give 4 in (10.2 cm) of depth, and the scallops add 1 in (2.5 cm). The edging finishes the header at 36.75 in x 5.25 in (93.3 cm x 13.3 cm). Long strands of 12 in (30.5 cm) bring the full drop to 17.25 in (43.8 cm).
Check your gauge, keep your sewing loose, and your window will have its own little meadow.
Happy crocheting!