

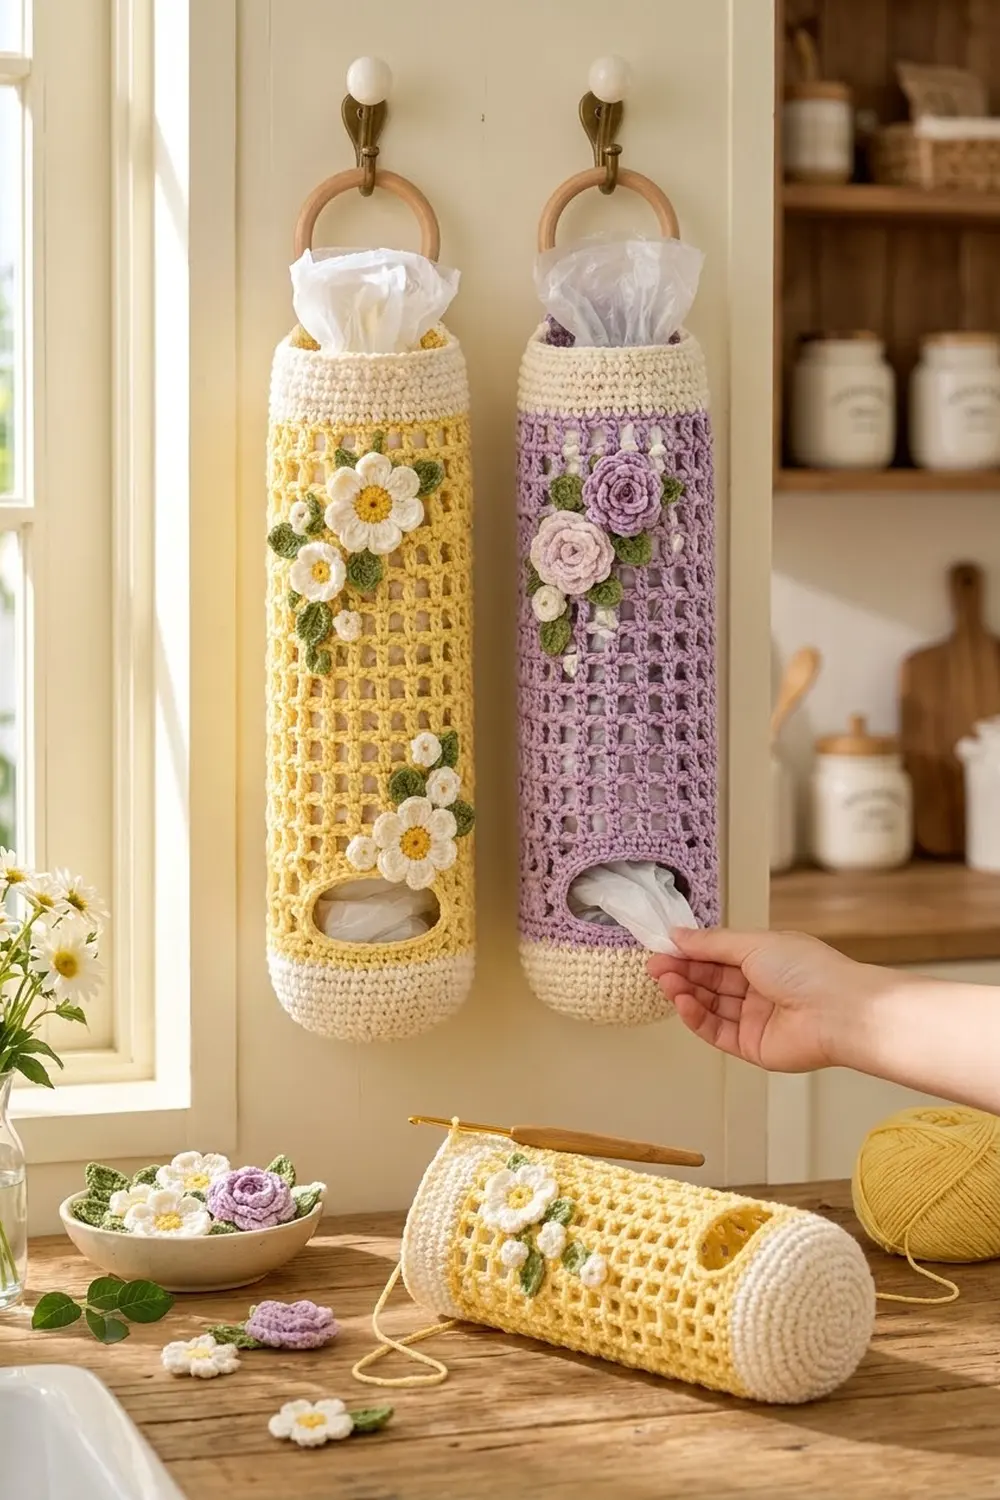
This cheerful bag holder turns a pile of plastic grocery bags into something you’ll actually want hanging in your kitchen. It’s a single tube worked in the round: a solid cream base, an airy square mesh body, a dispensing opening near the bottom, and a solid cream band at the top.
The main colorway is pale butter yellow with a cream base and band, decorated with white daisies, small white flowers and green leaves. A lilac version with rolled roses is included as a variation. The look is soft, cottage-style and practical.
The finished holder measures 6 in (15.2 cm) wide laid flat and 18 in (45.7 cm) long, not counting the hanging strap. The pattern uses US crochet terms.
You’ll work the base from the bottom up as a flat circle, build straight cream walls, then switch to mesh. To make the opening, you work three mesh rows back and forth and bridge the gap with a chain. A cream band, a strap around a wooden ring, and sewn appliqués finish the piece.
Finished Size and Construction
- Finished size: 6 in (15.2 cm) wide flat x 18 in (45.7 cm) long; circumference 12 in (30.5 cm)
- Skill level: Easy-intermediate
- Terminology: US
- Yarn weight: Worsted (#4) cotton
- Hook: 4.5 mm (US 7) for the body; 4.0 mm (US G-6) for appliqués
- Number of pieces: 1 tube, plus sewn-on appliqués
- Layout: Single seamless tube, opening centered on the front
- Piece size: 6 x 18 in (15.2 x 45.7 cm)
- Size before border: 6 x 16 in (15.2 x 40.6 cm) after the last mesh round
- Border depth: Top band 2 in (5.1 cm); opening edging 2 rounds of sc
Materials
Choose a smooth, mercerized or combed worsted cotton. Cotton holds the mesh shape and won’t stretch out under the weight of bags. Avoid fuzzy or very splitty yarns, since the mesh should look crisp.
Daisy colorway:
– Pale yellow (main): 80 g / 135 m
– Cream (base and band): 60 g / 100 m
– White (petals and small flowers): 10 g / 17 m
– Green (leaves): 10 g / 17 m
Lilac Rose colorway: replace yellow with lilac 80 g / 135 m; add pale pink 5 g / 9 m; use cream for small flowers instead of white.
All quantities include a margin of about 20 percent.
Tools:
– 4.5 mm (US 7) and 4.0 mm (US G-6) hooks
– Wooden ring, 3 in (7.6 cm) outer diameter
– Stitch marker
– Tapestry needle
– Scissors, measuring tape, rust-proof pins
Abbreviations (US Terms)
- ch – chain
- sl st – slip stitch
- sc – single crochet
- hdc – half double crochet
- dc – double crochet
- sc2tog – single crochet 2 together
- sk – skip
- sp – space
- MR – magic ring
- st(s) – stitch(es)
- RS / WS – right side / wrong side
Mesh square: one dc plus one ch-1 sp. Each square is 2 sts wide, about 0.5 in (1.3 cm).
Gauge and Checkpoints
- Solid sc: 16 sts x 18 rnds = 4 in (10.2 cm)
- Mesh: 8 squares (16 sts) x 6 rnds = 4 in (10.2 cm)
Your base is your test piece. Work Rnds 1–8, lay the circle flat and measure it before you go on.
Checkpoints:
– After Rnd 8: the circle is 3.75 in (9.5 cm) across.
– After Rnd 16: the holder is 6 in (15.2 cm) wide flat; the cream walls stand about 1.75 in (4.4 cm) tall.
– After Rnd 23: the first 6 mesh rounds measure 4 in (10.2 cm) tall.
– After Rnd 38: the mesh measures 14 in (35.6 cm); total length is 16 in (40.6 cm).
– After Rnd 47: total length is 18 in (45.7 cm).
If the base circle is larger than 3.75 in (9.5 cm), go down a hook size. If it’s smaller, go up a size. If the mesh is too short but the width is correct, pull your dc loops up slightly taller instead of changing the hook.
Part 1: Base
Use the 4.5 mm hook and cream. Join each round with a sl st to the first sc. The ch 1 at the start of each round doesn’t count as a stitch.
Rnd 1: MR, 6 sc in ring. (6 sts)
Rnd 2: 2 sc in each st around. (12 sts)
Rnd 3: [sc 1, 2 sc in next] 6 times. (18 sts)
Rnd 4: [sc 2, 2 sc in next] 6 times. (24 sts)
Rnd 5: [sc 3, 2 sc in next] 6 times. (30 sts)
Rnd 6: [sc 4, 2 sc in next] 6 times. (36 sts)
Rnd 7: [sc 5, 2 sc in next] 6 times. (42 sts)
Rnd 8: [sc 6, 2 sc in next] 6 times. (48 sts)
Checkpoint: 3.75 in (9.5 cm) across.
Rnds 9–16: Sc in each st around. (48 sts each round)
The base now curves up into a cup with straight walls. Fasten off cream.
Rnd 17: Join yellow. Ch 1, sc in each st around. (48 sts)
Number the stitches of Rnd 17 from 1 (the first sc) to 48. Place a marker in st 35.
Part 2: Mesh Body with Opening
The opening sits over sts 36–48 of Rnd 17. Rows 18–20 are worked back and forth over sts 1–35 only.
Row 18 (RS): Ch 3 (counts as dc) in st 1, [ch 1, sk next st, dc in next st] 17 times, ending in st 35. Turn. (18 dc, 17 ch-1 sps)
Row 19 (WS): Ch 3 (counts as dc), [ch 1, dc in next dc] 17 times, working the last dc in the top of the turning ch-3. Turn. (18 dc, 17 ch-1 sps)
Row 20 (RS): Repeat Row 19 but don’t turn. Ch 13 for the bridge, then sl st to the top of the beginning ch-3 of Row 20. (18 dc, 17 ch-1 sps, 13-ch bridge)
The 13 unworked sc of Rnd 17 (sts 36–48) form the bottom of the opening. The bridge forms its top.
Rnd 21: Ch 4 (counts as dc and ch 1), dc in next dc, [ch 1, dc in next dc] 16 times, ch 1, sk next bridge ch, dc in next bridge ch 6 times, ch 1, sk last bridge ch, sl st to 3rd ch of beginning ch-4. (24 dc, 24 ch-1 sps = 24 squares, 48 sts)
Check: 18 dc over the rows plus 6 dc over the bridge equals 24 dc. The 13 bridge chains carry 6 dc and 7 spaces, which matches the 13 sts of the gap.
Rnds 22–38: Ch 4 (counts as dc and ch 1), [dc in next dc, ch 1] 23 times, sl st to 3rd ch of beginning ch-4. (24 dc, 24 ch-1 sps each round)
Checkpoint after Rnd 23: the mesh is 4 in (10.2 cm) tall. After Rnd 38 you have 21 mesh rounds, 14 in (35.6 cm) of mesh.
Rnd 39 (conversion round): Ch 1, sc in each dc and sc in each ch-1 sp around, sl st to first sc. (24 sc in dc + 24 sc in sps = 48 sts)
Fasten off yellow.
Part 3: Appliqués
Use the 4.0 mm hook. Leave a 10 in (25.4 cm) tail on every piece for sewing.
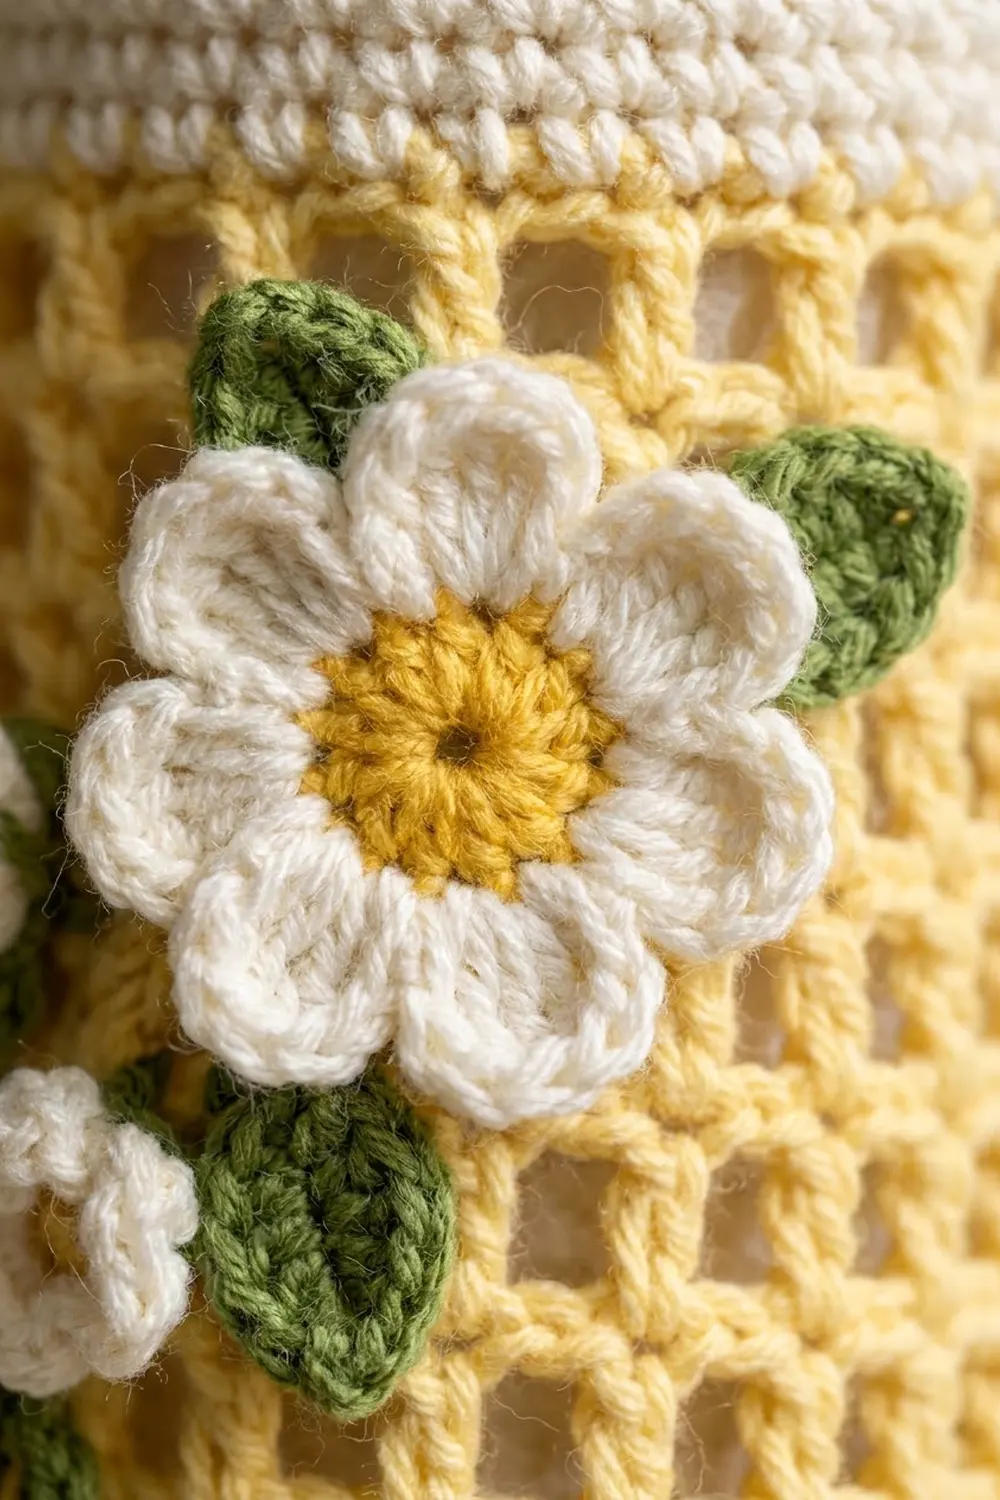
Large Daisy (make 2):
– Rnd 1: With yellow, MR, 8 sc in ring, join. (8 sts) Fasten off.
– Rnd 2: Join white in any sc. (sl st, ch 2, 2 dc, ch 2, sl st) in same st, move to next st 8 times. (8 petals)
The finished daisy is about 2 in (5.1 cm) across.
Small Flower (make 4): With white, MR, [ch 2, dc, ch 2, sl st] 5 times into ring. Pull the ring closed. (5 petals) About 1 in (2.5 cm) across. Optional: add a yellow French knot in the center.
Leaf (make 8): With green, ch 6. Sc in 2nd ch from hook, hdc in next, dc in next, hdc in next, 3 sc in last ch. Working along the other side of the chain: hdc in next, dc in next, hdc in next, sc in last ch, sl st to first sc. (11 sts) About 1.25 in (3.2 cm) long.
Lilac Rose variation:
– Large rose (lilac, make 1): Ch 21. Row 1: sc in 2nd ch from hook and each ch across. (20 sts) Row 2: ch 3 (counts as dc), 2 dc in first st, 3 dc in each remaining st. (60 sts) Roll the strip tightly from one end and stitch through the base.
– Small rose (pale pink, make 1): Ch 15. Row 1: sc in 2nd ch from hook and each ch across. (14 sts) Row 2: work as for the large rose. (42 sts) Roll and stitch.
– Make 3 small flowers in cream and 5 leaves.
Border: Top Band, Opening Edging and Strap
Border gauge: solid sc, 16 sts x 18 rnds = 4 in (10.2 cm), with the 4.5 mm hook.
Top Band
Rnds 40–47: Join cream in any st of Rnd 39. Ch 1, sc in each st around, join. (48 sts each round)
Laid flat, the band has 24 sts on the front and 24 on the back. Fasten off.
Why the math works: Rnd 39 converts 24 dc and 24 sps into exactly 48 sc. That gives the band the same 48 sts as the base walls. At 4 sts per inch that’s 12 in (30.5 cm) around, or 6 in (15.2 cm) flat, so the tube stays straight with no flare or pull-in. Rnd 39 plus 8 cream rounds makes 9 rounds, or 2 in (5.1 cm), which takes the 16 in (40.6 cm) body to 18 in (45.7 cm).
Opening Edging
The opening is 13 sts wide, 3.25 in (8.3 cm), and 3 mesh rows tall, 2 in (5.1 cm).
Edging Rnd 1: Join yellow at a bottom corner and ch 1. Then work these four sides:
– 13 sc across the bottom (1 in each of sts 36–48 of Rnd 17)
– 6 sc up the side (2 sc in each of 3 row-ends)
– 13 sc across the top (1 in each free loop of the bridge chain)
– 6 sc down the other side (2 sc in each of 3 row-ends)
Join. (13 + 6 + 13 + 6 = 38 sts)
Edging Rnd 2: Ch 1, sc in each st around, join. (38 sts) Fasten off.
The finished opening measures about 2.75 x 1.5 in (7.0 x 3.8 cm).
Hanging Strap
Flatten the tube with the opening centered on the front. On the back, count 16 sts of Rnd 47, centered on the back. Join yellow in the first of these.
Row 1: Ch 1, sc in each of the 16 sts. Turn. (16 sts)
Row 2: Ch 1, sc2tog, sc 12, sc2tog. Turn. (14 sts)
Row 3: Ch 1, sc across. Turn. (14 sts)
Row 4: Ch 1, sc2tog, sc 10, sc2tog. Turn. (12 sts)
Row 5: Ch 1, sc across. Turn. (12 sts)
Row 6: Ch 1, sc2tog, sc 8, sc2tog. Turn. (10 sts)
Rows 7–16: Ch 1, sc across. Turn. (10 sts each row)
The strap is 4 in (10.2 cm) wide at the band and 2.5 in (6.4 cm) wide at the top, and about 3.5 in (8.9 cm) long. Slip the wooden ring over the strap. Fold Rows 12–16 over the ring to the WS and whipstitch Row 16 to Row 11.
Final Blocking
- Weave in all ends on the body before blocking.
- Soak the tube in cool water for 10 minutes. Press the water out in a towel; don’t wring it.
- Slide a rolled towel or a cardboard tube about 3.5 in (8.9 cm) across inside to hold the round shape.
- Lay it flat and ease it to 6 in (15.2 cm) wide and 18 in (45.7 cm) long.
- Square up the mesh with your fingers so every dc stands straight.
- Pin the opening edging into a smooth oval.
- Block the appliqués flat separately, shaping each petal and leaf tip.
- Let everything dry completely.
- Sew on the appliqués:
- Upper cluster: one daisy, two small flowers and four leaves, starting 1 in (2.5 cm) below the band, left of center.
- Lower cluster: one daisy, two small flowers and four leaves, right of center, about 0.5 in (1.3 cm) above the opening.
- Stitch through the mesh posts only, never across an open square, so bags slide freely.
Final Quality-Control Checklist
- The base is flat and round, 3.75 in (9.5 cm) across.
- Every mesh round has 24 dc and 24 sps.
- The mesh posts line up vertically from bottom to top.
- The opening edging has 38 sts and lies flat.
- The top band has 48 sts and the same width as the base.
- The strap is centered on the back, opposite the opening.
- The ring is secure and the fold is sewn on the WS.
- The appliqués are firmly sewn, with no loose tails inside.
- The holder measures 6 x 18 in (15.2 x 45.7 cm).
Troubleshooting
Base ruffles: Your sc is loose. Go down a hook size or redo Rnd 8.
Base cups before Rnd 9: Your sc is tight. Go up a hook size.
Mesh slants into a spiral: You may be placing the dc into the ch-1 sp. Always work into the top of the dc below.
Opening looks too narrow: Recount Rnd 21. The bridge must carry 6 dc, not 7.
Top band flares: Recount Rnd 39. It should be exactly 48 sts.
Holder stretches with use: Add one extra round of sc to the band, or switch to a firmer cotton.
Appliqués droop: Add a few tacking stitches at each petal tip.
Care
Hand wash in cool water and lay flat to dry, reshaping the mesh. Don’t tumble dry, because heat can shrink cotton and distort the opening.
Final Notes
The measurement chain is simple. A 48-st base at 4 sts per inch gives 12 in (30.5 cm) around and 6 in (15.2 cm) flat. Every mesh round keeps 48 sts as 24 squares. Twenty-one mesh rounds add 14 in (35.6 cm), for a 16 in (40.6 cm) body. The 2 in (5.1 cm) top band brings the holder to 18 in (45.7 cm). Check the base and then the first 4 in (10.2 cm) of mesh, and the rest will follow.
Happy crocheting!