
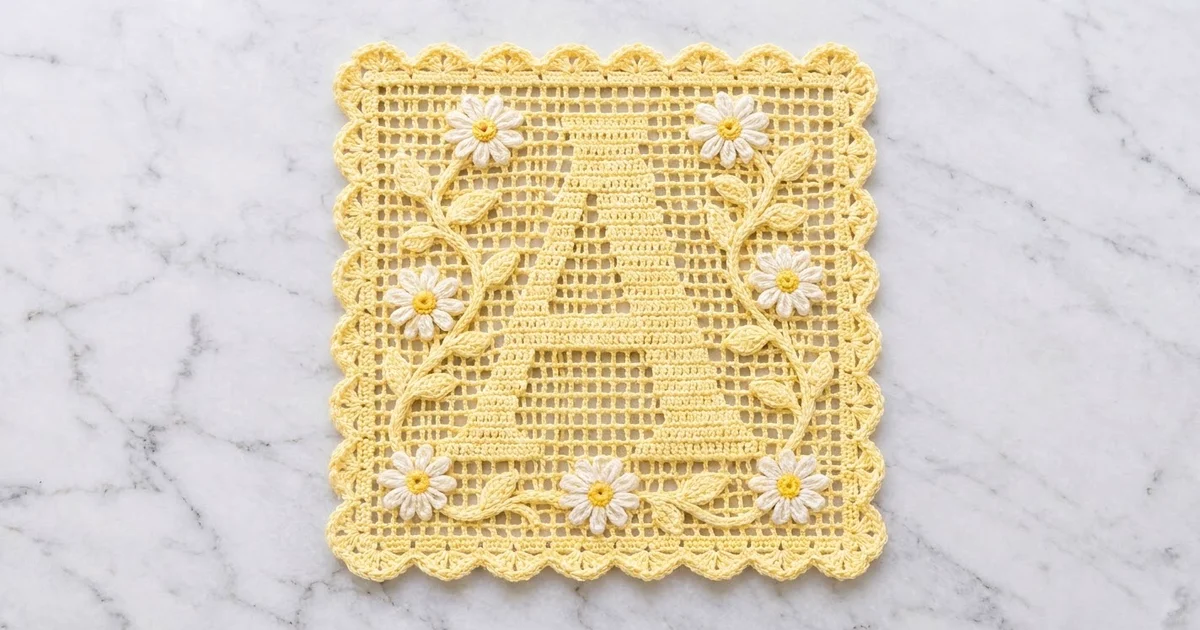
The Daisy Monogram Filet Square is a single crocheted square with a solid capital “A” set into open filet mesh. Leafy vines climb both sides and run across the bottom. Seven white daisies with golden centers sit along the vines, and a scalloped border finishes all four edges.
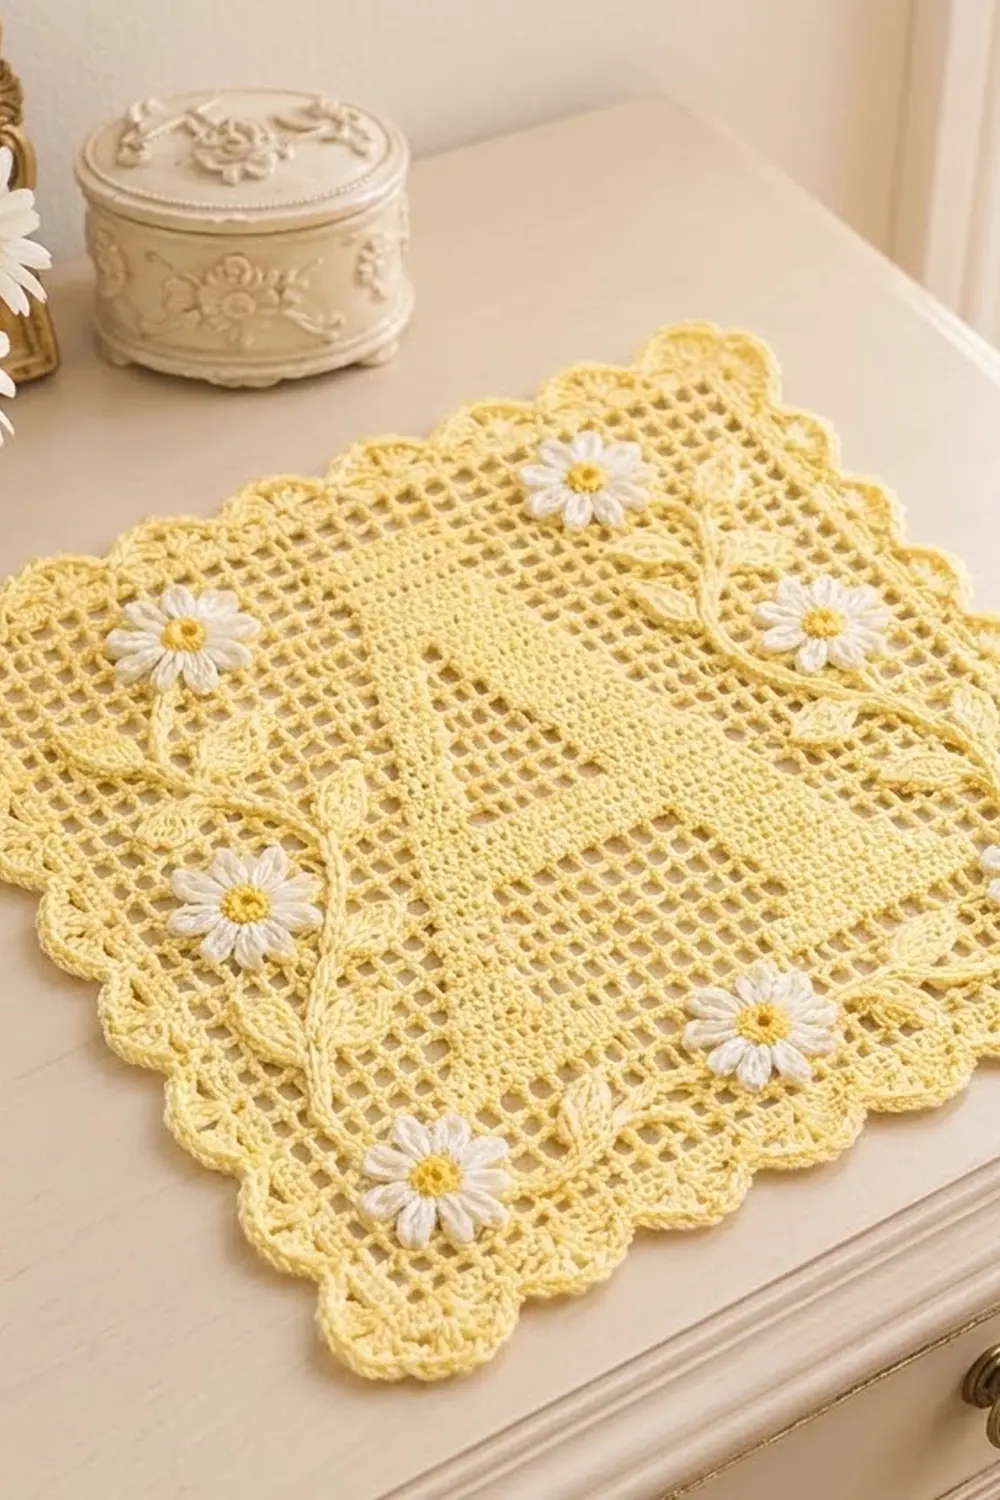
The sample is worked in soft butter-yellow cotton. White petals and golden-yellow centers add a little contrast. The look is vintage and cottage-style, so it works as a dresser mat, a doily under a vase, or a framed nursery initial.
This pattern uses US crochet terms. The finished square measures 11.5 in (29.2 cm) on each side, including the border. The filet center alone measures 10 in (25.4 cm) square.
You work the filet center in rows on a 30 x 30 mesh grid, written out row by row. Then you add a three-round border. The daisies, leaves and vine cords are made separately and sewn onto the mesh. Any 30 x 30 filet letter fits the same border math, so you can change the initial.
Finished Size and Construction
- Finished size: 11.5 x 11.5 in (29.2 x 29.2 cm)
- Skill level: Intermediate
- Terminology: US crochet terms
- Yarn weight: Super Fine (#1) fingering-weight mercerized cotton
- Hook: 2.5 mm
- Number of pieces: 1 square, plus sewn-on appliqués
- Layout: single piece, no joining
- Grid: 30 meshes wide x 30 rows tall
- Size before border: 10 x 10 in (25.4 x 25.4 cm)
- Border depth: 0.75 in (1.9 cm) per side
Materials
Use a smooth mercerized cotton so the mesh stays crisp and blocks well. Avoid fuzzy or very stretchy yarns, because they blur the solid blocks of the letter.
- Color A, butter yellow (main): 50 g, about 170 m (186 yd), for the filet square, border, vines and leaves
- Color B, white: 5 g, about 17 m (19 yd), for the daisy petals
- Color C, golden yellow: 3 g, about 10 m (11 yd), for the daisy centers
Tools:
- 2.5 mm crochet hook
- Tapestry needle
- Stitch markers
- Rust-proof pins and a blocking mat
- Spray bottle
- Measuring tape
All quantities include about a 15% margin for your gauge swatch and for differences in tension.
Abbreviations (US Terms)
- ch – chain
- sl st – slip stitch
- sc – single crochet
- hdc – half double crochet
- dc – double crochet
- sk – skip
- sp – space
- st(s) – stitch(es)
- O – open mesh
- S – solid block
Special stitches:
- Open mesh (O): Ch 2, sk 2 sts (or the ch-2 sp), dc in next dc.
- Solid block (S): Over an open mesh, work 2 dc in the ch-2 sp, then dc in the next dc. Over a solid block, dc in each of the next 3 dc.
- Turning chain: Every row starts with an open mesh. Ch 5 (counts as dc + ch 2), sk the ch-2 sp (or 2 dc), dc in next dc.
Every row has 31 dc posts and 91 sts in total. Each mesh, open or solid, is 3 sts wide.
Gauge and Checkpoints
Gauge: 12 meshes and 12 rows = 4 in (10.2 cm) in filet mesh, before blocking.
Filet is very sensitive to tension, so test your gauge first. Ch 41 and work Row 1 below, which gives 12 meshes. Work 11 more rows of open mesh, steam lightly and measure.
Checkpoints:
- After Row 1: the foundation measures 10 in (25.4 cm) wide.
- After Row 12: the piece measures 4 in (10.2 cm) tall.
- After Row 30: the piece measures 10 x 10 in (25.4 x 25.4 cm).
- After Border Round 2: the piece measures 10.5 in (26.7 cm) square.
- After Border Round 3: the piece measures 11.5 in (29.2 cm) square.
Too big? Change to a 2.25 mm hook. Too small? Change to a 2.75 mm hook. If only the height is off, adjust how tall you pull up each dc before you change hooks. Rows that come out short make the letter look squashed.
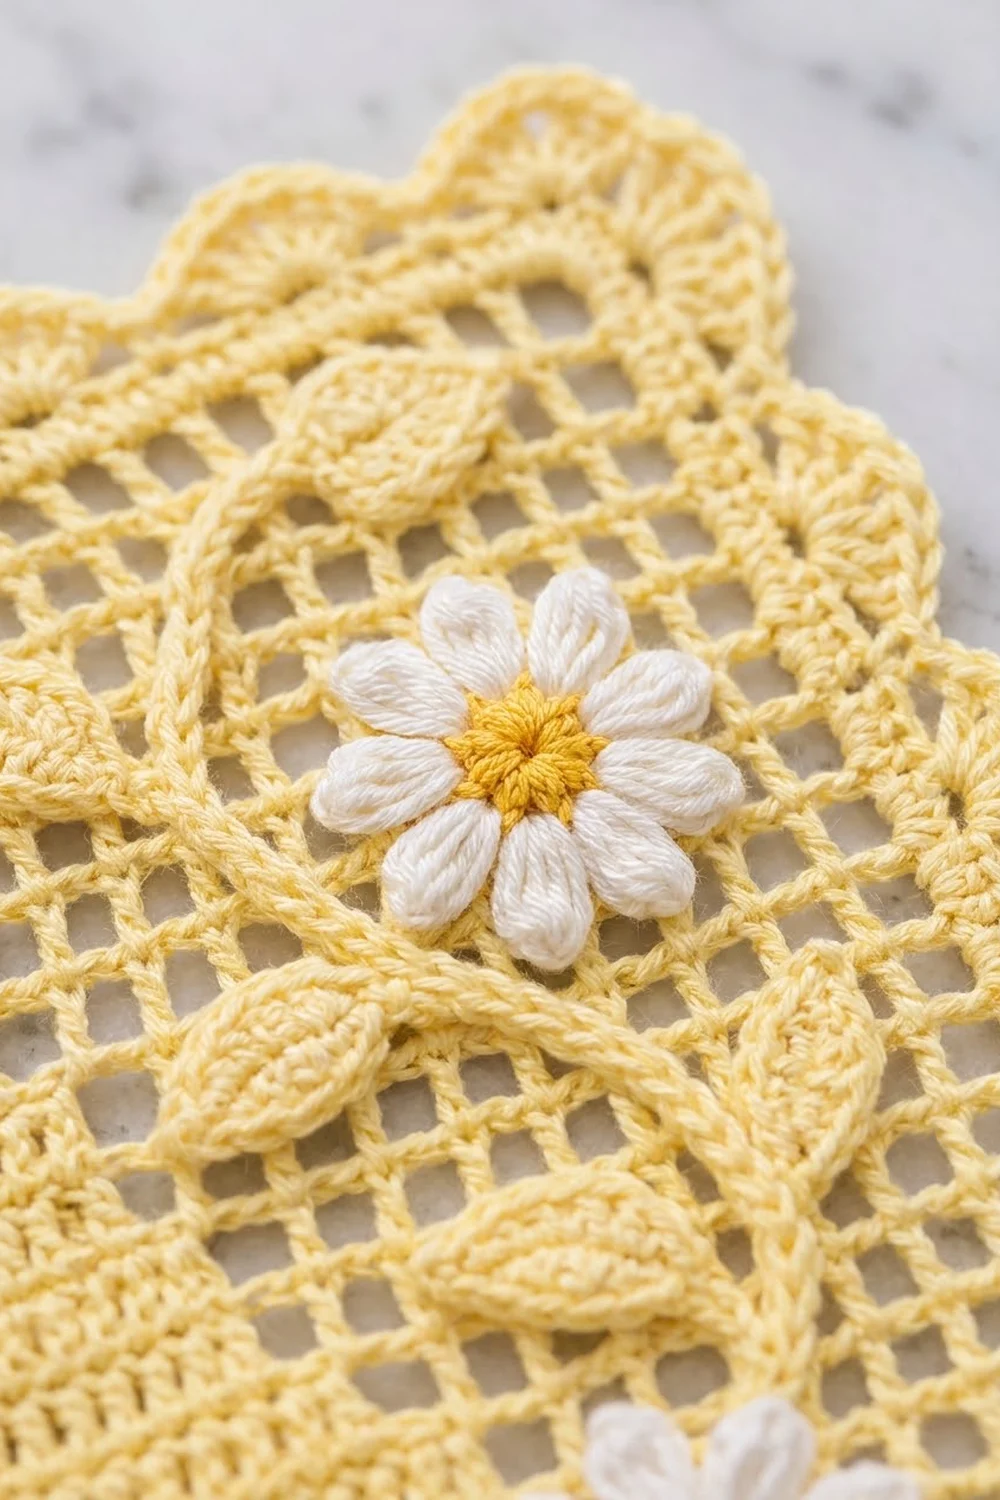
Filet Center
Use Color A throughout.
Foundation: Ch 95.
Row 1: Dc in 8th ch from hook, *ch 2, sk 2 ch, dc in next ch; repeat from * to end. Turn. (30 O)
Row 2 and later rows: Start each row with ch 5.
- On Row 2, work the last dc into the 5th of the 7 chains you skipped at the start of Row 1.
- On every later row, work the last dc into the 3rd ch of the turning ch-5.
- Turn at the end of every row.
The grid is symmetrical, so every row reads the same from either end.
Rows 2–5: 30 O. (4 rows)
Row 6 (feet): 5 O, 5 S, 10 O, 5 S, 5 O.
Rows 7–8: 6 O, 3 S, 12 O, 3 S, 6 O.
Rows 9–11: 7 O, 3 S, 10 O, 3 S, 7 O.
Row 12: 8 O, 3 S, 8 O, 3 S, 8 O.
Rows 13–14 (crossbar): 8 O, 14 S, 8 O.
Rows 15–17: 9 O, 3 S, 6 O, 3 S, 9 O.
Rows 18–20: 10 O, 3 S, 4 O, 3 S, 10 O.
Rows 21–23: 11 O, 3 S, 2 O, 3 S, 11 O.
Rows 24–26 (apex): 12 O, 6 S, 12 O.
Rows 27–30: 30 O.
Every row adds up to 30 meshes (91 sts). Each leg is 3 blocks wide and moves 1 mesh inward every 3 rows, which gives the letter its slope.
Keep the solid blocks snug. When you work 2 dc into a ch-2 sp, insert the hook under the chain, not into it, so the blocks stay level with the mesh.
Do not fasten off. Go straight on to the border.
Border
Border gauge: 3 sc = 1 mesh width, so 91 sc = 10 in (25.4 cm). Each sc round adds about 0.125 in (0.3 cm) per side.
Round 1: Ch 1.
- Top edge: Work (sc, ch 2, sc) in the corner dc. Work 2 sc in each ch-2 sp and 1 sc in each dc to the last dc. Work (sc, ch 2, sc) in the last dc.
- Side edge: Work 3 sc around each row-end post, but only 2 sc around the last post (29 x 3 + 2 = 89 sc).
- Bottom edge: Working into the foundation chain, work 2 sc in each ch-2 sp and 1 sc at the base of each dc. Work (sc, ch 2, sc) at each corner.
- Second side edge: Work it the same as the first side.
Join with a sl st to the first sc.
Each side has 89 sc between the corner groups plus 2 corner sc, for 91 sc. That matches the 91 sts in a filet row exactly. Total: 364 sc and 4 corner ch-2 sps.
Round 2: Sl st into the corner sp. Ch 1 and work (sc, ch 2, sc) in the same sp. Sc in each sc around, working (sc, ch 2, sc) in each corner sp. Join.
Per side: 91 sc (1 in each existing st) + 2 sc (added at the corners) = 93 sc. Total: 372 sc. The square now measures 10.5 in (26.7 cm).
Round 3 (scallops): Sl st into the corner sp and work 9 dc in that sp. On each side, think of the 93 sc as st 1 to st 93.
- Sk st 1 and sc in st 2.
- *Sk 2 sts, 7 dc in next st, sk 2 sts, sc in next st; repeat from * 14 more times. You end with a sc in st 92.
- Sk st 93 and work 9 dc in the next corner sp.
Repeat around, join with a sl st to the first dc, and fasten off.
Why the math works: 93 = 1 skipped + 1 sc + (15 x 6) + 1 skipped. Each side gets exactly 15 scallops, and every corner gets a matching 9-dc fan. Per side: 105 dc + 16 sc = 121 sts. Total: (4 x 121) + (4 x 9) = 520 sts.
Appliqués
Daisies (make 7)
Center: With Color C, make a magic ring.
Rnd 1: Ch 1, 6 sc in ring. Join. (6 sc)
Rnd 2: Ch 1, 2 sc in each sc. Join. (12 sc) Fasten off.
Petals: With Color B, join with a sl st in any sc.
*Ch 5, sl st in 2nd ch from hook, sc in next ch, hdc in each of the next 2 ch, sl st in next sc of Rnd 2; repeat from * 11 more times. The last sl st lands in the joining sc. (12 petals)
Fasten off, leaving a 6 in (15.2 cm) tail. Each daisy measures about 1.5 in (3.8 cm) across.
Leaves (make 20)
With Color A, ch 7.
- Sl st in 2nd ch from hook. Work 1 sc, 1 hdc, 1 dc and 1 hdc in the next 4 ch.
- Work 3 sc in the last ch.
- Rotate and work along the other side of the chain: 1 hdc, 1 dc, 1 hdc, 1 sc and 1 sl st in the next 5 ch.
- Sl st in the tip ch. (14 sts)
Fasten off, leaving a 6 in (15.2 cm) tail. Each leaf is about 0.9 in (2.3 cm) long.
Vine Cords (make 3)
With Color A, chain until the chain measures 9 in (22.9 cm) when lightly stretched. Sl st in the back bump of the 2nd ch from hook and of each ch across.
Make 2 cords this long for the sides. Make 1 cord 8 in (20.3 cm) long for the bottom.
Placement
Count meshes from the bottom-left corner of the filet center. Rows run from bottom to top and columns from left to right, so the bottom-left mesh is Row 1, column 1.
- Bottom daisies: column 4, columns 15–16 and column 27, all on Row 3
- Middle side daisies: column 3 and column 28, on Row 16
- Top daisies: column 4 and column 27, on Row 26
- Bottom vine: a gentle wave across Rows 2–4, between the two outer bottom daisies
- Side vines: from each bottom corner daisy, curving up through columns 2–6, passing behind the middle daisy and ending under the top daisy
- Leaves: 7 along each side vine and 6 along the bottom vine, on alternating sides with the tips tilted upward
Pin everything in place before you sew.
- Sew the vines down with small stitches through the dc posts.
- Tack each leaf at its base and at its tip.
- Sew each daisy around its center ring only, so the petals stay loose and raised.
Final Blocking
- Weave in all ends along solid blocks or border stitches, where they won’t show through the mesh.
- Soak the piece in cool water for 10 minutes. Roll it in a towel and press out the water. Do not wring it.
- Lay it face up on a blocking mat. Pin the filet center to 10 x 10 in (25.4 x 25.4 cm) first, keeping the mesh rows straight.
- Pin out each scallop so every outer edge measures 11.5 in (29.2 cm).
- Fluff the daisy petals with your fingers. Don’t pin through the appliqués.
- Let it dry completely before you remove the pins.
Final Quality-Control Checklist
- Every row has 30 meshes and 31 dc posts.
- The letter is symmetrical: the legs mirror each other and the crossbar sits on Rows 13–14.
- Each border side has 91 sc in Round 1, 93 sc in Round 2 and 15 scallops in Round 3.
- All 4 corners have a 9-dc fan.
- Every side measures 11.5 in (29.2 cm).
- All 7 daisies, 20 leaves and 3 vines are sewn on securely, with no stitches showing on the back.
Troubleshooting
- The mesh slants: Make sure you skip exactly 2 sts for each open mesh and work the last dc of every row into the turning chain.
- The letter looks short and wide: Your rows are shorter than your meshes are wide. Pull up your dc a little taller, or block the piece taller.
- The border ruffles: Your scallops are too loose. Try 6 dc per side scallop. Keep the Round 2 stitch counts as written.
- The border cups: Check that you worked (sc, ch 2, sc) at every corner in Rounds 1 and 2.
- The appliqués pucker the mesh: Your sewing stitches are too tight. Sew them again more loosely and re-block.
Care
Hand wash in cool water with mild soap and dry flat. If the scallops lose their shape, pin them out again while the piece is damp.
Final Notes
The measurements build in a simple chain. At 12 meshes = 4 in (10.2 cm), 30 meshes = 10 in (25.4 cm). The 91 sts in each filet row become 91 sc per side in Round 1 and 93 sc in Round 2. That count divides evenly into 15 scallops plus a corner fan, which brings the square to 11.5 in (29.2 cm). Check your size at each stage and the daisies and vines will land where they belong.
Happy crocheting!