
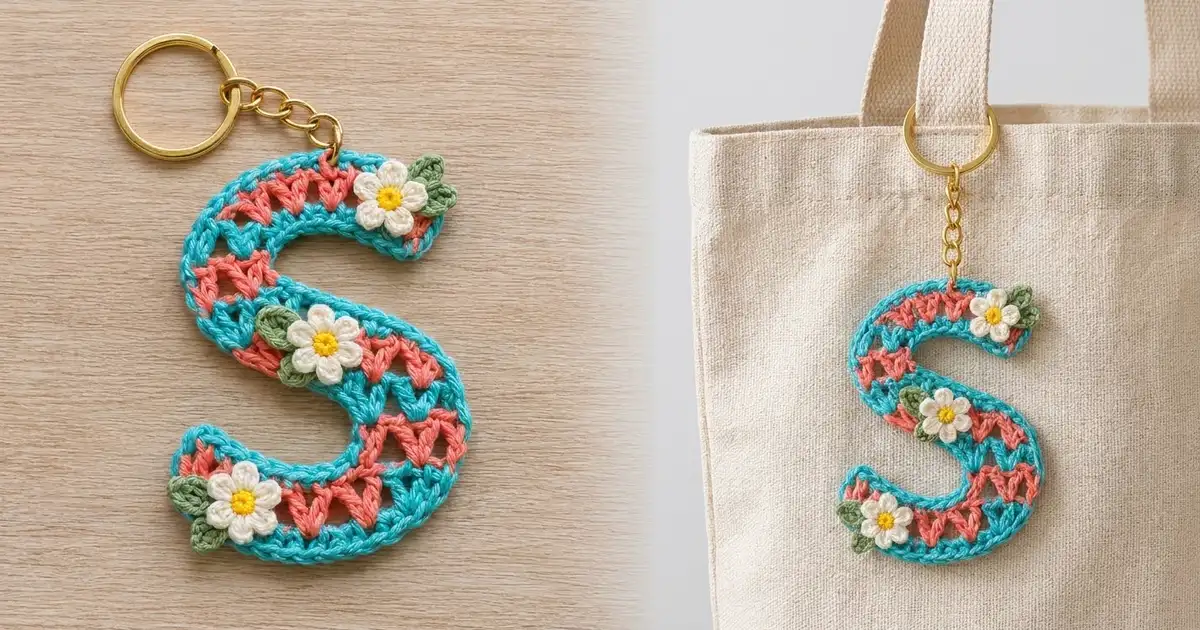
This cheerful letter S keychain is worked as one curved strip of V-stitches. Coral and turquoise stripes follow the shape of the letter, and a crisp turquoise edging frames the open V pattern. Three small cream daisies with yellow centers and green leaves finish it off.
The style is bright, light and a little retro. It makes a good bag charm, a personalized gift tag or a backpack keychain. Because it uses fingering-weight cotton, the stitches stay small and firm, so the letter keeps its shape on the go.
This pattern uses US crochet terms. The finished letter measures about 5 in (12.7 cm) tall × 3.25 in (8.3 cm) wide, and the strip is 1 1/4 in (3.2 cm) wide.
You will chain a foundation, work one row of single crochet, and then work three rows of V-stitches. Increases and decreases inside the V rows make the strip curve into an S by itself. After that you add a two-round border, sew on the daisies, block the letter and attach the hardware.
Finished Size and Construction
- Finished size: about 5 in (12.7 cm) tall × 3.25 in (8.3 cm) wide
- Skill level: Easy-intermediate
- Terminology: US crochet terms
- Yarn weight: Fingering / super fine (#1) cotton
- Hook: 2.25 mm (B-1)
- Number of pieces: 1 letter body + 3 daisies + 6 leaves (appliqués)
- Layout: One continuous S-shaped strip; no joining
- Strip width before border: 7/8 in (2.2 cm)
- Letter size before border: about 4 5/8 in (11.7 cm) × 2 7/8 in (7.3 cm)
- Border depth: about 3/16 in (0.5 cm) per side
Materials
Use a smooth, mercerized cotton or cotton blend in fingering weight. Mercerized cotton shows the V-stitches clearly and blocks to a crisp shape. Avoid fuzzy or very stretchy yarns, because the letter needs firm edges.
- Turquoise (MC): 6 g, about 20 m
- Coral (CC1): 5 g, about 17 m
- Cream-white (CC2): 2 g, about 7 m
- Yellow (CC3): 1 g, about 3 m
- Leaf green (CC4): 1 g, about 4 m
Tools
– 2.25 mm (B-1) crochet hook
– Tapestry needle
– Scissors
– Rustproof pins and a blocking mat
– Washable marker
– 1 in (2.5 cm) split key ring with about 1.5 in (3.8 cm) of chain
– 1 small jump ring and flat-nose pliers
– Optional: fabric stiffener spray
All quantities include a margin of about 20% for swatching and tails.
Abbreviations (US Terms)
- ch – chain
- sl st – slip stitch
- sc – single crochet
- hdc – half double crochet
- dc – double crochet
- sk – skip
- sp – space
- st(s) – stitch(es)
- RS – right side
Special stitch:
– V-st (V-stitch): (dc, ch 1, dc) in the same stitch or space. The ch-1 in the middle is the V-sp.
– First V-st of a row: ch 4 (counts as dc + ch 1), dc in the same stitch or space.
– V-inc: work 2 V-sts in the same V-sp.
Gauge and Checkpoints
Gauge: 24 sc = 3 in (7.6 cm), and 4 rows of V-sts = 1 in (2.5 cm), using a 2.25 mm hook.
At this gauge, one V-st with its skipped stitches covers 3 sc, which is 3/8 in (1.0 cm) along a straight edge.
Test the gauge on the letter itself: the first two rows act as your swatch.
Checkpoints:
– After Row 1: the straight strip is 9 1/8 in (23.2 cm) long and 1/8 in (0.3 cm) tall.
– After Row 2: the strip is 3/8 in (1.0 cm) wide. One end should already start to cup.
– After Row 3: the strip is 5/8 in (1.6 cm) wide, and you can see two opposite curves.
– After Row 4: the strip is 7/8 in (2.2 cm) wide, and the S shape is clear before blocking.
– After the border: the strip is 1 1/4 in (3.2 cm) wide, and the letter is about 5 in (12.7 cm) × 3.25 in (8.3 cm).
If Row 1 is longer than 9 1/2 in (24.1 cm), go down to a 2.0 mm hook. If it is shorter than 8 3/4 in (22.2 cm), go up to a 2.5 mm hook. Being off by a few millimeters is fine, because blocking evens it out.
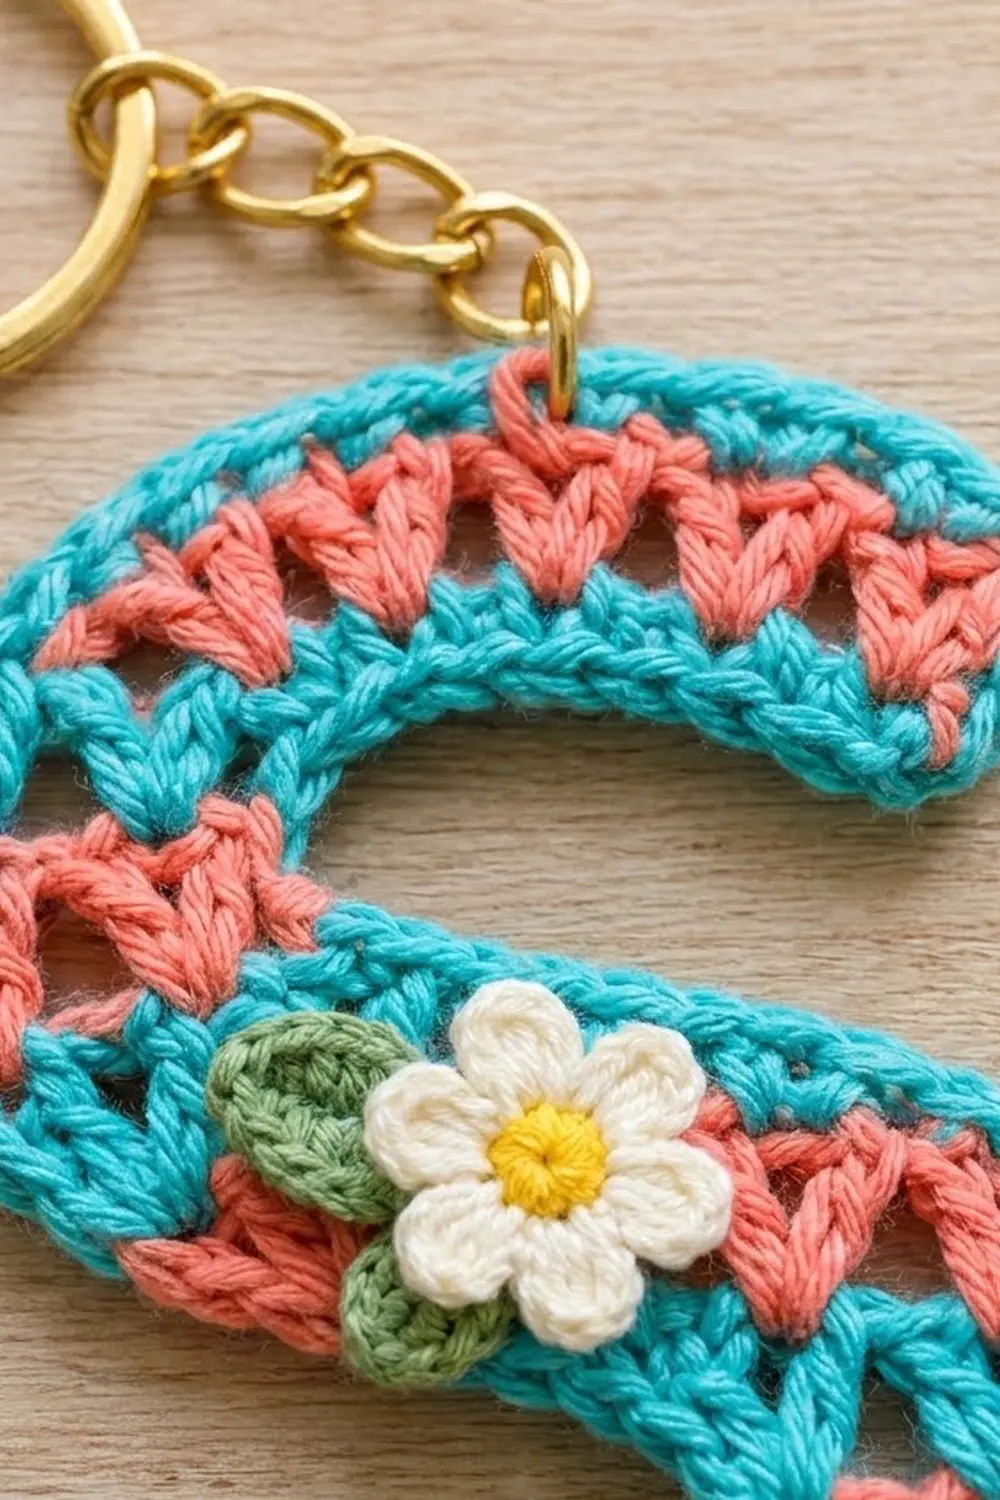
Letter Body
The strip has three sections along its length:
- Top section: the upper curve, 10 V-sts in Row 2
- Spine: the short middle, 2 V-sts in every row
- Bottom section: the lower curve, 16 V-sts in Row 2
In the top section, Row 1 is the inner edge, so each row gets longer. In the bottom section, Row 1 is the outer edge, so each row gets shorter. Every V row has 28 V-sts in total.
Change color on the last yarn-over of each row and cut the old color, leaving a 4 in (10.2 cm) tail.
Foundation (MC): Ch 74.
Row 1 (MC): Sc in the 2nd ch from the hook and in each ch across. (73 sc)
The end where you finish Row 1 is the top end. Change to CC1 in the last sc, then turn.
Row 2 (CC1, starts at the top end):
1. Top section: First V-st in the first sc. Then (sk 1 sc, V-st in the next sc) 9 times. This makes 10 V-sts and uses 19 sc.
2. Spine: (sk 2 sc, V-st in the next sc) 2 times. This makes 2 V-sts and uses 6 sc.
3. Bottom section: (sk 2 sc, V-st in the next sc) 16 times. This makes 16 V-sts and uses 48 sc.
(28 V-sts: 10 + 2 + 16)
Check the math: 1 + 18 + 6 + 48 = 73 sc. The last V-st sits in the last sc.
The top section uses tighter spacing (skip 1 instead of skip 2) because it lies on the inner curve. Change to MC, then turn.
Row 3 (MC, starts at the bottom end):
1. Bottom section (16 V-sps become 13 V-sts): First V-st in the first V-sp. V-st in each of the next 3 V-sps, then sk the next V-sp. Then (V-st in each of the next 4 V-sps, sk the next V-sp) 2 times. Finish with a V-st in the last V-sp of the section. Check: 4 + 1 + 4 + 1 + 4 + 1 + 1 = 16 V-sps, which gives 13 V-sts.
2. Spine: V-st in each of the 2 V-sps. This makes 2 V-sts.
3. Top section (10 V-sps become 13 V-sts): (V-st in each of the next 2 V-sps, V-inc in the next V-sp) 3 times. Finish with a V-st in the last V-sp. Check: 9 V-sps give 12 V-sts, plus 1 more, for 13 V-sts.
(28 V-sts: 13 + 2 + 13)
Change to CC1, then turn.
Row 4 (CC1, starts at the top end):
1. Top section (13 V-sps become 16 V-sts): (V-st in each of the next 3 V-sps, V-inc in the next V-sp) 3 times. The first V-st here is the ch-4 first V-st. Finish with a V-st in the last V-sp. Check: 12 V-sps give 15 V-sts, plus 1 more, for 16 V-sts.
2. Spine: V-st in each of the 2 V-sps. This makes 2 V-sts.
3. Bottom section (13 V-sps become 10 V-sts): (V-st in each of the next 3 V-sps, sk the next V-sp) 3 times. Finish with a V-st in the last V-sp. Check: 12 V-sps give 9 V-sts, plus 1 more, for 10 V-sts.
(28 V-sts: 16 + 2 + 10)
Fasten off and weave in all tails along the row ends.
The strip now curves one way at the top and the other way at the bottom. Lay it flat in an S. Row 4 should be on the outside of the upper curve and on the inside of the lower curve.
Daisy Appliqués (make 3)
Center (CC3):
– Rnd 1: Make a magic ring and work 5 sc into it. Sl st to the first sc to join. (5 sc)
– Fasten off CC3.
Petals (CC2):
– Join CC2 in any sc.
– Rnd 2: In each sc work (sl st, ch 2, 2 dc, ch 2, sl st). (5 petals)
– Fasten off, leaving an 8 in (20.3 cm) tail for sewing.
Each daisy measures about 3/4 in (1.9 cm) across. Pull the magic ring tight so the yellow center is closed and slightly domed.
Leaves (make 6)
CC4:
– Ch 5.
– Sl st in the 2nd ch from the hook, sc in the next ch, hdc in the next ch, sl st in the last ch. (4 sts)
– Fasten off, leaving a 6 in (15.2 cm) tail.
Each leaf is about 1/2 in (1.3 cm) long.
Border
Border gauge: 8 sc = 1 in (2.5 cm) along straight edges.
The letter has four sides:
– Side A: the Row 4 edge
– Side B: the foundation edge
– Two ends: the short, squared ends
Corners are ch-2 spaces and are not counted as sc.
Rnd 1 (MC, RS facing): Join MC in the first V-sp of Row 4 at the top end. Ch 1.
- Side A, top section: 3 sc in each of the 16 V-sps. (48 sc)
- Side A, spine: 3 sc in each of the 2 V-sps. (6 sc)
- Side A, bottom section: 2 sc in each of the 10 V-sps. (20 sc)
- Corner: ch 2.
- Bottom end: 2 sc around each of the 3 dc row-end posts, then 1 sc in the Row 1 sc end. (7 sc)
- Corner: ch 2.
- Side B: 1 sc in each foundation ch at the base of each Row 1 sc. (73 sc)
- Corner: ch 2.
- Top end: 1 sc in the Row 1 sc end, then 2 sc around each of the 3 dc row-end posts. (7 sc)
- Corner: ch 2. Sl st to the first sc to join.
Totals: Side A has 74 sc (48 + 6 + 20). Side B has 73 sc. Each end has 7 sc. The round has 161 sc (74 + 73 + 7 + 7) plus 4 ch-2 corners.
Rnd 2 (MC):
– Sl st in each sc around.
– Work 2 sl st in each corner ch-2 sp.
– (169 sl st: 161 + 8)
– Fasten off.
Why the math works:
– The outer edges get 3 sc per V-st, which matches the 3-stitch width of a V at gauge. Along the outer top curve, 48 sc measure about 6 in (15.2 cm).
– The inner edge of the lower curve is shorter, so it gets only 2 sc per V-st. Twenty sc measure 2.5 in (6.4 cm), which keeps that curve from ruffling.
– Side B uses exactly the 73 stitches of Row 1, because Row 1 was already spaced to fit both curves.
– Each end has 7 sc for its 7/8 in (2.2 cm) height, at a rate of 8 sc per inch.
Attaching the Daisies
Place the daisies on the RS before blocking:
– Daisy 1: centered on the upper-right end, with 2 leaves tucked behind its right side
– Daisy 2: on the left curve where the top section meets the spine, with 2 leaves tucked behind its lower-left side
– Daisy 3: centered on the lower-left end, with 2 leaves tucked behind its left side
Sew each leaf down first with small running stitches through its base. Then sew each daisy over the leaves, stitching around the yellow center and tacking down each petal tip. Work only through the front loops of the letter, so the stitches don’t show on the back.
Final Blocking
- Trace an S that is 5 in (12.7 cm) tall and 3.25 in (8.3 cm) wide onto the blocking mat with a washable marker.
- Soak the letter in cool water for 10 minutes. Gently press out the water in a towel.
- Lay it face up on the outline and pin both ends first.
- Pin the outer curves to the outline about every 1/2 in (1.3 cm).
- Ease the inner curves into place without stretching them. Check that the strip is 1 1/4 in (3.2 cm) wide all along.
- Open each V-sp with a pin tip so the V shapes look even.
- Optional: lightly mist the letter with fabric stiffener.
- Let it dry completely, for 12 to 24 hours.
- Attach the jump ring through 2 border stitches at the top center of the upper curve. Add the key ring and chain, then close the jump ring with pliers.
Final Quality-Control Checklist
- Every V row has 28 V-sts.
- Stripes go MC, CC1, MC, CC1, with an MC border.
- Border Rnd 1 has 161 sc plus 4 ch-2 corners. Rnd 2 has 169 sl st.
- The strip is 1 1/4 in (3.2 cm) wide all along.
- The letter is about 5 in (12.7 cm) × 3.25 in (8.3 cm).
- The ends are squared and both corners are sharp.
- There are three daisies, with two leaves each, sewn securely.
- No tails show on the front.
- The jump ring is closed with no gap.
Troubleshooting
- The upper curve won’t lie flat (it cups): Row 4 is too tight. Check that you made all 3 V-incs in the top section.
- The lower curve ruffles: Check that you skipped 3 V-sps in Row 4 and used 2 sc per V-sp there in the border.
- The letter is too big: Remake it with a 2.0 mm hook.
- The letter is too small: Remake it with a 2.5 mm hook.
- The ends flare: Keep the 2 sc per dc post to the count. Don’t add extra stitches.
- The daisy petals curl: Pin and steam them flat before sewing.
- The V-sps look uneven: Re-block and open each V-sp with a pin.
Care
Hand wash in cool water with mild soap and lay flat to dry. If you used stiffener, mist and reshape it again after washing.

Final Notes
Here is the measurement chain:
– Row 1 has 73 sc and is 9 1/8 in (23.2 cm) long.
– Each V row adds 1/4 in (0.6 cm) of width and keeps 28 V-sts, while the increases and decreases bend the strip into an S.
– After Row 4, the strip is 7/8 in (2.2 cm) wide.
– The 161-stitch border and the sl st round bring the strip to 1 1/4 in (3.2 cm) wide and the letter to 5 in (12.7 cm) × 3.25 in (8.3 cm).
Check each of these checkpoints as you go, and the letter will block cleanly into shape.
Happy crocheting!