
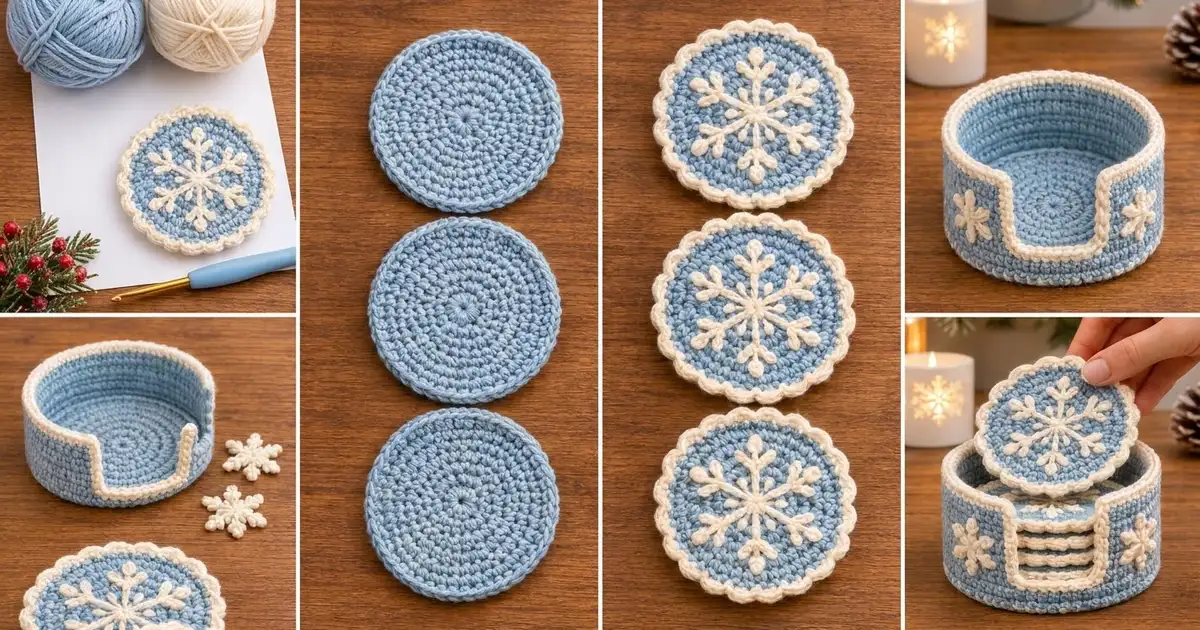
This set has six round coasters and a matching holder that keeps them stacked on the coffee table. The coasters are light dusty blue with a cream snowflake on top and a cream scalloped edge. The holder uses the same two colors and has a cream rope edge and two small snowflake appliqués.
Each coaster is a simple spiral of single crochet. The snowflake goes on top afterward with surface slip stitch and a few embroidery stitches. The six increase lines that form naturally in the circle become the six arms, so the snowflake always comes out even.
All terms are US crochet terms. Each finished coaster measures 4.5 in (11.4 cm) across. The holder measures about 5 in (12.7 cm) across and 2.25 in (5.7 cm) tall.
To make the set, you crochet the coaster bodies, add the snowflakes, and finish with the border. The holder starts as a larger version of the same circle. Its wall is worked upward, with a U-shaped opening at the front so you can grab a coaster easily.
Finished Size and Construction
- Coaster size: 4.5 in (11.4 cm) diameter
- Coaster size before border: 3.75 in (9.5 cm) diameter
- Border depth: 0.375 in (1.0 cm) all around
- Holder: 5 in (12.7 cm) outer diameter, 2.25 in (5.7 cm) tall
- Skill level: Easy–Intermediate
- Terminology: US
- Yarn weight: DK (light worsted / #3)
- Hook: 3.5 mm (E-4)
- Number of pieces: 6 coasters, 1 holder, 2 small snowflake appliqués
- Layout: coasters stand alone; they are not joined to each other or to the holder
- Construction: spiral rounds, surface embroidery, scalloped border; the holder wall is worked in rounds, then in rows to form the opening
Materials
Use a smooth cotton or cotton blend in DK weight. Cotton soaks up drips, holds its shape under a mug, and makes the stitches and embroidery stand out clearly.
- Color A – Light dusty blue: 70 g, about 168 m
- Color B – Cream: 35 g, about 84 m
These amounts include a margin of about 20% for gauge swatching and an extra length of embroidery yarn.
Tools:
– 3.5 mm (E-4) crochet hook
– Tapestry needle (blunt, large eye)
– Stitch marker
– Scissors
– Ruler or tape measure
– Blocking mat and rust-proof pins
– Optional: a 4.5 in (11.4 cm) disc of plastic canvas or stiff card for the holder base
Abbreviations (US Terms)
- ch – chain
- sl st – slip stitch
- sc – single crochet
- dc – double crochet
- BLO – back loop only
- st(s) – stitch(es)
- rev sc – reverse single crochet (crab stitch)
- inc – 2 sc in the same stitch
Surface slip stitch: hold the yarn behind the work. Insert the hook from front to back between two stitches, pull up a loop, then insert the hook at the next point along your line, pull up a loop, and draw it through the loop on the hook. This makes a chain-like line on the front.
Reverse sc: work single crochet from left to right (right to left if you crochet left-handed) to make a twisted, rope-like edge.
Scallop: skip 1 st, 5 dc in the next st, skip 1 st, sl st in the next st. Each scallop uses 4 stitches.
Gauge and Checkpoints
Gauge: 20 sc and 22 rounds = 4 in (10.2 cm) in sc with a 3.5 mm hook.
Make one full coaster body (Rounds 1–10) before anything else and treat it as your swatch. A circle shows tension problems much faster than a square swatch does.
Checkpoints:
– After Round 5 (30 sts): 1.75 in (4.4 cm) diameter
– After Round 10 (60 sts): 3.75 in (9.5 cm) diameter
– After Border Round 11: 4 in (10.2 cm) diameter
– After Border Round 12: 4.5 in (11.4 cm) diameter
If your circle measures more than 0.125 in (0.3 cm) too large at Round 10, go down half a hook size. If it is too small, go up half a size. If the circle cups, your increase rounds are too tight, so go up a hook size. If it ruffles, go down a size. Do not add or skip rounds to fix the size, because the snowflake and border are planned for exactly 60 stitches.
Coaster Body (make 6)
Work in continuous spiral rounds with Color A. Put the marker in the first stitch of each round and move it up as you go.
Round 1: Make a magic ring. Work 6 sc in the ring. Pull the ring closed. (6 sts)
Round 2: Inc in each st around. (12 sts)
Round 3: Sc 1, inc 6 times. (18 sts)
Round 4: Sc 2, inc 6 times. (24 sts)
Round 5: Sc 3, inc 6 times. (30 sts)
Checkpoint: 1.75 in (4.4 cm).
Round 6: Sc 4, inc 6 times. (36 sts)
Round 7: Sc 5, inc 6 times. (42 sts)
Round 8: Sc 6, inc 6 times. (48 sts)
Round 9: Sc 7, inc 6 times. (54 sts)
Round 10: Sc 8, inc 6 times. (60 sts)
To smooth the spiral step, sl st in the next stitch. Fasten off, leaving a 6 in (15.2 cm) tail, and weave it in on the back.
Checkpoint: 3.75 in (9.5 cm). Because each increase stacks above the last one, you now have six faint “spoke” lines running from the center to the edge. These guide the snowflake.
Snowflake Embroidery (each coaster)
Use Color B. Cut lengths of about 24 in (61.0 cm) so the yarn doesn’t fray as it passes through the fabric.
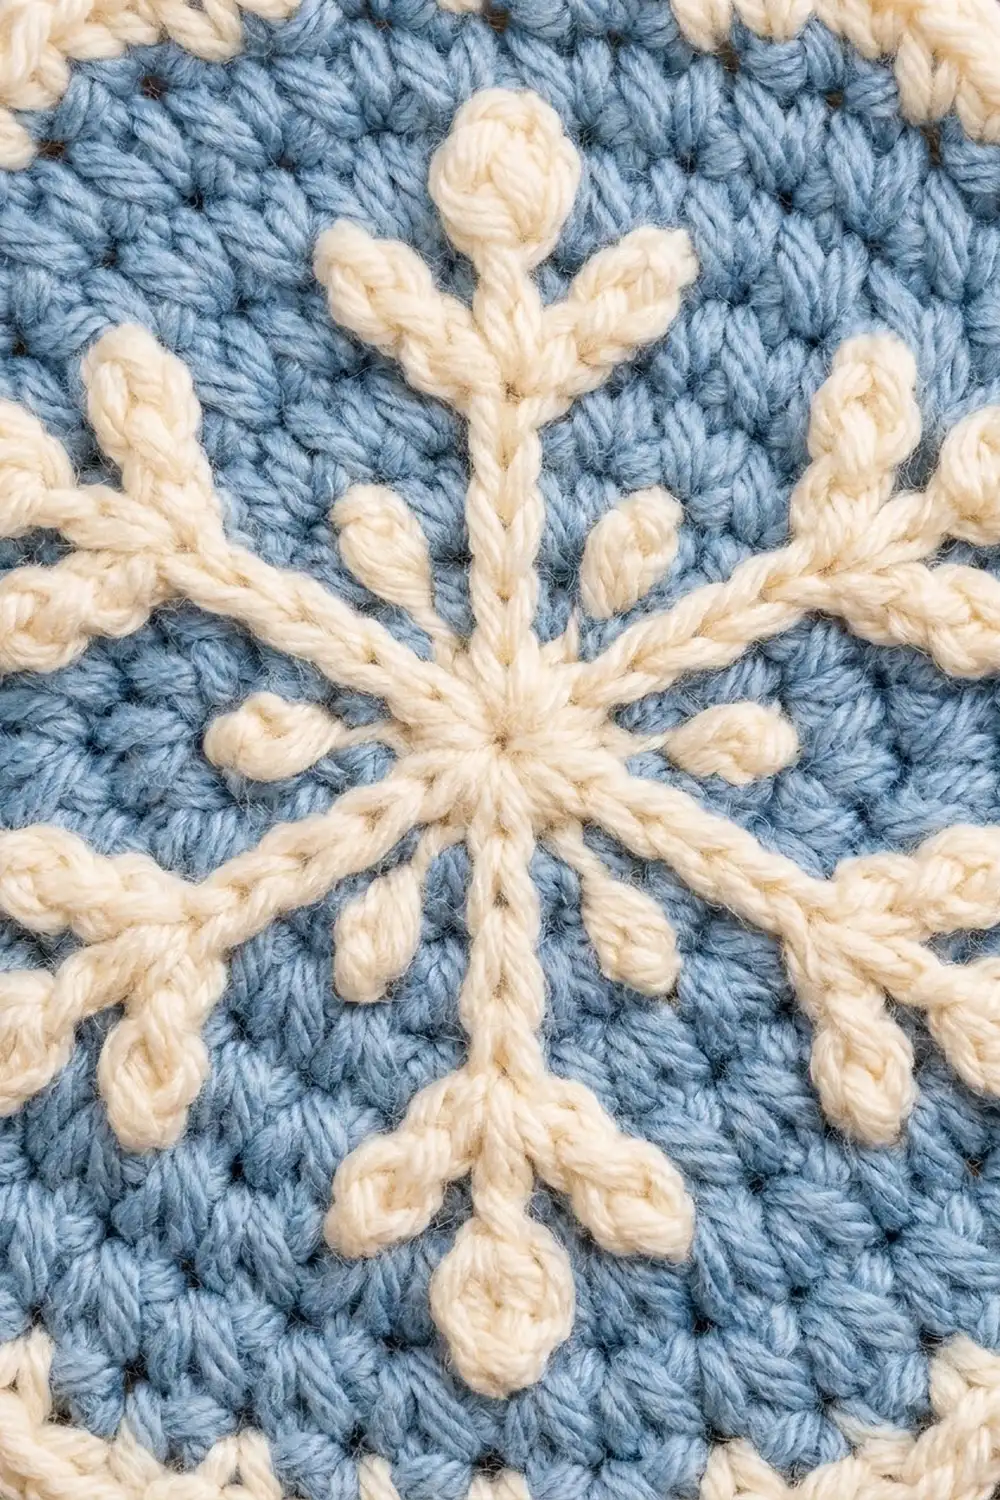
Arms (6): Begin at the center ring. Work surface slip stitch outward along one spoke, placing one sl st in each round from Round 2 through Round 9. That gives 8 sl sts per arm. Pull the yarn to the back, fasten it there, and repeat for all six spokes. The arms should end one round short of the edge, leaving Round 10 plain blue as a frame.
Branches: With a tapestry needle and a single strand of Color B, make one V at Round 4 and another at Round 7 on each arm. For each side of a V, bring the needle up beside the arm and take a straight stitch outward and up to the next round, angled 1 stitch away from the arm. Go over each stitch twice so it matches the thickness of the slip-stitch line. That gives 4 branch strokes per arm and 24 per coaster.
Tips: Make a French knot at the end of each arm in Round 10 by wrapping the yarn 3 times. Add one more French knot over the magic ring to cover the center.
Keep the yarn on the back relaxed. If it is pulled tight, the coaster will pucker.
Coaster Border (each coaster)
Border gauge: Each scallop uses 4 stitches of the base round and stands about 0.375 in (1.0 cm) proud of the blue edge, counting the sc round under it.
Round 11: Join Color B with a sl st in any st of Round 10. Ch 1, then sc in each st around. That is 60 sts worked 1-per-stitch + 0 extra = 60 sts. Sl st to the first sc.
Checkpoint: 4 in (10.2 cm).
Round 12: Skip 1 st, 5 dc in the next st, skip 1 st, sl st in the next st 15 times. You end with the last sl st in the joining stitch. (15 scallops: 75 dc + 15 sl sts)
Fasten off and weave in the ends.
Why the math works: 60 stitches divided by 4 stitches per scallop gives exactly 15 scallops, with no leftover stitches and no fudging at the join. A 5-dc shell over 4 stitches adds just enough fullness to spread around the curve without ruffling. Since 60 is also divisible by 6, the arm tips fall evenly between scallops.
Checkpoint: 4.5 in (11.4 cm).
Holder
Base: With Color A, work Rounds 1–10 exactly as for the coaster (60 sts), then continue:
Round 11: Sc 9, inc 6 times. (66 sts)
Round 12: Sc 10, inc 6 times. (72 sts)
Round 13: Sc 11, inc 6 times. (78 sts)
Checkpoint: 4.75 in (12.1 cm) diameter. The base is a little wider than a finished coaster, so the coasters drop in easily.
Wall:
Round 14: Sc in the BLO of each st around. (78 sts) This leaves the front loops of Round 13 free and makes a crisp fold where the wall turns up.
Rounds 15–20: Sc in each st around. (78 sts each round)
Sl st in the next st. The full-height wall now measures about 1.25 in (3.2 cm).
Opening: From now on you work in rows across part of the round and leave a gap at the front.
Row 21: Ch 1, sc in the next 54 sts, turn. Leave the remaining 24 sts unworked. (54 sts)
Rows 22–25: Ch 1, sc in each st across, turn. (54 sts each row)
Fasten off. The wall is 12 rounds and rows tall, about 2.25 in (5.7 cm). The opening is about 1 in (2.5 cm) deep and about 4.75 in (12.1 cm) wide, measured along the curve.
Holder edging:
Round 1: Join Color B at the top corner of Row 25 on one side. Ch 1. Sc in each of the 54 sts across the top. Work 5 sc down the side of the opening, one in each row end. Then work 1 sc in each of the 24 unworked sts of Round 20, and 5 sc up the other side of the opening. That is 54 + 5 + 24 + 5 = 88 sts, all worked 1-per-stitch or 1-per-row-end, + 0 extra = 88 sts. Sl st to the first sc.
Round 2: Ch 1, rev sc in each st around. (88 sts) Sl st to join and fasten off.
The rev sc rolls into the raised rope edge and softens the corners of the U.
Base line: With Color B, work surface slip stitch into each of the 78 free front loops of Round 13. (78 sl sts) Fasten off.
Small Snowflake Appliqués (make 2)
Use Color B.
Round 1: Make a magic ring. Work 6 sc in the ring. Pull it closed and sl st to the first sc. (6 sts)
Round 2: Ch 5, sl st in the 3rd ch from the hook (picot), [ch 3, sl st in the same ch] twice, sl st in the next 2 ch, sl st in the next sc of Round 1 6 times. (6 arms with three-picot tips)
Fasten off and leave a 12 in (30.5 cm) tail for sewing. Each appliqué measures about 1.5 in (3.8 cm) across.
Make All Pieces
- Color A: 6 coaster bodies + 1 holder base and wall
- Color B: 6 snowflake embroideries + 6 coaster borders + holder edging and base line + 2 appliqués
Set layout:
[Coaster][Coaster][Coaster]
[Coaster][Coaster][Coaster]
        [  Holder  ]
   (snowflake left · opening · snowflake right)
Joining (Holder Assembly Only)
The coasters are never joined, and the holder wall is worked in one piece with its base, so the only sewing is the two appliqués.
Place one snowflake centered on the wall halfway up, on each side of the opening, about 1.25 in (3.2 cm) back from the edge of the U. Pin them in place. Use the tail to whipstitch through the back loop of each picot tip and the center ring, picking up only the outer layer of wall stitches.
Keep the stitches snug but not tight. Pulling hard bends the wall inward and makes the snowflake cup.
Checkpoint: a finished coaster drops in and lies flat on the base without sticking or rocking. If you want a firmer bottom, slide the optional 4.5 in (11.4 cm) disc in before the first coaster.
Final Blocking
- Wet the coasters thoroughly in cool water and press out the water with a towel. Do not wring them.
- Pin each coaster to a 4.5 in (11.4 cm) circle, putting one pin at the top of each scallop (15 pins).
- Line up the snowflake arms straight along their spokes while the coaster is damp.
- Mist the holder and stuff it with a rolled towel so the walls stand straight. Pin the edges of the U so they are even.
- Pin each appliqué flat with one pin per arm tip.
- Let everything dry completely, usually 24 hours.
Final Quality-Control Checklist
- Each coaster measures 4.5 in (11.4 cm) and lies flat.
- 60 sts in Round 10, 60 sts in Round 11, 15 scallops in Round 12.
- Six arms, each 8 sl sts long, with 2 V-branches and a French knot tip.
- Holder base measures 4.75 in (12.1 cm) and the wall is 78 sts around.
- The opening leaves 24 sts unworked, and Rows 21–25 have 54 sts each.
- The edging has 88 sts, with no bunching at the corners of the U.
- All ends are woven in on the back or inside.
Troubleshooting
- The coaster cups: your increases are too tight. Go up a hook size or loosen your tension on the increase stitches.
- The coaster ruffles: your stitches are too loose. Go down a hook size.
- The arms drift off the spokes: the increase lines spiral slightly. Follow the stack of increases, not a ruler.
- The snowflake puckers: the yarn is too tight on the back. Loosen the stitches by easing the strands with the needle tip.
- The scallops don’t come out even: recount Round 11. It must be exactly 60.
- The holder walls lean inward: your tension tightened as you worked up the wall. Block it over a towel roll, or use a slightly larger hook for Rounds 15–25.
- The corners of the U gap: add one extra sc in the gap on Edging Round 1, then sc2tog nearby so the total stays at 88.
Care
Hand wash cool and lay flat to dry. Reshape the scallops while the coasters are damp, and keep the holder away from direct heat.

Final Notes
This set relies on one measurement chain. Round 5 measures 1.75 in (4.4 cm), Round 10 measures 3.75 in (9.5 cm), Border Round 11 measures 4 in (10.2 cm), and the finished coaster measures 4.5 in (11.4 cm). The holder base continues the same circle to 4.75 in (12.1 cm), and the wall rises 2.25 in (5.7 cm). If each checkpoint is right, the coasters fit the holder.
Make one coaster first, measure it, and the other five will match. Happy crocheting!