
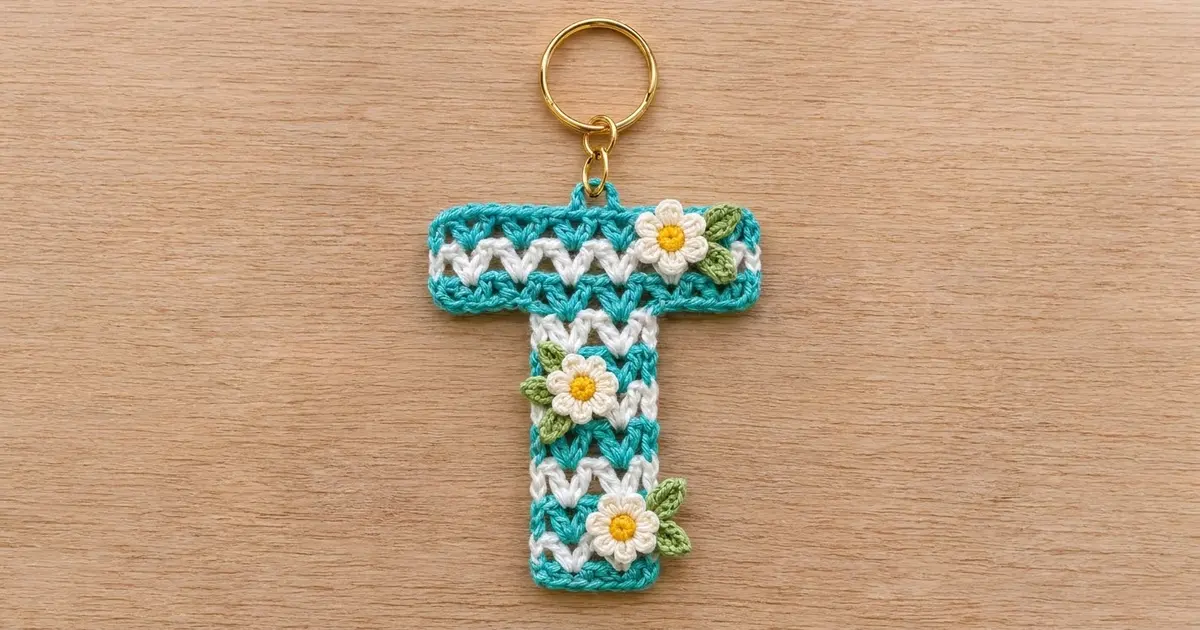
This cheerful letter T keychain is worked in V-stitch stripes of teal and white. It has a tidy teal border and three small daisies that make it look like a tiny spring garden. It is a quick project for gifting, initial-themed bag charms, or using up cotton scraps.
The palette is fresh and simple: teal and white for the letter, cream daisies with sunny yellow centers, and soft green leaves. A gold key ring finishes it off and makes it easy to clip onto a tote, backpack or set of keys.
This pattern uses US crochet terms. The finished T measures 4 in (10.2 cm) wide and 4.5 in (11.4 cm) tall, not including the hardware.
You work the stem first from the bottom up. Then you extend the last row sideways on both sides to start the crossbar, so all the V-stitches point the same direction. One single crochet border round neatens the edges, then you add the hanging loop and sew on the daisies.
Finished Size and Construction
- Finished size: 4 in wide x 4.5 in tall (10.2 x 11.4 cm)
- Skill level: Easy / advanced beginner
- Terminology: US crochet terms
- Yarn weight: Sport-weight (#2) cotton
- Hook: 3.0 mm
- Number of pieces: 1 letter piece, plus 3 daisy appliqués and 5 leaves
- Layout: Single letter T; the stem is centered under the crossbar
- Piece size before border: 3.75 in wide x 4.25 in tall (9.5 x 10.8 cm)
- Stem width before border: 1.75 in (4.4 cm)
- Border depth: 0.125 in (0.3 cm) per edge, which adds 0.25 in (0.6 cm) to each dimension
Materials
Use a smooth, mercerized sport-weight cotton. The V-stitches stay crisp, the stripes look clean and the charm holds its shape on a bag. Avoid fluffy or acrylic-blend yarns, because they blur the V texture.
Yarn amounts (based on 50 g = about 170 m):
- Teal (main color): 8 g, about 27 m
- White (stripe color): 5 g, about 17 m
- Cream (petals): 2 g, about 7 m
- Yellow (daisy centers): 1 g, about 3 m
- Green (leaves): 2 g, about 7 m
These amounts include a small safety margin for gauge swatching and weaving in ends.
Tools and hardware:
- 3.0 mm crochet hook
- Tapestry needle
- Sharp scissors
- Sewing pins
- 1 gold split key ring, 1 in (2.5 cm)
- 2 gold jump rings, 6 mm
- Gold chain, 1.25 in (3.2 cm) long
- 2 pairs of flat-nose pliers
- Optional: fabric stiffener or spray starch
Abbreviations (US Terms)
- ch – chain
- sl st – slip stitch
- sc – single crochet
- hdc – half double crochet
- dc – double crochet
- sc2tog – single crochet 2 together
- sk – skip
- sp – space
- st(s) – stitch(es)
- fsc – foundation single crochet
- RS – right side
Special stitches
- V-stitch (V): (dc, ch 1, dc) in the same stitch or space.
- Foundation single crochet (fsc) extension: Insert the hook into the chain “base” at the bottom of the last sc made, yarn over and pull up a loop, yarn over and pull through 1 loop (this makes the new base chain), then yarn over and pull through both loops. Repeat to keep extending.
- Position: In this pattern, a “position” is any single dc, any ch-1 space, or the top of a turning chain. One V row on the stem has 11 positions: dc, 3 x (dc, ch-1 sp, dc), dc.
Gauge and Checkpoints
Gauge: One V-group repeat = 0.5 in (1.3 cm) wide. One V-stitch row = 0.4 in (1.0 cm) tall. One sc row = 0.25 in (0.6 cm) tall.
The letter is small enough to act as its own gauge swatch. Work Rows 1–2 of the stem and measure before you go further.
Checkpoints:
- After stem Row 1: 1.75 in (4.4 cm) wide.
- After stem Row 7: 2.8 in (7.1 cm) tall.
- After crossbar Row 8: 3.75 in (9.5 cm) wide.
- After crossbar Row 11: the crossbar is 1.45 in (3.7 cm) tall, and the whole letter is 4.25 in (10.8 cm) tall.
- After the border: 4 in x 4.5 in (10.2 x 11.4 cm).
If the piece is too big: Change to a 2.75 mm hook, or check that your chains are not loose. If it is too small: Change to a 3.25 mm hook. A difference of 0.25 in (0.6 cm) across the crossbar is acceptable on a keychain. If the difference is larger, change hooks.
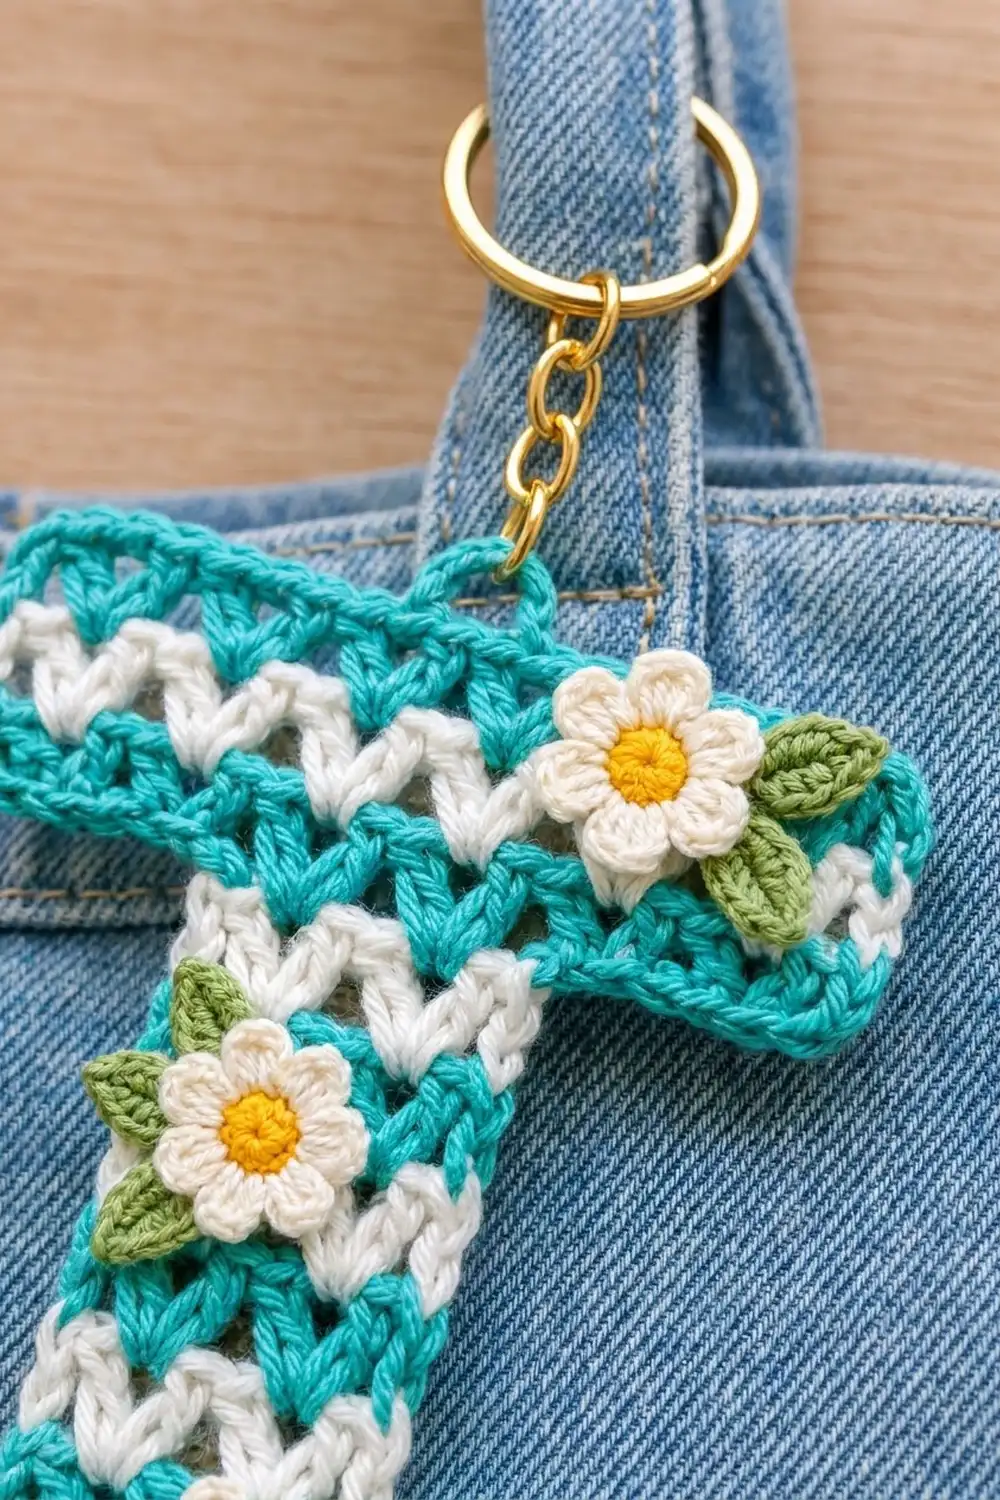
Stem (Rows 1–7)
You work the stem in white and teal stripes, alternating every row. Do not cut the yarn at each color change. Carry the color you are not using loosely up the side edge; the border will cover it.
Color change: Work the last dc of the row until 2 loops remain on the hook. Yarn over with the new color and pull it through.
Row 1 (white): Ch 13. V in 5th ch from hook (the first 3 skipped chs count as a dc, and the 4th ch is skipped). [Sk 2 ch, V in next ch] 2 times, sk 1 ch, dc in last ch. Turn.
Count: 3 V + 2 edge dc = 11 positions.
Row 2 (teal): Ch 3 (counts as dc). V in each ch-1 sp across (3 V). Dc in top of turning ch. Turn.
Count: 11 positions.
Rows 3–7: Repeat Row 2, alternating colors: Row 3 white, Row 4 teal, Row 5 white, Row 6 teal, Row 7 white.
Count: 11 positions on every row.
At the end of Row 7, cut both yarns, leaving 4 in (10.2 cm) tails.
Checkpoint: The stem measures 1.75 in (4.4 cm) wide and 2.8 in (7.1 cm) tall. Each V sits directly above the V below it.
Crossbar (Rows 8–11)
Row 8 – extension base row (teal): With the RS facing, join teal with a sl st in the top-right corner stitch of Row 7.
- Ch 7. Sc in 2nd ch from hook and in the next 5 chs (6 sc), working back toward the stem.
- Sc in each of the 11 positions across the top of Row 7 (11 sc).
- Work 6 fsc extending past the left edge of the stem (6 sc). Turn.
Count: 6 + 11 + 6 = 23 sc.
The extensions are equal on both sides, which keeps the stem centered.
Row 9 (teal): Ch 3 (counts as dc). Sk next sc, V in next sc. [Sk 2 sc, V in next sc] 6 times. Sk 1 sc, dc in last sc. Change to white. Turn.
Count: 1 + 1 + 1 + (6 x 3) + 1 + 1 = 23 stitches used. The row has 7 V + 2 edge dc = 23 positions.
Row 10 (white): Ch 3 (counts as dc). V in each ch-1 sp across (7 V). Dc in top of turning ch. Change to teal. Turn.
Count: 23 positions.
Row 11 (teal): Repeat Row 10. Do not fasten off.
Count: 23 positions.
Checkpoint: The crossbar measures 3.75 in (9.5 cm) wide and 1.45 in (3.7 cm) tall. The whole letter measures 4.25 in (10.8 cm) tall.
Border
Border gauge: Along the row edges, work 2 sc per V row and 1 sc per sc row. Along the top and bottom, work 1 sc per position.
Corner rule: In this border, the side counts below exclude the corner groups. Each outer (convex) corner gets its own 3-sc group, worked into the corner stitch, and the two inner (concave) corners each get one sc2tog.
Continue with teal from Row 11. Ch 1. Work 1 round as follows:
- Top-left corner: 3 sc in the first stitch.
- Top edge: 1 sc in each of the next 21 positions (21 sc).
- Top-right corner: 3 sc in the last stitch.
- Right end of crossbar: 7 sc down the edge (2 sc each for Rows 11, 10 and 9, and 1 sc for Row 8).
- Outer underside corner: 3 sc in the outer foundation loop.
- Right underside: 1 sc in each of the next 4 loops (4 sc).
- Inner corner: Sc2tog over the last underside loop and the top row-edge spot of the stem.
- Right side of stem: 13 sc down the edge, completing 2 sc per stem row.
- Bottom-right corner: 3 sc in the corner foundation loop.
- Bottom edge: 9 sc across the foundation chain.
- Bottom-left corner: 3 sc in the corner foundation loop.
- Left side of stem: 13 sc up the edge.
- Inner corner: Sc2tog over the top row-edge spot of the stem and the first underside loop.
- Left underside: 4 sc.
- Outer underside corner: 3 sc in the outer chain loop.
- Left end of crossbar: 7 sc up the edge.
- Sl st to the first sc. Fasten off.
Count: 3 + 21 + 3 + 7 + 3 + 4 + 1 + 13 + 3 + 9 + 3 + 13 + 1 + 4 + 3 + 7 = 98 stitches.
Why the math works:
- Top edge: 23 positions = 2 corner stitches + 21 middle stitches.
- Bottom edge: 11 positions = 2 corners + 9 middle stitches.
- Undersides: Each underside has 6 base loops: 1 outer corner, 4 single loops and 1 loop used in the sc2tog.
- Stem sides: Each stem side has 7 rows x 2 = 14 edge spots. One spot is used in the sc2tog, which leaves 13.
- Height: 14 sc over 2.8 in (7.1 cm) is 5 sc per inch, close to the width of a sc. The edges lie flat.
- Corners: The 3-sc groups turn the outer corners a full 90 degrees. The sc2tog removes extra fullness at the inner corners so they don’t ruffle.
Checkpoint: The letter measures 4 in x 4.5 in (10.2 x 11.4 cm), and the stem measures 2 in (5.1 cm) wide.
Hanging Loop
Find the center sc of the 21 top-edge sc (the 11th, with 10 on each side). Join teal with a sl st in that stitch.
Ch 6, then sl st in the same stitch. Work 8 sc into the ch-6 loop, then sl st into the base. Fasten off.
The loop should measure about 0.5 in (1.3 cm) tall.
Daisies (make 3)
Center (yellow): Make a magic ring.
- Rnd 1: Work 6 sc into the ring. Pull the ring closed and sl st to the first sc. Fasten off.
- Count: 6 sc.
Petals (cream): Join cream in any sc.
- Rnd 2: (Sl st, ch 2, 2 dc, ch 2, sl st) all in the same sc. Move to the next sc. Repeat from * to * 6 times. Fasten off, leaving a 6 in (15.2 cm) tail for sewing.
- Count: 6 petals.
Each daisy measures about 0.75 in (1.9 cm) across.
Leaves (make 5)
With green, ch 5. Working back along the chain:
- Sl st in 2nd ch from hook.
- Sc in next ch.
- Hdc in next ch.
- Sc in last ch.
Fasten off, leaving a 6 in (15.2 cm) tail. Each leaf is about 0.5 in (1.3 cm) long.
Assembly of Appliqués
Pin the daisies and leaves in place before you sew anything:
- Daisy 1: Right end of the crossbar, with 1 leaf to its right and 1 leaf angled down and to the right.
- Daisy 2: Middle-left of the stem, overlapping the border slightly, with 1 leaf above-left and 1 leaf below-left.
- Daisy 3: Lower right of the stem, with 1 leaf above-right.
Tuck each leaf base slightly under its daisy. Sew the leaves first, then the daisies. Use small stitches around the center and between the petals, and keep them catching only the front layer of the letter if you can.
Hardware
- Open a jump ring with two pliers by twisting the ends sideways, not pulling them apart.
- Thread the jump ring through the hanging loop and the bottom link of the chain, then close it.
- Use the second jump ring to attach the top of the chain to the split key ring.
Final Blocking
- Weave in all ends before blocking, hiding them inside the border stitches or behind the appliqués.
- Lightly mist the letter with water. Keep the daisies drier so they stay dimensional.
- Pin the letter flat to 4 in x 4.5 in (10.2 x 11.4 cm). Pin each corner square.
- Check that the stem is 2 in (5.1 cm) wide and centered: there should be 1 in (2.5 cm) of crossbar on each side.
- Optional: For a stiffer charm, spray lightly with starch or brush diluted fabric stiffener on the back.
- Let it dry completely, about 6 to 8 hours, before you remove the pins.
Final Quality-Control Checklist
- [ ] The stem has 7 V rows of 11 positions each.
- [ ] The crossbar has a 23-sc base row and 3 V rows of 23 positions each.
- [ ] All V-stitches point the same way across the stem and crossbar.
- [ ] The border round has exactly 98 stitches.
- [ ] Outer corners are square and inner corners lie flat.
- [ ] The finished size is 4 in x 4.5 in (10.2 x 11.4 cm).
- [ ] The hanging loop is centered on the top edge.
- [ ] All 3 daisies and 5 leaves are sewn securely, with no loose petals.
- [ ] The jump rings are fully closed with no gaps.
Troubleshooting
The crossbar is off-center. Count the Row 8 extensions. They must both be 6 sc.
The stem edges wave. You probably worked 3 sc per V row in the border. Use exactly 2 sc per row.
The inner corners bunch up. Check that you worked an sc2tog at each inner corner and not 2 separate sc.
The outer corners are rounded. Work all 3 sc of the corner group into the single corner stitch.
The stripes are jagged at the edges. Carry the unused yarn loosely, and make each color change on the final yarn over of the last dc.
The V-stitches lean. Make sure you work each V into the ch-1 space, not between groups.
The letter is floppy. Go down a hook size or add stiffener during blocking.
Care
Hand wash in cool water with mild soap, press out the water in a towel, and dry flat. If you used stiffener, reapply it after washing, and keep the metal hardware dry when you can.
Final Notes
The measurement chain is short and easy to check:
- The 11-position stem is 1.75 in (4.4 cm) wide, and its 7 rows reach 2.8 in (7.1 cm).
- The 23-sc extension row makes the crossbar 3.75 in (9.5 cm) wide.
- Three V rows bring the letter to 4.25 in (10.8 cm) tall.
- The 98-stitch border finishes the letter at 4 in x 4.5 in (10.2 x 11.4 cm).
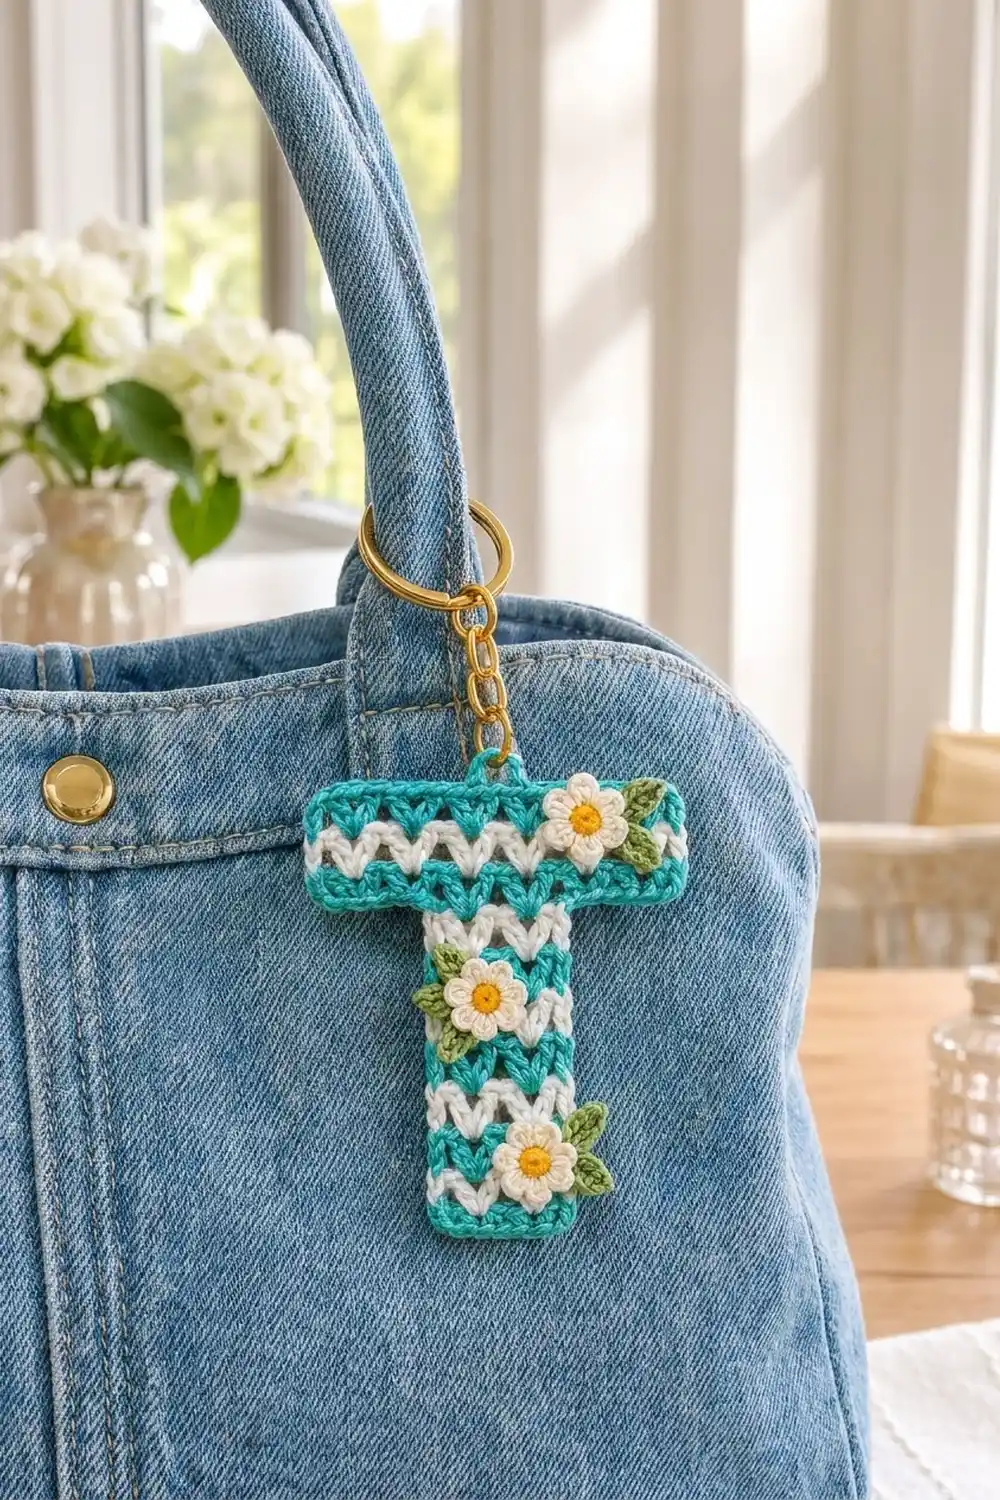
If each checkpoint matches, the daisies will sit just like the photo, and your charm will hang straight from its loop.
Happy crocheting!