

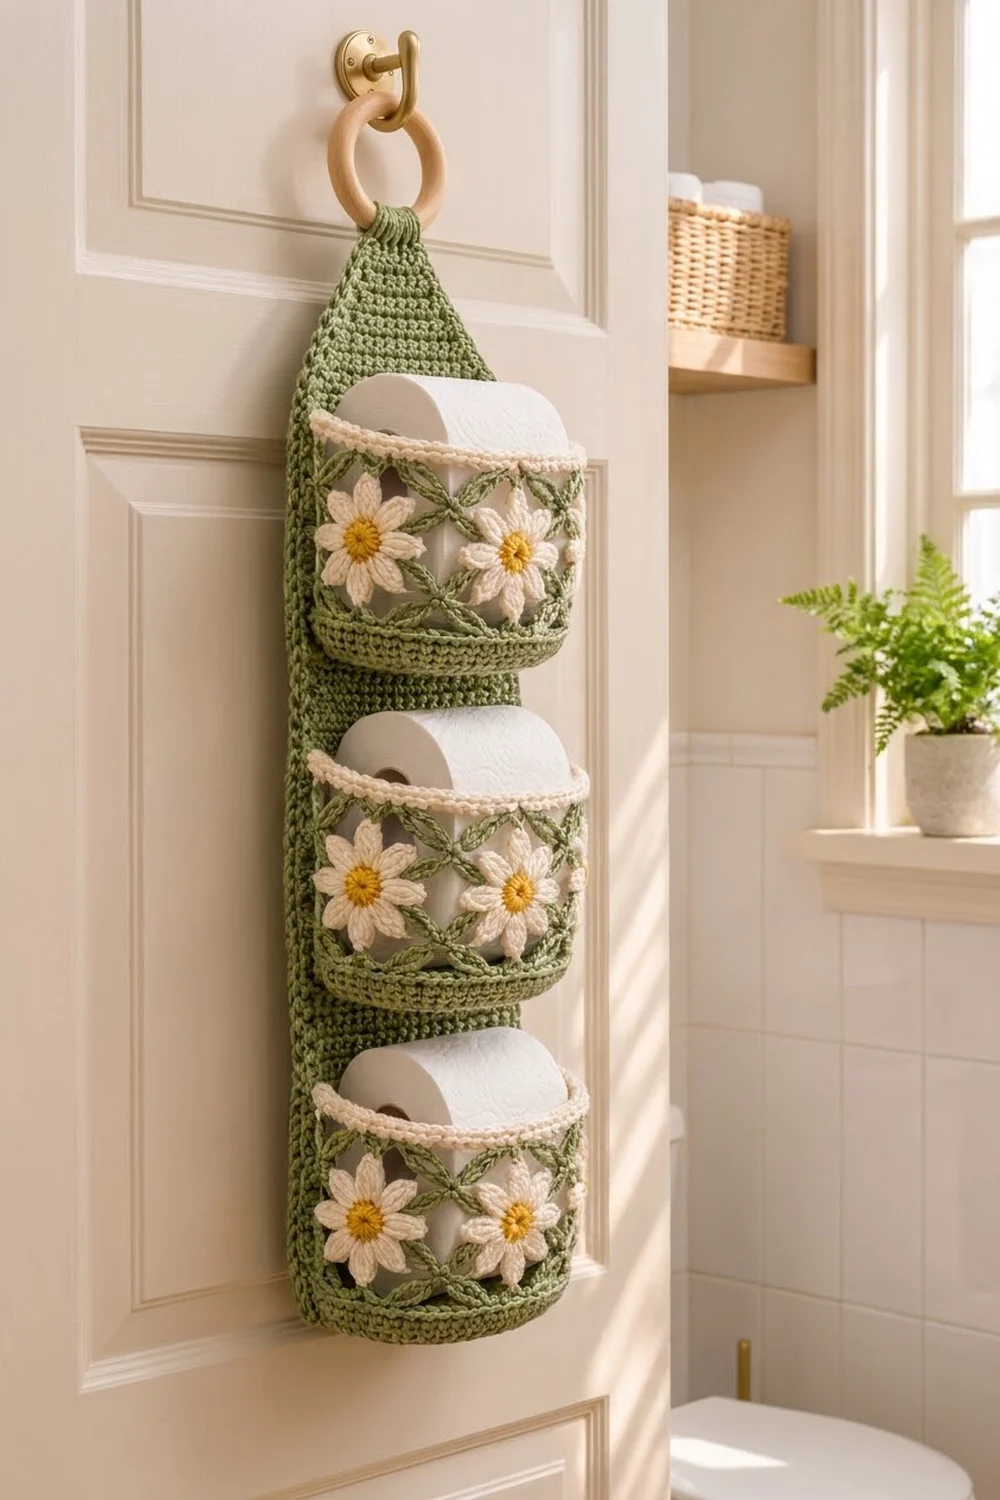
This hanging toilet paper holder has a long sage green backing strip with a tapered top and a natural wooden ring for hanging. Three rounded pockets run down the front, and each one holds a single roll.
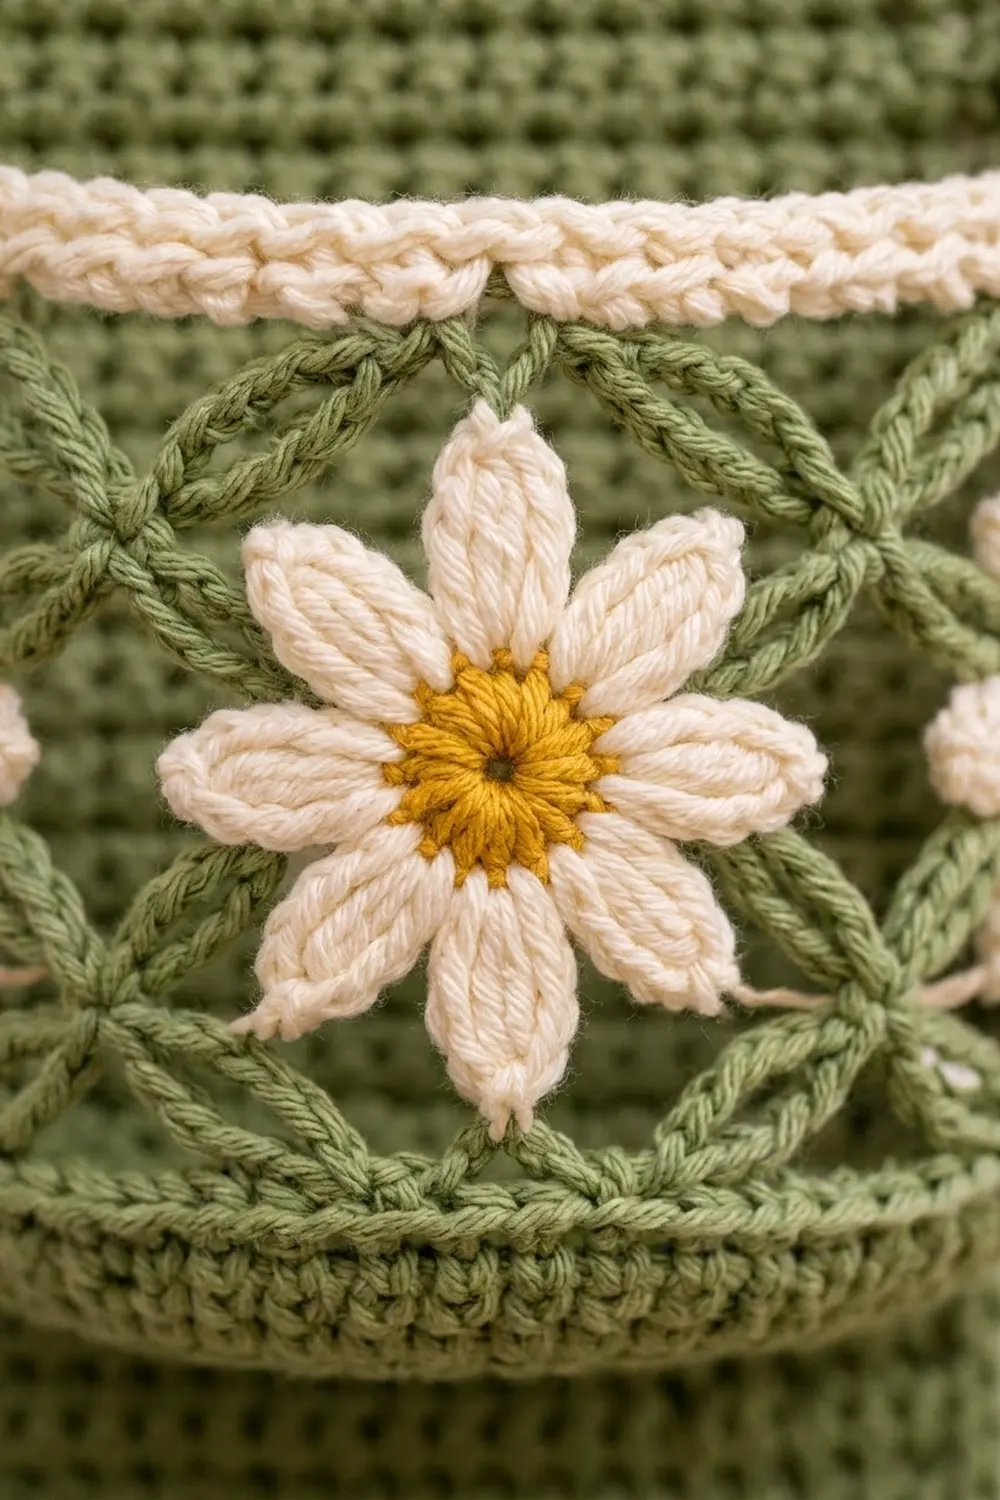
Each pocket has a solid green base and a band of green chain trellis. Three cream daisies with mustard centers are sewn into the trellis. A twisted cream crab-stitch rim finishes the top of every pocket. The overall look is soft cottage style in sage, cream, and golden yellow.
The pattern uses US crochet terms. The finished backing is 6.5 in (16.5 cm) wide and about 23.5 in (59.7 cm) long. With the ring, it hangs about 26 in (66.0 cm).
You crochet the backing in rows. The pockets are worked in joined rounds, starting from an oval base. Then you make nine daisies, sew everything together, add an edging around the backing, and fold the top tab over the ring.
Finished Size and Construction
- Finished size: 6.5 in (16.5 cm) wide x about 23.5 in (59.7 cm) long, or about 26 in (66.0 cm) including the ring
- Skill level: Intermediate
- Terminology: US
- Yarn weight: Worsted (#4) cotton
- Hook: 5 mm (H-8)
- Number of pieces: 1 backing strip, 3 pockets, 9 daisies, and 1 wooden ring
- Layout: 3 pockets stacked in one column, 6 in (15.2 cm) apart from base to base
- Pocket size: 6 in (15.2 cm) wide where it meets the backing, 4 in (10.2 cm) tall, and 18 in (45.7 cm) around
- Backing size before border: 6 in x 24.25 in (15.2 cm x 61.6 cm), with the tab unfolded
- Border depth: 0.25 in (0.6 cm) on each edge
Materials
Use a smooth worsted cotton or cotton blend with about 150 to 170 m per 100 g. Cotton holds its shape and stands up well to bathroom humidity. Acrylic also works, but the pockets will be softer.
- Sage green (main color): 350 g, about 545 m (595 yd)
- Cream: 50 g, about 78 m (85 yd)
- Mustard yellow: 20 g, about 31 m (34 yd)
These amounts include a margin of about 15 percent.
Tools:
– 5 mm (H-8) crochet hook
– One 3 in (7.6 cm) unfinished wooden ring
– Tapestry needle
– 8 locking stitch markers
– Rustproof pins and a towel or foam mat
– Measuring tape and scissors
Abbreviations (US Terms)
- ch – chain
- sl st – slip stitch
- sc – single crochet
- hdc – half double crochet
- dc – double crochet
- sc2tog – single crochet 2 together
- BLO – back loop only
- st(s) – stitch(es)
- rnd – round
- sp – space
- rev sc – reverse single crochet
Special stitch: reverse single crochet (crab stitch). Work from left to right (if you crochet right-handed). Insert the hook into the next stitch to the right, yarn over, and pull up a loop. Yarn over again and pull through both loops. This makes the twisted, rope-like rim.
Gauge and Checkpoints
Gauge: 16 sc and 18 rows = 4 in (10.2 cm), worked in rows.
Make one pocket first. It shows your gauge in rounds and uses less yarn than the full strip.
Checkpoints:
– Pocket base after Rnd 8: about 6.5 x 3.5 in (16.5 x 8.9 cm), lying flat
– Pocket after Rnd 19: 4 in (10.2 cm) tall and 18 in (45.7 cm) around
– Backing after Row 18: 6 in (15.2 cm) wide and 4 in (10.2 cm) tall
– Backing after Row 81: 18 in (45.7 cm) long
If your pieces come out too big, go down one hook size. If they’re too small, go up one size. The back of each pocket has to match the strip’s width, so check the strip width carefully.
Backing Strip
Work in sage green. The ch 1 at the start of each row doesn’t count as a stitch.
Row 1: Ch 25. Sc in the 2nd ch from the hook and in each ch across. (24 sts)
Rows 2–81: Ch 1, turn, sc in each st across. (24 sts)
As you go, place a marker on the right edge at Rows 3, 21, 30, 48, 57, and 75. These show where the pockets go.
Checkpoint: the strip measures 6 x 18 in (15.2 x 45.7 cm).
Taper
Row 82: Ch 1, turn, sc2tog, sc to the last 2 sts, sc2tog. (22 sts)
Row 83: Ch 1, turn, sc in each st across. (22 sts)
Rows 84–99: Repeat Rows 82–83 eight more times. After each decrease row you’ll have 20, 18, 16, 14, 12, 10, 8, and then 6 sts. (6 sts after Row 99)
The taper is 18 rows, about 4 in (10.2 cm) tall.
Tab
Rows 100–109: Ch 1, turn, sc in each st across. (6 sts)
The tab is about 2.25 in (5.7 cm) long. Fasten off and weave in the ends.
Work in sage green, in joined rounds. The ch 1 at the start of each round doesn’t count as a stitch. Join each round with a sl st to the first sc.
Base
Rnd 1: Ch 15. Sc in the 2nd ch from the hook, sc in the next 12 ch, then work 3 sc in the last ch. Rotate the work and continue along the other side of the chain: sc in the next 12 ch, then 2 sc in the same ch as the first sc. Join. (30 sts: 12 on each straight side and 3 at each end)
Rnd 2: 2 sc in the first st, sc in the next 12, 2 sc in each of the next 3, sc in the next 12, 2 sc in each of the last 2. (36 sts)
Rnd 3: (Sc, 2 sc in next) once, sc in the next 12, (sc, 2 sc in next) 3 times, sc in the next 12, (sc, 2 sc in next) 2 times. (42 sts)
Rnd 4: (Sc 2, 2 sc in next) once, sc in the next 12, (sc 2, 2 sc in next) 3 times, sc in the next 12, (sc 2, 2 sc in next) 2 times. (48 sts)
Rnd 5: (Sc 3, 2 sc in next) once, sc in the next 12, (sc 3, 2 sc in next) 3 times, sc in the next 12, (sc 3, 2 sc in next) 2 times. (54 sts)
Rnd 6: (Sc 4, 2 sc in next) once, sc in the next 12, (sc 4, 2 sc in next) 3 times, sc in the next 12, (sc 4, 2 sc in next) 2 times. (60 sts)
Rnd 7: (Sc 5, 2 sc in next) once, sc in the next 12, (sc 5, 2 sc in next) 3 times, sc in the next 12, (sc 5, 2 sc in next) 2 times. (66 sts)
Rnd 8: (Sc 6, 2 sc in next) once, sc in the next 12, (sc 6, 2 sc in next) 3 times, sc in the next 12, (sc 6, 2 sc in next) 2 times. (72 sts)
In Rnd 8, the two straight sides are sts 9–20 and sts 45–56.
Walls
Rnd 9: Sc in the BLO of each st. (72 sts) This makes a crisp ridge where the base turns up into the wall.
Rnds 10–13: Sc in each st. (72 sts)
Place a marker in st 15. This is the front center, and st 51 is the back center.
Trellis Band
Rnd 14: Ch 1, sl st in the first 2 sts, sc in st 3. Ch 15, skip 11 sts, sc in the next st. Repeat from * 4 more times. Ch 15, skip the last 9 sts and the first 2 sts, and join to the first sc. (6 sc and 6 ch-15 loops)
The sc anchors land in sts 3, 15, 27, 39, 51, and 63, exactly 12 sts apart.
Rnd 15: Sl st in the first 8 ch of the next loop. Ch 1, sc in the same ch (the center of the loop). Ch 15, sc in the 8th ch of the next loop. Repeat from * 4 more times. Ch 15, join. (6 sc and 6 ch-15 loops)
These sc are the X crosses at mid-height, halfway between the anchors.
Rnd 16: Sl st in the first 8 ch of the next loop. Ch 1, sc in the same ch. Ch 11, sc in the 8th ch of the next loop. Repeat from * 4 more times. Ch 11, join. (6 sc + 66 ch = 72 sts)
These sc sit directly above the Rnd 14 anchors. This closes six diamond windows, each 12 sts or 3 in (7.6 cm) wide, with an X between each pair. A green triangle sits above and below every X. The band is about 2.25 in (5.7 cm) tall.
Rnd 17: Ch 1, sc in each sc and in each ch. Work into the chains, not around them. (72 sts) This round now starts above the front center. Fasten off the green.
Rim
Rnd 18: Join cream in any st. Ch 1, sc in each st. (72 sts)
Rnd 19: Ch 1, rev sc in each st. (72 sts) Fasten off.
Checkpoint: the pocket is 4 in (10.2 cm) tall. The 48 front sts, centered on the marker, form the curved front, about 12 in (30.5 cm) across. The 24 back sts, centered on st 51, will lie flat on the backing. The fold lines fall at the anchors in sts 39 and 63.
Daisy
Rnd 1: With mustard, make a magic ring and work 6 sc into it. Pull the ring closed and join. (6 sts)
Rnd 2: Ch 1, 2 sc in each st, join. (12 sts) Fasten off. The center is about 1 in (2.5 cm) across.
Rnd 3: Join cream in any st. Ch 4, sc in the 2nd ch from the hook, hdc in the next ch, dc in the last ch, then sl st in the next st of the center. Repeat from * 11 more times. The last sl st goes into the joining st. (12 petals)
The daisy is about 2.25 in (5.7 cm) across. Leave a 12 in (30.5 cm) cream tail for sewing.
Make All Pieces
- Sage green: 1 backing strip and 3 pockets (the pocket rims are cream)
- Mustard and cream: 9 daisies
Layout (front view):
   [ ring ]
   [ tab  ]
  /  taper \
 | Pocket 3 |  ridge Row 57, rim Row 75
 | Pocket 2 |  ridge Row 30, rim Row 48
 | Pocket 1 |  ridge Row 3,  rim Row 21
Each pocket gets 3 daisies in a row: one in the front-center diamond and one in the diamond on each side of it.
Joining
Sew on the daisies first. Center one daisy in each front diamond, over anchors 3, 15, and 27. Use the cream tail to sew around the center, then tack each petal tip to the trellis. Leave the two side diamonds at the folds and the back diamond open.
Sew the pockets to the backing. Use sage green and a whipstitch, and work stitch to stitch:
- Lay the backing right side up. Place the bottom pocket so its Rnd 9 ridge sits on Row 3.
- Sew the 24 back ridge sts, from fold to fold, to the 24 sts of Row 3, one to one.
- Stand the pocket up. Sew the 24 back sts of Rnd 18 (just under the crab stitch) to the 24 sts of Row 21, one to one.
- Sew each fold line down the edge of the strip, spreading the stitches evenly over 18 rows.
- Repeat for the middle pocket (Rows 30 and 48) and the top pocket (Rows 57 and 75).
Keep your seams snug but not tight. Tight seams pucker the strip and pull it narrower than 6 in (15.2 cm).
Checkpoint: the backing is still 6 in (15.2 cm) wide at every pocket, and each ridge sits 6 in (15.2 cm) above the one below it.
Border
The edging goes around the backing only, not the pockets. It also covers the ends of the pocket side seams.
Border gauge: 4 sc per inch (2.54 cm), the same as the body.
Rnd 1: With sage green, join at the bottom right corner and ch 1. Then work:
– Bottom edge: 24 sc, one in each foundation ch.
– Corner: ch 1.
– Left long side: 99 sc in total:
– 72 sc over the 81 rectangle rows (skip every 9th row end)
– 18 sc over the 18 taper rows (one in each row end)
– 9 sc over the 10 tab rows (skip one row end)
– Corner: ch 1.
– Tab top: 6 sc, one in each st.
– Corner: ch 1.
– Right long side: 99 sc, worked the same as the left side.
– Corner: ch 1. Join to the first sc.
(228 sc + 4 ch-1 corner sps)
Rnd 2: Sl st in each sc and in each ch-1 corner sp. (232 sl sts) Fasten off.
Why the math works:
– Long sides: The rectangle has 4.5 rows per inch but needs 4 sc per inch. Working 8 sc over every 9 rows gives 72 sc over 18 in (45.7 cm), so the edge lies flat.
– Taper: Each row end on the taper is slanted and about one stitch wide, so one sc per row fits.
– Bottom and tab: The 24 bottom sts and 6 tab sts already match the stitch gauge.
Attach the ring: Push the tab through the wooden ring from front to back. Fold it down so its top edge lines up with Row 99 on the back, then whipstitch it in place across all 6 sts.
Final Blocking
- Soak the holder in cool water and squeeze it out gently. Don’t wring it.
- Roll it in a towel to remove extra water.
- Pin the backing flat at 6.5 in (16.5 cm) wide.
- Fill each pocket with a toilet roll wrapped in a plastic bag, or a rolled towel, to shape the curve.
- Straighten the trellis so each X sits at mid-height and the diamonds are even.
- Smooth each daisy flat with your fingers.
- Let it dry completely, for at least 24 hours.
Final Quality-Control Checklist
- The backing measures 6.5 in (16.5 cm) wide and about 23.5 in (59.7 cm) long, not counting the ring.
- Each pocket has 72 sts in Rnds 8–13 and 17–19.
- All 6 diamonds in each pocket are 3 in (7.6 cm) wide.
- Each pocket has 3 daisies, centered and level.
- The pocket ridges are 6 in (15.2 cm) apart.
- The border lies flat, without waves or cupping.
- The tab is sewn securely and the ring doesn’t slip.
- All ends are woven in.
Troubleshooting
- The base ruffles: Your tension in the round is loose. Go down a hook size for Rnds 1–8.
- The base cups before Rnd 9: Your tension is tight. Go up a hook size for the base.
- The trellis loops sag: Make your chains firmer, or work 14 ch instead of 15 in Rnds 14–15.
- The diamonds are uneven: Recount the 11 skipped sts in Rnd 14 and the center (8th) ch in Rnds 15–16.
- The pocket is wider than the strip: Check that you sewed exactly 24 sts to 24 sts.
- The border waves: Skip one more row end on each long side of the rectangle section.
- A roll falls out: Tighten the side seams, or add one extra green round before Rnd 18.
Care
Hand wash in cool water with mild soap and lay flat to dry. While it’s still damp, reshape each pocket around a roll.
Final Notes
Here’s how the measurements fit together:
– A gauge of 16 sc and 18 rows = 4 in (10.2 cm) gives a 24-st strip that is 6 in (15.2 cm) wide.
– Each pocket’s 24 back sts match the strip one to one.
– A 72-st round divides evenly into six 12-st diamonds, so 3 daisies sit centered on the front.
– The pocket ridges sit 27 rows apart, which is 6 in (15.2 cm).
– The border adds 0.25 in (0.6 cm) on each edge, bringing the backing to 6.5 in (16.5 cm) wide.
Happy crocheting!