

The Delft Blossom Curtain is a light, airy lace panel made from small flower motifs. Each cream flower sits inside a blue scalloped frame. Thin cream chain crosses link the motifs, so light passes through the open lattice and the flowers stand out against the window.
Two colors are used throughout: a soft cornflower blue and a warm cream. The look is cottage style, a bit like hand-painted blue-and-white china. This pattern uses US crochet terms.
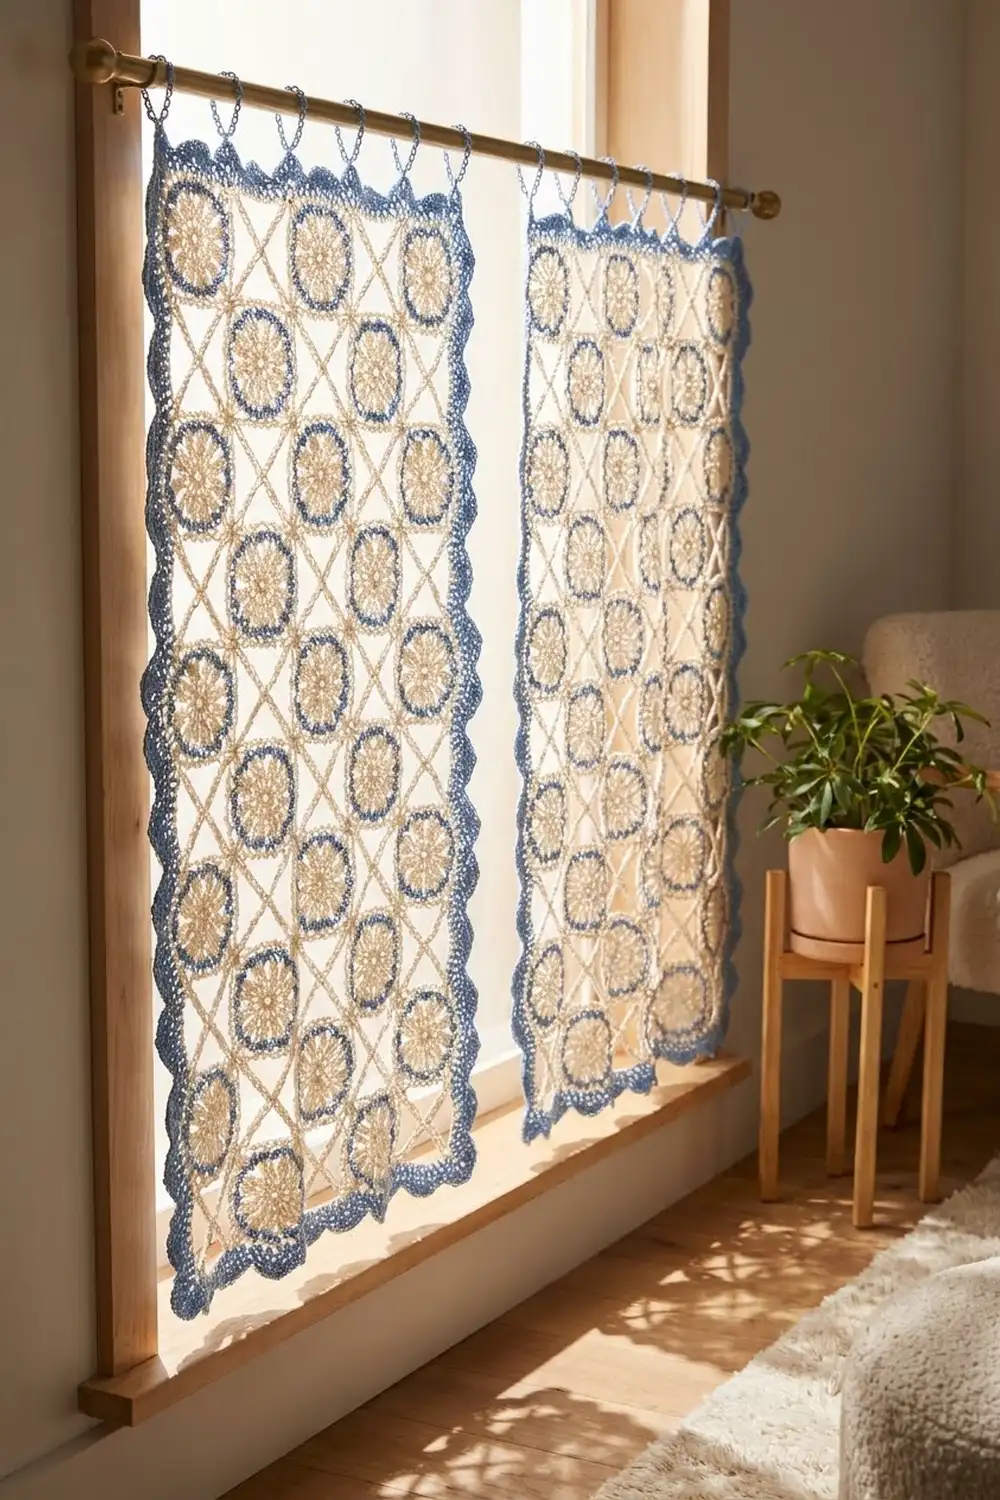
One finished panel measures 37 x 81 in (94.0 x 205.7 cm), not counting the hanging loops. Most windows need two panels, as shown in the photo.
Construction is simple and repeats. You crochet 180 motifs and join each one to its neighbors as you go, on its final round. Next you fill each gap between four motifs with a cream chain cross. Last, you add a two-round blue border around the whole panel and a row of hanging loops across the top.
Finished Size and Construction
- Finished panel size: 37 x 81 in (94.0 x 205.7 cm)
- Skill level: Intermediate
- Terminology: US crochet terms
- Yarn weight: DK / light (#3) cotton
- Hook: 4.0 mm (G-6)
- Number of pieces: 180 motifs per panel (360 for a pair)
- Layout: 9 motifs wide x 20 motifs long
- Single motif size: 4 in (10.2 cm) across, measured from petal tip to opposite petal tip
- Size before border: 36 x 80 in (91.4 x 203.2 cm)
- Border depth: 0.5 in (1.3 cm) on each side
- Hanging loops: 7 loops, each about 1.5 in (3.8 cm) tall
Materials
Yarn: Use a smooth mercerized or combed DK cotton, about 120 m per 50 g. Cotton holds its shape at a window and is easy to block. Avoid fuzzy yarns, because fuzz hides the eyelets and chain crosses.
Quantities for one panel:
- Cream: 700 g (about 1,680 m), for the flower centers and chain crosses
- Blue: 750 g (about 1,800 m), for the petal frames, border and loops
Double these amounts for a pair of panels. Both quantities include a margin of about 10% for gauge differences and swatching.
Tools:
– 4.0 mm (G-6) crochet hook
– Tapestry needle
– Stitch markers
– Measuring tape
– Blocking mats, rustproof pins and a spray bottle
– Scissors
Abbreviations (US Terms)
- ch – chain
- sl st – slip stitch
- sc – single crochet
- hdc – half double crochet
- dc – double crochet
- tr – treble crochet
- sp – space
- st(s) – stitch(es)
- tip – the ch-3 space at the point of a blue petal
Special stitch – tr2tog (treble two together): Yarn over twice and insert your hook in the first place you’re told to. Yarn over, pull up a loop, then [yarn over, pull through 2 loops] twice. Yarn over twice and insert your hook in the second place. Yarn over, pull up a loop, then [yarn over, pull through 2 loops] twice. Yarn over and pull through all 3 loops on the hook.
Joining tip: In place of the usual ch 3 at a petal point, work ch 1, sl st into the matching tip of the neighboring motif, ch 1.
Gauge and Checkpoints
Make one full motif and block it before you start the panel. Then make a 2 x 2 test block, with joins and one chain cross, to check that the joins lie flat.
- After Round 2: 1.75 in (4.4 cm) across
- After Round 3 (cream flower done): 2.75 in (7.0 cm) across
- After Round 5 (finished motif): 4 in (10.2 cm), tip to tip
- 2 x 2 test block: 8 x 8 in (20.3 x 20.3 cm)
- Border gauge: 18 sc = 4 in (10.2 cm)
Motif too big? Go down 0.5 mm in hook size. Motif too small? Go up 0.5 mm. A difference of 0.125 in (0.3 cm) per motif adds up to 2.5 in (6.4 cm) over the 20-motif length, so take the time to match gauge.
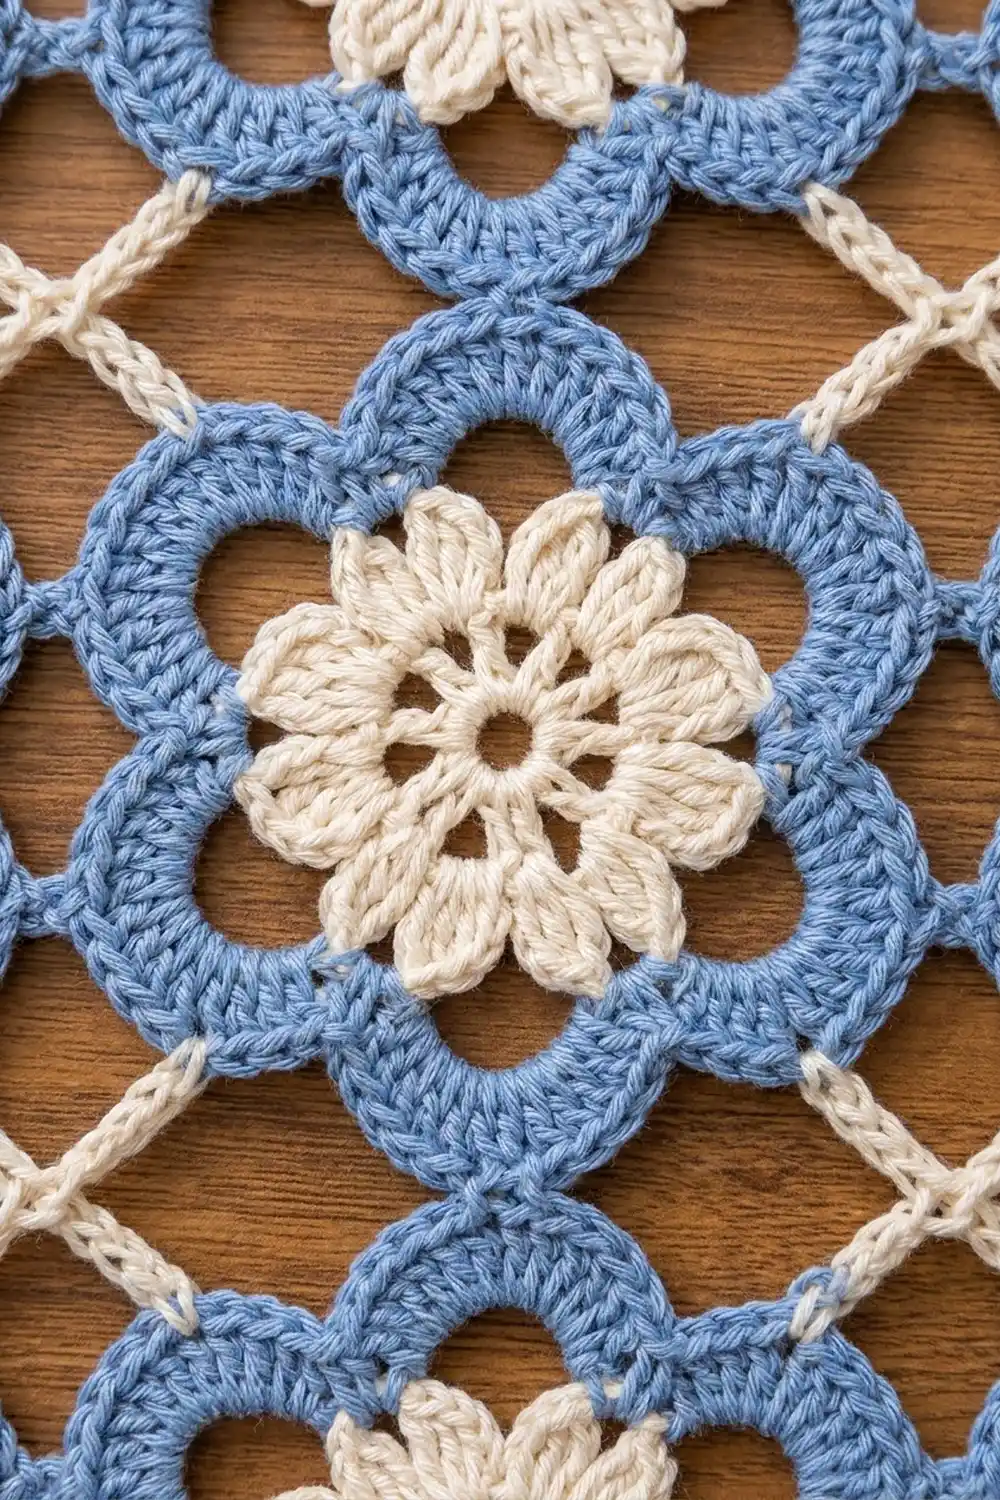
Motif Pattern
Rounds 1–3: Cream Flower
Round 1 (cream): Make a magic ring. Ch 4 (counts as dc + ch 1). [Dc in ring, ch 1] 7 times. Sl st to 3rd ch of the beginning ch-4. Pull the ring closed. (8 dc, 8 ch-1 sps)
These ch-1 spaces form the eyelet ring in the center.
Round 2: Sl st into next ch-1 sp. Ch 3 (counts as dc), 2 dc in same sp, ch 1. [3 dc in next ch-1 sp, ch 1] 7 times. Sl st to top of beginning ch-3. (24 dc in 8 groups of 3, 8 ch-1 sps)
Round 3: Sl st in next 2 dc and into next ch-1 sp. Ch 1, sc in same sp. [Skip 1 dc, 5 dc in next dc, skip 1 dc, sc in next ch-1 sp] 8 times, leaving out the last sc. Sl st to first sc. Fasten off cream. (8 petals: 40 dc + 8 sc = 48 sts)
Each 5-dc shell is one rounded cream petal, and each sc is the valley between two petals.
Rounds 4–5: Blue Petal Frame
Round 4 (blue): Join blue with a sc in any cream sc (petal valley). Ch 7. [Sc in next cream sc, ch 7] 7 times. Sl st to first sc. (8 sc + 56 ch = 64 sts; 8 ch-7 arches)
Each ch-7 arch passes over one cream petal. The arch is slightly longer than the petal is tall, which leaves the small openings between cream and blue.
Round 5: Sl st into first ch-7 arch. In each ch-7 arch work: (sc, hdc, 3 dc, ch 3, 3 dc, hdc, sc). Sl st to first sc. Fasten off. (8 petals x 13 sts = 104 sts; 8 tips)
Petal orientation: Number the petals 1 to 8 in the order you work them. Petals 1, 3, 5 and 7 are side petals: they point up, right, down and left once the motif is in the grid. Petals 2, 4, 6 and 8 are diagonal petals and point into the gaps between motifs.
Make All Pieces
Make the first motif in full. Work every other motif through Round 4 as written, then join it on Round 5.
Per panel:
– 180 motifs: Rounds 1–3 in cream, Rounds 4–5 in blue
– 152 chain crosses in cream: (9 − 1) x (20 − 1) = 8 x 19
Layout (each M is one motif, each + is one chain cross):
Row 1:   M M M M M M M M M
          + + + + + + + +
Row 2:   M M M M M M M M M
          + + + + + + + +
 ...     (repeat to Row 20)
Row 20:  M M M M M M M M M
Each row has 9 motifs, and there are 20 rows. There are 8 crosses between each pair of rows, and 19 such bands.
Joining
Method: Join as you go on Round 5. Work along the rows from left to right, then down the panel.
Stitch-to-stitch logic: Each motif joins only by its side petals. When a motif has a neighbor to its left, replace that side petal’s ch 3 with ch 1, sl st into the right-hand side tip of the left neighbor, ch 1. When it has a neighbor above, join its upper side petal the same way to the lower side tip of the motif above. A motif in the middle of the panel joins at 2 tips. The motifs below and to the right will join to it later.
Never join the diagonal petals at this stage. They stay free for the chain crosses and the border.
Tension advice: Keep the joining sl st loose, about the same height as a ch. A tight sl st pinches the petal tips and makes the panel pucker.
Chain crosses (cream): In each gap there are 4 diagonal tips, one from each motif; call them A, B, C and D going clockwise. Join cream with a sl st in tip A. Ch 4 to reach the center of the gap. Ch 4 more and sl st in tip C. Sl st back along the 4 ch you just made to reach the center. Ch 4, sl st in tip B, then sl st back along those 4 ch to the center. Ch 4, sl st in tip D, and fasten off. Each tip is about 0.8 in (2.0 cm) from the center of the gap, which matches 4 DK chains.
Size checkpoint: After 3 rows (27 motifs), lay the piece flat. It should measure 36 x 12 in (91.4 x 30.5 cm). The final unbordered panel should measure 36 x 80 in (91.4 x 203.2 cm).
Border
Border gauge: 18 sc = 4 in (10.2 cm), so each motif-width of edge gets 18 sts.
Along each edge, a motif shows three free tips: a diagonal tip, its side tip, and another diagonal tip. Where two edge motifs meet, their neighboring diagonal tips are worked together with a tr2tog. At each panel corner, the outer diagonal tip of the corner motif becomes the border corner.
Round 1 (blue): Join blue with a sl st in the outer diagonal tip of the top-left corner motif. Ch 4 (counts as tr), ch 3, tr in same tip. This is the first corner.
Along each side: [Ch 8, sc in side tip of next motif, ch 8, then either tr2tog (first leg in this motif’s second diagonal tip, second leg in the next motif’s first diagonal tip) or, on the last motif of the side, (tr, ch 3, tr) in the corner tip].
Repeat for all 4 sides. On the final corner, work only the tr, then ch 3 and sl st to the top of the beginning ch-4.
Each side has 1 opening tr plus 18 sts per motif (ch 8, sc, ch 8, tr2tog or closing tr):
– Top and bottom (9 motifs): 1 + (9 x 18) = 163 sts (9 sc, 8 tr2tog, 2 tr, 144 ch)
– Long sides (20 motifs): 1 + (20 x 18) = 361 sts (20 sc, 19 tr2tog, 2 tr, 320 ch)
– Plus 4 corner ch-3 sps, which are not counted in the sides
Round 2: Sl st into corner ch-3 sp. Ch 1, (sc, ch 2, sc) in same sp. Work 1 sc in each tr, sc and tr2tog, and 8 sc in each ch-8 arch. Work (sc, ch 2, sc) in each corner sp. Sl st to first sc.
This is a conversion round. Every st and ch from Round 1 gets exactly 1 sc, and each side also gains its 2 corner sc:
– Top and bottom: 163 + 2 = 165 sc each
– Long sides: 361 + 2 = 363 sc each
– Total: 1,056 sc + 4 corner ch-2 sps
Why the math works: 18 sc per motif at 18 sc = 4 in (10.2 cm) matches the 4 in (10.2 cm) motif width exactly. The edge lies flat with no ruffling or cupping. The few extra corner stitches only ease the stitches around the turns.
Round 3 (hanging loops, top edge only): Join blue in the first sc of the top edge. Sc in each of the 165 sts. On sts 8, 33, 58, 83, 108, 133 and 158, work (sc, ch 14, sc) all in that one st. Fasten off.
The loops are 25 sts apart, and the 83rd st is the exact center of the edge. This is a trim round: 165 sts worked 1 per st, plus 7 x 15 (ch 14 + 1 extra sc) = 270 sts.
Weave in all ends securely, following the stitches so they can’t pull loose and show through the lace.
Final Blocking
- Soak the panel in cool water for 15 minutes. Gently press out the water; don’t wring it.
- Roll it in towels to remove most of the moisture.
- Lay it flat on mats. You may need to block it in sections, about 6 motif-rows at a time.
- Pin the outer border straight to 37 in (94.0 cm) wide.
- Pin the tip of every side petal so the grid stays square, and open each chain cross into a crisp X.
- Check that the length reaches 81 in (205.7 cm) as each section dries.
- Let it dry completely before unpinning.
Final Quality-Control Checklist
- Every motif has 8 cream petals, 8 blue petals and an open eyelet center.
- All side tips are joined, and every interior gap has one cream cross (152 total).
- No diagonal tip is joined to a side tip by mistake.
- Top and bottom borders have 165 sc each; long sides have 363 sc each.
- The 7 loops are evenly spaced, with the middle loop at the center.
- The panel measures 37 x 81 in (94.0 x 205.7 cm).
- All ends are woven in and invisible from both sides.
Troubleshooting
- The cream flower cups: Round 3 is too tight. Go up a hook size for that round only.
- The blue frame ruffles: Your ch-7 arches are loose. Try ch 6 and recheck the 4 in (10.2 cm) gauge.
- The panel slants: Some joins went to a diagonal tip by mistake. Undo and rejoin to the side tip.
- The chain crosses sag: Use ch 3 per arm, or block them firmly.
- The border waves: Your sc gauge is loose. Put 7 sc in each ch-8 arch, or use a smaller hook.
- The border pulls in: Use a larger hook for Round 2.
Care
Hand wash in cool water with a mild detergent and dry flat, reshaping it while damp. Avoid long, direct afternoon sun if you want the blue to stay bright.
Final Notes
The measurement chain is simple. Each motif is 4 in (10.2 cm), and a grid of 9 x 20 motifs gives 36 x 80 in (91.4 x 203.2 cm). The border adds 0.5 in (1.3 cm) on each side, at 18 sc per motif, for a finished 37 x 81 in (94.0 x 205.7 cm) panel. Check your first motif, your 2 x 2 test block and your first 3 rows, and the full panel will come out to size.
Happy crocheting!