
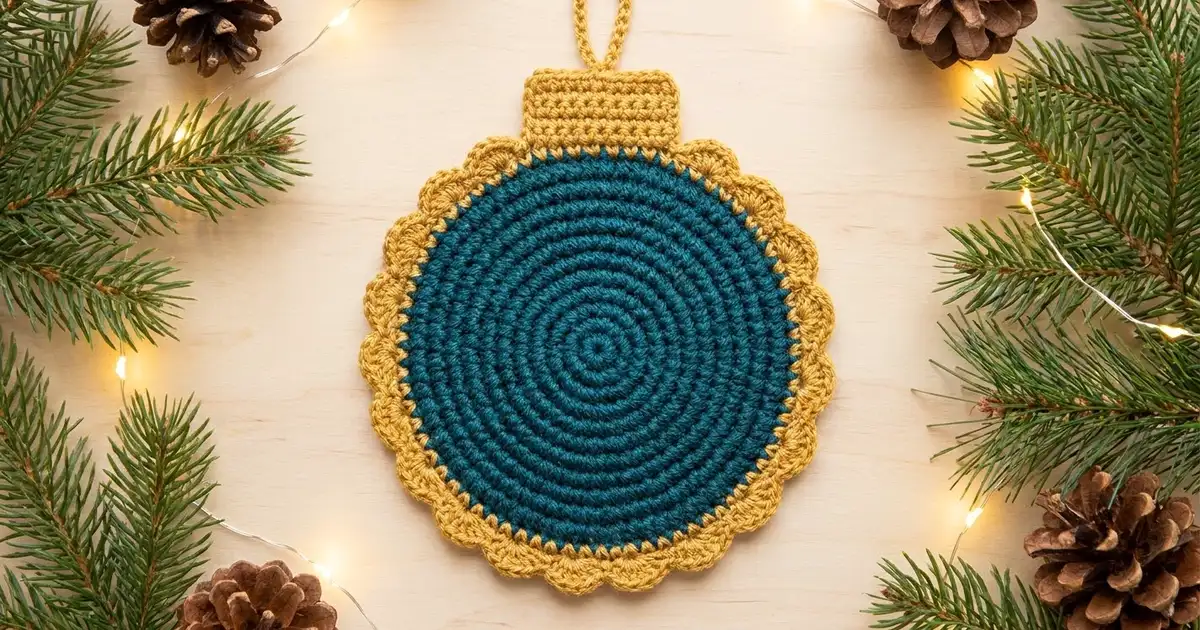
The Evergreen Bauble Coaster is a small, flat Christmas ornament that you can actually use. A solid deep-teal circle forms the bauble and a gold scalloped edge frames it. On top sits a ribbed gold cap with a tiny hanging loop, just like a classic glass tree ornament.
You need only two colors: a rich teal for the body and a warm gold or champagne for the trim. The teal is worked in tight single crochet so the concentric rings show clearly, while the gold shells catch the light around the edge.
This pattern uses US crochet terms. The finished coaster measures about 4.5 in (11.4 cm) across the scallops. It is about 5.2 in (13.2 cm) tall from the bottom scallop to the top of the hanging loop.
The coaster is made in one piece. First you work 11 joined rounds of single crochet in teal and add one gold round. Then you crochet a short ribbed cap in rows directly onto the top of that round. Last, a round of shell scallops runs around the circle from one side of the cap to the other.
Finished Size and Construction
- Finished size: 4.5 in (11.4 cm) wide; 5.2 in (13.2 cm) tall including cap and loop
- Skill level: Easy to intermediate (post stitches on the cap)
- Terminology: US crochet terms
- Yarn weight: Sport / fine (#2) cotton or cotton blend
- Hook: 3 mm (US C/2 or D/3)
- Number of pieces: 1 (a single coaster; no joining)
- Layout: One circle with a cap at the top
- Teal circle before border: 3.5 in (8.9 cm) diameter
- After gold Round 12: 3.8 in (9.7 cm) diameter
- Border depth: about 0.5 in (1.3 cm) per side, gold band plus scallops
- Cap: about 1.3 in (3.3 cm) wide x 0.6 in (1.5 cm) tall, plus a loop about 0.45 in (1.1 cm) tall
Materials
Use a smooth sport-weight cotton, either mercerized or combed. Cotton absorbs moisture, protects the table from a hot mug, and shows the rounds crisply. For the gold, a cotton with a light metallic strand looks festive, but plain mustard-gold or champagne cotton works just as well. Avoid fuzzy or very stretchy acrylic, which will blur the scallops.
Yarn:
- Color A – Deep Teal: about 12 g, roughly 40 m (44 yd)
- Color B – Gold / Champagne: about 6 g, roughly 20 m (22 yd)
These amounts are for one coaster. They include about 20 percent extra for tails, differences in tension, and starting over if you need to.
Tools:
- 3 mm crochet hook
- Tapestry needle
- 2 locking stitch markers
- Scissors
- Ruler or tape measure
- Blocking mat and rust-proof pins
- Spray bottle or steam iron
Abbreviations (US Terms)
- MR – magic ring
- ch – chain
- sl st – slip stitch
- sc – single crochet
- hdc – half double crochet
- dc – double crochet
- st(s) – stitch(es)
- RS / WS – right side / wrong side
Special stitches:
- BPhdc (back post half double crochet): Yarn over. Insert the hook from back to front to back around the post of the stitch. Yarn over, pull up a loop, then yarn over and pull through all 3 loops. When you work it from the WS, it makes a raised ridge on the RS.
- FPhdc (front post half double crochet): Yarn over. Insert the hook from front to back to front around the post of the stitch. Yarn over, pull up a loop, then yarn over and pull through all 3 loops.
- Scallop: 5 dc in the same stitch.
Gauge and Checkpoints
Gauge: 24 sc x 25 rounds = 4 in (10.2 cm) in single crochet. That works out to 6 sc per 1 in (2.5 cm), and each round adds about 0.16 in (0.4 cm) to the radius.
Since this is one small piece, the coaster itself is your gauge test. At each checkpoint, lay it flat and measure the diameter without stretching:
- After Round 5 (30 sts): 1.6 in (4.1 cm)
- After Round 8 (48 sts): 2.5 in (6.4 cm)
- After Round 11 (66 sts): 3.5 in (8.9 cm)
- After Round 12 (72 sts, gold): 3.8 in (9.7 cm)
- After the scallop round: 4.5 in (11.4 cm) wide
If it’s too big (Round 5 measures more than 1.7 in / 4.3 cm), use a hook 0.25–0.5 mm smaller. If it’s too small (Round 5 measures less than 1.5 in / 3.8 cm), use a hook 0.25–0.5 mm larger.
If the circle cups into a bowl shape, loosen your tension a little or use a hook one size larger. If the edge ruffles, your stitches are too loose, so use a hook one size smaller.
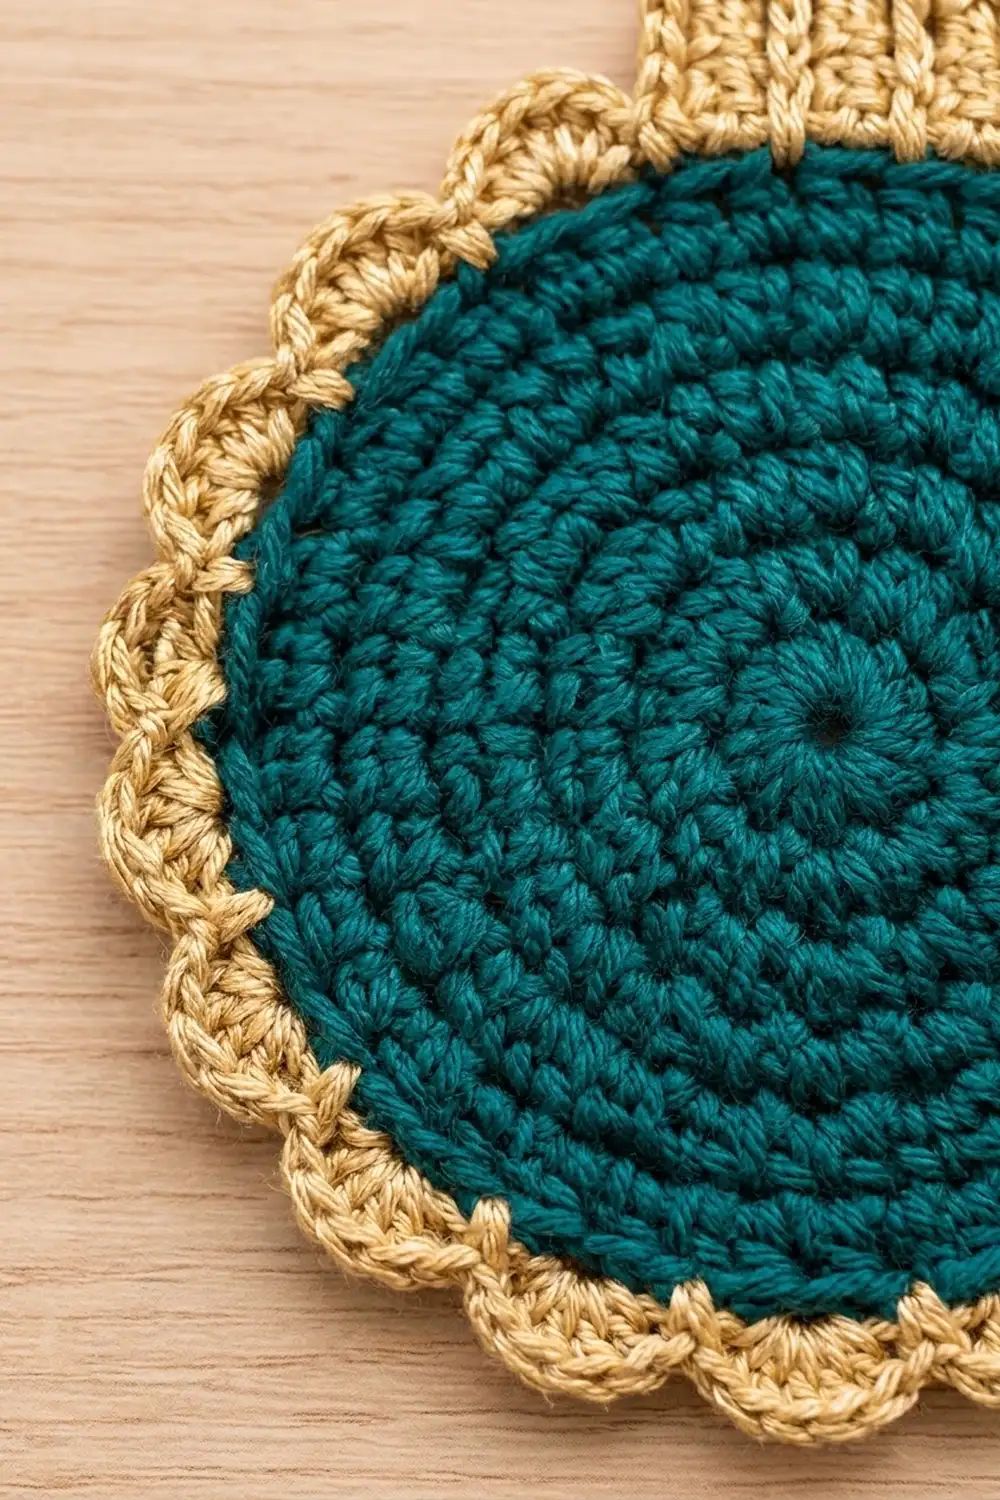
Teal Bauble Circle
Work in joined rounds with the RS facing. Do not turn. The ch 1 at the start of each round doesn’t count as a stitch. Join every round with a sl st to the first sc. On odd rounds the increases are shifted (staggered) so the circle stays round instead of turning into a hexagon.
With Color A:
Round 1: Make a MR, ch 1, 6 sc in ring, sl st to first sc. Pull the ring closed. (6 sts)
Round 2: Ch 1, 2 sc in each st around, sl st to join. (12 sts)
Round 3: Ch 1, sc in next st, 2 sc in next st; repeat from * 6 times total, sl st to join. (18 sts)
Round 4: Ch 1, sc in next 2 sts, 2 sc in next st; repeat 6 times total, sl st to join. (24 sts)
Round 5: Ch 1, sc in next st, 2 sc in next st, sc in next 3 sts, 2 sc in next st; repeat from * 5 times, sc in last 2 sts, sl st to join. (30 sts)
Checkpoint: 1.6 in (4.1 cm) across.
Round 6: Ch 1, sc in next 4 sts, 2 sc in next st; repeat 6 times total, sl st to join. (36 sts)
Round 7: Ch 1, sc in next 2 sts, 2 sc in next st, sc in next 5 sts, 2 sc in next st; repeat from * 5 times, sc in last 3 sts, sl st to join. (42 sts)
Round 8: Ch 1, sc in next 6 sts, 2 sc in next st; repeat 6 times total, sl st to join. (48 sts)
Checkpoint: 2.5 in (6.4 cm) across.
Round 9: Ch 1, sc in next 3 sts, 2 sc in next st, sc in next 7 sts, 2 sc in next st; repeat from * 5 times, sc in last 4 sts, sl st to join. (54 sts)
Round 10: Ch 1, sc in next 8 sts, 2 sc in next st; repeat 6 times total, sl st to join. (60 sts)
Round 11: Ch 1, sc in next 4 sts, 2 sc in next st, sc in next 9 sts, 2 sc in next st; repeat from * 5 times, sc in last 5 sts, sl st to join. (66 sts)
Fasten off Color A and weave in the tail on the WS.
Checkpoint: 3.5 in (8.9 cm) across. Each round from 2 to 11 adds exactly 6 sts, so Round N always has 6 x N sts.
Gold Round and Ornament Cap
Round 12 (gold): With RS facing, join Color B with a sl st in any st. Ch 1, sc in next 10 sts, 2 sc in next st; repeat 6 times total, sl st to join. (72 sts)
This is a regular increase round: you work once into each of the 66 sts and add 6 increases, for 72. Fasten off and weave in the tail.
Checkpoint: 3.8 in (9.7 cm) across.
Mark the cap position. Lay the coaster flat with the joins at the bottom. Pick the 8 sts at the very top of the circle and number them 1 to 8 from right to left. Place a marker in st 1 and in st 8. The rest of the circle is sts 9 through 72.
You’ll work the cap in short rows on these 8 sts only.
Cap Row 1 (RS): Join Color B with a sl st in st 1. Ch 1, sc in sts 1 through 8, turn. (8 sts)
Cap Row 2 (WS): Ch 2 (does not count as a st), BPhdc around each of next 8 sts, turn. (8 sts)
Back-post stitches worked from the WS stand out on the RS. This makes the first set of vertical ridges.
Cap Row 3 (RS): Ch 2 (does not count), FPhdc around each of next 8 sts, turn. (8 sts)
Each post stitch sits directly above the one below it, so the cap shows clear vertical ribs.
Hanging Loop (WS): Ch 1, sl st in next 3 sts, ch 8, skip next 2 sts, sl st in last 3 sts. (3 sl sts + ch-8 loop + 3 sl sts, covering all 8 sts)
Fasten off. The loop stands about 0.45 in (1.1 cm) above the cap. The cap is about 1.3 in (3.3 cm) wide and 0.6 in (1.5 cm) tall.
Scalloped Border
Border gauge: Each scallop uses 4 sts of Round 12 (1 sc, skip 1, 5 dc in next, skip 1) and covers about 0.67 in (1.7 cm) of the gold edge. Each shell rises about 0.35 in (0.9 cm) above Round 12.
Round 13 (scallop round): With RS facing, join Color B with a standing sc in st 9, which is the first st on the left side of the cap. Skip st 10, 5 dc in st 11, skip st 12. Sc in next st, skip next st, 5 dc in next st, skip next st; repeat from * 15 more times. The last skip falls in st 72, and you now have 16 scallops.
Sl st into the side of Cap Row 1 at the right edge of the cap. Fasten off and weave in the tail.
Counts for this round:
- Scallop section: 64 sts of Round 12 used (sts 9–72) = 16 repeats x 4 sts
- Cap section: 8 sts of Round 12 (sts 1–8), already used by the cap
- Total check: 64 + 8 = 72, which matches Round 12
- Stitches made: 16 sc + 80 dc = 96 sts
Why the math works: Each scallop uses 4 sts, so the scallop section needs a multiple of 4. Round 11’s 66 sts don’t divide evenly by 4, so Round 12 adds 6 sts to reach 72. The cap takes 8 of those sts, leaving 64. That gives exactly 16 scallops with no partial repeat and no extra stitch to fudge. Each shell spreads 5 dc over 4 sts, which gives the edge just enough fullness to lie flat.
Final width: 3.8 in (9.7 cm) plus about 0.35 in (0.9 cm) of scallop on each side = 4.5 in (11.4 cm).
Final height: From the bottom scallop tip to the top of Round 12 is about 4.15 in (10.5 cm). Add the 0.6 in (1.5 cm) cap and the 0.45 in (1.1 cm) loop for about 5.2 in (13.2 cm).
Final Blocking
- Weave in any remaining tails on the WS along the stitches, then trim them.
- Mist the coaster with cool water until it’s damp, not soaked. You can also hold a steam iron about 1 in (2.5 cm) above the cotton. Never let the iron touch metallic yarn.
- Lay the coaster RS up on the blocking mat.
- Use a ruler to shape the teal circle to 3.5 in (8.9 cm) and the gold edge to 3.8 in (9.7 cm).
- Pin the tip of each of the 16 scallops so the outer diameter is 4.5 in (11.4 cm).
- Square up the cap with 2 pins at its top corners, keeping the ribs straight up and down.
- Shape the hanging loop into a round arch and pin it.
- Let the coaster dry completely, then remove the pins.
Final Quality-Control Checklist
- Round 11 has 66 sts and measures 3.5 in (8.9 cm).
- Round 12 has 72 sts and measures 3.8 in (9.7 cm).
- The circle lies flat, with no cupping or ruffling.
- The outline is round, not hexagonal.
- The joins are at the bottom, away from the cap.
- The cap is centered over 8 sts, with clear ribs on the RS.
- There are 16 even scallops running from one side of the cap to the other.
- The coaster measures about 4.5 in (11.4 cm) wide and 5.2 in (13.2 cm) tall.
- All tails are woven in securely.
Troubleshooting
The circle looks like a hexagon: The increases are stacking on top of each other. Follow the shifted increase placement on odd rounds exactly as written.
The circle cups: Your tension is too tight. Loosen up or use a hook 0.25 mm larger.
The edge ruffles: Your tension is too loose, or you added an extra increase. Recount your stitches, or use a hook 0.25 mm smaller.
The scallops don’t fit evenly: Recount Round 12 (it must have 72 sts). Then check that the cap sits on exactly 8 sts, leaving 64.
The cap ribs look flat: Row 2 must be BPhdc worked from the WS, and Row 3 must be FPhdc worked from the RS.
Care
Hand wash in cool water with mild soap. Roll it in a towel to remove water, then dry flat and reshape the scallops. Never iron directly on metallic gold trim.
Final Notes
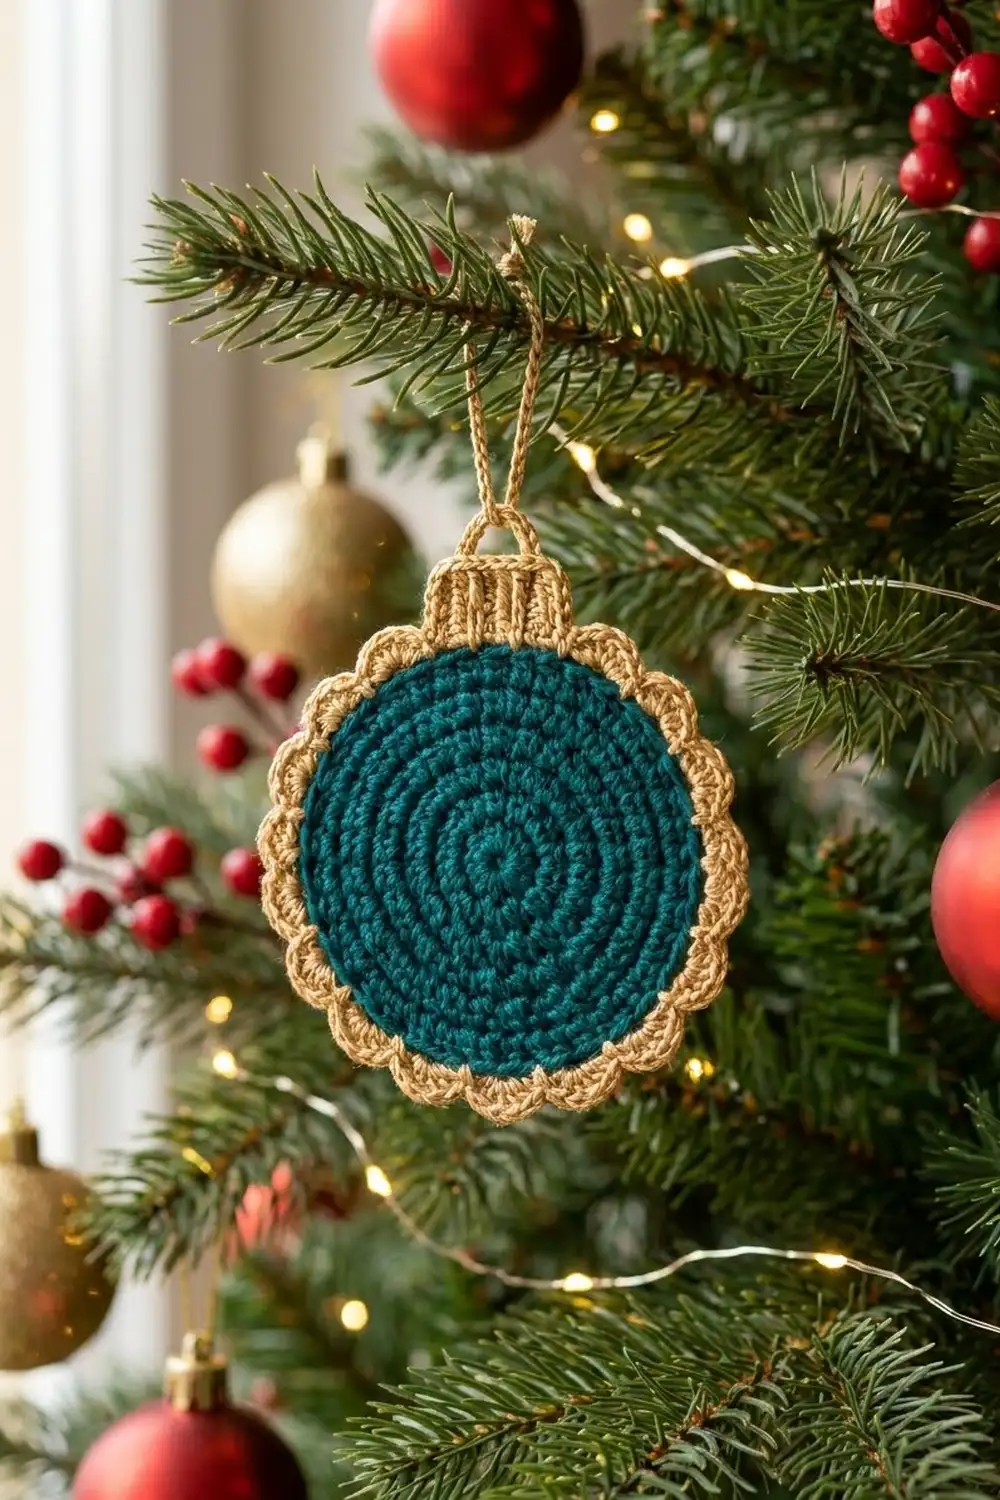
Each measurement builds on the one before it. At 6 sc per 1 in (2.5 cm), Round 5 measures 1.6 in (4.1 cm) and Round 8 measures 2.5 in (6.4 cm). Round 11 has 66 sts and measures 3.5 in (8.9 cm). Gold Round 12 brings the circle to 72 sts and 3.8 in (9.7 cm). Eight of those stitches carry the ribbed cap, and the other 64 hold 16 scallops. The finished ornament is about 4.5 in (11.4 cm) wide and 5.2 in (13.2 cm) tall.
If your size matches at each checkpoint, the cap and scallops will fit exactly. Use it under a mug, tie it onto a gift, or hang it on the tree.
Happy crocheting!