

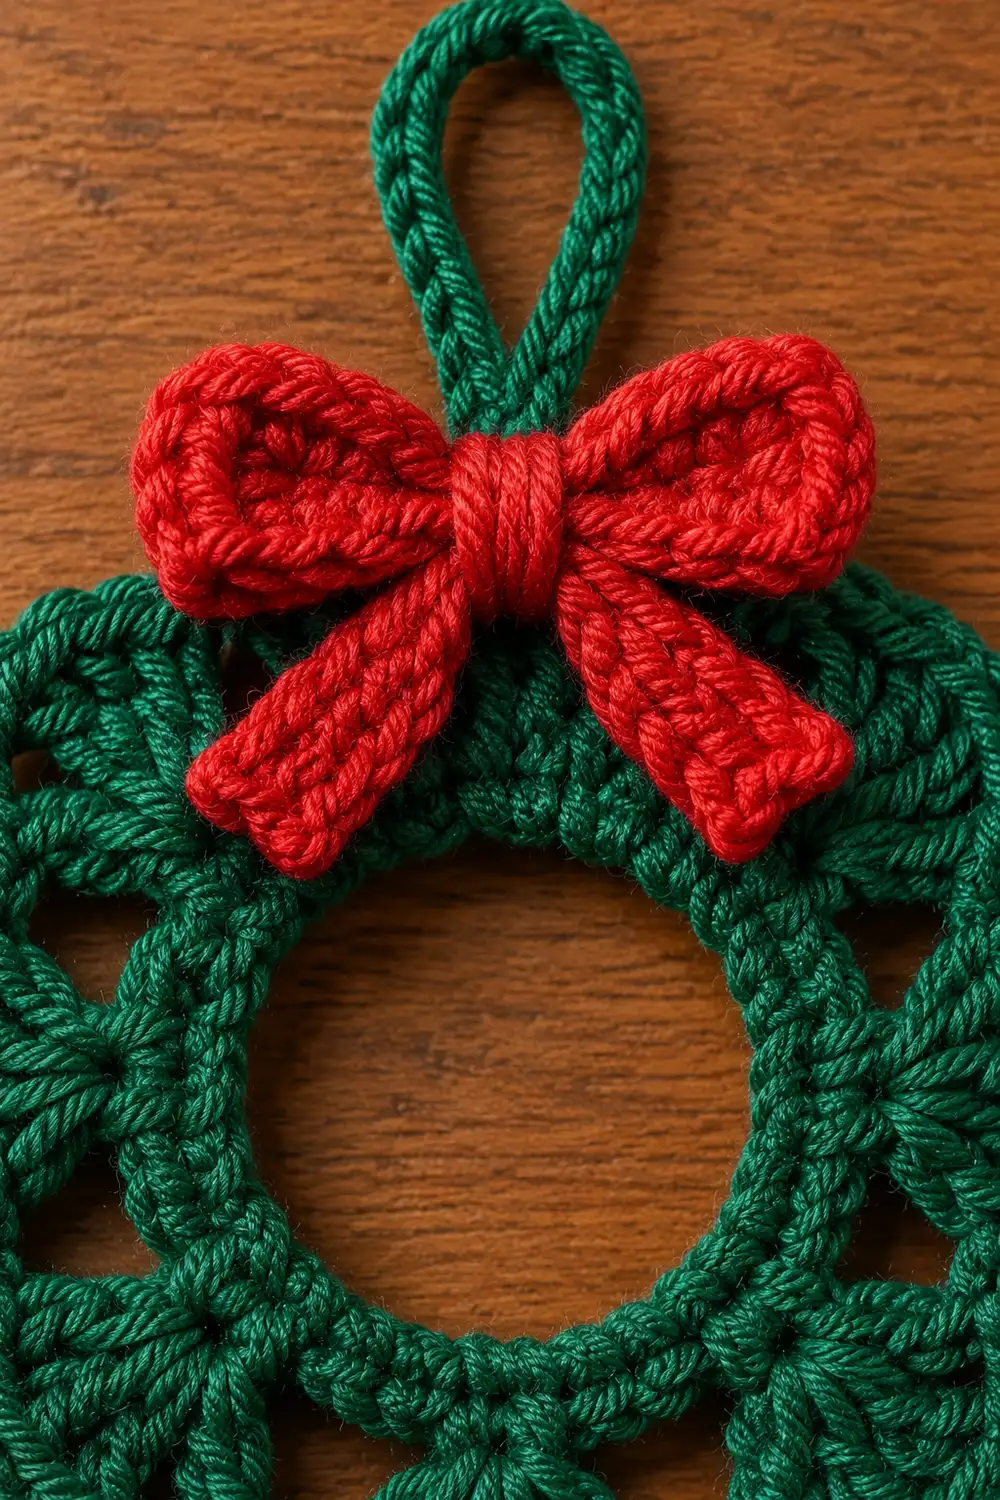
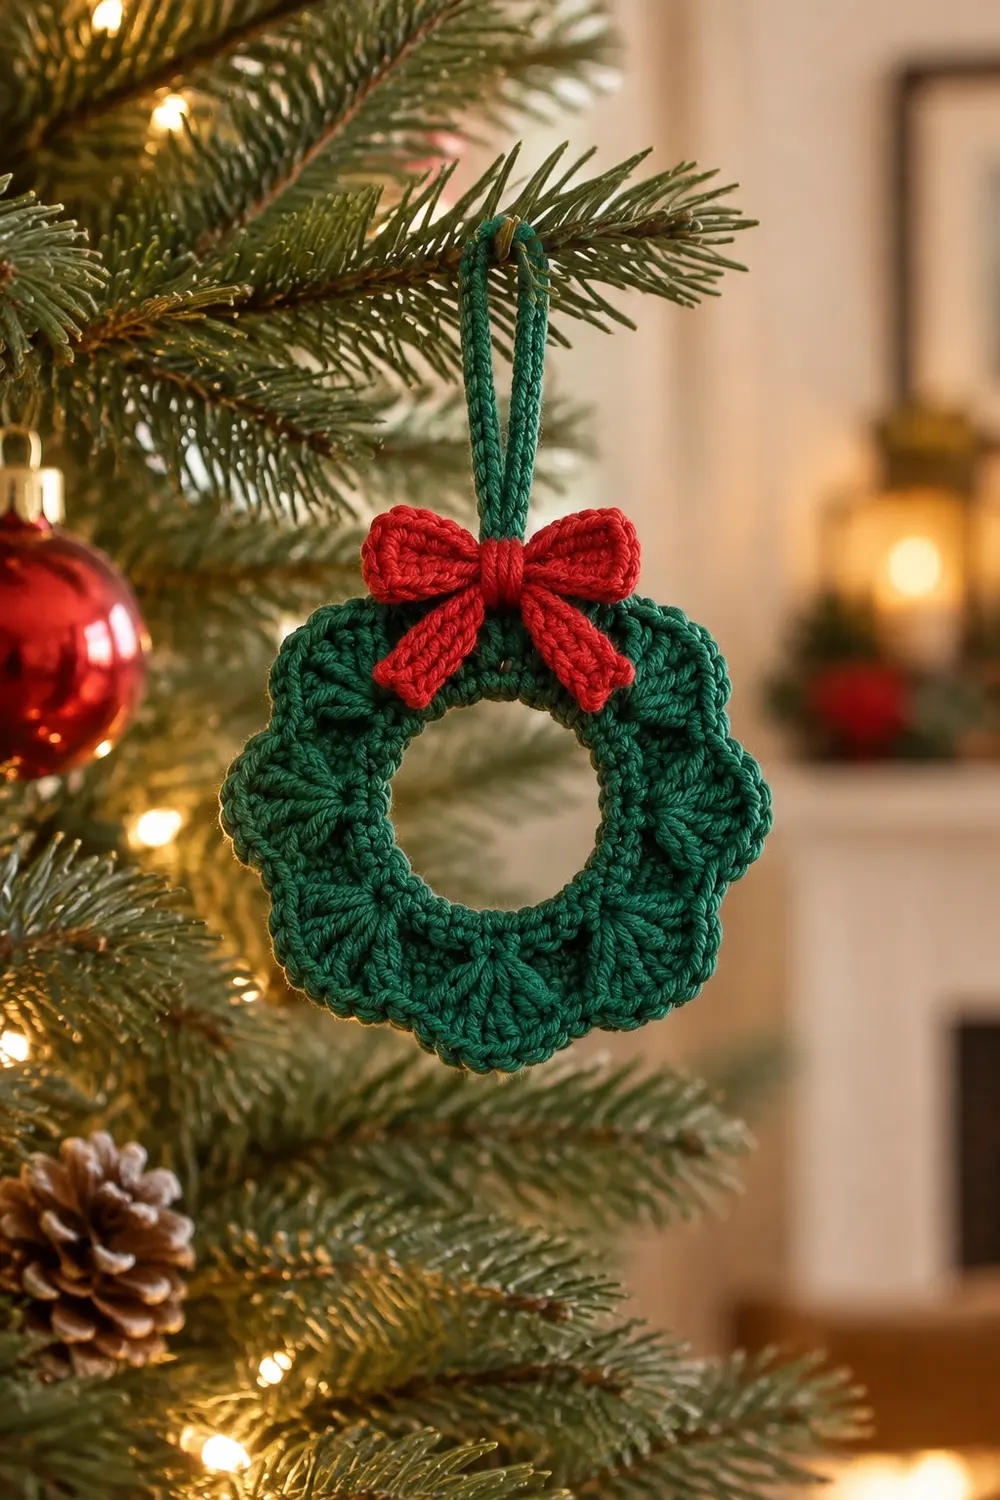
This little wreath ornament is worked as one ring in dark forest green yarn. Eight textured fan clusters circle the outside edge, and each fan has a small popcorn at its center that pops forward. A bright red two-loop bow sits at the top, and a green hanging loop rises from behind the bow knot.
The style is classic and cozy. The open center keeps it light enough for a tree branch. The layered fans give it real dimension even though the wreath lies flat. Use it on the tree, as a gift topper, or hang it on a cabinet knob.
This pattern uses US crochet terms. The finished wreath measures 4.5 in (11.4 cm) across, from fan tip to opposite fan tip. The center opening is about 1.75 in (4.4 cm) wide.
Construction is simple. You chain a ring and work 3 rounds outward into the fan clusters, then add 1 outline round as the border. The hanging loop is worked straight off the border. The bow is a small separate strip, folded and cinched, then sewn over the base of the loop.
Finished Size and Construction
- Finished size: 4.5 in (11.4 cm) diameter; center opening 1.75 in (4.4 cm)
- Skill level: Easy / advanced beginner (popcorn stitch included)
- Terminology: US crochet terms
- Yarn weight: Worsted (#4)
- Hook: 5.0 mm (US H-8)
- Number of pieces: 1 wreath (with hanging loop worked on) + 1 bow
- Layout: Single ring, 8 fans around, bow centered at the top over the gap between 2 fans
- Piece size: Wreath 4.5 in (11.4 cm); bow 2.25 in (5.7 cm) wide
- Size before border: 4.25 in (10.8 cm)
- Border depth: about 0.125 in (0.3 cm) per side, adding 0.25 in (0.6 cm) to the total diameter
Materials
Choose a smooth worsted yarn with good stitch definition. Cotton or a cotton blend holds the fan shape best and blocks crisply. Soft acrylic also works, but the popcorns may need a firmer block. Avoid fuzzy or brushed yarns, which blur the fans.
- Dark forest green: 15 g, about 30 m (wreath, border, hanging loop)
- Bright red: 6 g, about 12 m (bow and center wrap)
These quantities include a margin for a gauge swatch and weaving in ends.
Tools:
– 5.0 mm (US H-8) crochet hook
– Tapestry needle
– Scissors
– 1 stitch marker
– Rust-proof pins and a foam blocking board
– Spray bottle
– Optional: fabric stiffener for a firmer ornament
Abbreviations (US Terms)
- ch – chain
- sl st – slip stitch
- sc – single crochet
- hdc – half double crochet
- dc – double crochet
- st(s) – stitch(es)
- sk – skip
- rep – repeat
- BLO – back loop only
- pc – popcorn
Popcorn (pc): Work 4 dc in the indicated st. Remove the hook from the loop. Insert the hook from front to back into the top of the first dc of the group. Pick up the dropped loop and pull it through. Ch 1 to close. The closing ch 1 is the top of the popcorn and counts as 1 st.
Fan: In the same st, work 3 dc, 1 pc, 3 dc. One fan = 7 sts (3 dc + 1 pc + 3 dc).
Gauge and Checkpoints
Gauge: 16 sc and 18 rows = 4 in (10.2 cm) in rows of sc with a 5.0 mm hook.
This is a single small piece, so the pattern itself works as your test. Make Rounds 1–2, then stop and measure before you go on. Keeping the early rounds accurate saves you from ripping out the fans later.
Checkpoints (measure flat, without stretching):
– Foundation ring: about 1.75 in (4.4 cm) across the inside
– After Round 1: 2.25 in (5.7 cm) outer diameter
– After Round 2: 3 in (7.6 cm) outer diameter
– After Round 3: 4.25 in (10.8 cm) fan tip to opposite fan tip
– After Round 4 (border): 4.5 in (11.4 cm)
If your piece is too big: Change to a 4.5 mm hook and restart.
If your piece is too small or the ring cups upward: Change to a 5.5 mm hook. Also check that your foundation chain is not tight.
A difference of 0.25 in (0.6 cm) at Round 2 grows to about 0.5 in (1.3 cm) by the border, so fix it early.
Wreath Body
Use dark forest green throughout.
Foundation: Ch 24. Make sure the chain is not twisted, then sl st into the first ch to form a ring.
Round 1: Ch 1 (does not count as a st). Sc in each ch around. Sl st to the first sc to join. (24 sc)
This round is worked 1 sc into each of the 24 chains, with no increases. It firms up the inner edge of the wreath. Place a marker in the first st of each round if that helps.
Round 2 (growth round): Ch 2 (does not count as a st). Hdc in each of the next 2 sts, 2 hdc in the next st. Rep from * 8 times total. Sl st to the first hdc to join. (32 hdc)
Each repeat turns 3 stitches into 4. With 8 repeats, the round has 32 sts. This widens the ring so the fans have room to spread. Check the 3 in (7.6 cm) checkpoint now.
Round 3 (fan round): Ch 1. Sc in the next st, sk 1 st, fan (3 dc, pc, 3 dc) in the next st, sk 1 st. Rep from * 8 times total. Sl st to the first sc to join. (8 sc + 8 fans of 7 sts = 64 sts)
Stitch logic: Each repeat uses exactly 4 sts of Round 2: sc, skip, fan, skip. 8 repeats × 4 sts = 32 sts, so the round closes evenly. Each repeat makes 8 new sts (1 sc + 7 fan sts), so 8 × 8 = 64 sts.
As you work each popcorn, push it toward the front (right side) of the wreath. The 3 dc on either side of the popcorn fan out behind it. This creates the layered, clustered texture. Skipping 1 st on each side of the fan leaves small openings between the fans, which helps them sit apart like separate clusters.
Measure fan tip to opposite fan tip: 4.25 in (10.8 cm).
Bow
Use bright red. The bow is worked flat as one strip, then folded into 2 loops.
Foundation: Ch 19.
Row 1: Sc in the 2nd ch from the hook and in each ch across. (18 sc)
Rows 2–5: Ch 1, turn. Sc in BLO of each st across. (18 sc)
Working in the back loops creates a soft ribbed texture that reads as ribbon. Fasten off and leave an 8 in (20.3 cm) tail.
Strip check: about 4.5 in (11.4 cm) long and 1.1 in (2.8 cm) tall.
Shape the bow:
1. Using the tail, whipstitch the 2 short ends together to form a loop.
2. Flatten the loop with the seam at the center back.
3. Pinch the center so the strip forms 2 equal loops.
4. Cut a 12 in (30.5 cm) length of red yarn. Wrap it tightly around the pinched center about 8–10 times to form a plump knot.
5. Knot the ends at the back. Leave both tails long for sewing.
Bow check: 2.25 in (5.7 cm) wide and about 1.1 in (2.8 cm) tall.
Border
The border is 1 outline round in dark forest green. It defines each scallop and tidies the fan edges.
Border gauge: The border uses the same gauge as the body: 1 st worked into each existing st, with no extra stitches. It does not change the stitch density.
Round 4 (conversion round): Continue with the green yarn from Round 3 (do not fasten off). Ch 1. Sl st in the next sc, sc in each of the next 7 fan sts (3 dc, the pc closing ch, 3 dc). Rep from * 8 times total. Join with a sl st to the first sl st. Fasten off and leave a 6 in (15.2 cm) tail.
Count: 64 sts worked 1-per-existing-stitch + 0 extra stitches = 64 sts (8 sl st + 56 sc).
Per fan section: 1 sl st + 7 sc = 8 sts. 8 sections × 8 sts = 64 sts.
Why the math works: Round 3 has exactly 64 sts, arranged as 8 identical sections of 8. Round 4 places one stitch on top of each one. No increases are needed because the fans already flare outward on their own. The sl st sinks into the sc between fans, which keeps the dips sharp. The sc follows the curve of each fan, which keeps the tips rounded. Adding stitches here would make the scallops ruffle.
The border adds about 0.125 in (0.3 cm) on each side. Total: 4.25 in + 0.25 in = 4.5 in (10.8 cm + 0.6 cm = 11.4 cm).
Hanging loop: Choose the top of the wreath. This is a sl st between 2 fans, so there are 4 fans on each side. Join green with a sl st into that sl st. Ch 16, then sl st into the same st to form a loop. Ch 1. Work 22 sc over the chain loop, enclosing it completely. Sl st into the base st and fasten off.
Loop check: about 1.75 in (4.4 cm) tall, firm and fully covered.
Final Blocking
- Weave in all wreath ends along the back of Rounds 1–2, where they are hidden. Keep the bow tails long.
- Lightly spray the wreath until it is damp, not soaked.
- Lay it right side up on the blocking board. Pin the center opening into a 1.75 in (4.4 cm) circle.
- Pin the outer edge to 4.5 in (11.4 cm). Place 1 pin at each sl st dip and 1 at each fan tip, for 16 pins total. Space the fans evenly.
- Push each popcorn forward with your fingertip so it stands proud.
- If you want a stiffer ornament, brush on a thin coat of fabric stiffener now.
- Let it dry completely, at least 6–8 hours, before unpinning.
- Block the bow separately. Spray lightly and fluff the 2 loops into rounded shapes. Let it dry.
- Attach the bow: Center the bow over the base of the hanging loop, so the loop appears to rise from the knot. Use the red tails to sew through the knot and into Rounds 2–4 of the wreath. Make 4–5 secure stitches. Tie off at the back and weave in the ends.
Final Quality-Control Checklist
- Wreath measures 4.5 in (11.4 cm) fan tip to opposite fan tip
- Center opening measures 1.75 in (4.4 cm) and is round, not oval
- Round 2 had 32 hdc; Rounds 3 and 4 each had 64 sts
- All 8 fans are present, evenly spaced, and the same size
- All 8 popcorns face the front
- Wreath lies flat without cupping or rippling
- Hanging loop sits at the top, centered, with 4 fans on each side
- Bow is 2.25 in (5.7 cm) wide, with 2 even loops
- Bow knot covers the base of the hanging loop
- No visible ends on the front
Troubleshooting
The foundation ring twisted. Undo and rechain. Before joining, lay the chain flat with all the V’s facing up.
The wreath cups like a bowl. Your Round 2 increases may be tight, or a repeat was missed. Count for 32 hdc. If the count is right, try a larger hook.
The wreath ripples or waves. You may have added stitches in Round 4. Recount for 64. Or your fans are too loose; go down a hook size.
Popcorns sit on the back. You inserted the hook from back to front when closing them. Always insert from front to back into the first dc.
Round 3 does not close evenly. Check that each repeat used exactly 4 sts of Round 2. Missing a skip throws the spacing off.
The center opening is too small. Your foundation chain is tight. Chain with a hook 0.5 mm larger, then switch back for Round 1.
The bow is floppy. Wrap the center more tightly, or add a light coat of stiffener to the bow loops.
The hanging loop shows gaps. Add 2–3 more sc over the chain until it is fully covered.
Care
Spot clean or hand wash gently in cool water, then reshape and dry flat. If you used fabric stiffener, spot clean only.
Final Notes
The measurement chain is short and easy to track:
- Foundation ring: 1.75 in (4.4 cm)
- Round 1: 24 sc, 2.25 in (5.7 cm)
- Round 2: 32 hdc, 3 in (7.6 cm)
- Round 3: 64 sts, 4.25 in (10.8 cm)
- Round 4 border: 64 sts, 4.5 in (11.4 cm)
Check each stage before you move on. If Round 2 measures correctly, everything after it will fall into place. Add the bow last, after blocking, for the cleanest finish.
Optional: make several of these in a single afternoon for gift toppers or a tree set, all from one pattern.
Happy crocheting!