

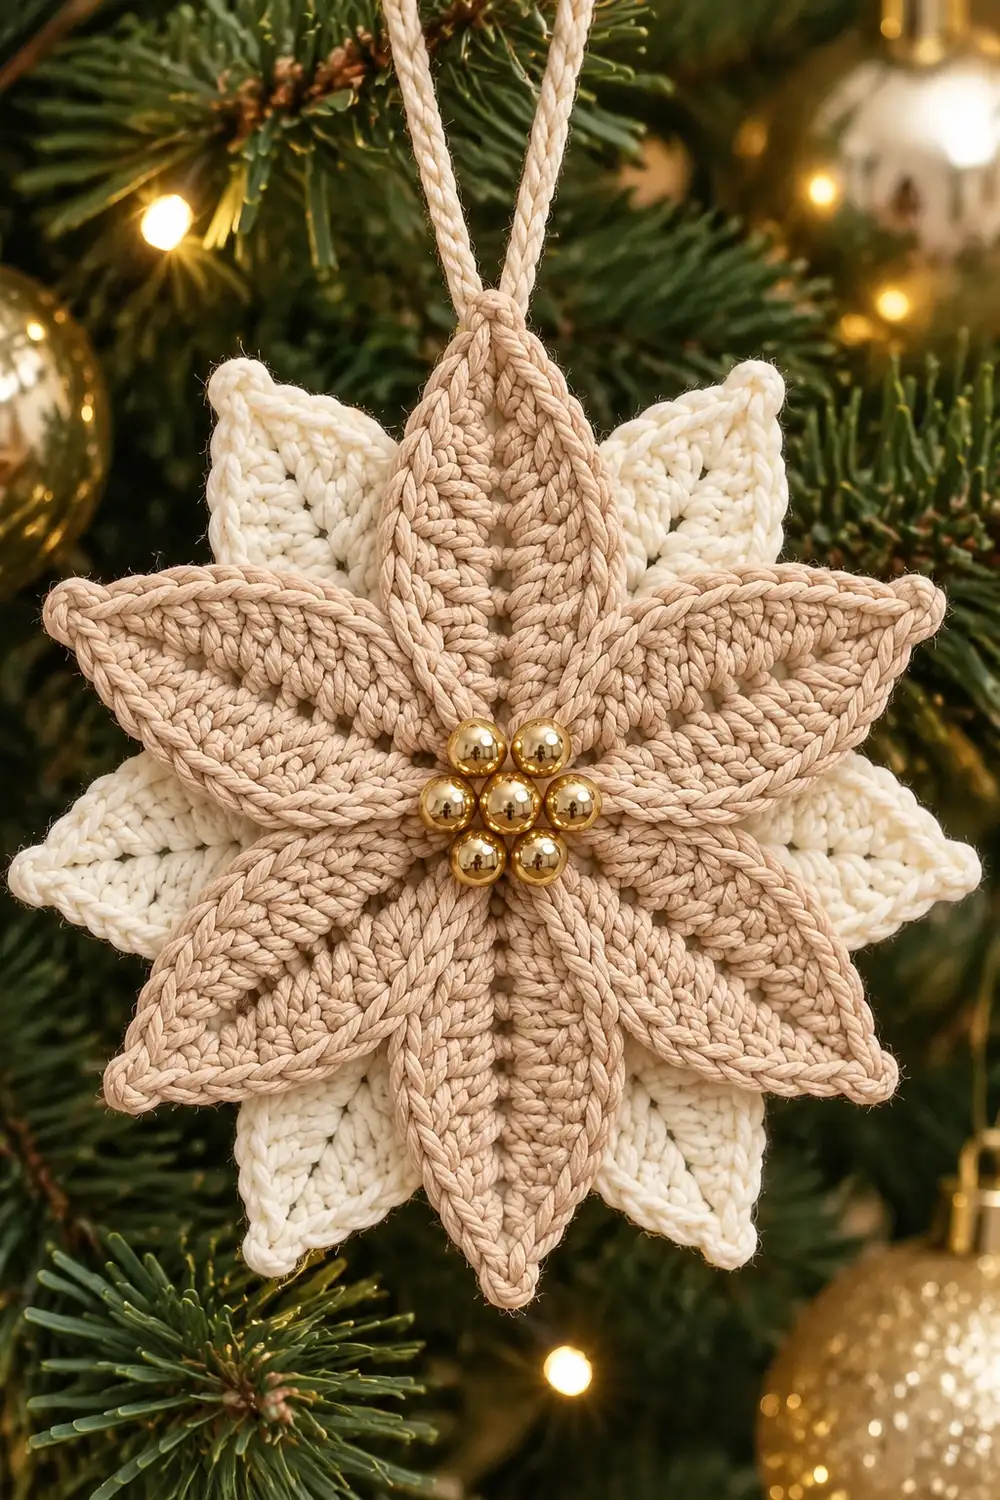
This six-pointed star flower ornament is small, elegant, and quick to make. Each motif is worked in a single cream or off-white yarn. Raised post-stitch ridges run from the center out to each of the six points, which gives the petals texture and dimensional depth. A cluster of gold metallic beads sits in the center, and a cream chain loop at the top lets it hang from a branch.
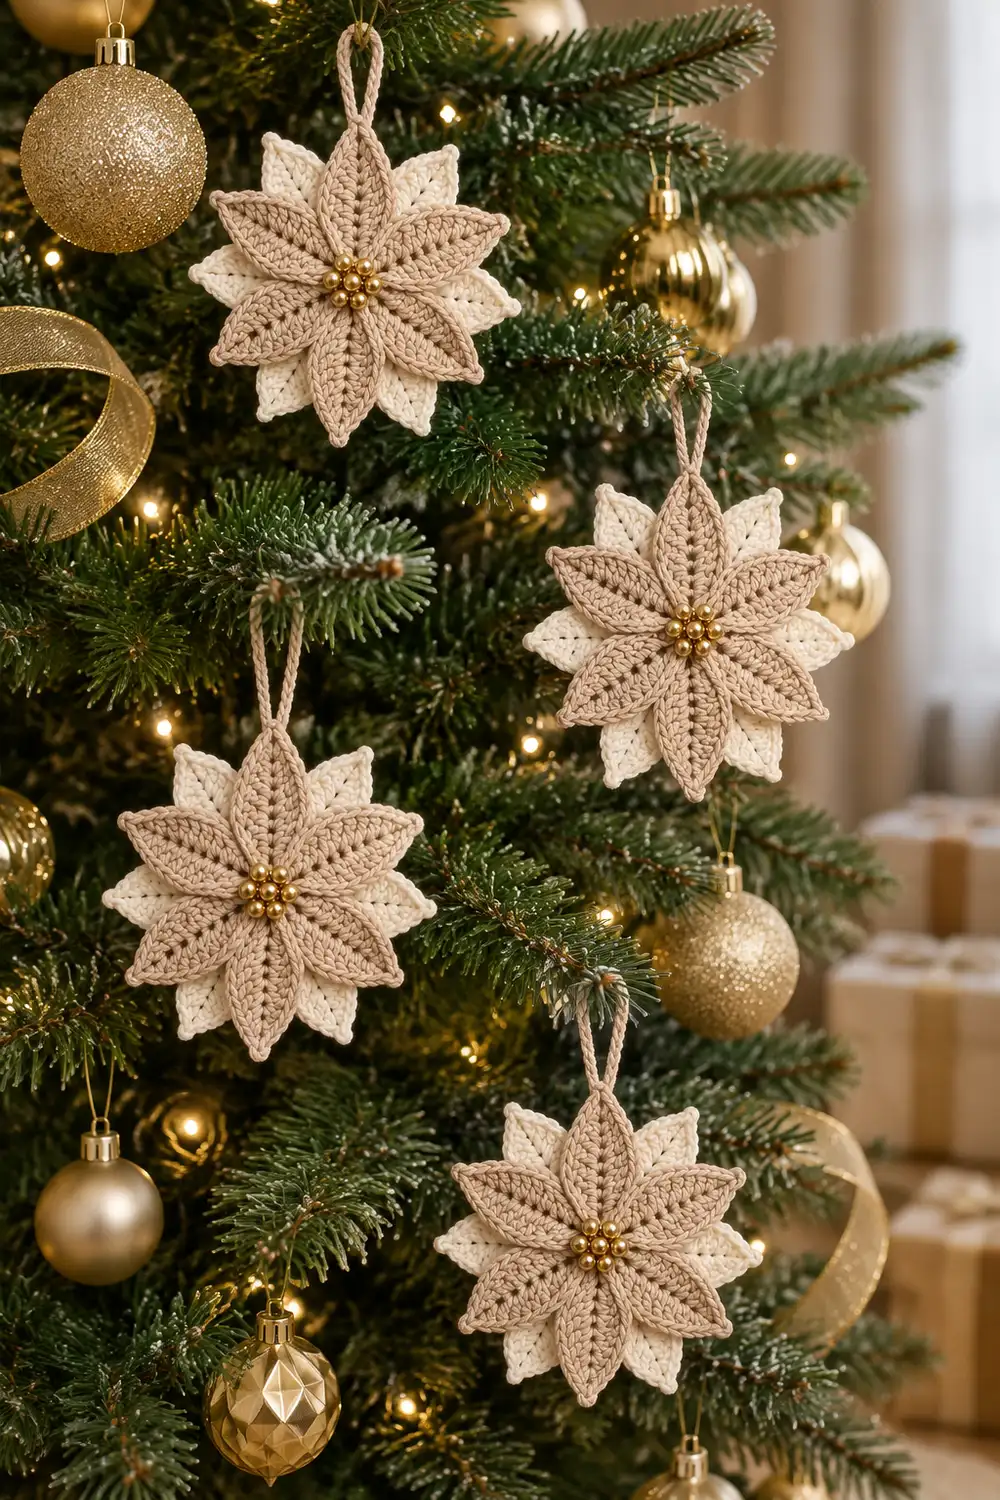
The style is soft and neutral. It looks especially good among evergreen branches, gold and champagne baubles, and warm white fairy lights. In the photo, four of these ornaments hang on the tree as separate motifs. You make each one individually, then make as many as you like.
This pattern uses US crochet terms. One finished ornament measures 3.5 in (8.9 cm) across, from point tip to opposite point tip. That is within the 3–4 in (7.6–10.2 cm) range of the ornaments in the photo.
Construction is simple. You work four rounds from a magic ring, with a front post double crochet (FPdc) ridge stacked in six places. Round 5 builds the six points. Round 6 is a single crochet edging that sharpens the tips and valleys. You then sew on the bead cluster and add the hanging loop.
Finished Size and Construction
- Finished size: 3.5 in (8.9 cm) tip to tip
- Skill level: Easy-intermediate (post stitches, working in the round)
- Terminology: US crochet terms
- Yarn weight: Sport weight (#2) cotton or cotton blend
- Hook: 3.25 mm (US D-3)
- Number of pieces: 1 motif per ornament
- Layout: Single six-pointed star motif; no joining
- Piece size before edging (after Round 5): 3.25 in (8.3 cm) tip to tip
- Edging: 1 round of single crochet (Round 6)
- Edging depth: about 0.125 in (0.3 cm) per side, adding 0.25 in (0.6 cm) to the total width
Materials
Yarn advice: Choose a smooth, mercerized or matte cotton in sport weight. Cotton holds crisp points and shows the post-stitch ridges clearly. Avoid fuzzy or brushed yarns, which blur the texture. Pick a warm cream or off-white so the gold beads stand out.
Yarn quantities:
- Cream / off-white, one ornament: 8 g, about 26 m (28 yd), including the hanging loop
- Cream / off-white, set of four (as in the photo): 32 g, about 102 m (112 yd)
These quantities include a small safety margin for gauge differences and weaving in ends.
Tools and notions:
- 3.25 mm (US D-3) crochet hook
- 7 gold metallic beads per ornament, 5 mm round
- Sewing needle with an eye small enough to pass through the beads
- Cream sewing thread, or a strand of the cream yarn split in half
- Tapestry needle for weaving in ends
- Stitch marker
- Rust-proof pins and a foam blocking mat
- Spray bottle with water
- Optional: spray starch or fabric stiffener
Abbreviations (US Terms)
- ch – chain
- sl st – slip stitch
- sc – single crochet
- hdc – half double crochet
- dc – double crochet
- tr – treble crochet
- sc2tog – single crochet 2 together
- st(s) – stitch(es)
- sp – space
- rep – repeat
Special stitch – FPdc (front post double crochet): Yarn over. Insert the hook from front to back to front around the post of the indicated stitch, not into its top. Yarn over and pull up a loop. Then (yarn over, pull through 2 loops) twice. The stitch sits raised on the front of the work and forms the petal ridge.
Magic ring: Wrap the yarn around two fingers to form a loop. Work the first round into the loop, then pull the tail to close the center.
Gauge and Checkpoints
Make one complete ornament before starting a set. Measure it at each checkpoint below. Small differences add up quickly on a motif this size.
Base gauge: 6 sc per 1 in (2.5 cm) in flat sc with this yarn and hook.
Round checkpoints (measured flat, straight across):
- After Round 1: 0.75 in (1.9 cm)
- After Round 2: 1.25 in (3.2 cm)
- After Round 3: 1.75 in (4.4 cm)
- After Round 4: 2.25 in (5.7 cm)
- After Round 5: 3.25 in (8.3 cm), tip to tip
- After Round 6: 3.5 in (8.9 cm), tip to tip
If your motif is too big: Go down to a 3.0 mm hook, or check that your dc stitches are not too tall. A difference of more than 0.25 in (0.6 cm) at Round 4 means you should change hooks.
If your motif is too small: Go up to a 3.5 mm hook. Also check that the post stitches are not pulling tight. FPdc stitches should lie on the surface without puckering the round.
If the motif cups or ruffles: Stop at Round 4 and lay it flat. Cupping means your tension is too tight. Ruffling means it is too loose. Fix this before building the points.
Pattern: Center Rounds
The center is a flat circle with six FPdc ridges. Each ridge stacks directly on the one below it, so the six lines run straight out to the six points.
The beginning ch 2 in Rounds 2–4 does not count as a stitch. Join each round with a sl st to the first stitch of the round.
Round 1: Make a magic ring. Ch 2 (does not count as a st), work 12 dc into the ring. Pull the tail to close the center. Sl st to the first dc. (12 sts)
Checkpoint: 0.75 in (1.9 cm) across.
Round 2 (growth round): Ch 2. FPdc around the next dc, 2 dc in the next dc. Rep from * 5 more times, for 6 repeats total. Sl st to the first FPdc. (18 sts: 6 FPdc + 12 dc)
Each repeat uses 2 sts from Round 1 and makes 3 new sts.
Checkpoint: 1.25 in (3.2 cm) across.
Round 3 (growth round): Ch 2. FPdc around the next FPdc, dc in the next dc, 2 dc in the next dc. Rep from * 5 more times. Sl st to the first FPdc. (24 sts: 6 FPdc + 18 dc)
Each repeat now has 4 sts.
Checkpoint: 1.75 in (4.4 cm) across.
Round 4 (growth round): Ch 2. FPdc around the next FPdc, dc in the next dc, 2 dc in the next dc, dc in the next dc. Rep from * 5 more times. Sl st to the top of the first FPdc. (30 sts: 6 FPdc + 24 dc)
Each repeat now has 5 sts: 1 FPdc ridge followed by 4 dc.
Checkpoint: 2.25 in (5.7 cm) across. Lay the motif flat. You should see six raised ridges, evenly spaced like the spokes of a wheel.
Pattern: The Six Points
Round 5 turns the circle into a six-pointed star. Each point is centered on an FPdc ridge, so the raised line runs right up into the tip.
The stitch heights step down from the point into the valley and back up again:
- tr at the tip
- dc on each side of the tip
- sc in the valley
Round 5: You begin on top of the first FPdc.
- Ch 4 (counts as the first tr), ch 2, tr in the top of the same FPdc.
- Dc in the next dc, sc in each of the next 2 dc, dc in the next dc, (tr, ch 2, tr) in the top of the next FPdc.
- Rep from * 4 more times.
- Then dc in the next dc, sc in each of the next 2 dc, and dc in the next dc.
- Sl st to the top of the beginning ch-4.
(36 sts + 6 ch-2 sps)
Count check: each point section has tr, ch-2 sp, tr, dc, sc, sc, dc. That is 6 sts plus 1 ch-2 sp. Six sections × 6 sts = 36 sts, with 6 ch-2 tip spaces. All 30 sts of Round 4 are used: each FPdc takes 2 tr, and each dc takes 1 st.
Checkpoint: 3.25 in (8.3 cm) tip to tip. The valleys sit about 2.5 in (6.4 cm) apart across the center.
Edging
The edging is a single round of plain sc. It gives the star a smooth, defined outline and sharpens both the tips and the valleys.
Edging gauge: About 4 sc per 1 in (2.5 cm) along the outer edge.
This is deliberately looser than the flat base gauge of 6 sc per 1 in (2.5 cm). Each edging sc sits on top of a tall tr or dc, and the tops of tall stitches are wider than a sc. Working exactly 1 sc per existing stitch matches the width that is already there, so the edge lies flat without frilling or pulling in.
Round 6 (conversion round):
- Sl st into the first ch-2 sp.
- Ch 1 (does not count). Work (sc, ch 2, sc) in the same ch-2 sp.
- Sc in the next tr, sc in the next dc, sc2tog over the next 2 sc, sc in the next dc, sc in the next tr, (sc, ch 2, sc) in the next ch-2 sp.
- Rep from * 4 more times.
- Then sc in the next tr, sc in the next dc, sc2tog over the next 2 sc, sc in the next dc, and sc in the top of the beginning ch-4.
- Sl st to the first sc.
Fasten off, leaving a 6 in (15.2 cm) tail.
Stitch count, shown as a conversion:
- Stitches worked into existing stitches: Round 5 has 36 sts. Each section’s 6 sts become 5 sts (4 sc + 1 sc2tog), giving 30 sts.
- Extra stitches added: 2 sc in each of the 6 ch-2 tip spaces = 12 sc.
- Total: 30 + 12 = 42 sts + 6 ch-2 tips
Per point section: 1 tip sc + 5 sts along the edge + 1 tip sc = 7 sts. Six sections × 7 = 42.
Why the math works: Every Round 5 stitch receives exactly one stitch. The only exceptions are the two valley sc, which merge into one sc2tog to deepen the valley. The only additions are at the tips, where (sc, ch 2, sc) keeps each point sharp.
The edging adds about 0.125 in (0.3 cm) on each side. That brings the ornament from 3.25 in (8.3 cm) to 3.5 in (8.9 cm) tip to tip.
Bead Center and Hanging Loop
Bead cluster:
- Thread the sewing needle with a doubled length of cream thread and knot the end.
- Bring the needle up through the center of the magic ring from the back.
- Sew 1 bead in the exact center.
- Sew 6 beads in a ring around it, each touching the center bead.
- Pass the thread through each bead twice so the beads sit snugly and do not flop.
The finished cluster is about 0.6 in (1.5 cm) across. It sits within Round 1 and covers the magic ring hole. Knot the thread securely on the back and hide the end under the stitches.
Hanging loop:
- Choose one point to be the top.
- Join the cream yarn with a sl st in that point’s ch-2 sp.
- Ch 24, which is about 4 in (10.2 cm).
- Sl st in the same ch-2 sp. Fasten off.
The folded loop stands about 2 in (5.1 cm) tall. Weave both tails into the back of the motif.
Final Blocking
- Weave in all ends on the back, following the stitch lines so they do not show from the front.
- Lightly mist the ornament with water until it is damp, not soaked. Do not wet the beads heavily.
- Lay it face up on the blocking mat.
- Pin each of the six tips through its ch-2 sp, pulling gently outward to 3.5 in (8.9 cm) tip to tip.
- Check that opposite tips line up through the center bead.
- Use your fingertip to press each valley inward slightly so the star shape is crisp.
- Do not flatten the FPdc ridges. Leave them raised so the texture stays visible.
- Optional: lightly spray with starch or brush the back with fabric stiffener for firmer points.
- Let it dry completely, about 6–12 hours, before unpinning.
Final Quality-Control Checklist
- Six points, evenly spaced, each centered on a raised FPdc ridge
- Tip-to-tip measurement of 3.5 in (8.9 cm) in all three directions
- Round 6 count of 42 sts plus 6 ch-2 tips (7 sts per point section)
- Motif lies flat, with no cupping or ruffling
- Magic ring fully closed and covered by the bead cluster
- 7 gold beads sewn firmly, with no wobble
- Hanging loop secure, centered on one tip, about 2 in (5.1 cm) tall
- All ends woven in and invisible from the front
- Every ornament in a set measures within 0.125 in (0.3 cm) of the others
Troubleshooting
Ridges drift sideways instead of running straight: You worked the FPdc around a dc instead of the previous FPdc. Each FPdc must go around the FPdc directly below it. Frog back to that round and redo it.
Center hole won’t close: Pull the magic ring tail firmly before working Round 2. Then weave the tail in a small circle around the ring to lock it.
Points look rounded: Make sure Round 6 has the ch-2 at each tip, and pin through that ch-2 when blocking. Starch also helps.
Valleys are shallow: Check that you worked sc2tog over the 2 valley sc in Round 6, not 2 separate sc.
Motif cups after Round 4: Your tension is tight. Redo the round with a hook 0.25 mm larger, or loosen your post stitches.
Edge ruffles: You may have added extra sc. Recount: Round 6 should have exactly 42 sts.
Beads tilt or sag: Pass the thread through each bead a second time, then tug gently before knotting.
Care
Spot clean with cool water and mild soap, then reshape and dry flat. Store flat or loosely wrapped in tissue so the points and loop keep their shape.
Final Notes
The measurement chain is simple.
- Round 1: 0.75 in (1.9 cm)
- Round 2: 1.25 in (3.2 cm)
- Round 3: 1.75 in (4.4 cm)
- Round 4: 2.25 in (5.7 cm)
- Round 5: 3.25 in (8.3 cm), tip to tip
- Round 6: 3.5 in (8.9 cm), tip to tip
The stitch counts follow the same steady logic:
- Rounds 1–4: 12, 18, 24, then 30 sts
- Round 5: 36 sts with 6 tips
- Round 6: 42 sts
If your first ornament hits each checkpoint, every one after it will match. Make one, check it, then make as many as your tree needs. The photo shows four.
Happy crocheting!