

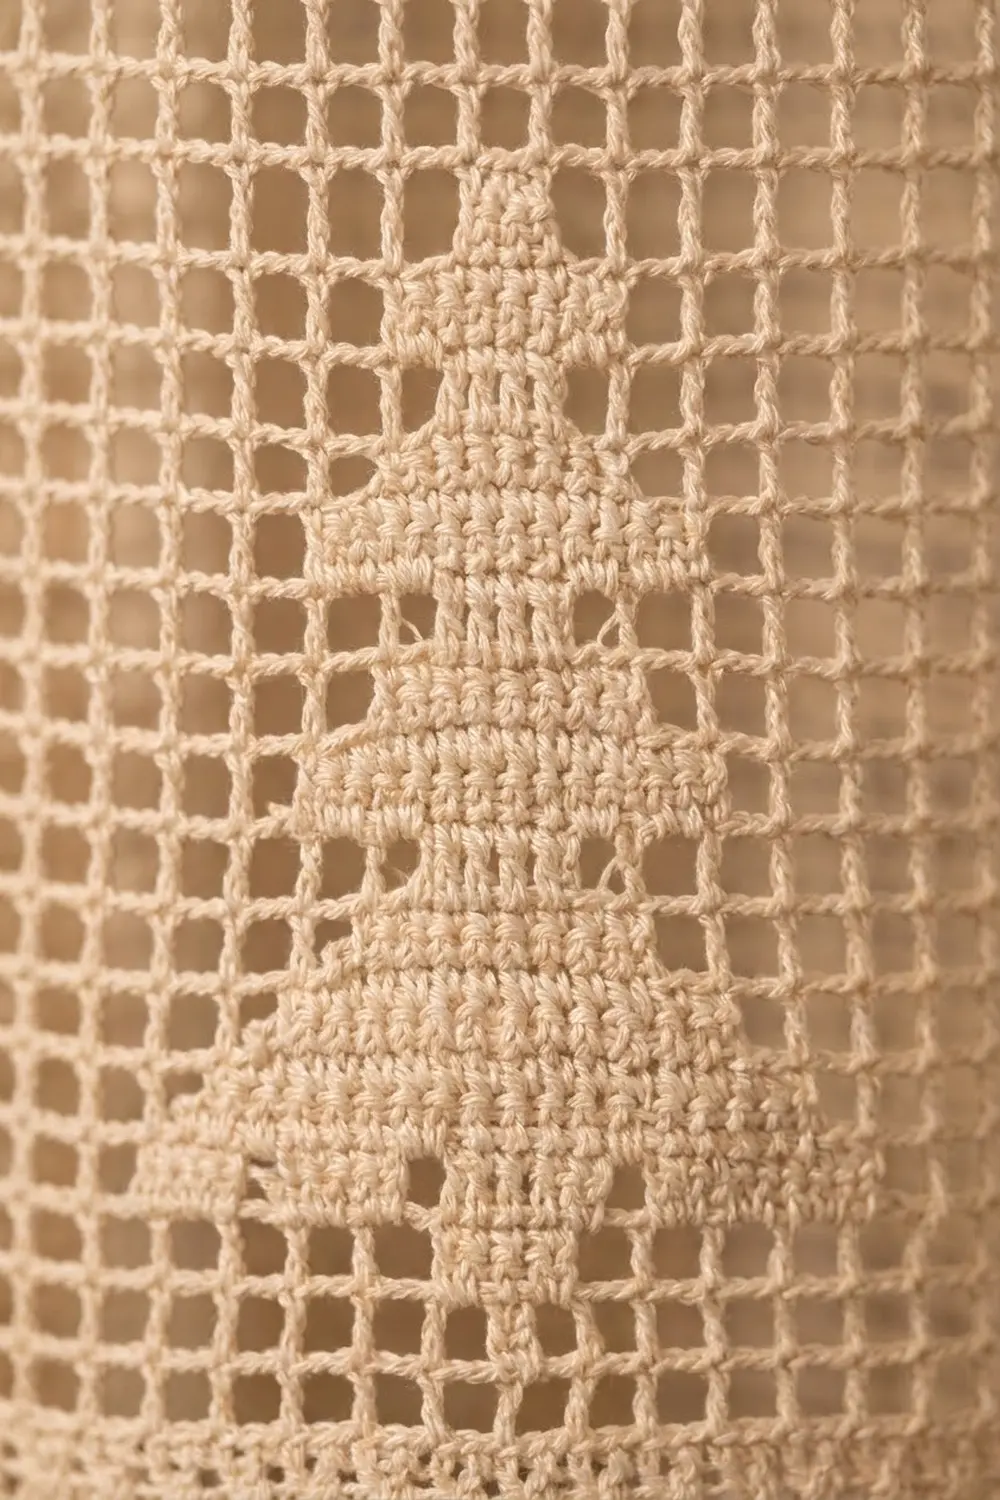
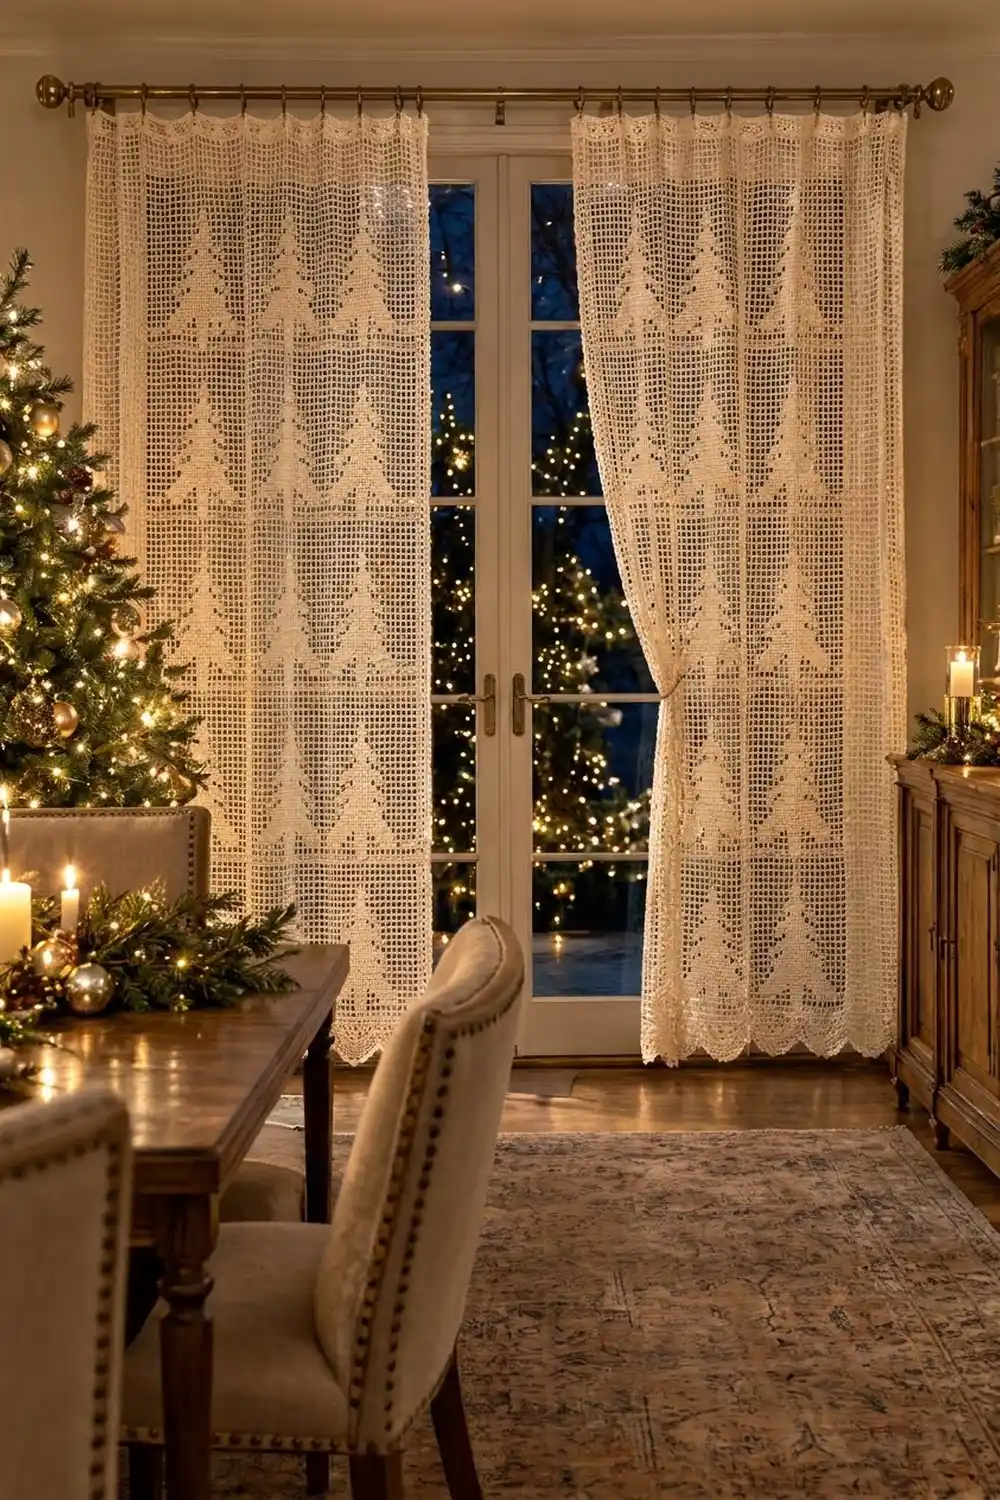
These filet crochet curtain panels show rows of Christmas trees against an open mesh grid. Lamplight and window light pass through the mesh and make the solid trees stand out. They’re made to hang over a door or tall window for the winter season.
Each panel is worked in one cream mercerized cotton. The design uses only two shapes: an open mesh square and a filled block. Three trees sit side by side, and the trees are repeated seven times up the panel. A scalloped shell hem with picots finishes the bottom edge.
This pattern uses US crochet terms. One finished panel measures about 30.5 in (77.5 cm) wide and 75.5 in (191.8 cm) long after blocking, including the border. The instructions are for one panel. Make two for a pair.
Each panel is worked flat in rows from the bottom up. It starts with a solid foundation row and a short mesh band, then the seven tree tiers, then a mesh band and a solid header. Two rounds of edging and a bottom picot row finish it.
Finished Size and Construction
- Finished panel size: 30.5 in × 75.5 in (77.5 cm × 191.8 cm)
- Size before border: 30 in × 74 in (76.2 cm × 188.0 cm)
- Skill level: Intermediate
- Terminology: US crochet terms
- Yarn weight: Sport weight (#2 fine) mercerized cotton
- Hook: 3.25 mm (US D-3)
- Number of pieces: 2 separate identical panels (not joined)
- Layout per panel: 3 tree motifs across × 7 tiers high
- Motif cell size: 20 squares × 20 rows = 10 in × 10 in (25.4 cm × 25.4 cm)
- Border depth: 0.25 in (0.6 cm) on the sides and top; 1.25 in (3.2 cm) at the scalloped hem
Materials
Yarn: Choose a smooth, mercerized sport-weight cotton. It shows crisp block edges, holds its shape when hanging, and washes well. Avoid fuzzy or very stretchy fibers, because a long panel will drop over time.
- Cream (one color): 300 g (about 930 m) per panel, based on 50 g / 155 m balls. For a pair: 600 g (about 1,860 m).
These quantities include a margin of about 15% for gauge differences, the swatch, and weaving in ends.
Tools:
– 3.25 mm (US D-3) crochet hook
– Tapestry needle
– Stitch markers (at least 4)
– Measuring tape
– Rust-proof blocking pins and a large blocking surface, such as foam mats or a bed covered with towels
– Spray bottle
– 10 curtain clip rings per panel
Abbreviations (US Terms)
- ch – chain
- sl st – slip stitch
- sc – single crochet
- dc – double crochet
- tr – treble crochet
- sp – space
- st(s) – stitch(es)
- M – mesh square
- B – block square
Filet basics. Each square is 3 stitches wide, plus 1 dc shared with the next square. A row of 60 squares therefore has 60 × 3 + 1 = 181 stitches.
- Mesh (M): ch 2, skip 2 sts, dc in next dc.
- Block over mesh: 2 dc in the ch-2 sp, dc in next dc.
- Block over block: dc in next 3 dc.
- Mesh over block: ch 2, skip 2 dc, dc in next dc.
- Turning chains: If a row begins with a mesh, ch 5 (counts as dc + ch 2), skip the first 3 sts, then dc in the next dc. If a row begins with a block, ch 3 (counts as dc).
- Last stitch of a row: Work the last dc into the 3rd ch of the turning chain from the row below.
Special stitch – Shell: (tr, ch 1) 6 times, tr, all in the same stitch. This makes 7 tr and 6 ch-1 sps.
Gauge and Checkpoints
Gauge: 10 squares × 10 rows = 5 in × 5 in (12.7 cm × 12.7 cm) in filet mesh, after blocking. One square is 0.5 in (1.3 cm) wide and one row is 0.5 in (1.3 cm) tall.
Test one motif first. Ch 63. Work a foundation row of 61 dc, as in Row 1 below. Then work the 20-row tree chart once, across 20 squares. Block the swatch and let it dry. It should measure 10 in (25.4 cm) wide and 10.5 in (26.7 cm) tall, including the foundation row. Check that the tree sits centered, with 2 mesh squares at each side of the widest tier.
Checkpoints on the panel (lightly pinned flat):
– After Row 3: 30 in (76.2 cm) wide, 1.5 in (3.8 cm) tall
– After Row 23 (Tier 1 done): 11.5 in (29.2 cm) tall
– After Row 83 (Tier 4 done): 41.5 in (105.4 cm) tall
– After Row 143 (Tier 7 done): 71.5 in (181.6 cm) tall
– After Row 148: 74 in (188.0 cm) tall
If your work is too big: Go down 0.25 mm in hook size, or tighten the ch-2 spaces so they match the width of your blocks.
If your work is too small: Go up 0.25 mm in hook size. If only the height is short, pull up the dc loops a little taller. Make this change on the swatch, not partway through the panel.
Panel Pattern
Bottom Band
Foundation: Ch 183.
Row 1 (solid): Dc in the 4th ch from the hook (the skipped 3 ch count as the first dc). Dc in each remaining ch across. Turn. (181 sts = 60 blocks)
Row 2 (mesh): Ch 5 (counts as dc + ch 2). Skip the first 3 dc and dc in the next dc. Ch 2, skip 2 dc, dc in next dc. Repeat from * across, working the last dc in the top of the turning ch-3. Turn. (60 M; 61 dc + 60 ch-2 sps = 181 sts)
Row 3: Ch 5. Skip the first dc and ch-2 sp, and dc in the next dc. Ch 2, dc in next dc. Repeat from * across, working the last dc in the 3rd ch of the turning ch-5. Turn. (60 M)
Tree Tiers (Rows 4–143)
Each tier is 20 rows. Every chart row below describes one 20-square motif cell. Work that cell sequence 3 times across every row. Each row always totals 60 squares (181 sts).
Every tree row begins and ends with mesh squares, so every row starts with ch 5.
Tree chart (one cell, 20 squares wide):
- Chart Row 1: 20 M
- Chart Rows 2–3 (trunk): 9 M, 2 B, 9 M
- Chart Row 4: 2 M, 16 B, 2 M
- Chart Row 5: 3 M, 14 B, 3 M
- Chart Row 6: 4 M, 12 B, 4 M
- Chart Row 7: 5 M, 10 B, 5 M
- Chart Row 8: 6 M, 8 B, 6 M
- Chart Row 9: 4 M, 12 B, 4 M
- Chart Row 10: 5 M, 10 B, 5 M
- Chart Row 11: 6 M, 8 B, 6 M
- Chart Row 12: 7 M, 6 B, 7 M
- Chart Row 13: 5 M, 10 B, 5 M
- Chart Row 14: 6 M, 8 B, 6 M
- Chart Row 15: 7 M, 6 B, 7 M
- Chart Row 16: 8 M, 4 B, 8 M
- Chart Row 17 (tip): 9 M, 2 B, 9 M
- Chart Rows 18–20: 20 M
The squares in every row add up to 20, so the tree stays centered in its cell. Chart Rows 4–8 form the wide lower tier, which is 16 blocks at the base. Rows 9–12 start a middle tier that steps back out to 12 blocks, and Rows 13–17 form the top tier, which narrows to a 2-block tip. These outward steps at Rows 9 and 13 make the stacked-triangle look.
Building the tier above a narrower row: where a new block sits over a mesh, work 2 dc into the ch-2 sp. Where a mesh sits over a block, ch 2 and skip 2 dc.
Example, Chart Row 9 worked across the panel: Ch 5, skip 3 sts, dc in the next dc. Ch 2, dc in the next dc (2 M made). Next work 12 B: 4 block-over-mesh squares where Row 8 was mesh, then 8 block-over-block squares. Then 4 M. Repeat this 20-square cell 2 more times. (181 sts; 36 B and 24 M across)
Rows 4–23: Tier 1 (Chart Rows 1–20).
Rows 24–43: Tier 2.
Rows 44–63: Tier 3.
Rows 64–83: Tier 4. Check that the height is 41.5 in (105.4 cm).
Rows 84–103: Tier 5.
Rows 104–123: Tier 6.
Rows 124–143: Tier 7. Check that the height is 71.5 in (181.6 cm).
The tiers stack with no extra spacer rows. The 3 open rows at the top of each cell (Chart Rows 18–20) plus the open Chart Row 1 of the next cell give a 4-row gap of mesh between the tree tip and the next trunk.
Top Band and Header
Rows 144–146 (mesh): Ch 5. Ch 2, dc in next dc across, working the last dc in the 3rd ch of the turning ch-5. Turn. (60 M each row)
Row 147 (solid): Ch 3 (counts as dc). 2 dc in the ch-2 sp, dc in the next dc. Repeat from * across. Turn. (1 + 60 × 3 = 181 dc)
Row 148 (solid): Ch 3. Dc in each dc across, working the last dc in the top of the turning ch-3. (181 dc) Do not fasten off.
The two solid rows make a firm 1 in (2.5 cm) header that holds clip rings without stretching the mesh. The panel now measures 30 in × 74 in (76.2 cm × 188.0 cm).
Make Both Panels
Make 2 panels, each using 300 g (about 930 m) of cream. The panels are not joined. Each hangs on its own set of clips.
Layout of one panel (T = tree motif), from top to bottom:
[ header – 2 solid rows ]
[ 3 mesh rows ]
 T  T  T    Tier 7
 T  T  T    Tier 6
 T  T  T    Tier 5
 T  T  T    Tier 4
 T  T  T    Tier 3
 T  T  T    Tier 2
 T  T  T    Tier 1
[ 2 mesh rows ]
[ 1 solid row ]
[ scalloped hem ]
Hanging the pair: [ Panel A ] [ Panel B ]. Hang them side by side, and check that the tree rows line up across both panels.
Border
Border gauge: 2 sc fit along the side of each dc row, so 2 sc cover 0.5 in (1.3 cm). This matches the dc row height, so the side edges lie flat without ruffling or pulling in.
Round 1 (all sides): Continue from the end of Row 148. Ch 1, then work in the stitches below:
– Top edge: sc in each st across (181 sc). Ch 1 for the corner.
– Long side: 2 sc in the side of each row-end (148 rows × 2 = 296 sc). Ch 1 for the corner.
– Bottom edge: sc in each loop of the foundation chain (181 sc). Ch 1 for the corner.
– Second long side: 2 sc in the side of each row-end (296 sc). Ch 1 for the corner.
Join with a sl st to the first sc. (954 sc, plus 4 corner ch-1 sps that are not counted)
The side counts already contain every stitch along that side. The corner chains sit between the sides and add no stitches.
Round 2:
– Top: ch 1, then sc in each sc (181 sc). Ch 1 at the corner.
– Long side: sc in each sc (296 sc). Ch 1 at the corner.
– Bottom: sc in the first sc. Skip 2 sc, Shell in the next sc, skip 2 sc, sc in the next sc. Repeat from * 30 times. Ch 1 at the corner.
– Second long side: sc in each sc (296 sc). Ch 1, and join with a sl st to the first sc.
Why the scallop math works: Each scallop repeat uses 6 stitches (2 skipped + 1 shell + 2 skipped + 1 sc). The opening sc uses 1. That gives 1 + 30 × 6 = 181, exactly the bottom-edge count. The hem has 30 shells and 31 sc, with a full scallop at each end.
Row 3 (bottom edge only): Fasten off. Join yarn with a sl st in the first sc of the bottom edge. In each of the next 6 ch-1 sps of the shell, work (sc, ch 3, sc). Sl st in the next sc between shells. Repeat from * across all 30 shells. Fasten off. (180 picots, 31 sl sts)
Final dimensions: 30.5 in (77.5 cm) wide, with 0.25 in (0.6 cm) of border per side. Length is 75.5 in (191.8 cm): 74 in (188.0 cm) of body, plus 0.25 in (0.6 cm) at the top and 1.25 in (3.2 cm) at the hem.
Final Blocking
- Weave in all ends. Run each one along the solid blocks and avoid the open mesh, where ends would show.
- Soak the panel in cool water with a little wool wash for 15 minutes. Gently squeeze out the water. Do not wring.
- Roll the panel in towels to remove extra water.
- Lay it flat and pin the body to 30 in × 74 in (76.2 cm × 188.0 cm). Pin the four corners first, then the midpoints of each side.
- Pin along the long sides every 6 in (15.2 cm), and check that the rows run straight across.
- Ease each mesh square into a true square with your fingers. Pay attention to the squares beside the tree edges.
- Pin the point of each of the 30 scallops so the hem reaches 1.25 in (3.2 cm) below the body.
- For a crisper drape, mist the panel with light spray starch.
- Let it dry completely before you unpin, usually 24–36 hours. Repeat for the second panel.
Final Quality-Control Checklist
- Each row has 60 squares (181 sts), with no squares added or lost
- 21 trees per panel, in 3 columns and 7 tiers, all centered in their cells
- Each tree has a 2-block trunk, three stepped tiers, and a 2-block tip
- Side edges are straight, with no waves or pulling
- 30 shells and 180 picots across the hem
- The panel measures 30.5 in × 75.5 in (77.5 cm × 191.8 cm)
- Both panels match in length within 0.5 in (1.3 cm)
- All ends are secure and hidden in the blocks
Troubleshooting
Mesh squares look like tall rectangles: Your chains are tighter than your dc. Loosen the ch-2 spaces or use a slightly shorter dc.
Trees lean or drift sideways: You’ve likely skipped or added a stitch. Count each cell as 20 squares, and put a marker at every cell boundary.
Panel narrows toward the top: You’re working the last dc into the wrong chain. Always work it into the 3rd ch of the turning ch-5, or the top of the ch-3.
Side border ruffles: Use exactly 2 sc per row-end. If it still ruffles, work 2 sc into 3 of every 4 row-ends on Round 1, then sc in every st on Round 2.
Hem flares: Reblock and pin each scallop point, or use a hook 0.25 mm smaller for the shells.
Panels hang at different lengths: Wet-block both together to the same pinned measurements.
Care
Hand wash cool or use a gentle machine cycle in a mesh bag. Lay flat to dry, and re-pin to size if needed. A quick press with a warm iron under a cloth restores crisp tree edges.
Final Notes
Every measurement in this pattern builds on the 0.5 in (1.3 cm) filet square:
– 60 squares make 30 in (76.2 cm) across.
– 148 rows make 74 in (188.0 cm) up.
– Each tree cell is 10 in × 10 in (25.4 cm × 25.4 cm).
– 2 sc per row keeps the sides flat, and a 6-stitch scallop repeat fits the 181-stitch hem with no adjustment.
Check your swatch, count each cell, and measure at every checkpoint. Your pair of panels will hang straight and even.
Happy crocheting!