

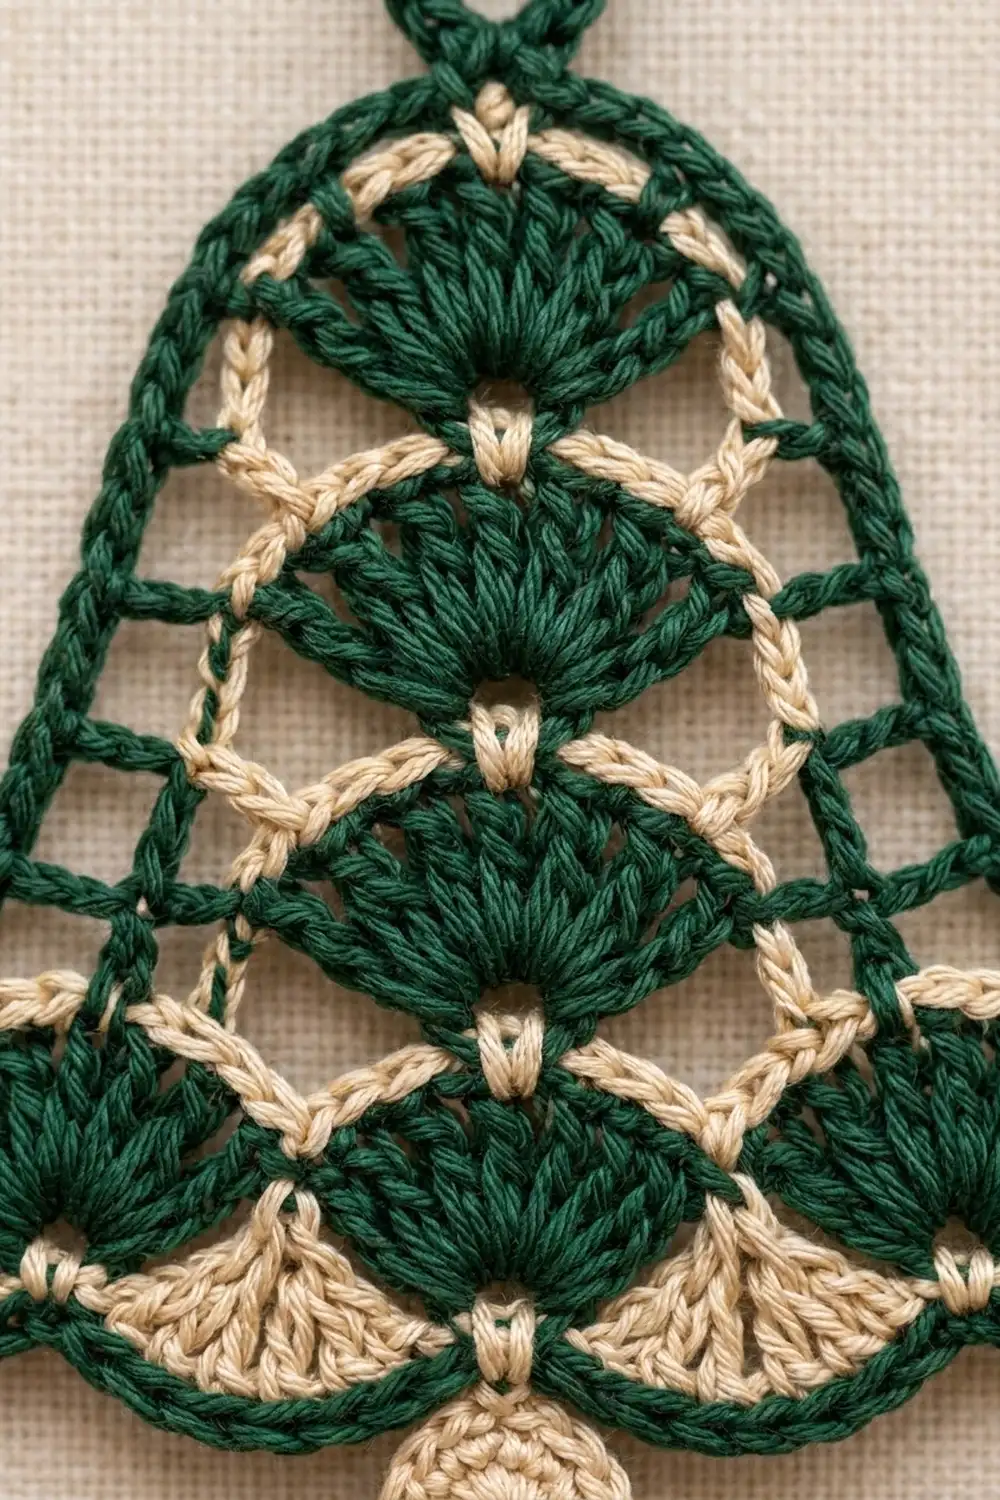
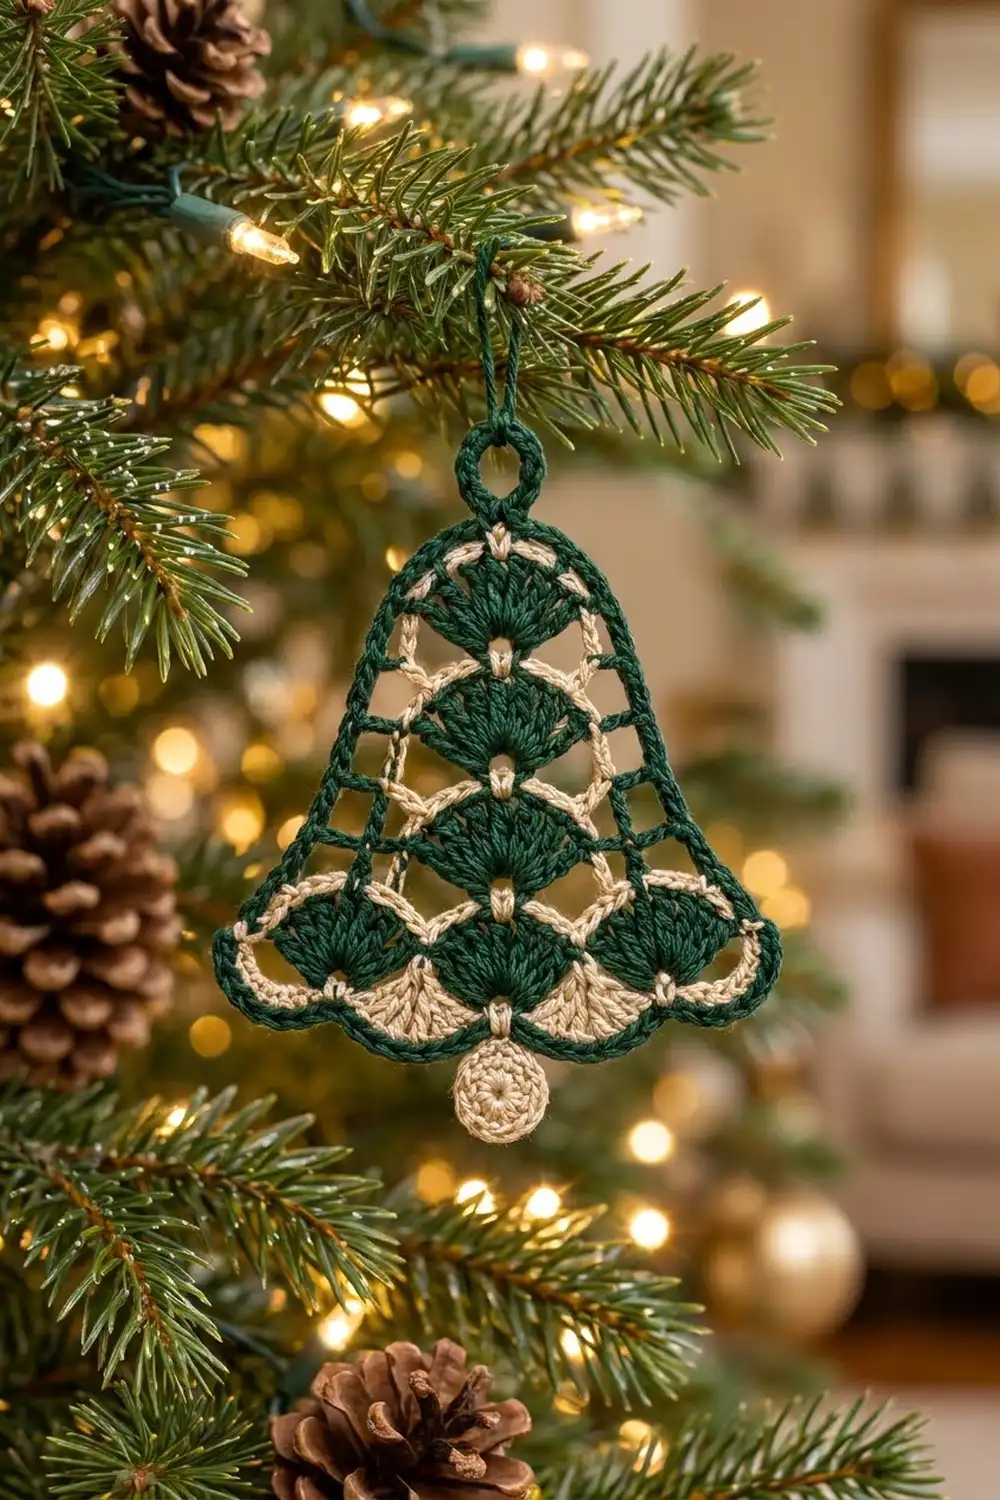
The Evergreen Lace Bell is a small, open-lace Christmas ornament with a classic bell outline. Deep forest-green fans stack down the center, and cream chain arches link them like fine filigree. A narrow column of open ladder squares runs down each side. A green outline frames everything, a green loop sits at the top for hanging, and a little cream disc dangles below the hem as the clapper.
The palette has only two colors: forest green and warm cream. The green carries the fans, the side posts, the outline, and the hanging loop. The cream carries the arch rows, the scalloped hem, and the clapper. Together they give a vintage, heirloom look that suits a tree, a gift tag, or a window.
This pattern uses US crochet terms throughout. The finished bell measures 3.5 in (8.9 cm) wide and 3.5 in (8.9 cm) tall. With the loop and the clapper, the total hanging length is 5.25 in (13.3 cm).
Construction is simple and flat. You work the body in 8 short rows from the hem up to the top, always with the right side facing, alternating green fan rows and cream arch rows. Then you add a cream scalloped edging along the bottom of the foundation chain and a single green outline round with the hanging loop worked in. Last, you make the cream clapper and attach it below the center of the hem.
Finished Size and Construction
- Finished size: 3.5 in x 3.5 in (8.9 cm x 8.9 cm), bell only
- Total hanging length: 5.25 in (13.3 cm) including loop and clapper
- Skill level: Easy-intermediate (fans, chain arches, joining new colors, many ends)
- Terminology: US crochet terms
- Yarn weight: Size 3 crochet cotton thread (Category 1, super fine)
- Hook: 2.25 mm (US B-1)
- Number of pieces: 1 bell body plus 1 small clapper disc, attached together
- Layout: One standalone ornament, no joining of motifs
- Body size after Row 8: 3 in (7.6 cm) wide at the hem, 2.75 in (7.0 cm) tall
- Size before border: 3.25 in x 3.25 in (8.3 cm x 8.3 cm), including the cream hem edging
- Border depth: 1 round of sc, about 0.125 in (0.3 cm) on every edge
Materials
Choose a smooth, tightly plied mercerized cotton thread in size 3. Mercerized cotton gives crisp stitch definition, blocks well, and holds the lace open. Avoid fuzzy or very soft acrylic, because the fans will blur and the arches will droop.
- Forest green: 6 g, about 16 m
- Cream: 4 g, about 11 m
These quantities include a margin of about 25 percent for your test piece, joining tails, and the outline round. One standard ball of each color will make many bells.
Pick a green dark enough to contrast clearly with the cream. If the two colors are close in value, the arches disappear against the fans and the lace loses its layered look.
Tools:
- 2.25 mm (US B-1) crochet hook
- Tapestry needle with an eye large enough for size 3 thread
- Small sharp scissors
- 2 stitch markers
- Blocking mat or folded towel
- Rustproof pins
- Spray starch or fabric stiffener (optional, for a crisp hanging ornament)
Abbreviations (US Terms)
- ch = chain
- sl st = slip stitch
- sc = single crochet
- dc = double crochet
- sk = skip
- sp = space
- st(s) = stitch(es)
- RS = right side
- rep = repeat
Special stitches:
- Shell: 7 dc in the same stitch. The 4th dc of a shell is its center dc.
- Fan: 5 dc in the same stitch (used only in the cream hem edging). The 3rd dc of a fan is its center dc.
- Post: a single dc that forms a vertical bar at the side of the body. A beginning ch-3 counts as a post.
Color note: Work every row with the RS facing. Fasten off at the end of each row, leaving a 6 in (15.2 cm) tail, and join the next color at the right-hand end of the piece as directed. Work over the tails where you can to save weaving time later.
Gauge and Checkpoints
Gauge matters less for an ornament than for a garment, but it does control the shape. Make one test bell before you plan a batch.
- Gauge: Row 1 (3 shells over a 19-stitch base) measures 3 in (7.6 cm) wide and 0.5 in (1.3 cm) tall.
- Checkpoint 1, after Row 1: 3 in (7.6 cm) wide.
- Checkpoint 2, after Row 4: the body measures 2 in (5.1 cm) across, outer post to outer post.
- Checkpoint 3, after Row 8: 2.75 in (7.0 cm) tall from foundation to top, with the top about 1.25 in (3.2 cm) wide.
- Checkpoint 4, after the hem edging: 3.25 in x 3.25 in (8.3 cm x 8.3 cm).
- Checkpoint 5, after the border: 3.5 in x 3.5 in (8.9 cm x 8.9 cm).
If your bell is too big, go down to a 2.0 mm hook and work the chains a little tighter. If it is too small, go up to a 2.5 mm hook. Chain arches cause most size drift, so keep every ch-3 the same length.
Pattern: Bell Body
The body grows from the hem upward. Rows 1 to 8 alternate green and cream.
Row 1 (green, RS): hem shells
With green, ch 20.
Sc in 2nd ch from hook (this uses 19 base chains). *Sk 2 ch, shell in next ch, sk 2 ch, sc in next ch; rep from * 2 more times. Fasten off.
Count: 3 shells and 4 sc (21 dc + 4 sc = 25 sts).
Each shell fans upward from a single point, so together they make the three wide fans of the flared hem.
Row 2 (cream, RS): first arch row
With RS facing, join cream with a sl st in the first sc of Row 1.
Ch 1, sc in same sc. *Ch 3, sc in center dc of next shell, ch 3, sc in next sc; rep from * 2 more times. Fasten off.
Count: 7 sc and 6 ch-3 sps.
Number the sc 1 to 7 from right to left. Sc 2, 4, and 6 sit on the shell centers. Sc 1 and 7 sit at the hem corners.
Row 3 (green, RS): second tier with ladders
With RS facing, join green with a sl st in sc 2 of Row 2.
Ch 5 (counts as post + ch 2), dc in sc 3, ch 1, shell in sc 4, ch 1, dc in sc 5, ch 2, dc in sc 6. Fasten off.
Count: 4 posts and 1 shell (11 dc total), 2 ch-2 sps, 2 ch-1 sps.
The ch-2 spaces between the outer posts form the first open ladder square on each side. Sc 1 and sc 7 of Row 2 stay unworked and become the hem shoulders.
Row 4 (cream, RS)
Join cream with a sl st in the 3rd ch of the beginning ch-5.
Ch 1, sc in same st, ch 2, sc in next post, ch 3, sc in center dc of shell, ch 3, sc in next post, ch 2, sc in last post. Fasten off.
Count: 5 sc, 2 ch-2 sps, 2 ch-3 sps.
Checkpoint 2: the body should measure 2 in (5.1 cm) across.
Row 5 (green, RS): third tier
Join green with a sl st in the first sc of Row 4.
Ch 5 (counts as post + ch 2), dc in next sc, ch 1, shell in next sc, ch 1, dc in next sc, ch 2, dc in last sc. Fasten off.
Count: 4 posts and 1 shell (11 dc total), 2 ch-2 sps, 2 ch-1 sps.
These ladder squares sit directly above the ones in Row 3, so each side now has two open squares stacked.
Row 6 (cream, RS)
Work exactly as Row 4.
Count: 5 sc, 2 ch-2 sps, 2 ch-3 sps.
Row 7 (green, RS): top shell
Join green with a sl st in the 2nd sc of Row 6.
Ch 4 (counts as post + ch 1), shell in next sc, ch 1, dc in next sc. Fasten off.
Count: 2 posts and 1 shell (9 dc total), 2 ch-1 sps.
The first and last sc of Row 6 stay unworked. This steps the outline inward and rounds the crown of the bell.
Row 8 (cream, RS): crown arches
Join cream with a sl st in the 3rd ch of the beginning ch-4.
Ch 1, sc in same st, ch 3, sc in center dc of shell, ch 3, sc in last post. Fasten off.
Count: 3 sc and 2 ch-3 sps.
Checkpoint 3: the body measures 2.75 in (7.0 cm) tall.
Cream Hem Edging
Turn the piece upside down so the foundation chain is at the top, RS facing. You will work into the free loops of the 19 base chains. Number them 1 to 19 from the right.
Join cream with a sl st in base ch 1. Ch 3 (counts as first dc), 4 dc in same ch (first fan made). *Sk 2 ch, sc in next ch, sk 2 ch, fan in next ch; rep from * 2 more times. Fasten off.
Count: 4 fans and 3 sc (20 dc + 3 sc = 23 sts).
The fans land on base chains 1, 7, 13, and 19. The sc land on chains 4, 10, and 16, directly below the green shells. This puts the four cream scallops beside and between the three green hem shells and gives the lacy double-scalloped hem.
Checkpoint 4: the piece measures 3.25 in x 3.25 in (8.3 cm x 8.3 cm).
Border: Green Outline Round
Border gauge: about 6 sc per 1 in (2.5 cm) along the straight sides. The counts below are fixed so the bell stays symmetrical.
With RS facing, join green with a sl st in sc 1 of Row 2 (the bottom right corner, just above the first cream fan).
Right side (16 sc): Ch 1, sc in same sc, 4 sc in next ch-3 sp of Row 2, 2 sc around post of Row 3, sc in first sc of Row 4, 2 sc around post of Row 5, sc in first sc of Row 6, 2 sc in next ch-2 sp of Row 6, 2 sc around post of Row 7, sc in first sc of Row 8.
Top (10 sc + loop): 4 sc in next ch-3 sp, (sc, ch 12, sc) in center sc, 4 sc in next ch-3 sp.
Left side (16 sc): Sc in last sc of Row 8, 2 sc around post of Row 7, 2 sc in ch-2 sp of Row 6, sc in last sc of Row 6, 2 sc around post of Row 5, sc in last sc of Row 4, 2 sc around post of Row 3, 4 sc in last ch-3 sp of Row 2, sc in sc 7 of Row 2.
Hem (27 sc): Working along the cream edging: *sc in each of first 2 dc of fan, 2 sc in center dc, sc in each of last 2 dc, sc in next sc; rep from * 2 more times. Work the 4th fan the same way (6 sc). Sl st to the first sc.
Count: 16 + 10 + 16 + 27 = 69 sc, plus the ch-12 loop.
Loop cover: Sl st into the ch-12 loop, work 18 sc in the loop, sl st in the next sc of the outline. Fasten off.
Tension tip: Keep the outline sc relaxed. If you pull them tight, the lace puckers and the hem scallops close up.
Why the math works: Each side count follows the row ends exactly: 1 sc per sc row end, 2 sc per post, 4 sc per exposed ch-3, and 2 sc per exposed ch-2. Both sides follow the same path, so both total 16. On the hem, each 5-dc fan becomes 6 sc, with one increase at the center to keep the scallop round. That gives 4 fans x 6 sc = 24, plus 3 connecting sc = 27. The 14th hem sc (6 + 1 + 6 + 1) is the exact center, which is where the clapper hangs.
Checkpoint 5: the bell measures 3.5 in x 3.5 in (8.9 cm x 8.9 cm).
Clapper
With cream, make a magic ring.
Rnd 1: Ch 3 (counts as dc), 11 dc in ring, sl st to top of ch-3. Pull the ring closed. Count: 12 dc.
Rnd 2: Ch 1, sc in next st, 2 sc in next st; rep from * 5 more times, sl st to first sc. Count:* 18 sc.
The disc measures 0.75 in (1.9 cm) across.
Attach: Ch 3, then sl st in the 14th (center) sc of the hem border. Fasten off and weave the tail back through the chain to firm it. The link adds about 0.25 in (0.6 cm).
Final Blocking
- Weave in all remaining ends through stitches of the same color, never across open spaces.
- Soak the bell in cool water for 5 minutes, then press the water out in a towel. Do not wring.
- Pin it RS up on the mat. Set the hem width to 3.5 in (8.9 cm) and the height to 3.5 in (8.9 cm).
- Pin out each of the 4 cream scallops and the 3 green hem shells so the hem edge waves evenly.
- Pin the ladder squares open and square, and stretch each cream arch into a smooth curve.
- Pin the clapper flat, centered below the hem.
- Mist with spray starch if you want a stiff ornament. Let it dry completely, about 6 to 12 hours.
Final Quality-Control Checklist
- Bell measures 3.5 in x 3.5 in (8.9 cm x 8.9 cm).
- Total hanging length is 5.25 in (13.3 cm).
- 4 green shell tiers: 3 shells at the hem, then 1, 1, and 1 up the center.
- 2 open ladder squares stacked on each side.
- Outline has 16 sc per side, 10 sc across the top, and 27 sc along the hem.
- 4 cream scallops on the hem, evenly spaced.
- Loop is fully covered with 18 sc and centered.
- Clapper is round, flat, and centered under the middle shell.
- No ends visible from the RS.
Troubleshooting
Hem cups or curls upward: the Row 1 base chain is too tight. Remake it, using a hook one size larger for the chain only.
Arches sag: the chains are loose. Shorten each ch-3 by holding the thread more firmly, or try a 2.0 mm hook.
Sides lean or look uneven: check that each side got exactly 16 outline sc.
Fans look crowded: make sure each shell is worked into the correct sc, with a ch-1 on each side.
Hem scallops flatten: check that you worked 2 sc in the center dc of each cream fan.
Posts look short next to the shells: pull up the first loop of each dc to full height before yarning over.
Clapper ruffles: you may have worked too many increases in Rnd 2. Recount to 18 sc.
Color joins show as bumps: join with a sl st and ch 1 snugly, then work the first stitch over the tail.
Care
Hand wash in cool water with mild soap, press dry in a towel, and reshape flat. Starch again after washing if you want the bell crisp.
Final Notes
The measurement chain is short and easy to check. Row 1 sets the hem at 3 in (7.6 cm). Rows 2 to 8 build the body to 2.75 in (7.0 cm) tall. The cream hem edging brings the piece to 3.25 in x 3.25 in (8.3 cm x 8.3 cm). The 69-sc green outline adds 0.125 in (0.3 cm) on every edge, for a finished 3.5 in x 3.5 in (8.9 cm x 8.9 cm). The loop and clapper bring the full hanging length to 5.25 in (13.3 cm).
Make one bell and check it against these numbers. Once it matches, every bell after it will too.
Happy crocheting!