
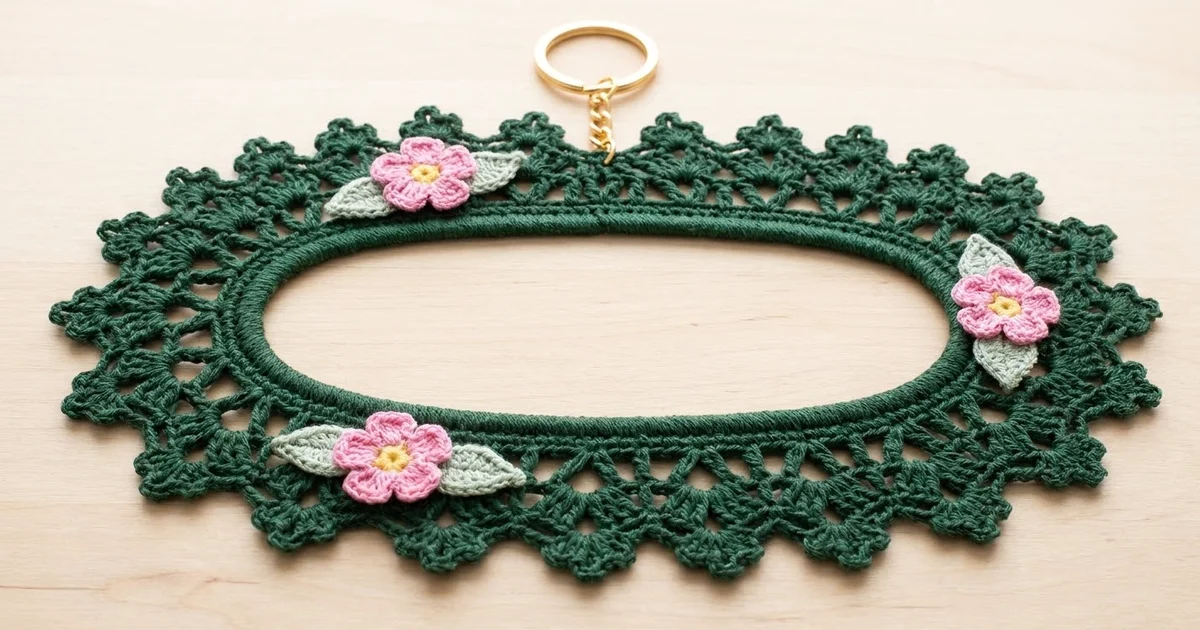
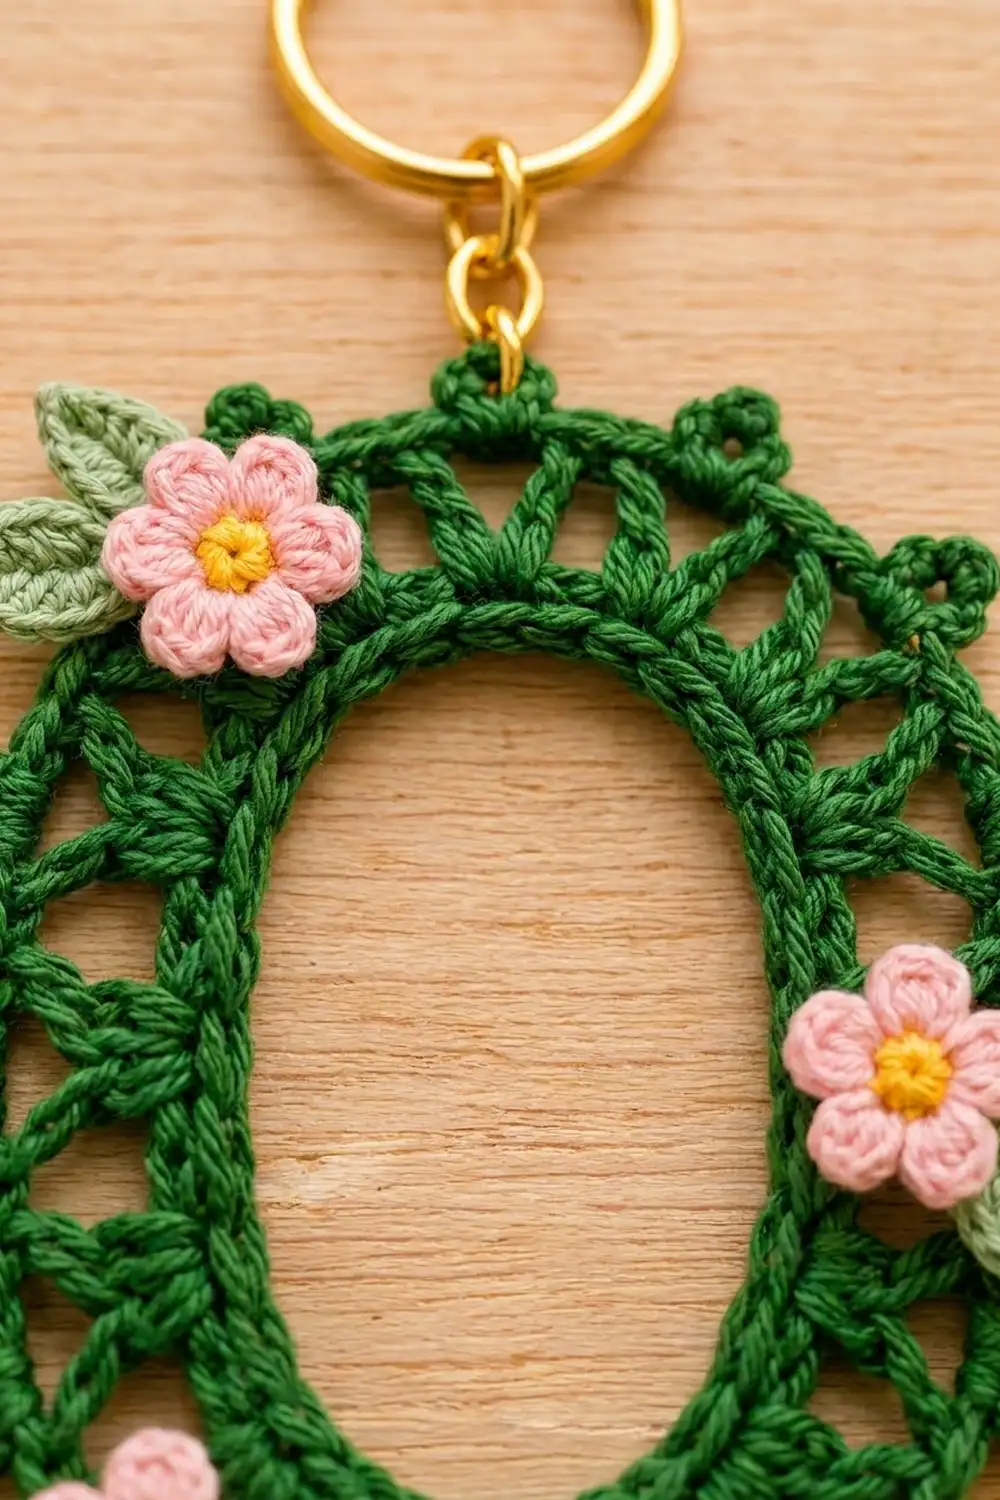
The Evergreen Lace Oval is a small, open frame of crochet lace that hangs from a gold keyring. It is a single oval ring with a solid inner band, a round of V-stitch spokes, little three-double-crochet fans, a smooth outer band, and sixteen tiny trefoil picots around the edge.
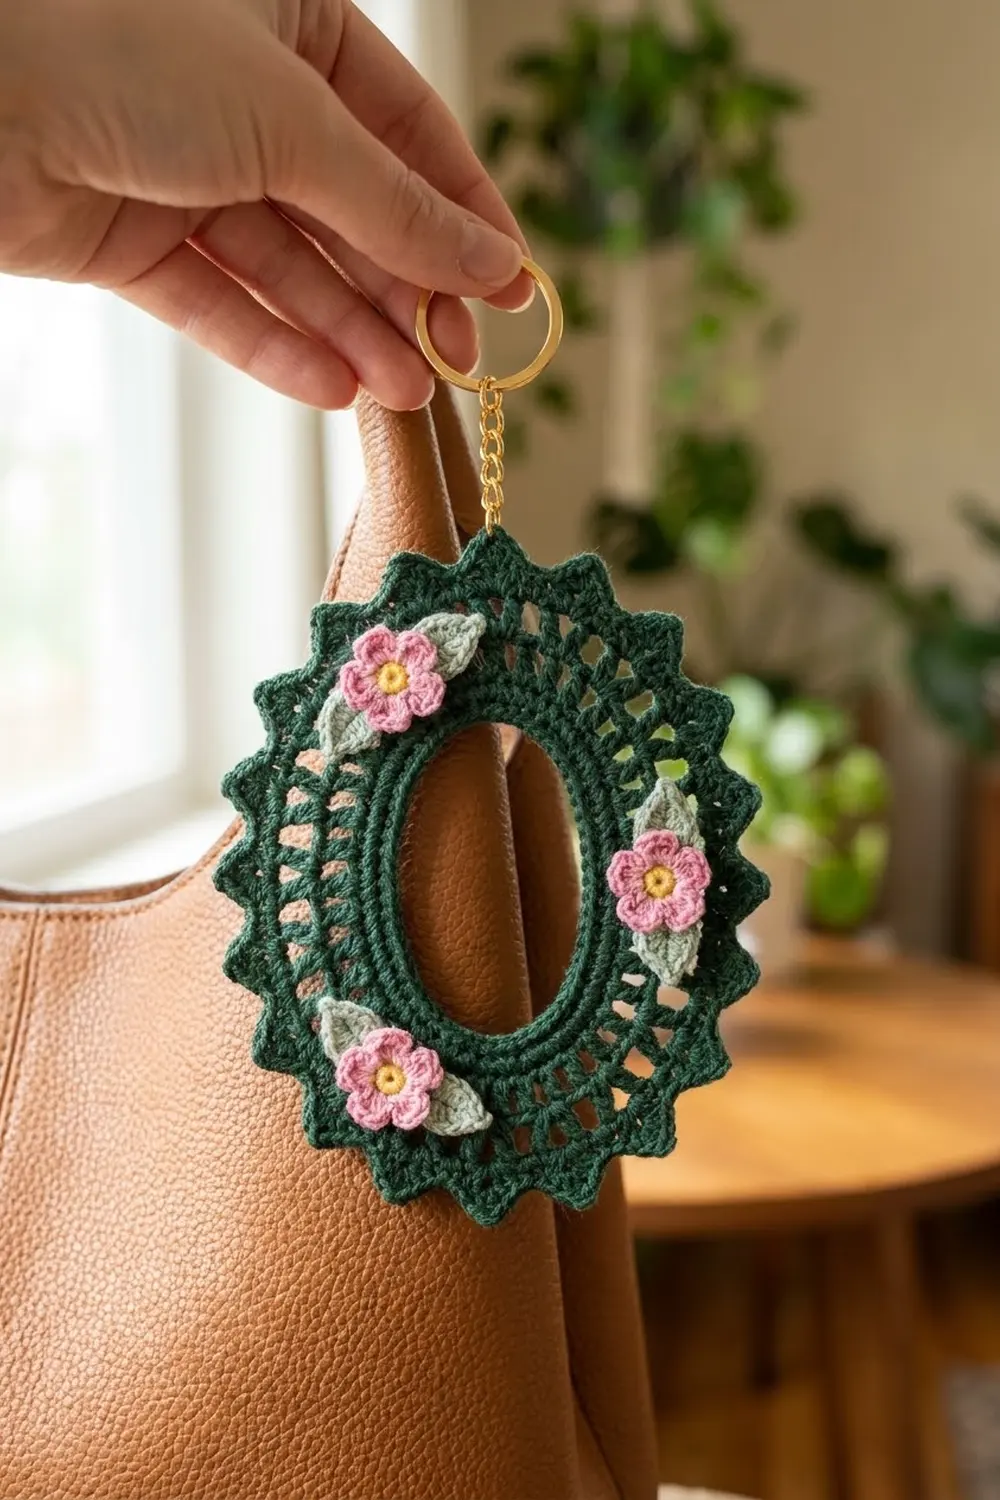
The sample is worked in deep forest green cotton. A gold split ring and a short gold chain at the top turn it into a bag charm or keychain. Three small pink five-petal flowers with yellow centers and sage-green leaves sit at the upper left, right middle, and lower left of the frame. Together they give it a fresh, garden-cottage look.
The pattern uses US crochet terms. The finished charm measures 4 in wide x 4.5 in tall (10.2 cm x 11.4 cm), not counting the hardware. The center opening is about 1.75 in x 2.25 in (4.4 cm x 5.7 cm).
You work one piece in the round, starting from a chain ring. All the increases go into the top and bottom curves, which creates the oval shape, and blocking sets it. The hardware and flowers go on last.
Finished Size and Construction
- Finished size: 4 in x 4.5 in (10.2 cm x 11.4 cm), not counting the keyring
- Skill level: Easy-intermediate
- Terminology: US crochet terms
- Yarn weight: Super Fine #1 (fingering) cotton
- Hook: 2.25 mm (US B-1)
- Number of pieces: 1 crochet piece (plus purchased hardware and flowers)
- Layout: Single vertical oval, hung from the top center picot
- Piece size before border: 3.5 in x 4 in (8.9 cm x 10.2 cm) after Round 5
- Border depth: 0.25 in (0.6 cm) per side, Rounds 6–7
Materials
Choose a smooth mercerized cotton in fingering weight. It keeps picots crisp, blocks well, and won’t fuzz much on a bag that gets handled every day. Avoid fuzzy or very stretchy yarns, because the lace will lose its shape.
- Forest green: 8 g, about 29 m (32 yd) of fingering-weight cotton
Tools and notions:
- 2.25 mm (US B-1) crochet hook
- Tapestry needle
- 4 stitch markers
- 1 gold split ring, 1 in (2.5 cm) across
- 1 in (2.5 cm) of small gold chain, about 5 links
- 2 gold jump rings, 6 mm
- 2 pairs of flat-nose pliers
- 3 pink five-petal flower embellishments with yellow centers, about 0.5 in (1.3 cm) across
- 3 sage-green leaf embellishments, about 0.6 in (1.5 cm) long
- Clear textile glue, or matching sewing thread and a fine needle
- Blocking mat, rust-proof pins, spray bottle, optional spray starch
The yarn amount includes a margin of about 40% for your gauge test and tails.
Abbreviations (US Terms)
- ch – chain
- sl st – slip stitch
- sc – single crochet
- dc – double crochet
- st(s) – stitch(es)
- sp – space
- sk – skip
- rep – repeat
- V-st – (dc, ch 1, dc) in the same st
Trefoil picot: (Ch 3, sl st in 3rd ch from hook) 3 times, then sl st into the top of the sc you just made. This makes a small cluster of three loops.
Gauge and Checkpoints
Gauge: 15 sc = 2 in (5.1 cm), which is 7.5 sc per 1 in (2.5 cm).
The charm is small, so the piece itself is your best gauge test. Work Rounds 1–3, then lay the piece flat and measure before you go on.
Checkpoints (measured flat, gently eased into an oval):
- After Round 3: 2.25 in x 2.75 in (5.7 cm x 7.0 cm) outside; opening 1.75 in x 2.25 in (4.4 cm x 5.7 cm)
- After Round 5: 3.5 in x 4 in (8.9 cm x 10.2 cm)
- After Round 6: 3.75 in x 4.25 in (9.5 cm x 10.8 cm)
- After Round 7: 4 in x 4.5 in (10.2 cm x 11.4 cm)
If your piece is more than 0.25 in (0.6 cm) too big at Round 3, go down to a 2 mm hook. If it is too small, or the band cups upward, go up to a 2.5 mm hook. Pull it out and start again rather than forcing it, because the lace rounds will only make the difference bigger.
Pattern
Don’t turn at the end of rounds. Keep the right side facing you the whole time.
Round 1: Foundation Ring
Ch 36. Check that the chain is not twisted, then sl st in the first ch to form a ring. (36 ch)
Keep these chains even and not too tight. Rounds 2 and 3 are worked into them, and the ring sets the size of the opening.
Round 2: Inner Band
This round creates the oval. The left and right sides are straight, and the top and bottom curves get the increases.
Ch 1. Working into each ch of the ring:
- Right side: sc in each of the next 9 ch. (9 sc)
- Bottom curve: [2 sc in next ch, 2 sc in next ch, sc in next ch] 3 times. (15 sc)
- Left side: sc in each of the next 9 ch. (9 sc)
- Top curve: [2 sc in next ch, 2 sc in next ch, sc in next ch] 3 times. (15 sc)
Sl st in the first sc to join. Round 2 total: 48 sc (9 + 15 + 9 + 15). Chains used: 9 + 9 + 9 + 9 = 36.
Put a marker in the first st of each curve and each side so you can find them in Round 3.
Round 3: Inner Band Increase
Ch 1.
- Right side: sc in each of the next 9 sts. (9 sc)
- Bottom curve: [2 sc in next st, sc in next st] 7 times, 2 sc in next st. (23 sc from 15 sts)
- Left side: sc in each of the next 9 sts. (9 sc)
- Top curve: [2 sc in next st, sc in next st] 7 times, 2 sc in next st. (23 sc from 15 sts)
Sl st in the first sc to join. Round 3 total: 64 sc (9 + 23 + 9 + 23).
Rounds 2 and 3 together make the solid inner band around the opening. Measure now.
Round 4: V-Stitch Spokes
Ch 4 (counts as dc and ch 1), dc in same st as the join (first V-st made), ch 2, sk next 3 sts, *V-st in next st, ch 2, sk next 3 sts; rep from * around. Sl st in the 3rd ch of the beginning ch-4.
Round 4 total: 16 V-sts (32 dc), 16 ch-1 sps, 16 ch-2 sps. Each repeat uses 4 sts of Round 3: 16 x 4 = 64.
The V-sts become the spokes that spread outward, and the ch-2 sps become the open windows between them. If the spokes lean, check that you skipped exactly 3 sts each time.
Round 5: Fans and Triangles
Sl st into the first ch-1 sp. Ch 3 (counts as dc), 2 dc in same sp, ch 2, sc in next ch-2 sp, ch 2, *3 dc in next ch-1 sp, ch 2, sc in next ch-2 sp, ch 2; rep from * around. Sl st in the top of the beginning ch-3.
Round 5 total: 16 fans (48 dc) + 16 sc = 64 sts, plus 32 ch-2 sps.
Each fan sits right above a V-st, and each sc anchors the window between two spokes. The ch-2 lengths on either side of each sc frame a small open triangle. The piece should now measure 3.5 in x 4 in (8.9 cm x 10.2 cm).
Border
The border is Rounds 6 and 7: a smooth outer band, then the trefoil picot edge. It adds 0.25 in (0.6 cm) on every side.
Border gauge: the same 7.5 sc per 1 in (2.5 cm). If anything, work the border a little looser than the inner band, because a tight outer edge will pull the oval into a cup.
An oval has no corners, so think of the edge in halves. With the hanging point at top center, the right half holds 8 repeats and the left half holds 8 repeats.
Round 6: Outer Band (Conversion Round)
Ch 1, sc in same st as join (first dc of a fan), sc in next 2 dc, sc in next ch-2 sp, sc in next sc, sc in next ch-2 sp, *sc in next 3 dc, sc in next ch-2 sp, sc in next sc, sc in next ch-2 sp; rep from * around. Sl st in the first sc to join.
Round 6 count: 64 sts worked 1-per-stitch + 32 extra (1 sc in each ch-2 sp) = 96 sc. That is 6 sc per repeat and 48 sc on each half.
Round 7: Trefoil Picot Edge (Trim Round)
Ch 1, *sc in next st, sc in next st and work a trefoil picot, sc in next 4 sts; rep from * around. Sl st in the first sc to join. Fasten off, leaving an 8 in (20.3 cm) tail.
Round 7 count: 96 sc worked 1-per-stitch + 0 extra sc, plus 16 trefoil picots. That is 48 sc and 8 picots on each half.
Each picot lands on the 2nd sc of its repeat, which sits above the center dc of a fan. The picots point straight outward, one for each spoke.
Why the Math Works
Round 3 has 64 sts, which splits evenly into 16 repeats of 4. Every later round keeps those 16 repeats: 16 V-sts, 16 fans, 16 x 6 = 96 sc, and 16 picots. At 7.5 sc per inch, 96 sc make an outer edge of about 12.8 in (32.5 cm). That matches the perimeter of a 3.75 in x 4.25 in (9.5 cm x 10.8 cm) oval. The picots fall every 6 sts, about 0.8 in (2.0 cm) apart, so they stay evenly spaced on the curves and the sides.
Final Blocking
- Weave in all tails along the back of the sc bands. Don’t trim them yet.
- Soak the piece in cool water for 10 minutes, then roll it in a towel to remove excess water.
- Pin the oval to 4 in x 4.5 in (10.2 cm x 11.4 cm), with the long direction vertical. A paper template drawn to that size helps.
- Pin the opening to 1.75 in x 2.25 in (4.4 cm x 5.7 cm), centered.
- Pin each trefoil picot outward. Pin the center loop of each trefoil so the three loops spread.
- Mist with spray starch if you want a firm charm. Let it dry completely, at least 6 hours.
- Unpin and trim the tails.
- Hardware: Open a jump ring with two pairs of pliers. Thread it through the top center trefoil picot, add one end of the gold chain, and close it. Use the second jump ring to join the other end of the chain to the split ring.
- Flowers: Place one flower with its leaf at the upper left of the band, one at the right middle, and one at the lower left. Glue or stitch each one in place, with the leaf tucked behind the flower and angled outward. Let the glue cure fully before use.
Final Quality-Control Checklist
- Round 3 has 64 sc, and the opening is a tall oval, not a circle.
- There are 16 spokes, 16 fans, and 16 trefoil picots.
- Round 6 has 96 sc, 6 per repeat.
- Each picot sits above the center of a fan.
- The charm measures 4 in x 4.5 in (10.2 cm x 11.4 cm) and lies flat.
- The jump rings are fully closed with no gap.
- The flowers are secure and sit at the upper left, right middle, and lower left.
- No tail ends show on the front.
Troubleshooting
The opening is round, not oval. Check Rounds 2 and 3: the increases must stay in the curves only. Block firmly to the oval template.
The piece cups or curls up. Round 4 or Round 6 is too tight. Go up a hook size for those rounds, or lengthen the ch-2 spaces slightly by pulling up each ch.
The edge ruffles. You probably added extra sc in Round 6. Recount: there should be exactly 6 sc per repeat.
Picots are uneven. Keep each ch-3 the same size and make the closing sl st snug. Pin each picot during blocking.
The charm stretches on the ring. Attach the jump ring through the base of the trefoil, not just one loop, and use starch.
A flower comes loose. Scuff the back of the flower lightly, then reglue it, or add two small stitches through the leaf.
Care
Spot clean with a damp cloth and mild soap, then pin flat to dry. Don’t machine wash it, because the glued flowers and the hardware can come loose.
Final Notes
Here is the measurement chain. A 36-ch ring becomes 48 sc and then 64 sc, measuring 2.25 in x 2.75 in (5.7 cm x 7.0 cm). Sixteen spokes and fans bring it to 3.5 in x 4 in (8.9 cm x 10.2 cm). The 96-sc outer band reaches 3.75 in x 4.25 in (9.5 cm x 10.8 cm), and the trefoil edge finishes at 4 in x 4.5 in (10.2 cm x 11.4 cm). Check each stage and block well, and your Evergreen Lace Oval will hang neatly from any bag.
Happy crocheting!