

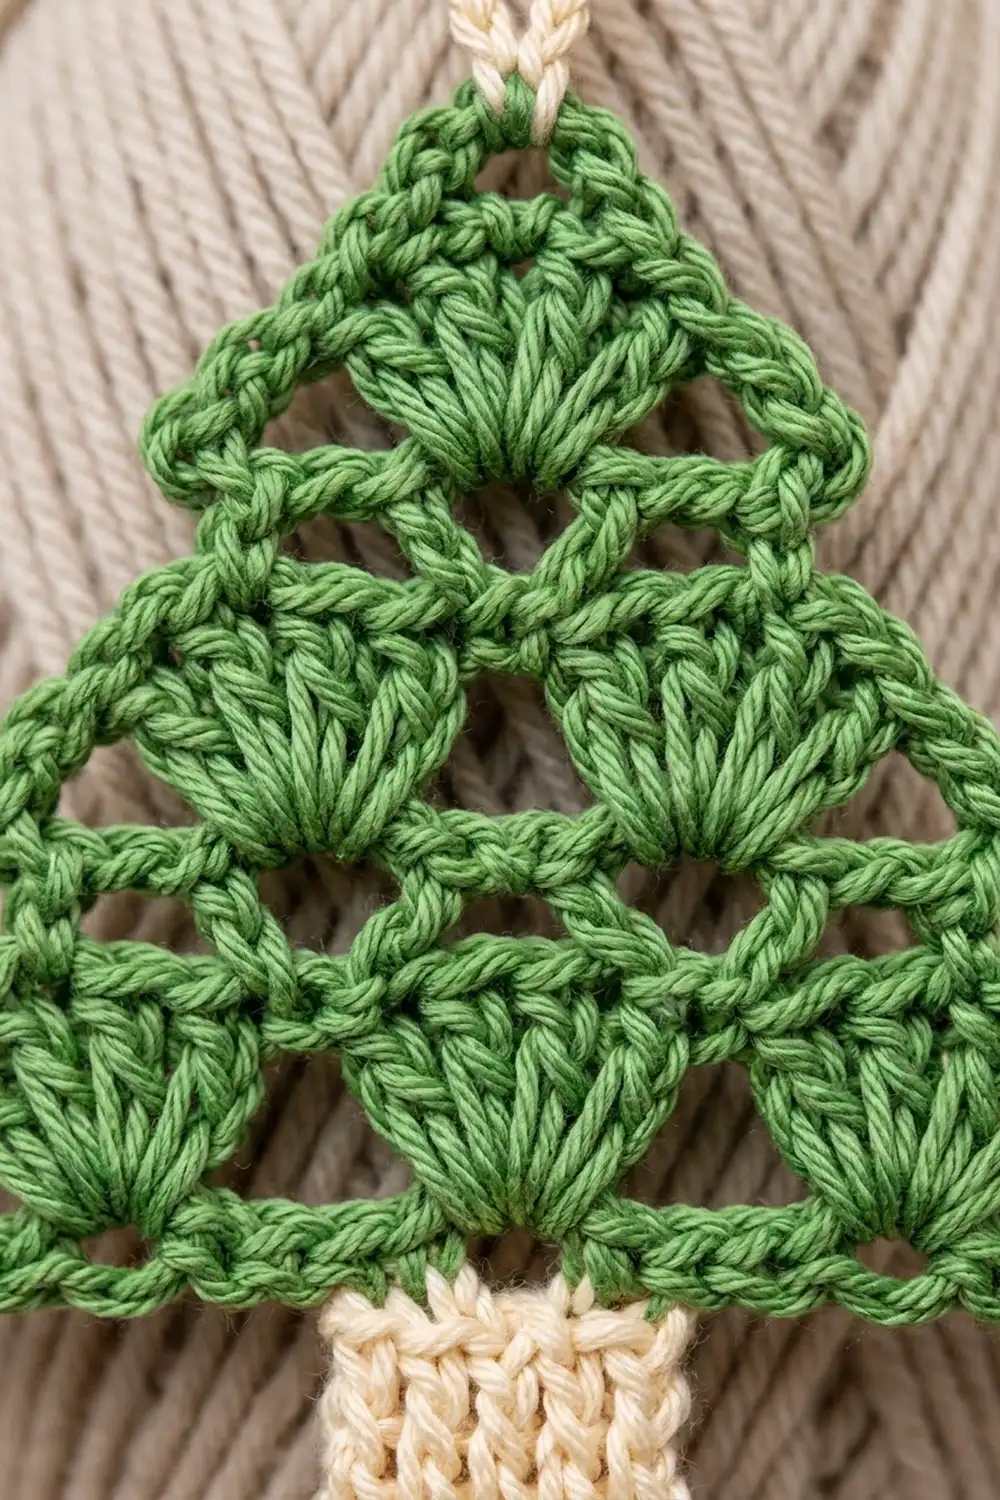
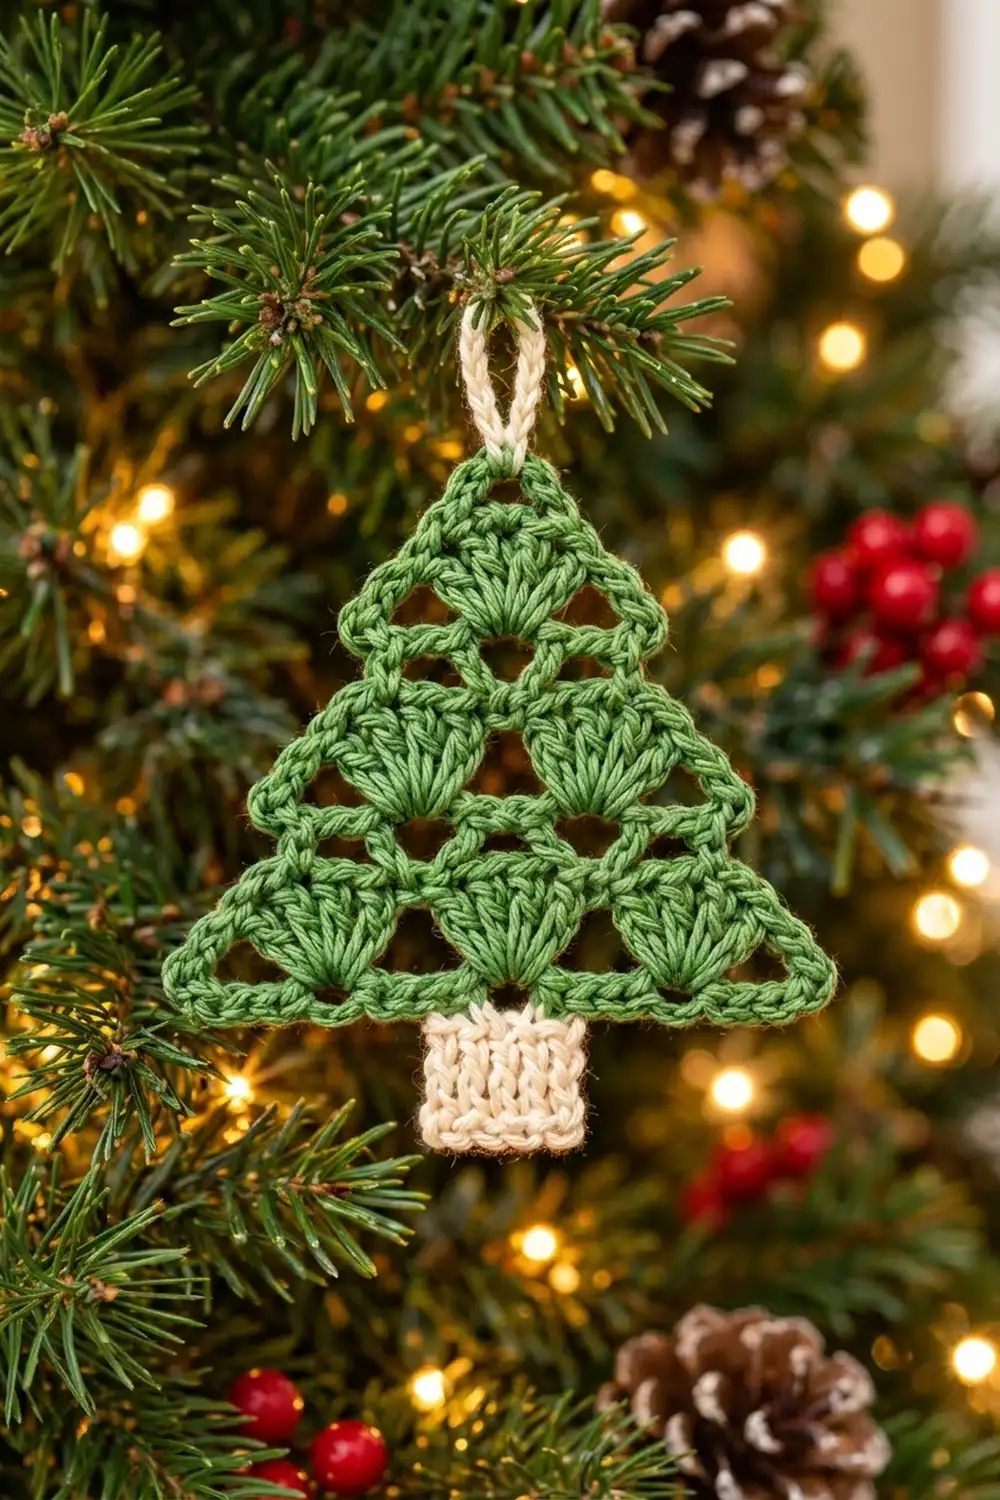
This little tree ornament is built from stacked shell fans. Thin chain-like bars separate the tiers and leave small triangular windows between the fans. The three tiers form a pyramid: three fans on the bottom, two in the middle, one at the top. A raised slip-stitch outline frames the triangle, and a cream trunk and hanging loop finish it.
The colors are classic but soft: leaf or sage green for the tree and warm cream for the trunk and loop. The look is light and lacy, so it works on a real tree, a wreath, or a gift tag.
The pattern uses US crochet terms. The finished triangle measures 4.5 in (11.4 cm) wide by 3.5 in (8.9 cm) tall. It is 4.25 in (10.8 cm) tall with the trunk and about 5.25 in (13.3 cm) with the loop.
You crochet the tree in one piece, in turned rows from the base up. Each tier is a shell row followed by a bar row that narrows the shape. After that, you add a two-round outline, work the trunk in rows from the bottom edge, and chain the hanging loop at the tip.
Finished Size and Construction
- Finished size: 4.5 in (11.4 cm) wide x 3.5 in (8.9 cm) tall triangle; 4.25 in (10.8 cm) tall with trunk; about 5.25 in (13.3 cm) with loop
- Skill level: Easy (advanced beginner)
- Terminology: US terms
- Yarn weight: DK / light worsted (#3), cotton or cotton blend
- Hook: 3.5 mm (E-4)
- Number of pieces: 1 (a single ornament, worked in one piece)
- Layout: single triangular motif with a centered trunk
- Piece size before border: 4 in (10.2 cm) wide x 3 in (7.6 cm) tall
- Border depth: 0.25 in (0.6 cm) on each edge
- Trunk: 1.1 in (2.8 cm) wide x 0.75 in (1.9 cm) tall
Materials
Choose a smooth, tightly plied cotton. It shows the shell ribs clearly and blocks crisply. Avoid fuzzy or brushed yarns, which blur the open windows.
Yarn (one ornament):
- Green (tree): 10 g, about 25 m (27 yd)
- Cream (trunk and loop): 3 g, about 8 m (9 yd)
These amounts assume a DK cotton of about 125 m (137 yd) per 50 g. They include a margin for your test piece and for weaving in ends.
Tools:
- 3.5 mm (E-4) crochet hook
- Tapestry needle
- Scissors
- Stitch marker
- Blocking mat and rust-proof pins
- Spray bottle with water
Abbreviations (US Terms)
- ch = chain
- sl st = slip stitch
- sc = single crochet
- dc = double crochet
- sk = skip
- st(s) = stitch(es)
- sp = space
- RS / WS = right side / wrong side
Special stitches:
- Shell: 7 dc in the same st. The 4th dc is the center dc.
- Knit-look sc (ksc): Insert the hook between the two legs of the V of the st below, not under the top loops. Yarn over, pull up a loop, yarn over, and pull through both loops. On RS rows these stack into vertical, knit-like columns.
Gauge and Checkpoints
Gauge: 19 sc = 4 in (10.2 cm) over Row 1. One shell row is about 0.6 in (1.5 cm) tall.
Make one complete tree as your test piece. It is small, so the full ornament is the best swatch. Measure at these points:
- After Row 2: 4 in (10.2 cm) wide x 0.75 in (1.9 cm) tall
- After Row 4: 1.75 in (4.4 cm) tall
- After Row 7: 3 in (7.6 cm) tall
- After the border: 4.5 in (11.4 cm) wide x 3.5 in (8.9 cm) tall
If Row 1 is wider than 4 in (10.2 cm), switch to a 3.25 mm hook. If it is narrower, switch to 3.75 mm. If the width is right but the shells are too tall, keep your dc yarn-overs snug instead of changing hooks.
Tree
With green, ch 20.
Row 1 (RS): Sc in 2nd ch from hook and in each ch across. Turn. (19 sc)
Row 2 (Tier 1 shells): Ch 1, sc in first st, [sk 2, shell in next st, sk 2, sc in next st] 3 times. Turn. (3 shells, 4 sc = 25 sts)
The shells sit on Row 1 sts 4, 10 and 16. The sc sit on sts 1, 7, 13 and 19.
Row 3 (Bar 1): Do not ch. Sl st in the first 4 dc of the first shell, so your hook is in its center dc. Ch 1, sc in same st, ch 3, sk 3 dc, dc in next sc, ch 3, sk 3 dc, sc in center dc of next shell, ch 3, sk 3 dc, dc in next sc, ch 3, sk 3 dc, sc in center dc of last shell. Leave the remaining 3 dc and 1 sc unworked. Turn. (3 sc, 2 dc, 4 ch-3 sps)
Each dc post stands between two Tier 1 shell tops. The ch-3 strands form the bar, and the gaps on either side of each dc become the triangular windows.
Row 4 (Tier 2 shells): Ch 1, sc in first sc, sk ch-3 sp, shell in next dc, sk ch-3 sp, sc in next sc, sk ch-3 sp, shell in next dc, sk ch-3 sp, sc in last sc. Turn. (2 shells, 3 sc = 17 sts)
Checkpoint: the piece is 1.75 in (4.4 cm) tall.
Row 5 (Bar 2): Do not ch. Sl st in the first 4 dc of the first shell. Ch 1, sc in same st, ch 3, sk 3 dc, dc in next sc, ch 3, sk 3 dc, sc in center dc of next shell. Leave the rest unworked. Turn. (2 sc, 1 dc, 2 ch-3 sps)
Row 6 (Tier 3 shell): Ch 1, sc in first sc, sk ch-3 sp, shell in dc, sk ch-3 sp, sc in last sc. Turn. (1 shell, 2 sc = 9 sts)
Row 7 (Tip): Do not ch. Sl st in the first 4 dc of the shell. Ch 1, sc in same st. (1 sc) Do not fasten off.
Checkpoint: the base is 4 in (10.2 cm) wide and the piece is 3 in (7.6 cm) tall. The shells form a 3-2-1 pyramid, and each upper shell is centered over the sc between two lower shells.
Border
Border gauge: The outline sc works out to about 4.5 sts per inch along the base and about 4.1 sts per inch along the longer slanted sides. That spacing lets every edge lie flat without ruffling.
Round 1 (sc outline): Work 2 more sc in the Row 7 sc. (3 sc top corner) Turn the piece to work down the first slanted side.
- Side 1 (15 sc): For each tier, work 4 sc evenly along the outer edge of the shell, then 1 sc in the end of the bar or sc row below it. 3 tiers x (4 + 1) = 15 sc.
- Bottom-left corner: 3 sc in the first foundation ch.
- Bottom (17 sc): Sc in each of the next 17 foundation ch.
- Bottom-right corner: 3 sc in the last foundation ch.
- Side 2 (15 sc): Work up the second side to match: for each tier, 1 sc in the row end, then 4 sc along the shell edge.
Join with a sl st to the first sc. (56 sc)
Count check: 3 + 15 + 3 + 17 + 3 + 15 = 56. Counted from one corner center to the next, each slanted side has 17 sts (15 plus a corner center at each end). The base has 19 sts (17 plus two corner centers), the same as Row 1, so the bottom edge stays as wide as the tree.
Round 2 (slip-stitch ridge): Working in the same direction, sl st loosely in each st around. Join with a sl st to the first sl st. (56 sl sts) Fasten off.
This round creates the raised, braided-looking outline. Keep it loose, because a tight sl st round pulls the sides in and curls the tips.
Checkpoint: the triangle is 4.5 in (11.4 cm) wide x 3.5 in (8.9 cm) tall, with each edge about 0.25 in (0.6 cm) larger than before.
Why the math works: The base has 19 sts at 4.5 sts per inch, which is about 4.2 in (10.7 cm), plus the border depth. Before the border, each slanted side is about 3.6 in (9.1 cm) long. Seventeen sts over that length is about 4.7 sts per inch on the inner edge. After Round 2 the outer edge is longer, about 4.1 in (10.4 cm), and the density eases to about 4.1 sts per inch. Because that stays close to the base gauge, the triangle lies flat and keeps sharp corners.
Trunk
The trunk is worked in rows straight off the base, centered on the 17 straight base sts.
Hold the piece RS facing with the base at the top. Starting from the bottom-left corner group, count 6 sts along the base. Join cream with a sl st in the 7th st, working into the Round 2 sl sts.
Row 1 (RS): Ch 1, sc in same st and in next 4 sts. Turn. (5 sc)
This leaves 6 free base sts on each side: 6 + 5 + 6 = 17.
Row 2 (WS): Ch 1, sc in each st. Turn. (5 sc)
Row 3 (RS): Ch 1, ksc in each st. Turn. (5 ksc)
Row 4 (WS): Ch 1, sc in each st. Turn. (5 sc)
Row 5 (RS): Ch 1, ksc in each st. (5 ksc) Fasten off.
Checkpoint: the trunk is 1.1 in (2.8 cm) wide x 0.75 in (1.9 cm) tall, and the whole ornament is 4.25 in (10.8 cm) tall.
Hanging Loop
Join cream with a sl st in the center sc of the top corner group, working under the Round 2 sl st. Ch 14, then sl st in the same st. Fasten off.
The loop rises about 1 in (2.5 cm) above the tip, bringing the total height to about 5.25 in (13.3 cm).
Weave in each end through stitches of its own color: green tails inside the bar rows and cream tails inside the trunk.
Final Blocking
- Mist the ornament until it is evenly damp but not soaked.
- Lay it RS up on the blocking mat.
- Pin the three corners first, with the base 4.5 in (11.4 cm) wide and the tip 3.5 in (8.9 cm) above the base.
- Pin the trunk square at 1.1 in (2.8 cm) wide, with its columns running straight down.
- Use a fingertip to open each triangular window and spread each shell into an even fan.
- Straighten the bar rows so they run level across the tree.
- Let it dry completely, at least 6 hours, before removing the pins.
- For a stiffer ornament, mist it lightly with spray starch before drying.
Final Quality-Control Checklist
- The shells form a 3-2-1 pyramid, with each shell centered over the sc between the two shells below it.
- Every shell has exactly 7 dc.
- Bar 1 shows 4 open windows (one on each side of both dc posts), and Bar 2 shows 2.
- Border Round 1 has 56 sc: 15 per slanted side, 17 across the base and 3 in each corner.
- The slip-stitch outline is even and the corners are sharp.
- The trunk is centered, with 6 free base sts on each side.
- The trunk is 5 sts wide and 5 rows tall, with knit-look columns on the RS.
- The loop is centered on the tip.
- The triangle measures 4.5 in (11.4 cm) x 3.5 in (8.9 cm).
Troubleshooting
The tree leans to one side. A bar row probably started after 3 or 5 sl sts instead of 4. Recount so every bar row starts in a center dc.
The windows close up. The ch-3s are too tight, or you worked into the ch-3 sps instead of skipping them. Loosen your chains and skip the sps as written.
The sides ruffle. Work 3 sc along each shell edge instead of 4. That gives 12 sc per side and 50 sc in Round 1.
The sides pull in or cup. Work Round 2 more loosely, or use a hook one size larger for that round only.
The base flares. Make sure Row 1 has exactly 19 sc and that there are 17 sc between the bottom corner groups.
The trunk is off-center. Recount from the corner group. The trunk starts in the 7th straight base st.
The ksc rows are tight. Put the hook through the center of the V, and pull the loop up to full height before you finish the st.
Care
Hand wash in cool water with mild soap, press out the water in a towel, and reshape the ornament flat to dry. Store it flat or hanging, away from heavy ornaments that could crush the shells.
Final Notes
The measurement chain is short. Row 1 sets the base at 19 sts, or 4 in (10.2 cm). Three tiers of shells and bars bring the height to 3 in (7.6 cm). The 56-st border adds 0.25 in (0.6 cm) to every edge, giving a 4.5 in (11.4 cm) x 3.5 in (8.9 cm) triangle. The 5-st trunk brings the height to 4.25 in (10.8 cm), and the loop takes it to about 5.25 in (13.3 cm).
If Row 1 is the right width and every bar row starts in a center dc, the rest of the ornament follows.
Happy crocheting!