

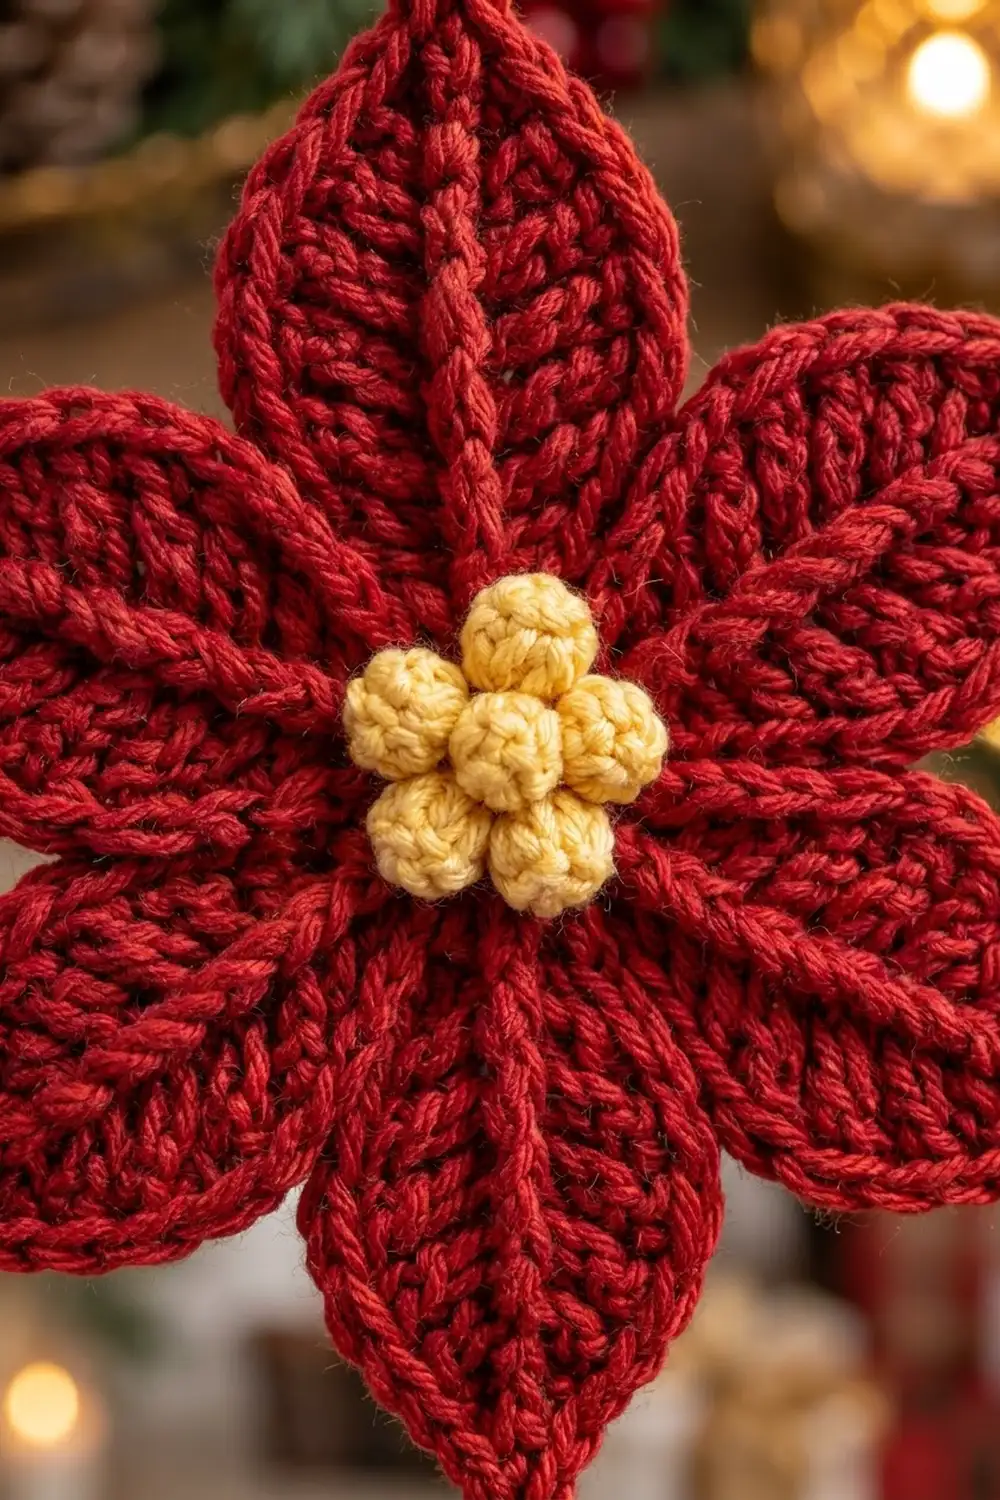
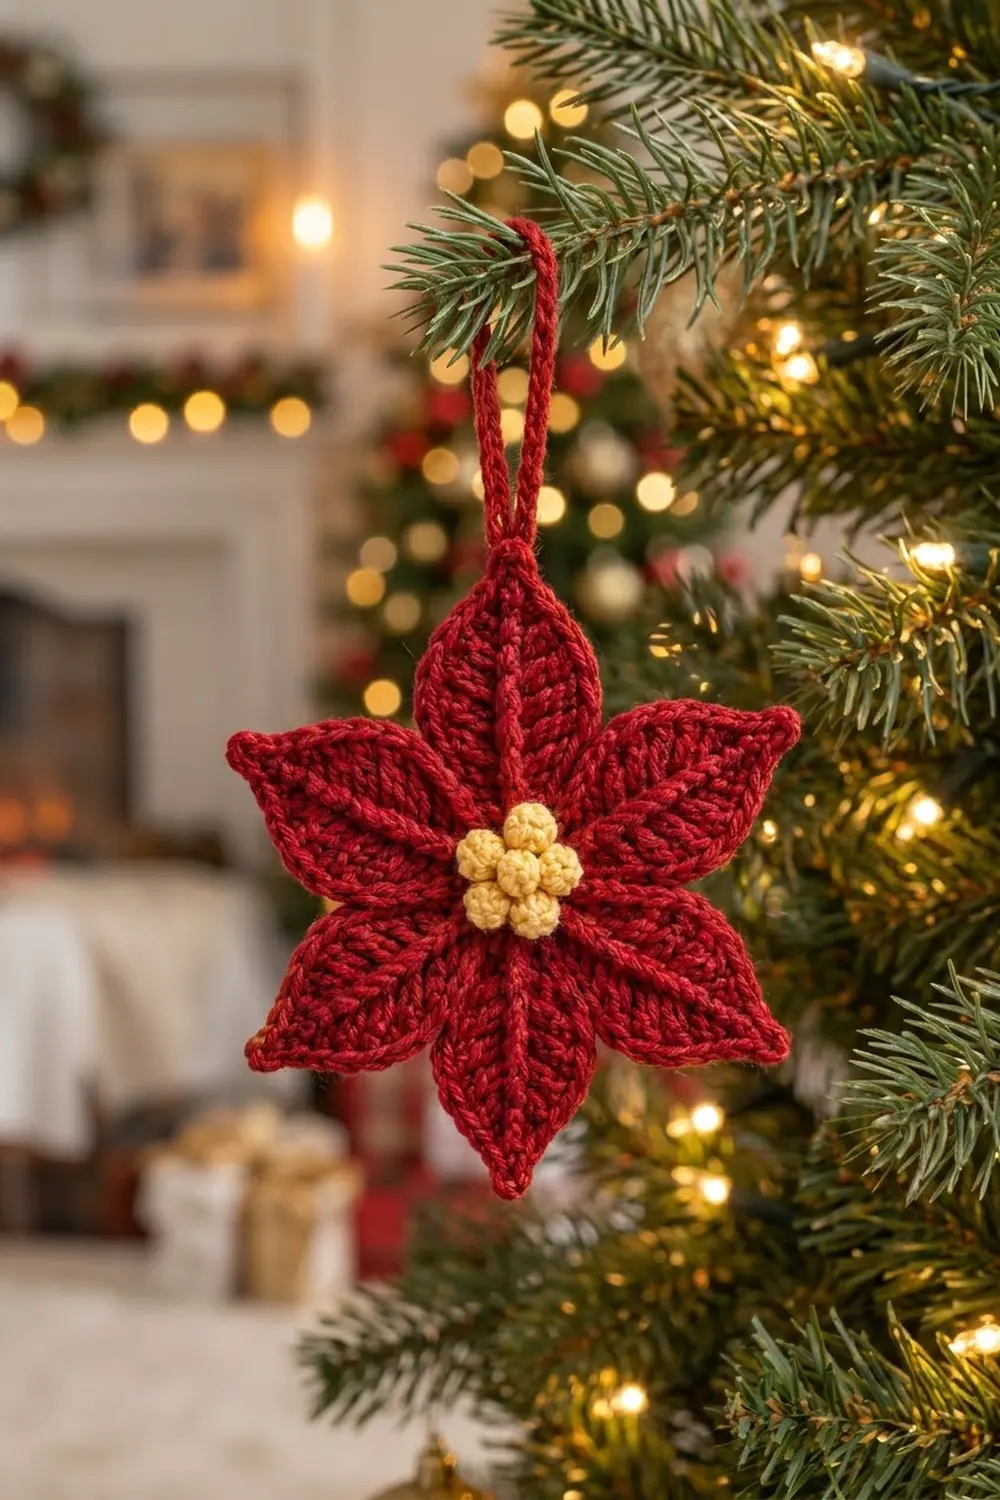
This six-leaf poinsettia ornament has deep red leaves and a small cluster of golden bobbles in the center. Each leaf has a raised center vein and ridged texture, so the flower has some depth even though it hangs flat on the tree.
It’s made in classic Christmas colors: a rich cranberry red for the leaves and loop, and a soft butter-yellow for the center. Mercerized cotton gives crisp stitch definition and a slight sheen that catches tree lights.
The pattern uses US crochet terms. The finished ornament measures 4.75 in (12.1 cm) from tip to tip and hangs from a loop about 2.25 in (5.7 cm) long.
Here’s how it’s built. You make six leaves by working around a foundation chain, then gather and seam them at the base. Next, you work a slip-stitch border around the whole outline. Finally, you sew on a seven-bobble center and attach a doubled chain loop.
Finished Size and Construction
- Finished size: 4.75 in (12.1 cm) from tip to tip
- Skill level: Easy+ (working around a chain, bobbles, simple seaming)
- Terminology: US crochet terms
- Yarn weight: Sport weight (#2) mercerized cotton
- Hook: 2.75 mm (US C-2)
- Number of pieces: 6 leaves, 1 center cluster, 1 extra bobble, 1 hanging loop
- Layout: 6 leaves arranged in a star, one leaf pointing straight up
- Leaf size: 2.25 in (5.7 cm) long × 1.25 in (3.2 cm) wide
- Size before border: 4.5 in (11.4 cm) from tip to tip
- Border depth: about 0.125 in (0.3 cm) at each tip
Materials
Use a smooth, tightly plied cotton or cotton blend. Fuzzy or loosely spun yarn will blur the ridges and the vein. Acrylic sport yarn also works, but it won’t block as crisply.
- Red (leaves, border, loop): 12 g, about 36 m
- Pale yellow (center): 3 g, about 9 m
Tools:
– 2.75 mm (US C-2) crochet hook
– Tapestry needle with a sharp tip
– Scissors
– Stitch markers (2)
– Blocking mat and rust-proof pins
– Spray bottle with water
– Ruler or tape measure
All yarn quantities include a margin of about 25% for your gauge swatch and tails.
Abbreviations (US Terms)
- ch – chain
- sl st – slip stitch
- sc – single crochet
- hdc – half double crochet
- dc – double crochet
- st(s) – stitch(es)
- sp – space
- MR – magic ring
- rnd – round
- yo – yarn over
Special stitch: 5-dc bobble. Do this 5 times in the same stitch: yo, insert hook, yo and pull up a loop, yo and pull through 2 loops. That leaves 6 loops on the hook. Yo and pull through all 6 loops.
Picot tip: Ch 3, then sl st in the 3rd ch from the hook.
Gauge and Checkpoints
Gauge: 13 sc and 14 rows = 2 in (5.1 cm) in sc worked in rows.
Make one full leaf before anything else and use it as your gauge test. It shows your tension better than a flat swatch does.
- Foundation chain: The 12 working chains (not counting the turning ch) should measure about 1.75 in (4.4 cm).
- After leaf Rnd 1: 2 in (5.1 cm) long × 1 in (2.5 cm) wide.
- After leaf Rnd 2: 2.25 in (5.7 cm) long × 1.25 in (3.2 cm) wide.
- Center cluster: 0.75 in (1.9 cm) across.
If your leaf is too big, go down to a 2.5 mm hook. If it’s too small, go up to a 3 mm hook. A difference of only 0.125 in (0.3 cm) per leaf turns into 0.25 in (0.6 cm) across the finished flower, so check carefully.
Leaves (Make 6)
Use red. Each leaf is worked in rounds around both sides of one foundation chain. The chain itself becomes the base for the center vein.
Foundation: Ch 13.
Rnd 1 (side A): Sc in the 2nd ch from the hook (the tip end), hdc in the next ch, dc in the next 7 ch, hdc in the next ch, sc in the next ch. That’s 11 sts.
Base: Work 3 sc in the last ch.
Side B: Rotate the work and continue along the opposite side of the foundation chain. Sc in the next ch, hdc in the next ch, dc in the next 7 ch, hdc in the next ch, sc in the next ch. The last sc goes into the same ch as the first sc of the round. That’s 11 sts.
Tip: Ch 2, then sl st to the first sc. (25 sts: 11 + 3 + 11, plus 1 ch-2 tip sp)
The short stitches at each end and the dc in the middle give the leaf its almond shape. The tall stitches lie side by side and form the ridges that run across the leaf.
Rnd 2: Ch 1. This is an edge round worked 1 sc per existing st, plus increases at the base and tip.
– Sc in the same st as the sl st, then sc in the next 10 sts. (11 sc along side A)
– Sc in the next st, 3 sc in the center base st, sc in the next st. (5 sc at the base)
– Sc in the next 11 sts. (11 sc along side B)
– In the ch-2 tip sp, work (sc, picot tip, sc).
– Sl st to the first sc.
Count: 29 sc (25 worked 1-per-st + 4 extra: 2 at the base and 2 at the tip), plus 1 picot.
Fasten off and leave a 10 in (25.4 cm) tail on 1 leaf and a 6 in (15.2 cm) tail on the other 5. The long tail is for gathering the bases.
Center vein: With the right side facing, join red at the base on the foundation chain. Work surface sl sts along the line between side A and side B all the way to the tip, pulling up 1 loop per chain. That’s 12 surface sl sts. Fasten off and weave in the ends on the back. This makes the raised vein down the middle of the leaf.
Checkpoint: Each leaf measures 2.25 in (5.7 cm) × 1.25 in (3.2 cm), with 11 sc along each side.
Center Cluster
Use pale yellow.
Rnd 1: In a MR, work 6 sc. Sl st to the first sc. (6 sc)
Rnd 2: Ch 2 (doesn’t count as a st). Work [5-dc bobble in the next sc, ch 1] 6 times. Sl st to the top of the first bobble. (6 bobbles, 6 ch-1 sps)
Pull the MR tail tight so the bobbles push forward into a ring. Fasten off and leave a 12 in (30.5 cm) tail.
Extra bobble: Ch 3, then work a 5-dc bobble in the 3rd ch from the hook. Ch 1 to close. Fasten off and leave a 6 in (15.2 cm) tail. Sew it into the middle of the ring.
Count: 7 bobbles in total (6 around + 1 in the middle). Size: 0.75 in (1.9 cm).
Make All Pieces
- Red: 6 leaves (each with a vein) + 1 hanging loop (made at the end)
- Yellow: 1 center ring of 6 bobbles + 1 extra bobble
Layout, with the right side facing:
            [L1]  ← loop here
     [L6]          [L2]
            [C]
     [L5]          [L3]
            [L4]
L1 points straight up and L4 points straight down. The leaves sit 60° apart, and C is the center cluster.
Joining
Method: Gather the bases, then whipstitch neighboring leaves together.
- Lay out all 6 leaves right side up, with the base ends meeting in the middle.
- Thread the 10 in (25.4 cm) tail onto the needle. Run a gathering thread through the 5 base sc of each leaf in turn, going L1 through L6. That’s 30 sts in total, 5 per leaf.
- Pull gently until the bases close into a small ring about 0.25 in (0.6 cm) across. Knot the thread on the back.
- Stitch-to-stitch seam: Whipstitch side A of each leaf to side B of the next leaf. Use only the first 2 sc next to the base, matching st to st. That’s 2 sts per seam, 6 seams, and 12 sts in total.
- The other 9 sc on each side stay free, which gives the open gaps between the leaves.
Tension: Pull each whipstitch snug but not tight. If you pull too hard, the center will dome and the leaves won’t lie flat.
Checkpoint: The flower lies flat and measures 4.5 in (11.4 cm) from tip to tip.
Border
The border is one continuous slip-stitch outline that travels around all six leaves. It firms up the edges and sharpens the points.
Border gauge: 1 sl st per sc. A slip stitch is about as wide as a single crochet, so this keeps the edge flat without ruffling or pulling in.
Starting count per leaf: 11 sc per side − 2 seamed sc = 9 free sc per side. Add 2 tip sc and 1 picot. Nothing else is added at the seams.
Border Rnd: With the right side facing, join red with a sl st in the first free sc of side A on L1, right next to the seam. Then, for each leaf:
- Sl st in the next 8 sc. (9 sl sts on side A, counting the joining sl st)
- Sl st in the tip sc. (1)
- In the picot, work (sl st, ch 2, sl st). (2 sl sts + ch-2 point)
- Sl st in the next tip sc. (1)
- Sl st in the 9 free sc of side B. (9)
Per leaf: 22 sl sts + 1 ch-2 point.
Move across the seam into the next leaf without adding a stitch, and repeat around. When you finish all 6 leaves, sl st to the first sl st.
Total: 132 sl sts (6 × 22) + 6 ch-2 points. The math works because every border stitch sits on exactly one existing stitch. Only the ch-2 at each tip adds length, and that’s what brings the size from 4.5 in (11.4 cm) to 4.75 in (12.1 cm): 0.125 in (0.3 cm) at each opposite tip.
Hanging loop: Ch 31. Sl st in the 2nd ch from the hook and in each of the remaining 29 ch. (30 sl sts) This makes a cord about 4.5 in (11.4 cm) long. Fold it in half and sew both ends to the back of L1’s tip. The finished loop is about 2.25 in (5.7 cm).
Attach the center: Center the bobble cluster over the gathered hole. Sew through the ch-1 sps of Rnd 2 into the leaf bases, going around twice for strength.
Final Blocking
- Weave in all the ends on the back. Trim them to 0.25 in (0.6 cm).
- Pin the flower face up on the blocking mat.
- Pin each tip out until the flower measures 4.75 in (12.1 cm) from tip to tip.
- Set the leaves 60° apart. Put one pin at the widest point of each leaf.
- Mist the flower with water until it’s damp but not soaked. Don’t flatten the bobbles.
- Let it dry completely, usually 6–8 hours.
- Unpin it and check that the loop hangs straight up from L1.
Final Quality-Control Checklist
- 6 leaves, each 2.25 in (5.7 cm) × 1.25 in (3.2 cm)
- Each leaf has 29 sc plus a picot after Rnd 2
- A raised vein runs from base to tip on every leaf
- 12 whipstitch seam sts in total, 2 per seam
- 132 border sl sts and 6 ch-2 points
- The center has 7 bobbles and measures 0.75 in (1.9 cm)
- Finished size: 4.75 in (12.1 cm)
- The loop is secure and about 2.25 in (5.7 cm) long
- No loose ends show on the front
Troubleshooting
Leaves curl lengthwise: The foundation chain is too tight. Chain with a hook 0.5 mm larger, then switch back for the rounds.
Leaf tips are rounded: Make sure you worked the picot in Rnd 2 and the ch-2 in the border.
Center domes up: Loosen the gathering thread, or seam only 1 st per side instead of 2. If you do that, the border has 10 free sc per side, so 24 sl sts per leaf and 144 in total.
Bobbles lie flat: Pull the MR tighter, and push each bobble forward from the back.
Border ruffles: You’re putting more than 1 sl st into some stitches. Count 9 per side.
Vein disappears: Work the surface sl sts a little looser, so they sit on top of the fabric.
Care
Hand wash in cool water and lay flat to dry, reshaping the points. Store the ornament flat, wrapped in tissue, so the loop and tips keep their shape.
Final Notes
Here’s the full measurement chain. A 1.75 in (4.4 cm) foundation chain becomes a 2 in (5.1 cm) leaf after Rnd 1 and a 2.25 in (5.7 cm) leaf after Rnd 2. Six leaves gathered at the base make a 4.5 in (11.4 cm) flower, and the border brings it to a finished 4.75 in (12.1 cm). If you check your gauge on the first leaf, every later stage should come out on size.
Make one for your own tree, and a few more to tie onto gifts.
Happy crocheting!