

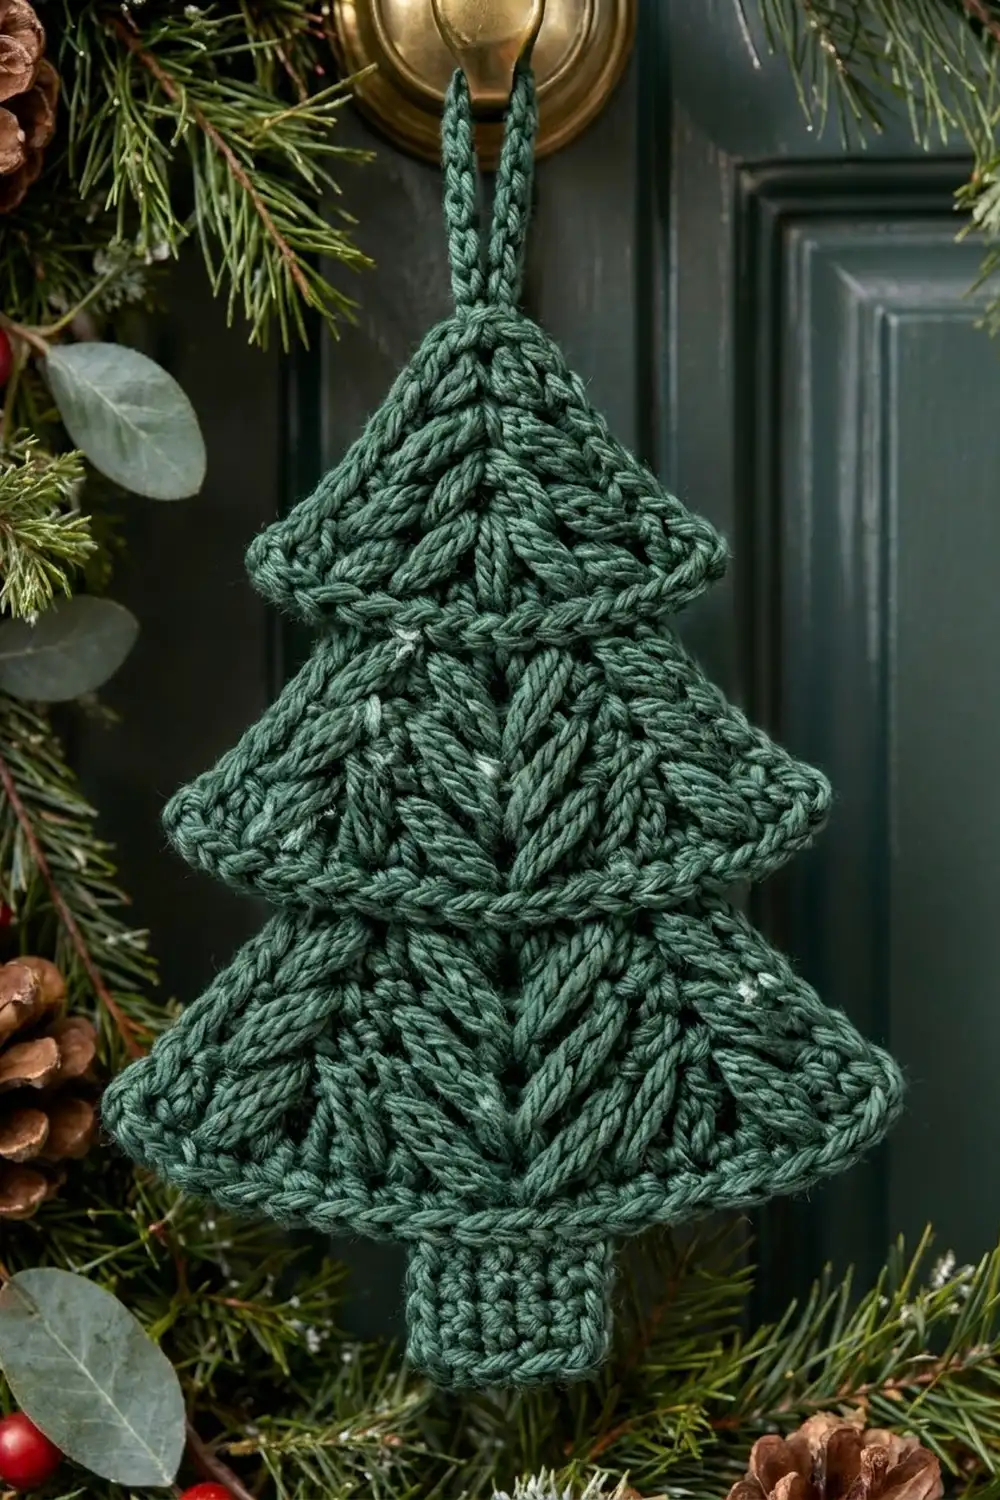
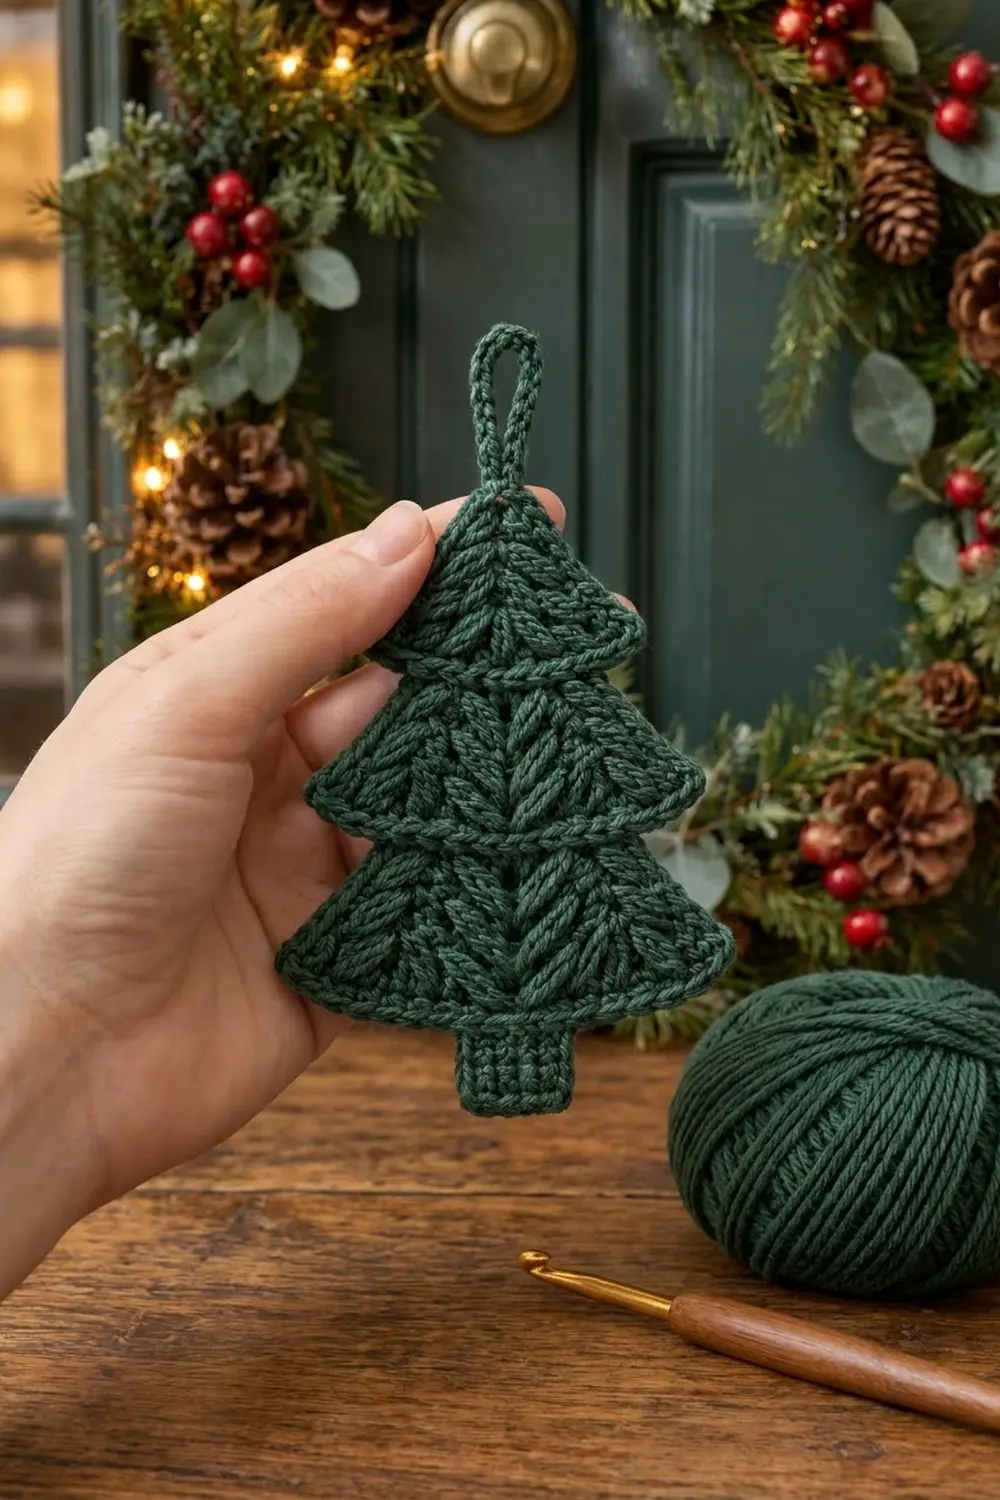
This ornament is a three-tier Christmas tree with a leaf texture and a corded edge on each tier. Stacked V-stitches form a spine down the center of every tier, and the stitches beside them lean outward like branches. Each tier ends in a curved rim that sits over the tier below, which gives the flat ornament a layered look.
The tree is made in one color, a deep pine green. A single color shows off the texture best, but any evergreen, sage or even metallic gold will work. The finished ornament is about 4.3 in (10.9 cm) wide and 5.4 in (13.7 cm) tall, not counting the hanging loop.
This pattern uses US crochet terms throughout.
The tree is one continuous piece worked top-down in rows, starting from a magic ring at the tip. Each new tier is worked into only one loop of the tier above. That leaves a row of free loops on the front, and you later crochet the corded tier rims into those loops. A short single-crochet trunk, one outline round and a chain loop finish the ornament.
Finished Size and Construction
- Finished size: about 4.3 in (10.9 cm) wide x 5.4 in (13.7 cm) tall, excluding loop
- Hanging loop: about 1.5 in (3.8 cm)
- Skill level: Intermediate (decreases, front-loop work, working into free loops)
- Terminology: US
- Yarn weight: Sport (2 – fine)
- Hook: 3.25 mm (US D/3)
- Number of pieces: 1 (single piece, no joining)
- Layout: 3 tiers stacked vertically + trunk
- Piece size before border: about 4.1 in (10.4 cm) wide x 5.25 in (13.3 cm) tall
- Border: 3 tier rims + 1 outline round
- Border depth: about 0.1 in (0.3 cm) at the sides; the tier rims project about 0.2 in (0.5 cm)
Materials
Yarn: Use a smooth sport-weight cotton, cotton blend or acrylic. Smooth, tightly plied yarn shows the leaf texture best. Fuzzy or brushed yarns blur the V-spine and the rims.
- Pine Green: 15 g, about 50 m (55 yd)
This quantity includes a margin for your gauge swatch and tails. The ornament itself uses about 11–12 g.
Tools:
- 3.25 mm (US D/3) crochet hook
- Tapestry needle
- 2 locking stitch markers
- Scissors
- Rustproof pins and a blocking mat
- Spray bottle
- Optional: fabric stiffener for a crisper hanging ornament
Abbreviations (US Terms)
- ch – chain
- sl st – slip stitch
- sc – single crochet
- hdc – half double crochet
- dc – double crochet
- dc2tog – double crochet 2 together (1 decrease)
- dc3tog – double crochet 3 together (2 decreases)
- FLO – front loop only
- sp – space
- st(s) – stitch(es)
- tch – turning chain
- RS / WS – right side / wrong side
Special stitch – V-stitch (V-st): (dc, ch 1, dc) in the ch-1 sp. Each V-st adds 1 dc to each half of the row. Stacked row on row, the V-sts form the leaf spine.
Stitch-count rule: The ch-3 at the start of each row counts as 1 dc. Counts are given as total dc plus the center ch-1 sp, which is not counted as a stitch. Each half of a row holds exactly half of the total dc.
Gauge and Checkpoints
Gauge: 24 dc and 13 rows = 4 in (10.2 cm). In single crochet, 24 sc and 26 rows = 4 in (10.2 cm).
Use Tier 1 as your gauge test. It takes about 10 minutes and gives you a direct check on width and height.
Checkpoints (measured flat, before blocking):
- After Row 5 (Tier 1): about 2.75 in (7.0 cm) wide x 1.5 in (3.8 cm) tall
- After Row 9 (Tier 2): about 3.4 in (8.6 cm) wide x 2.75 in (7.0 cm) tall from the tip
- After Row 13 (Tier 3): about 4.1 in (10.4 cm) wide x 4.0 in (10.2 cm) tall from the tip
- Trunk: about 1.2 in (3.0 cm) wide x 1.25 in (3.2 cm) tall
If Tier 1 is too big (wider than 3 in / 7.6 cm), go down to a 3.0 mm hook. If it is too small (narrower than 2.5 in / 6.4 cm), go up to a 3.5 mm hook. Being off by 0.1 in (0.3 cm) is fine on an ornament. A larger error grows by every tier.
Tier 1 (Top Tier)
Row 1 (RS): Make a magic ring. Ch 3 (counts as dc), dc, ch 1, 2 dc in ring. Pull the ring tightly closed. Turn. (4 dc + 1 ch-1 sp; 2 dc per half)
Row 2 (WS): Ch 3, skip first st, dc in next st, V-st in ch-1 sp, dc in next st, dc in top of tch. Turn. (6 dc + 1 sp)
Row 3 (RS): Ch 3, dc in first st (edge increase), dc in each st to sp, V-st in sp, dc in each st to tch, 2 dc in top of tch. Turn. (10 dc + 1 sp)
Row 4 (WS): Ch 3, skip first st, dc in each st to sp, V-st in sp, dc in each st to tch, dc in top of tch. Turn. (12 dc + 1 sp)
Row 5 (RS): Repeat Row 3. Do not turn yet. (16 dc + 1 sp; 8 per half)
Every RS row adds 4 dc: 2 from the edge increases and 2 from the V-st. Every WS row adds 2 dc, both from the V-st. Alternating the two keeps the tier taller than a plain triangle would be.
Measure now (checkpoint 1). Then turn and go on to Tier 2.
Tier 2 (Middle Tier)
Row 6 is a transition row. It is worked in FLO with the WS facing. That leaves the RS loops of Row 5 free for the rim later, and the decreases tuck Tier 2 slightly under Tier 1.
Row 6 (WS, FLO): Ch 3, skip first st, dc2tog, dc3tog, dc2tog over the next 7 sts. V-st in sp. Over the next 7 sts, work dc2tog, dc3tog, dc2tog. Dc in top of tch. Turn. (10 dc + 1 sp)
Count for each half: 1 (ch-3) + 3 (decreases) + 1 (V-st dc) = 5.
Row 7 (RS): Work in both loops from here on. Repeat Row 3. (14 dc + 1 sp)
Row 8 (WS): Repeat Row 4. (16 dc + 1 sp)
Row 9 (RS): Repeat Row 3. Turn. (20 dc + 1 sp; 10 per half)
Measure (checkpoint 2).
Tier 3 (Bottom Tier)
Row 10 (WS, FLO): Ch 3, skip first st, [dc2tog] 4 times, dc in next st. V-st in sp. Dc in next st, [dc2tog] 4 times, dc in top of tch. Turn. (14 dc + 1 sp)
Count for each half: 1 + 4 + 1 + 1 = 7.
Row 11 (RS): Work in both loops again. Repeat Row 3. (18 dc + 1 sp)
Row 12 (WS): Repeat Row 4. (20 dc + 1 sp)
Row 13 (RS): Repeat Row 3. (24 dc + 1 sp; 12 per half)
Fasten off, leaving a 6 in (15.2 cm) tail. Measure (checkpoint 3).
Trunk
The trunk is worked into the WS loops of Row 13, so all of Row 13’s RS loops stay free for the bottom rim.
Trunk Row 1 (WS): Hold the tree with the WS facing. Count 9 sts in from the right edge and skip them. Join yarn in FLO of the 10th st. Ch 1, sc in FLO of the same st and the next 2 sts. Sc in ch-1 sp. Sc in FLO of the next 3 sts. Turn. (7 sc)
The trunk is centered: 3 sts + sp + 3 sts, with 9 sts left free on each side.
Trunk Rows 2–8: Ch 1, sc in each st across. Turn. (7 sc per row)
Fasten off and weave in the end. The trunk should measure about 1.2 in (3.0 cm) wide and 1.25 in (3.2 cm) tall.
Border: Tier Rims and Outline
Border gauge: 2 sc per dc row-end. One dc row is about 0.31 in (0.8 cm) tall, and 2 sc at sc gauge cover about 0.33 in (0.8 cm). That close match keeps the side edges flat, without ruffling or cupping.
Tier Rims
All rims are worked with the RS facing into the free loops left on Rows 5, 9 and 13. Each half follows the same formula: 1 sl st, then (half count ÷ 2 − 1) sc, then (half count ÷ 2) hdc. Two dc go around the center ch-1 sp, worked around the V-st that already sits there.
Going from sl st to sc to hdc to dc makes each stitch taller than the last. That curves the rim gently downward toward the center and makes it roll forward over the tier below.
Tier 1 rim (Row 5 loops, 8 per half): Join with sl st in first free loop. Sc in next 3, hdc in next 4, 2 dc around ch-1 sp, hdc in next 4, sc in next 3, sl st in last. (18 sts) Fasten off.
Tier 2 rim (Row 9 loops, 10 per half): Join with sl st in first free loop. Sc in next 4, hdc in next 5, 2 dc around sp, hdc in next 5, sc in next 4, sl st in last. (22 sts) Fasten off.
Tier 3 rim (Row 13 loops, 12 per half): Join with sl st in first free loop. Sc in next 5, hdc in next 6, 2 dc around sp, hdc in next 6, sc in next 5, sl st in last. (26 sts) This rim passes in front of the top edge of the trunk. Fasten off.
Why the math works: each rim uses every free loop exactly once (8, 10 and 12 per half) plus 2 sts at the center. So each rim count is its row’s dc total + 2: 16 + 2 = 18, 20 + 2 = 22 and 24 + 2 = 26.
Outline Round
The tree has 13 dc rows, so there are 13 row-ends per side.
With the RS facing, join yarn in the row-end of Row 13 at the lower right corner of Tier 3.
- Right side: 2 sc in each row-end up to Row 1. (26 sc)
- Tip: 3 sc around the closed magic ring. (3 sc)
- Left side: 2 sc in each row-end down to Row 13. (26 sc)
Fasten off. (55 sc total)
Where a side meets a rim, keep working into the row-ends behind the rim’s sl st. The outline steps inward naturally at each tier.
Hanging Loop
Join yarn in the center sc of the 3 tip sts. Ch 20, then sl st in the same sc. Fasten off, leaving an 8 in (20.3 cm) tail. Weave the tail back through the base of the loop twice so it stays secure. The loop measures about 1.5 in (3.8 cm).
Final Blocking
- Weave in all ends along the WS, following the stitch columns, so nothing shows through the texture.
- Lightly mist the ornament until it is damp, not soaked.
- Lay it RS up on the blocking mat.
- Pin the tip, the outer corner of each tier, and the two bottom corners of the trunk.
- Check the width at Tier 3: 4.3 in (10.9 cm). Check the overall height from tip to trunk bottom: 5.4 in (13.7 cm).
- Gently roll each tier rim forward with your fingertip so it sits over the tier below. Do not flatten the rims.
- Keep the center spine straight and vertical from the tip down to the trunk.
- Let it dry completely, about 6–12 hours.
- For a stiffer ornament, brush diluted fabric stiffener onto the WS only, then let it dry pinned.
Final Quality-Control Checklist
- Row counts match: 16, 20 and 24 dc at the bottom of Tiers 1, 2 and 3
- The V-spine runs in a straight line from tip to trunk
- Each tier is the same shape on both sides of the spine
- Rim counts are 18, 22 and 26 sts, and each rim curves evenly
- The trunk is 7 sc wide and centered under the spine
- The outline has 26 sc per side and 3 at the tip
- Final size is about 4.3 in (10.9 cm) x 5.4 in (13.7 cm)
- The hanging loop is secure and untwisted
- No ends show on the RS
Troubleshooting
Tier is lopsided: You probably missed the edge increase at the start or end of an RS row. Count each half separately. Both halves should always be equal.
Spine wanders off-center: You may have worked the V-st into a dc instead of the ch-1 sp. Place a stitch marker in each sp as you go.
Tiers don’t overlap: You may have worked the transition rows (6 and 10) in both loops. Those two rows must be worked in FLO with the WS facing.
Rim ruffles: Your tension is too loose on the hdc. Work the rim with a 3.0 mm hook.
Rim pulls the tier up: You skipped free loops. The rim must use every one of them.
Sides wave: You added extra sc in the outline. Keep exactly 2 sc per row-end.
Trunk is off-center: Recount the 9 skipped sts before joining.
Ornament is too floppy: Go down a hook size or use fabric stiffener.
Care
Hand wash in cool water and lay flat to dry, reshaping the rims while the ornament is damp. Store it flat or hanging so the loop and rims keep their shape.
Final Notes
Here is the measurement chain. Tier 1 is 2.75 in (7.0 cm) wide after Row 5. Tier 2 is 3.4 in (8.6 cm) wide after Row 9. Tier 3 is 4.1 in (10.4 cm) wide after Row 13, at a height of 4.0 in (10.2 cm). The trunk adds 1.25 in (3.2 cm) of height, giving 5.25 in (13.3 cm) before the border. The outline brings the ornament to about 4.3 in (10.9 cm) x 5.4 in (13.7 cm). If your Tier 1 checkpoint matches, every later measurement should follow.
Make one for the door, a few for the tree, or tie one onto a gift.
Happy crocheting!