

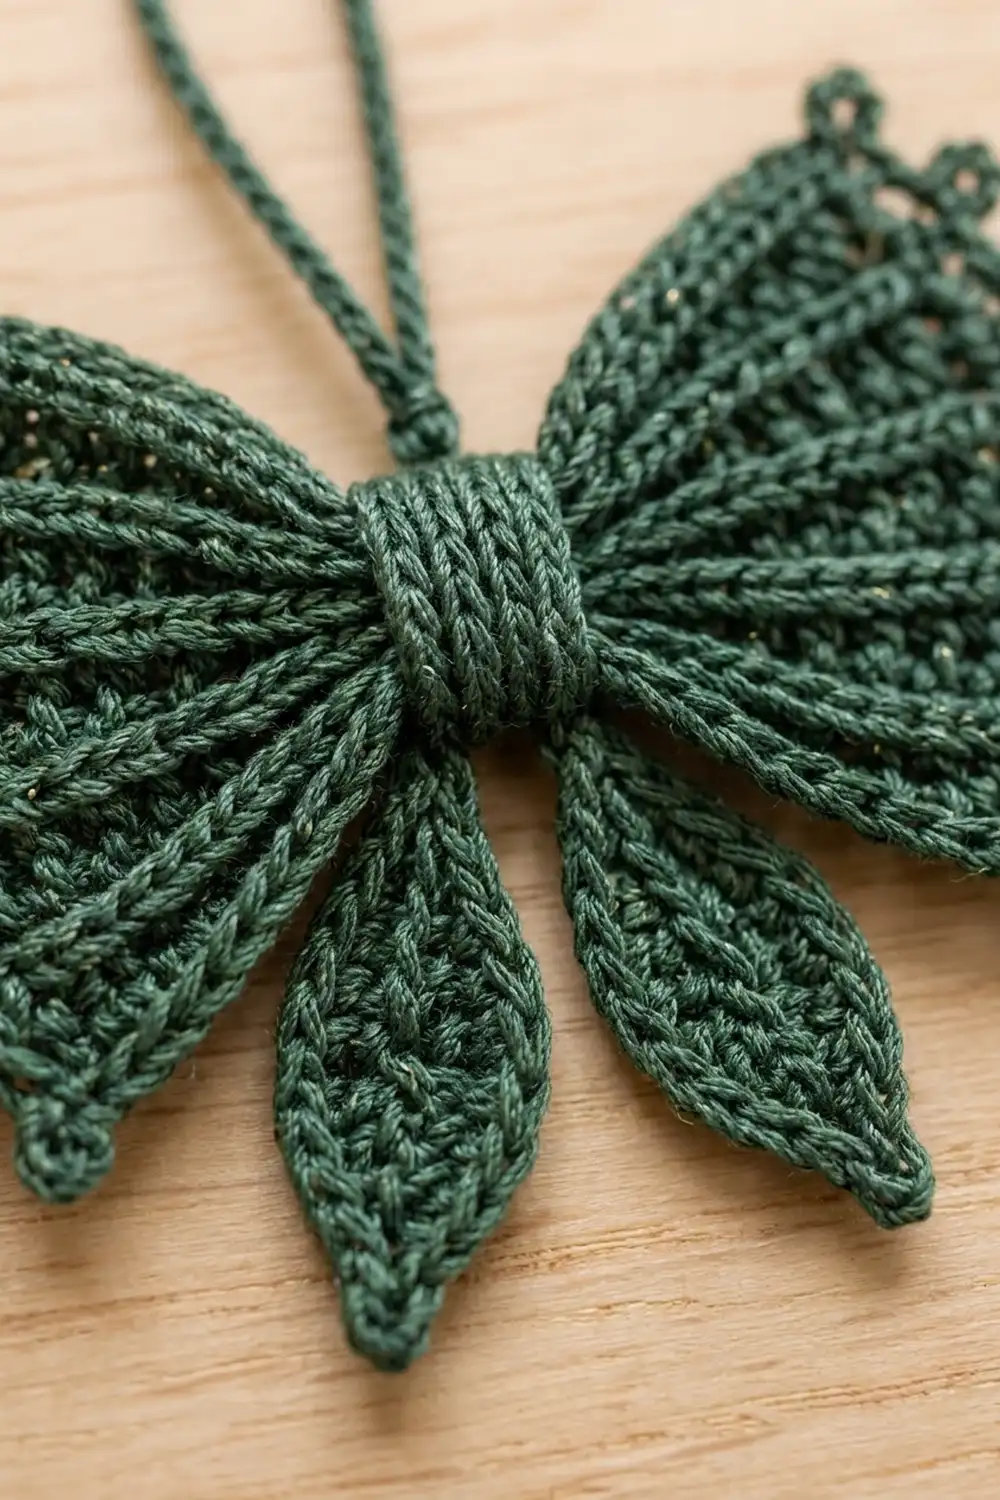
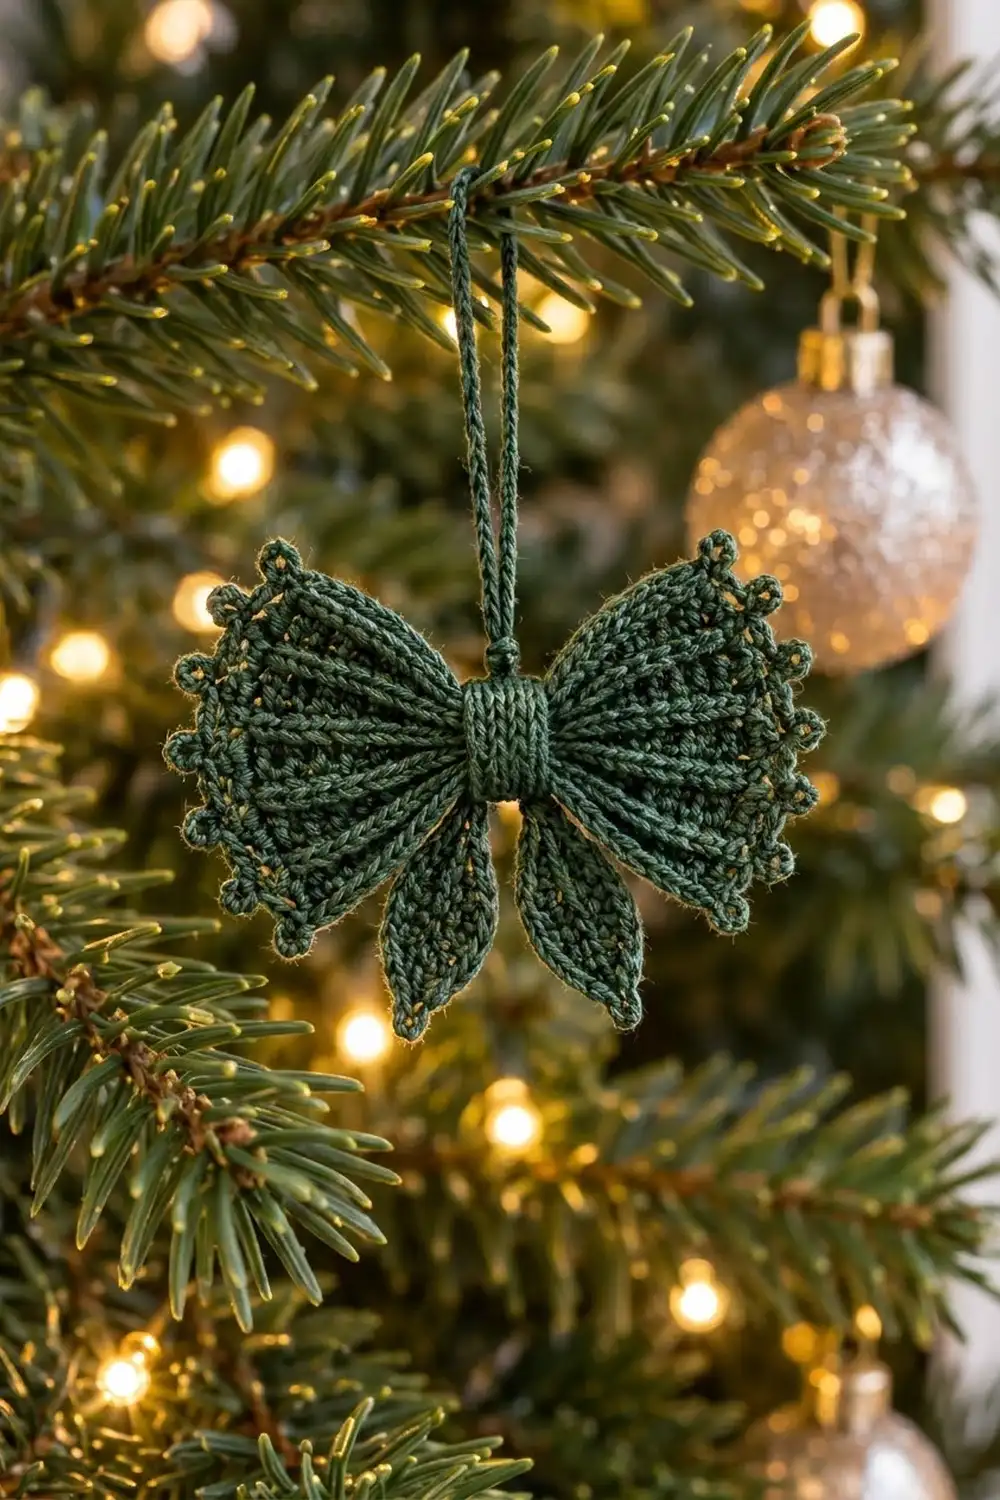
This little bow ornament looks lovely on fresh fir branches. It has two ribbed fan wings with picot edges, a snug ribbed center band, and two pointed tails that hang in a soft V. A slim slip-stitch cord makes the hanging loop.
The whole ornament is one deep forest green, so all the interest comes from texture. Raised front-post ribs spread out from the center of each wing like the folds of real ribbon. A row of tiny picots catches the light along the outer curve.
This pattern uses US crochet terms. The finished bow is about 3 3/4 in (9.5 cm) wide and 3 in (7.6 cm) tall. The hanging loop adds about 2 in (5.1 cm).
You make six small parts: two wings worked in rows from a magic ring, two tails worked around a foundation chain, one center band worked in back-loop rows, and one cord. Then you stack the parts, cinch the middle, and wrap it with the band.
Finished Size and Construction
- Finished size: 3 3/4 in (9.5 cm) wide x 3 in (7.6 cm) tall, plus a 2 in (5.1 cm) loop
- Skill level: Intermediate (front-post stitches at a small scale)
- Terminology: US
- Yarn weight: Size 3 crochet cotton / fingering (#1 super fine)
- Hook: 2.25 mm (B-1)
- Number of pieces: 6 (2 wings, 2 tails, 1 center band, 1 cord)
- Layout: Wings left and right, tails below in a V, band in the center, loop on top
- Wing size before edging: 1 3/4 in (4.4 cm) from point to outer curve
- Wing size after edging: 2 in (5.1 cm) from point to picot tips
- Edging depth: 1/4 in (0.6 cm)
- Tail size: 1 3/4 in (4.4 cm) long x 1 in (2.5 cm) wide
- Center band: 1/2 in (1.3 cm) x 1 1/4 in (3.2 cm)
Materials
Pick a smooth mercerized cotton in size 3 crochet thread or fingering weight. Cotton keeps the ribs and picots crisp, and its sheen shows off the texture. Avoid fuzzy yarns, because they blur the post-stitch ribs.
- Forest green: 6 g, about 25 m (27 yd) per ornament
This amount includes a margin for a test wing and for the long yarn tails used in sewing. A 50 g ball makes about eight ornaments.
Tools:
- 2.25 mm (B-1) crochet hook
- Tapestry needle with a small eye
- Small scissors
- 1 stitch marker
- Rustproof pins and a foam blocking mat
- Spray bottle with water
- Optional: fabric stiffener
Abbreviations (US Terms)
- ch – chain
- sl st – slip stitch
- sc – single crochet
- hdc – half double crochet
- dc – double crochet
- tr – treble crochet
- fpdc – front post double crochet
- BLO – back loop only
- MR – magic ring
- st(s) – stitch(es)
- sp – space
- RS / WS – right side / wrong side
Special stitch – Picot: Ch 3, sl st in the 3rd ch from the hook (the first ch made).
Note: In the wing, the ch 3 at the start of each row counts as 1 dc. Work the last stitch of each row in the top of the turning ch.
Gauge and Checkpoints
Gauge: 8 dc and 4 dc rows = 1 in (2.5 cm). 9 sc and 10 BLO sc rows = 1 in (2.5 cm).
Exact gauge is not critical for an ornament, but it decides whether the wings, band, and tails fit together. Make one wing first and check it before you make the other pieces.
Wing checkpoints (measured from the ring to the outer edge):
- After Row 1: 1/4 in (0.6 cm)
- After Row 3: 3/4 in (1.9 cm)
- After Row 5: 1 1/4 in (3.2 cm)
- After Row 7: 1 3/4 in (4.4 cm)
- After the picot edging: 2 in (5.1 cm)
If the wing is too big: Use a 2.0 mm hook, or check that your dc loops are not too tall.
If the wing is too small: Use a 2.5 mm hook.
If the outer edge ruffles: Go up half a hook size. If it cups: Go down half a hook size.
Wing (make 2)
Each wing starts at its point in a magic ring and gets wider with each row. The rows are not joined into a circle, so the piece opens into a wedge. The fpdc ribs line up row after row and spread out from the point.
Row 1 (RS): MR, ch 3, 7 dc in ring. Pull the ring tightly closed. Turn. (8 sts)
Row 2 (WS): Ch 3, dc in same st, 2 dc in each of next 6 sts, dc in top of turning ch. Turn. (15 sts)
Row 3 (RS): Ch 3, fpdc around next st, dc in next st; repeat from * 6 more times. Turn. (15 sts: 8 dc + 7 fpdc)*
The 7 fpdc are the ribs. From now on, work each rib stitch into or around the rib stitch directly below it.
Row 4 (WS): Ch 3, dc in same st, dc in next st (rib), 2 dc in next st; repeat from * 6 more times (the last 2 dc go in the top of the turning ch). Turn. (23 sts)*
Check: 2 edge sts + 7 x (1 rib + 2 dc) = 23. Each edge section and each gap between ribs now has 2 dc.
Row 5 (RS): Ch 3, dc in next st, fpdc around next st (rib), dc in next 2 sts; repeat from * 6 more times. Turn. (23 sts: 16 dc + 7 fpdc)*
Row 6 (WS): Ch 3, dc in each st across. Turn. (23 sts)
This row has no increases, so the wing stays a wedge instead of opening into a half circle.
Row 7 (RS): Ch 3, dc in next st, fpdc around next st (rib), dc in next 2 sts; repeat from * 6 more times. Turn. Do not fasten off. (23 sts: 16 dc + 7 fpdc)*
The wing should measure 1 3/4 in (4.4 cm) from the ring to the outer edge. Go straight on to the edging.
Picot Edging (on each wing)
The picot edging is the only border on this ornament. You work it along the curved outer edge of each wing, on top of Row 7.
Edging gauge: 9 sc = 1 in (2.5 cm). The picots add about 1/4 in (0.6 cm) of depth.
Edging Row (WS): Ch 1, sc in first st, picot, sc in next 2 sts; repeat from * 10 more times. (23 sc + 11 picots)*
The picots sit right on the top edge, so they show clearly from the RS.
Why the math works: Row 7 has 23 sts and the edging puts 1 sc in each, so the sc count stays at 23. After the first sc, 22 sts are left. Each repeat uses 2 sts, so 22 ÷ 2 = 11 repeats with nothing left over. The row starts and ends with an sc, so the picots are evenly spaced and there is a clean sc at both corners.
Fasten off, leaving a 6 in (15.2 cm) tail, and weave it in. Leave the magic-ring tail long, because you will use it to cinch the bow.
The wing now measures 2 in (5.1 cm) from point to picot tips. Measured straight from corner to corner, it is about 2 1/2 in (6.4 cm) across the curve.
Tail (make 2)
Each tail is a pointed almond shape worked around both sides of a foundation chain. Taller stitches in the middle make the tail wide there, and short stitches at each end make the points.
Ch 13.
Round 1: Sc in 2nd ch from hook, hdc in next ch, dc in next 3 ch, tr in next 2 ch, dc in next 3 ch, hdc in next ch, (sc, ch 2, sc) in last ch for the tip. Rotate to work along the bottom loops of the chain. Hdc in next ch, dc in next 3 ch, tr in next 2 ch, dc in next 3 ch, hdc in next ch, sc in the last ch (the same ch as the first sc). Sl st to first sc. (24 sts + 1 ch-2 sp)
Check: each side has 11 sts (1 + 1 + 3 + 2 + 3 + 1 = 11), and the tip adds 2 sc. 11 + 2 + 11 = 24.
Round 2: Ch 1, sc in each of next 12 sts, (sc, ch 2, sc) in ch-2 sp, sc in each of next 12 sts. Sl st to first sc. (26 sc + 1 ch-2 sp)
Fasten off, leaving a 10 in (25.4 cm) tail at the wide, flat end for sewing. The tail measures 1 3/4 in (4.4 cm) long and 1 in (2.5 cm) wide.
Center Band (make 1)
Ch 6.
Row 1: Sc in 2nd ch from hook and in each ch across. Turn. (5 sc)
Rows 2–12: Ch 1, sc BLO in each st across. Turn. (5 sc each row)
Fasten off, leaving a 10 in (25.4 cm) tail. The band is 1/2 in (1.3 cm) wide and 1 1/4 in (3.2 cm) long. The BLO ridges run across the strip, so they stand up as vertical ribs once the band wraps around the bow.
Hanging Cord (make 1)
Ch 36.
Row 1: Sl st in the back bump of 2nd ch from hook and in the back bump of each ch across. (35 sl sts)
Fasten off, leaving a 4 in (10.2 cm) tail at both ends. The cord is about 4 1/2 in (11.4 cm) long. Folded in half, it makes a loop about 2 in (5.1 cm) tall.
Make All Pieces
All pieces are forest green.
| Piece | Quantity | Approx. size |
|---|---|---|
| Wing | 2 | 2 in (5.1 cm) deep |
| Tail | 2 | 1 3/4 in x 1 in (4.4 x 2.5 cm) |
| Center band | 1 | 1/2 in x 1 1/4 in (1.3 x 3.2 cm) |
| Cord | 1 | 4 1/2 in (11.4 cm) |
Layout (front view):
            [ cord loop ]
 [ wing L ] [   band   ] [ wing R ]
       [ tail L ]  [ tail R ]
Assembly
Method: Stack the parts, pull the middle tight with the magic-ring tails, and cover that gathered center with the band.
- Lay both wings RS up with their points facing each other. Overlap the points by about 1/4 in (0.6 cm), so the bow measures 3 3/4 in (9.5 cm) across.
- Thread the magic-ring tail of each wing through the point of the other wing. Pull both tails firmly. The points gather and the ribs fan out like folded ribbon.
- Wrap both tails around the gathered center 3 times and knot them at the back. Don’t cut them yet.
- Place the two tails behind the center with their flat ends up. Angle them out in a V, with the tips about 1 in (2.5 cm) apart. Sew each flat end to the back of the gather with 3 or 4 stitches.
- Fold the cord in half. Place both cord ends behind the center so the loop rises 2 in (5.1 cm) above the top edge. Sew the ends in place.
- Wrap the band around the center, RS out, with the short ends meeting at the back. Sew the short ends together stitch to stitch: the 5 sts of Row 12 to the 5 bottom loops of Row 1. Catch the layers underneath with 1 or 2 stitches so the band can’t slide.
Tension advice: Pull the center firm enough that the wings stand out, but not so tight that the band won’t close. If the band ends don’t meet, take off one wrap. If the band slips, add one.
Size checkpoint: The assembled bow should be 3 3/4 in (9.5 cm) wide and 3 in (7.6 cm) from the top of the wings to the tips of the tails.
Final Blocking
- Weave in all remaining ends behind the band and trim them.
- Mist the bow lightly with water until it is damp but not soaked.
- Lay it RS up on the blocking mat.
- Pin each wing open to 2 in (5.1 cm) from center to picot tips, keeping the curve smooth.
- Put a pin through each picot to open it into a round bead.
- Use your fingertips to straighten the ribs so they run cleanly from center to edge.
- Pin the tails into a V and pin the cord straight up.
- Optional: brush fabric stiffener onto the wings only.
- Let the bow dry completely, at least 6 hours, before you unpin it.
Final Quality-Control Checklist
- Each wing has 7 raised ribs running from the point to the edge.
- Each wing has 11 picots, with an sc at both corners.
- Both wings are 2 in (5.1 cm) deep.
- Both tails are 1 3/4 in (4.4 cm) long and point downward in a V.
- The band shows vertical ribs, and its seam is hidden at the back.
- The loop is centered and 2 in (5.1 cm) tall.
- No yarn ends show on the front.
- The bow measures 3 3/4 in x 3 in (9.5 x 7.6 cm).
Troubleshooting
Ribs drift or zigzag: An fpdc went around the wrong stitch. Each fpdc must go around the rib stitch directly below it. Put a stitch marker on the first rib.
Ribs look flat: Insert the hook from the front around the post, and snug the yarn after each fpdc.
Wing opens into a half circle: You added increases in Row 6. Work that row straight, with 23 sts.
Picots are uneven: Work 2 sc between picots. If the row ends on a picot, recount Row 7. It must have exactly 23 sts.
Tail is lopsided: Check that both sides of Round 1 have 11 sts in the same order.
Band won’t close: Add 1 BLO row, or loosen the wraps around the center.
Hole at the wing point: Pull the magic-ring tail tighter before you cinch the bow.
Care
Spot clean with cool water and mild soap, then reshape and dry flat. Store the ornament in a box so the wings don’t get crushed.
Final Notes
Here is how the measurements build. Each wing grows to 1 3/4 in (4.4 cm) in 7 rows, and the 23-stitch picot edging brings it to 2 in (5.1 cm). Two overlapping wings make a bow 3 3/4 in (9.5 cm) wide. The 1 3/4 in (4.4 cm) tails bring the height to 3 in (7.6 cm), the 1 1/4 in (3.2 cm) band wraps the center, and the cord adds a 2 in (5.1 cm) loop. If your first wing matches these numbers, the rest of the ornament will fit together.
Happy crocheting!