

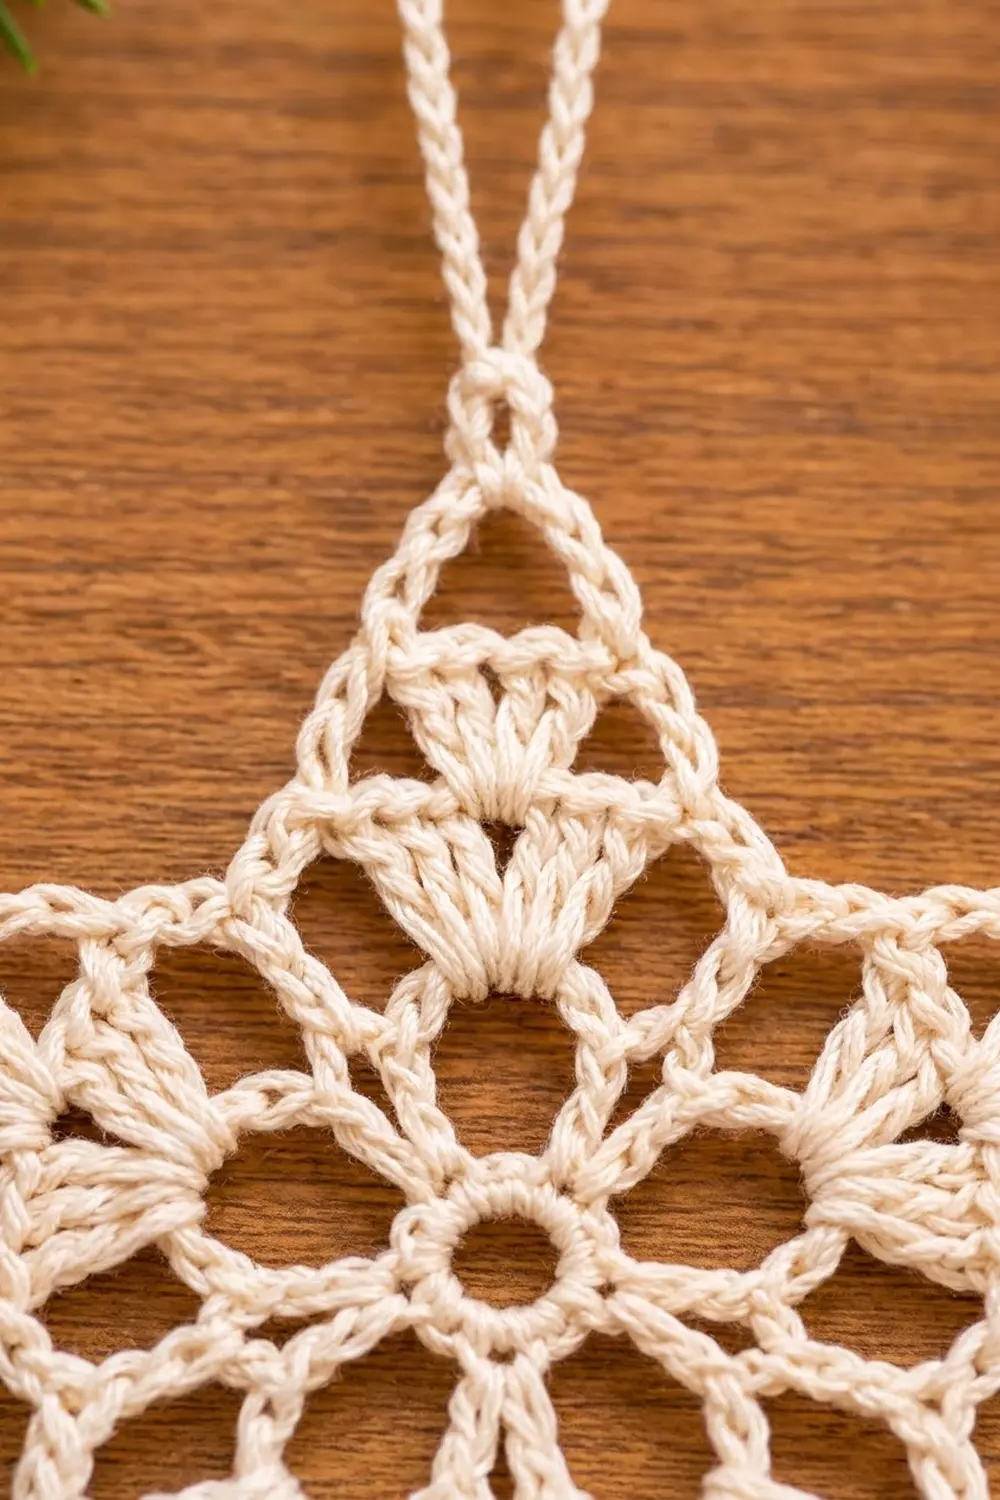
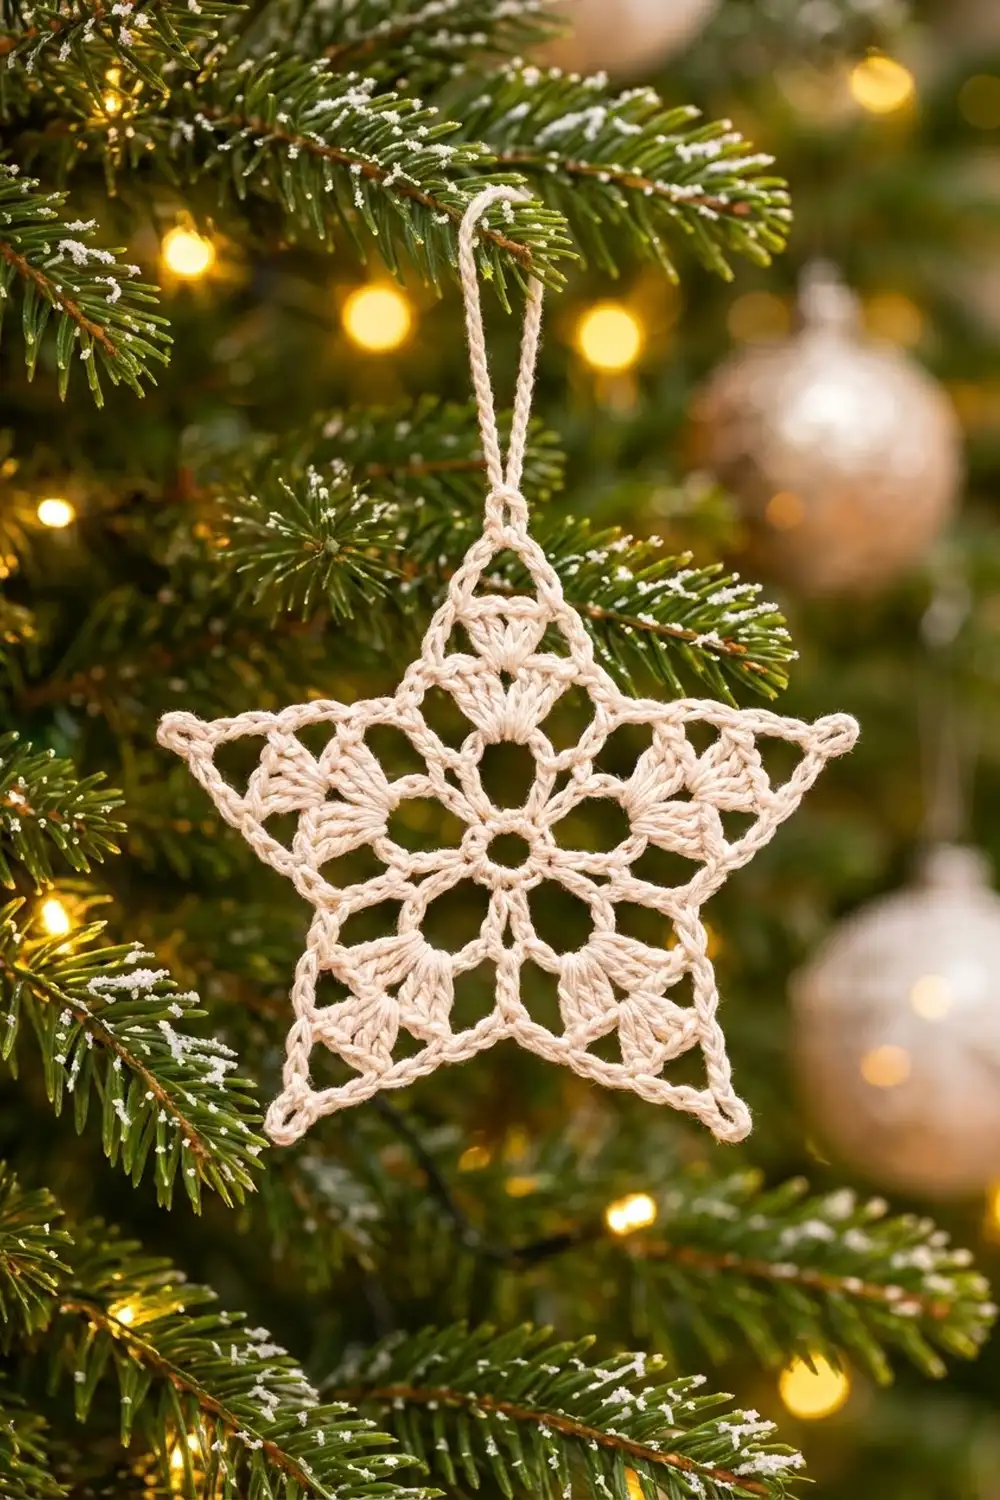
This little star is a lacy, single-piece ornament worked in natural cream cotton. It has a small open ring at the center, a round of framed openings around it, five fan shells that point into the five tips, and a crisp single crochet outline that makes the sharp star silhouette. A crocheted hanging loop at the top point gets it ready for the tree.
The look is soft and Scandinavian: one color, lots of air, and clear geometry. Cream or ivory works best because the lace shows clearly against green branches and warm lights, but any light solid color will work.
The pattern uses US crochet terms. The finished star is 4.75 in (12.1 cm) from side tip to side tip and 4.5 in (11.4 cm) from top tip to the base of the lower points, not counting the hanging loop. The loop adds about 3 in (7.6 cm).
Construction is simple. You work seven joined rounds from the center out: a ring, a framed lace round, a chain-loop round, a fan round, and a two-round star outline. You don’t turn your work at any point. The hanging loop is added last at the top tip, and blocking sets the points.
Finished Size and Construction
- Finished size: 4.75 in (12.1 cm) wide x 4.5 in (11.4 cm) tall, plus a 3 in (7.6 cm) hanging loop
- Skill level: Easy-intermediate
- Terminology: US crochet terms
- Yarn weight: Size 3 cotton crochet thread (about fingering weight)
- Hook: 2.25 mm (US B-1)
- Number of pieces: 1 (single motif, no joining)
- Layout: One five-pointed star, worked in the round
- Piece size before outline (after Round 5): 2.75 in (7.0 cm) across
- Outline depth (Rounds 6-7): about 1.1 in (2.8 cm) from the fan round to each tip
Materials
Yarn: Use mercerized cotton thread in size 3 for crisp stitch definition and stiff, sharp points. Matte or brushed yarns blur the lace. If you can’t find size 3 thread, a smooth fingering-weight cotton is a good substitute.
- Cream / natural white: about 9 g (approx. 25 m) per star
One 50 g ball (about 140 m) makes 5 stars with some thread left over.
Tools:
- 2.25 mm (US B-1) crochet hook
- Tapestry needle with a small eye
- Sharp scissors
- Blocking board or folded towel
- Rustproof pins
- Spray bottle with water; spray starch or diluted fabric stiffener (optional)
- Ruler or tape measure
The quantities include a safety margin of about 20% for the gauge swatch, weaving in ends, and any tension differences.
Abbreviations (US Terms)
- ch – chain
- sl st – slip stitch
- sc – single crochet
- dc – double crochet
- sk – skip
- st(s) – stitch(es)
- sp – space
- rep – repeat
- *…* – repeat the instructions between asterisks as directed
Special stitch – Fan: Work 9 dc into the same chain loop. The 5th dc is the center of the fan.
Special stitch – Tip picot: Ch 3, then sl st into the 3rd ch from the hook. This makes a small ring that becomes the point of the star.
Gauge and Checkpoints
Gauge isn’t critical for an ornament, but it controls how sharp the points look and how much thread you use. Make one complete star first and measure it before making a set.
Outline gauge: 20 sc = 3 in (7.6 cm) along the Round 7 outline.
Checkpoints (measured lightly, before blocking):
- After Round 1: about 0.6 in (1.5 cm) across
- After Round 3: about 1.5 in (3.8 cm) across
- After Round 5: about 2.75 in (7.0 cm) across at the widest point
- After Round 7 (blocked): 4.75 in (12.1 cm) wide, 4.5 in (11.4 cm) tall
- Each star side (valley to tip): about 1.65 in (4.2 cm)
If your star is too big: go down to a 2.0 mm hook, or work the long chains in Round 6 more tightly.
If your star is too small or the points curl: go up to a 2.5 mm hook. If only the outline pulls, loosen your tension on the Round 6 chains.
A difference of up to 0.25 in (0.6 cm) is fine. Blocking will correct most of it.
Pattern
The rounds are joined, and the right side faces you throughout.
Round 1 – Center Ring
Ch 6, sl st in first ch to form a ring.
Ch 1, work 15 sc into the ring. Sl st in first sc to join. (15 sc)
Pull the starting tail gently so the center hole is small but still open, not closed.
Round 2 – Five Openings
Ch 1, sc in the same st as the join. *Ch 6, sk 2 sts, sc in next st.* Rep from * to * 3 more times. Ch 6, sk 2 sts, then sl st in first sc to join.
(5 sc, 5 ch-6 loops)
Check: 5 sc + (5 x 2 skipped sts) = 15, which matches Round 1.
Round 3 – Framing the Openings
This is a conversion round. The chain loops become solid sc so the openings keep a round, firm shape.
Ch 1, sc in the same st as the join. *Work 8 sc in the next ch-6 loop, sc in next sc.* Rep from * to * 3 more times. Work 8 sc in the last ch-6 loop, then sl st in first sc to join.
Count: 5 sc (1 in each existing sc) + 40 sc (8 in each of the 5 loops) = 45 sc
Each repeat has 9 sts: 1 sc over the Round 2 sc, plus 8 sc around one opening.
Round 4 – Chain Loops
Ch 1, sc in the same st as the join. This sc is above a Round 2 sc. *Ch 7, sk 8 sts, sc in next sc.* Rep from * to * 3 more times. Ch 7, sk 8 sts, then sl st in first sc to join.
(5 sc, 5 ch-7 loops)
Check: 5 sc + (5 x 8 skipped) = 45, which matches Round 3. Each ch-7 loop sits directly above one framed opening.
Round 5 – Fans
Ch 1, sc in the same st as the join. *Work a Fan (9 dc) in the next ch-7 loop, sc in next sc.* Rep from * to * 3 more times. Work a Fan in the last ch-7 loop, then sl st in first sc to join.
Count: 5 sc + 45 dc (5 fans of 9 dc) = 50 sts
Each fan points out toward where a star tip will be. Each sc between two fans is a valley, the inner corner of the star.
Checkpoint: 2.75 in (7.0 cm) across. Lay the piece flat. The five fans should be evenly spaced, like a flower. If it ruffles, the fans are too loose. If it cups, the ch-7 loops are too tight.
Round 6 – Star Frame
This round makes the five points with long chain legs. Each tip sits above the center (5th dc) of a fan, and each valley is anchored on a Round 5 sc.
Ch 1, sc in the same st as the join (a valley sc).
*Ch 10, work a Tip picot, ch 10, sk the next fan, sc in next valley sc.* Rep from * to * 3 more times.
For the last point: ch 10, Tip picot, ch 10, sk the last fan, then sl st in first sc to join.
(5 valley sc, 10 ch-10 legs, 5 tip picots)
The legs float over the fans and leave an open triangle above each fan. Keep the chains even, because they control your finished size more than any other part of the star.
Round 7 – Outline
This is a trim round. It changes the chain frame into a firm, smooth single crochet edge.
Ch 1, sc in the same st as the join.
*Work 11 sc in the next ch-10 leg. In the tip picot, work (2 sc, ch 3, 2 sc). Work 11 sc in the next ch-10 leg, sc in next valley sc.* Rep from * to * 3 more times.
For the last point: 11 sc in the leg, (2 sc, ch 3, 2 sc) in the tip picot, 11 sc in the last leg. Sl st in first sc to join. Fasten off and weave in the end.
Count per leg: 10 (1 for each chain) + 1 extra = 11 sc
Count per point: 11 + 4 + 11 + 1 valley sc = 27 sc, plus one ch-3 tip space
Round total: 5 x 27 = 135 sc and 5 ch-3 tip spaces
Hanging Loop
Choose the neatest tip for the top. Join thread with a sl st in that tip’s ch-3 space.
Ch 40, then sl st in the same ch-3 space to form a loop. Ch 1, work 44 sc around the ch-40 loop, and sl st in the tip space to join. Fasten off and weave in the end through the outline sts.
Count: 40 (1 for each chain) + 4 extra = 44 sc
The 4 extra sts keep the loop from twisting tightly, so it hangs straight. The finished loop is about 3 in (7.6 cm) tall.
Border (Star Outline) Details
Rounds 6 and 7 form the border on this design. This section brings the math together.
Border gauge: 20 sc = 3 in (7.6 cm), so 11 sc covers about 1.65 in (4.2 cm), which is one side of the star.
Per side: A five-pointed star has 10 sides (legs). Each side has exactly 11 sc. The valley sc and tip sts are counted separately, so no corner gets counted twice:
- 10 legs x 11 sc = 110 sc
- 5 tips x 4 sc = 20 sc
- 5 valleys x 1 sc = 5 sc
- Total = 135 sc, plus 5 ch-3 tip spaces
Why the math works: For the star to have its shape, each side needs to be about 1.65 in (4.2 cm) long, measured from a valley on the fan round out to its tip. Ten chains alone come up slightly short once you sc over them. The 11th sc fills the leg so it lies straight instead of bowing inward. The (2 sc, ch 3, 2 sc) group at each tip turns sharply without pulling, and the single valley sc keeps each inner corner crisp.
Final Blocking
Blocking makes a big difference with lace. Don’t skip it.
- Wet: Soak the star in cool water for 5 minutes. Press out water gently in a towel. Don’t wring.
- Pin the center: Place it right side up on the blocking board. Pin through the center ring so it stays open and round.
- Pin the tips: Pin each ch-3 tip space outward. The side tips should be 4.75 in (12.1 cm) apart, and the top tip should be 4.5 in (11.4 cm) above the line between the two lower tips.
- Pin the valleys: Pin each valley sc inward toward the center so the legs pull straight.
- Shape the fans: With your fingertip, spread each fan into an even half-circle that points at its tip.
- Open the round openings: Use a pin or blunt needle to open each Round 3 opening into a circle.
- Stiffen (optional): Mist with spray starch or brush on diluted stiffener.
- Dry: Leave it pinned until completely dry, at least 6 hours.
- Measure: After unpinning, check the final width of 4.75 in (12.1 cm) and height of 4.5 in (11.4 cm).
Final Quality-Control Checklist
- Center ring is open and about 0.6 in (1.5 cm) across
- Five framed openings, all the same size
- Five fans with 9 dc each, centered under each tip
- Each leg has 11 sc and lies straight
- Each tip has (2 sc, ch 3, 2 sc) and comes to a clear point
- Round 7 total is 135 sc
- Star measures 4.75 in (12.1 cm) wide x 4.5 in (11.4 cm) tall
- Hanging loop has 44 sc, is at the top tip, and is about 3 in (7.6 cm) tall
- All ends are woven in invisibly along solid stitches
Troubleshooting
Center won’t lie flat: Your Round 1 ring may be too tight for 15 sc. Redo it with a looser ring, but keep the count at 15.
Fans ruffle: Your dc are too tall. Try a smaller hook just for Round 5.
Star points curl or the star cups: The Round 6 chains are too tight. Rework them with a looser tension or a hook one size larger, keeping 10 chains.
Legs bow inward after blocking: Make sure you worked all 11 sc in each leg. Pin the tips farther out and stiffen.
Lopsided star: Count the legs. Each must have 10 chains in Round 6 and 11 sc in Round 7.
Hanging loop twists: Re-block it flat, or add 2 more sc around the loop.
Care
Hand wash in cool water with mild soap, press dry in a towel, and re-block flat. Store flat between tissue paper so the points stay sharp.
Final Notes
The measurement chain for this star is short and easy to track. A 0.6 in (1.5 cm) center ring grows to a 1.5 in (3.8 cm) lace round. Then it grows to 2.75 in (7.0 cm) fans. Finally, it becomes a 4.75 in (12.1 cm) x 4.5 in (11.4 cm) star with 135 outline stitches, 11 on each of its 10 sides. If each checkpoint matches, your finished star will too.
Once you’ve made one, you’ll be able to make many more in an evening. They’re great for gift toppers, tree ornaments, or window hangings.
Happy crocheting!