

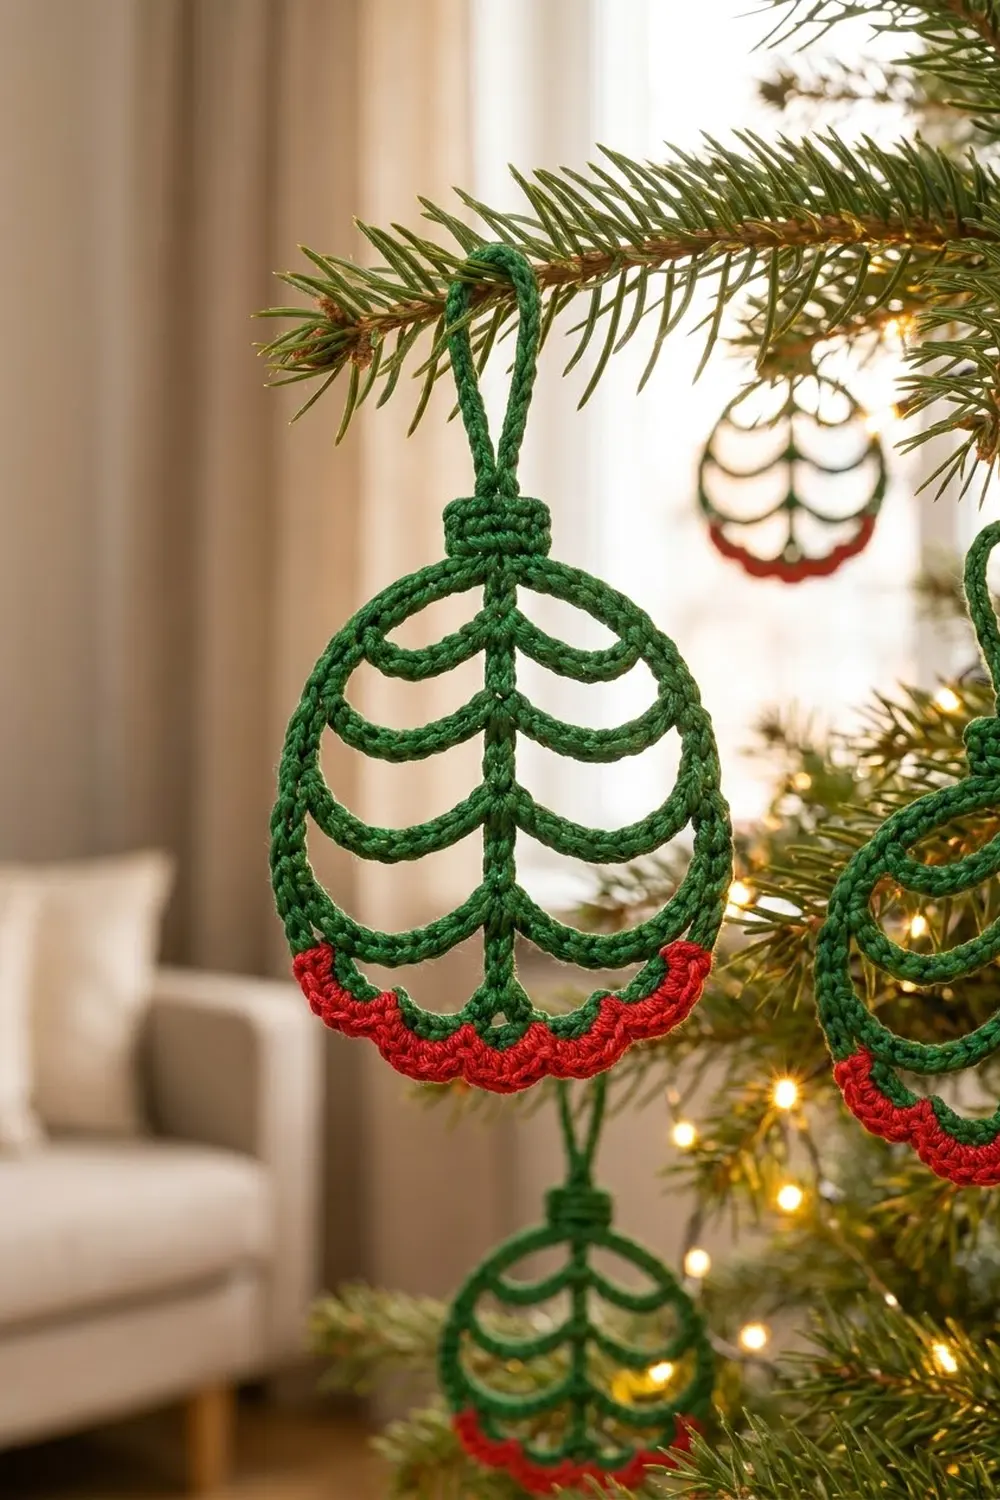
This openwork bauble is made of cord and nothing else. A round green ring frames a central spine, and three tiers of drooping swags curve off it like fir branches. A small solid cap and a slim loop sit at the top, and a row of red scallops trims the lower curve.
It comes in two colors, forest green and bright red, and the style sits somewhere between a classic glass bauble and a stylized Christmas tree. Mercerized cotton gives the cords a crisp, rope-like look that holds its shape on the tree.
The pattern uses US crochet terms. The finished ornament measures about 3.75 in (9.5 cm) wide and 6 in (15.2 cm) tall including the hanging loop. The body without the loop is about 4.75 in (12.1 cm) tall.
It’s all made as one piece. You crochet a chain ring and cover it with single crochet, add the cap and loop, then work the spine and swags as chain-and-single-crochet cords, each anchored to the ring as you go. The red edging goes on last.
Finished Size and Construction
- Finished size: 3.75 in (9.5 cm) wide x 6 in (15.2 cm) tall with loop
- Skill level: Intermediate (cord work and anchoring into the ring’s inner edge)
- Terminology: US crochet terms
- Yarn weight: DK (#3) mercerized cotton
- Hook: 3.0 mm (US C/2 or D/3)
- Number of pieces: 1 (single ornament, worked in one piece)
- Layout: ring frame, vertical spine, 3 tiers of swags, top cap and loop
- Ring size: 3.5 in (8.9 cm) across
- Size before edging: 3.5 in (8.9 cm) wide x 4.25 in (10.8 cm) tall without loop
- Edging depth: 0.5 in (1.3 cm) along the lower arc
Materials
Pick a smooth, tightly plied mercerized cotton in DK weight. A firm cotton keeps the cords round and defined. Soft acrylic tends to flatten and makes the swags sag.
- Color A, forest green: 5 g, about 12 m
- Color B, bright red: 2 g, about 5 m
Tools:
- 3.0 mm crochet hook
- Tapestry needle
- 4 locking stitch markers
- Rust-proof pins and a blocking mat
- Spray bottle with water
- Scissors and a ruler
These yarn amounts include a margin for weaving in tails and for a gauge swatch.
Abbreviations (US Terms)
- ch – chain
- sl st – slip stitch
- sc – single crochet
- dc – double crochet
- sk – skip
- st(s) – stitch(es)
- RS – right side
Special technique – cord: Make a chain of the stated length. Then work 1 sc into the back bump of each ch back along it. This gives a firm, round cord about 0.25 in (0.6 cm) thick.
Inner edge / outer edge: On the ring, the sc tops make the outer edge. The foundation chain side makes the inner edge. The cap and edging go into the outer edge, and the spine and swags anchor into the inner edge.
Gauge and Checkpoints
Gauge: 5 sc in cord = 1 in (2.5 cm).
Make a test cord first: ch 20, then work 1 sc in the back bump of each ch (20 sc). It should measure 4 in (10.2 cm). This swatch is your one test piece, and every measurement below depends on it.
Checkpoints:
- After the ring: the 56-sc ring is about 11.2 in (28.4 cm) around and 3.5 in (8.9 cm) across when laid flat.
- After the cap: the cap is about 1 in (2.5 cm) wide and 0.75 in (1.9 cm) tall, and the loop stands about 1.25 in (3.2 cm) tall.
- After the spine: the spine lies straight with no bowing, about 3 in (7.6 cm) long.
- After the edging: the ornament is 3.75 in (9.5 cm) wide and 6 in (15.2 cm) tall.
If your cord is too long (fewer than 5 sc per inch), go down 0.25 mm in hook size. If it’s too short (more than 5 sc per inch), go up 0.25 mm. Getting the length right matters more than the stitch count, because the spine has to span the ring exactly.
Part 1: Outer Ring
With Color A:
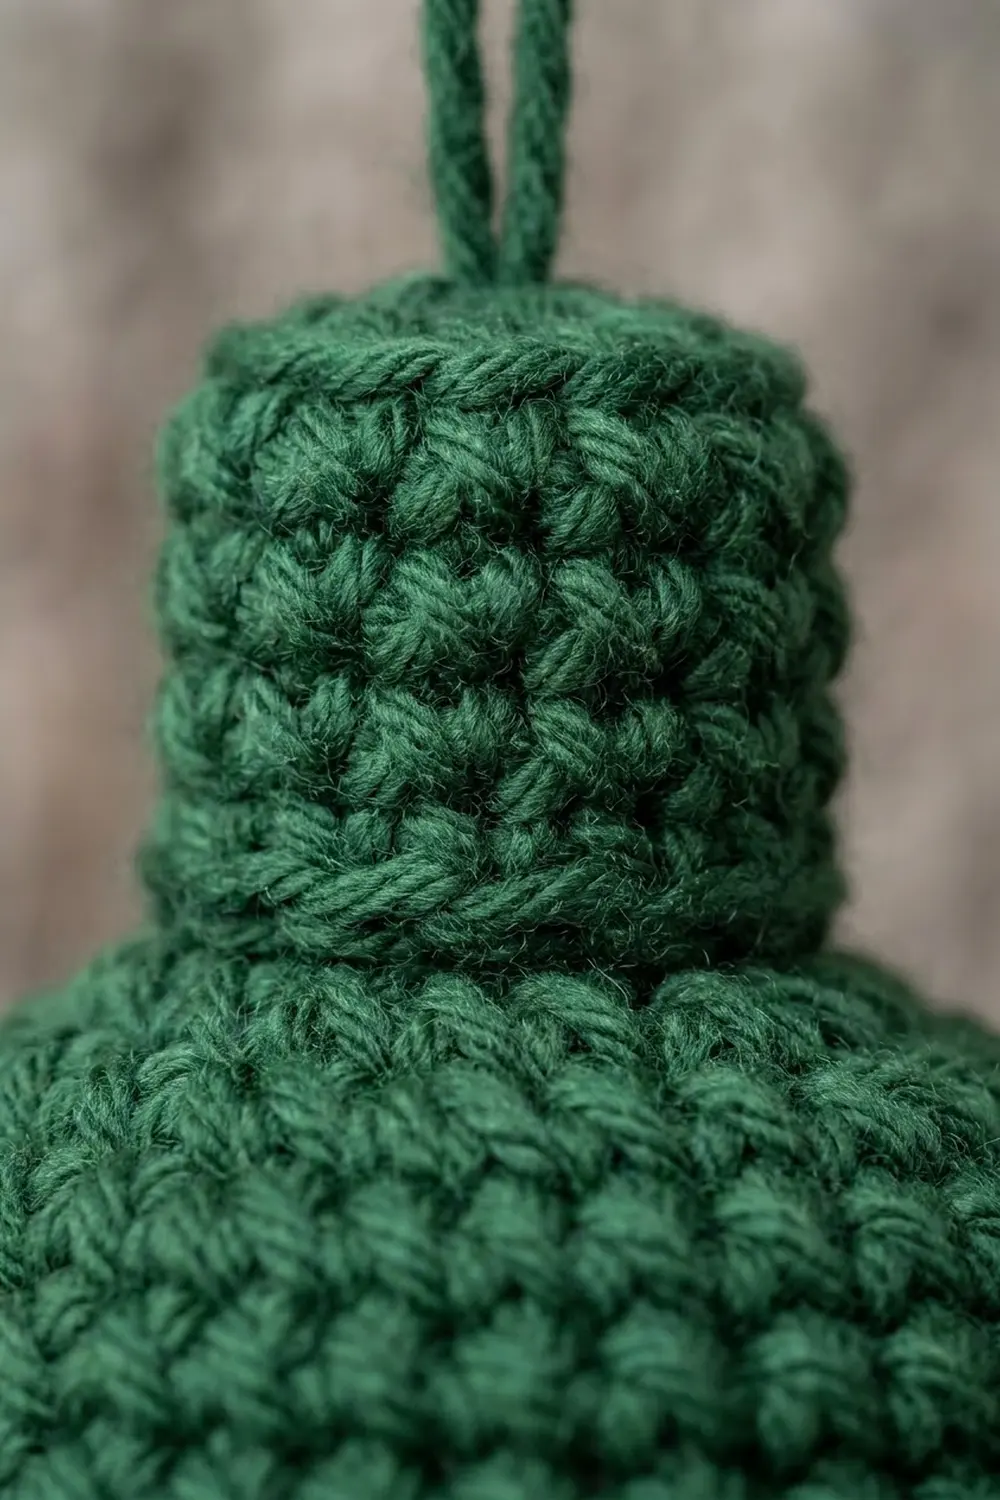
Foundation: Ch 56. Without twisting the chain, sl st into the first ch to form a ring.
Rnd 1: Ch 1, sc in the back bump of each ch around, then sl st to the first sc to join. (56 sc) Fasten off.
Lay the ring flat and number the stitches. The first sc is st 1, which is the top center. Count around in your working direction, so st 29 is the bottom center. Sts 2–28 make up side A and sts 30–56 make up side B, with 27 sts per side between top and bottom.
Place markers in sts 1 and 29. The anchor points you’ll need later are:
- Tier 1: st 10 (side A) and st 48 (side B)
- Tier 2: st 15 (side A) and st 43 (side B)
- Tier 3: st 20 (side A) and st 38 (side B)
Each pair is the same distance from st 1 (9, 14 and 19 sts), so the swags mirror each other.
Checkpoint: 3.5 in (8.9 cm) across.
Part 2: Cap and Hanging Loop
The cap is worked into the outer edge of sts 55, 56, 1, 2 and 3, with st 1 at its center.
Row 1: With RS facing, join Color A with a sl st in st 55. Ch 1, sc in sts 55, 56, 1, 2 and 3. (5 sc)
Rows 2–3: Ch 1, turn, sc in each sc across. (5 sc)
Row 4 (loop row): Ch 1, turn, sc in the first 2 sc. Sc in the next sc (the center), ch 14, then sl st into that same center sc to close the loop. Work 1 sc in the back bump of each of the 14 ch, then sl st into the center sc again. Sc in the last 2 sc. (5 sc across the cap plus 14 sc around the loop)
Fasten off. The cap is a firm block 4 rows tall that wraps the top of the ring.
Checkpoint: cap 1 in (2.5 cm) wide x 0.75 in (1.9 cm) tall, loop 1.25 in (3.2 cm) tall.
Part 3: Central Spine
Step 1: With Color A, join with a sl st into the inner edge of st 1, directly under the cap.
Step 2: Ch 15. Sl st into the inner edge of st 29 (bottom center).
Step 3: Ch 1, turn. Work 1 sc in the back bump of each ch back up to the top. (15 sc)
Step 4: Sl st into the inner edge of st 1. Fasten off.
Count the spine stitches from the top, so the sc nearest the cap is spine sc 1 and the sc at the bottom is spine sc 15. Mark spine sc 2, 6 and 10.
Checkpoint: the spine is about 3 in (7.6 cm) long and pulls the ring into a true circle, not an oval. If the ring stretches tall, your spine is too long. If it squashes, the spine is too short.
Part 4: Branch Swags
Each tier is one continuous strand: a half-swag goes out to side B, comes back, then a matching half-swag goes out to side A and comes back. The chains are longer than the straight distance on purpose, and that extra length makes the drooping curve.
Tier 1 (top):
- Join Color A with a sl st in spine sc 2, on the side B side.
- Ch 9, then sl st into the inner edge of ring st 48.
- Ch 1, turn, sc in the back bump of each ch back to the spine. (9 sc)
- Sl st through spine sc 2 to the side A side.
- Ch 9, then sl st into the inner edge of ring st 10.
- Ch 1, turn, sc in the back bump of each ch back to the spine. (9 sc)
- Sl st into spine sc 2. Fasten off.
Tier 1 total: 18 sc
Tier 2 (middle): Repeat the Tier 1 steps, but join at spine sc 6, ch 10 for each half, and anchor at ring st 43 (side B) and st 15 (side A). (10 sc per half; Tier 2 total: 20 sc)
Tier 3 (bottom): Repeat the Tier 1 steps, but join at spine sc 10, ch 9 for each half, and anchor at ring st 38 (side B) and st 20 (side A). (9 sc per half; Tier 3 total: 18 sc)
Swag total: 56 sc (18 + 20 + 18).
Keep the chain tension the same on both halves of a tier. If one half comes out tighter, that side will droop less and the ornament will look lopsided even when the stitch counts match. A quick fix is to work every chain of a tier in one sitting, without stopping between halves.
Checkpoint: each swag should dip gently below the straight line between spine and ring. Below Tier 3, there should be 5 spine sc (sc 11–15) running down to the bottom of the ring.
Edging (Red Scallop Border)
Edging gauge: this follows the main gauge, 5 sc = 1 in (2.5 cm), and each scallop covers 4 sts, or 0.8 in (2.0 cm).
The edging goes along the outer edge of sts 17 through 41. That’s the lower arc, centered on st 29.
Row 1: With RS facing, join Color B with a sl st in st 17. Ch 1, sc in st 17 and in each st through st 41. (25 sc)
Row 2 (scallops): Ch 1, turn. Sl st in the first sc, then sk 1 sc, 5 dc in next sc, sk 1 sc, sl st in next sc. Repeat from * 5 more times. (6 scallops: 30 dc + 7 sl st = 37 sts)
Fasten off.
Why the math works: Row 1 has 25 sc. Each scallop repeat uses 4 sc, and there’s 1 sl st at the start, so 1 + (6 x 4) = 25. Every stitch gets used and the row ends exactly on st 41. The 13th sc is st 29 (17 + 12), and it gets a sl st, so the middle dip of the edging lines up with the spine. The 25 sts make 5 in (12.7 cm) of the ring’s 11.2 in (28.4 cm) outer edge, which matches the 25/56 share of the ring.
Checkpoint: the edging adds 0.5 in (1.3 cm) at the bottom, so the full height is 6 in (15.2 cm) and the width at the scallops is about 3.75 in (9.5 cm).
Final Blocking
- Weave in all tails along the cords, going through the sc in the same direction as the cord so they don’t show.
- Mist the ornament until it’s damp but not dripping.
- Lay it RS up on the blocking mat and shape the ring into a 3.5 in (8.9 cm) circle.
- Pin the top of the loop, the bottom center, and three points on each side of the ring.
- Straighten the spine with a pin at the bottom.
- Ease each swag into an even downward curve, matching the two halves of every tier by eye.
- Open each scallop into a neat fan with your fingertips.
- Let it dry completely, at least 6 hours, before unpinning.
Final Quality-Control Checklist
- Ring has 56 sc and measures 3.5 in (8.9 cm) across
- Cap is 5 sc wide and 4 rows tall, centered on st 1
- Loop has 14 sc and stands 1.25 in (3.2 cm) tall
- Spine has 15 sc and runs from st 1 to st 29
- Tiers have 18, 20 and 18 sc and anchor at sts 10/48, 15/43 and 20/38
- Edging Row 1 has 25 sc, and Row 2 has 6 scallops with the center dip at the spine
- Finished size is 3.75 in (9.5 cm) x 6 in (15.2 cm)
- No tails or knots are visible from the RS
Troubleshooting
Ring twists into a figure eight: the foundation chain twisted before joining. Undo it and lay the chain flat before you join.
Ring is oval after adding the spine: the spine length is off. Redo it with 1 ch more or less until the ring sits round.
Swags are flat and straight: your chains are too tight. Go up a hook size for the chains only.
Swags sag below the next tier: take 1 ch off each half of that tier, and keep both halves matching.
Scallops ruffle or cup: you’re working loosely compared with the base. Try 4 dc per scallop, or use a smaller hook for Row 2.
Edging is off-center: recount from st 17. The 13th sc of Row 1 has to be st 29.
Cap looks lumpy: make sure Row 1 covers exactly sts 55, 56, 1, 2 and 3.
Ornament won’t hang straight: the loop is off-center. Check that it starts from the 3rd (center) sc of Row 4.
Care
Hand wash in cool water with mild soap, press the water out in a towel, and reshape it flat to dry. Store it flat or hanging so the swags keep their curve.
Final Notes
Everything comes back to one gauge: 5 sc = 1 in (2.5 cm). That gives a 56-sc ring of 11.2 in (28.4 cm) around, which lays flat at 3.5 in (8.9 cm) across. The 15-sc spine spans the inside, and the 18-, 20- and 18-sc tiers branch off it to their anchor points. The cap and loop add 2 in (5.1 cm) on top, and the 25-sc red edging adds 0.5 in (1.3 cm) at the bottom, for a finished ornament of 3.75 in (9.5 cm) x 6 in (15.2 cm). Check each measurement as you reach it, and they’ll add up to the right final size.
Happy crocheting!