

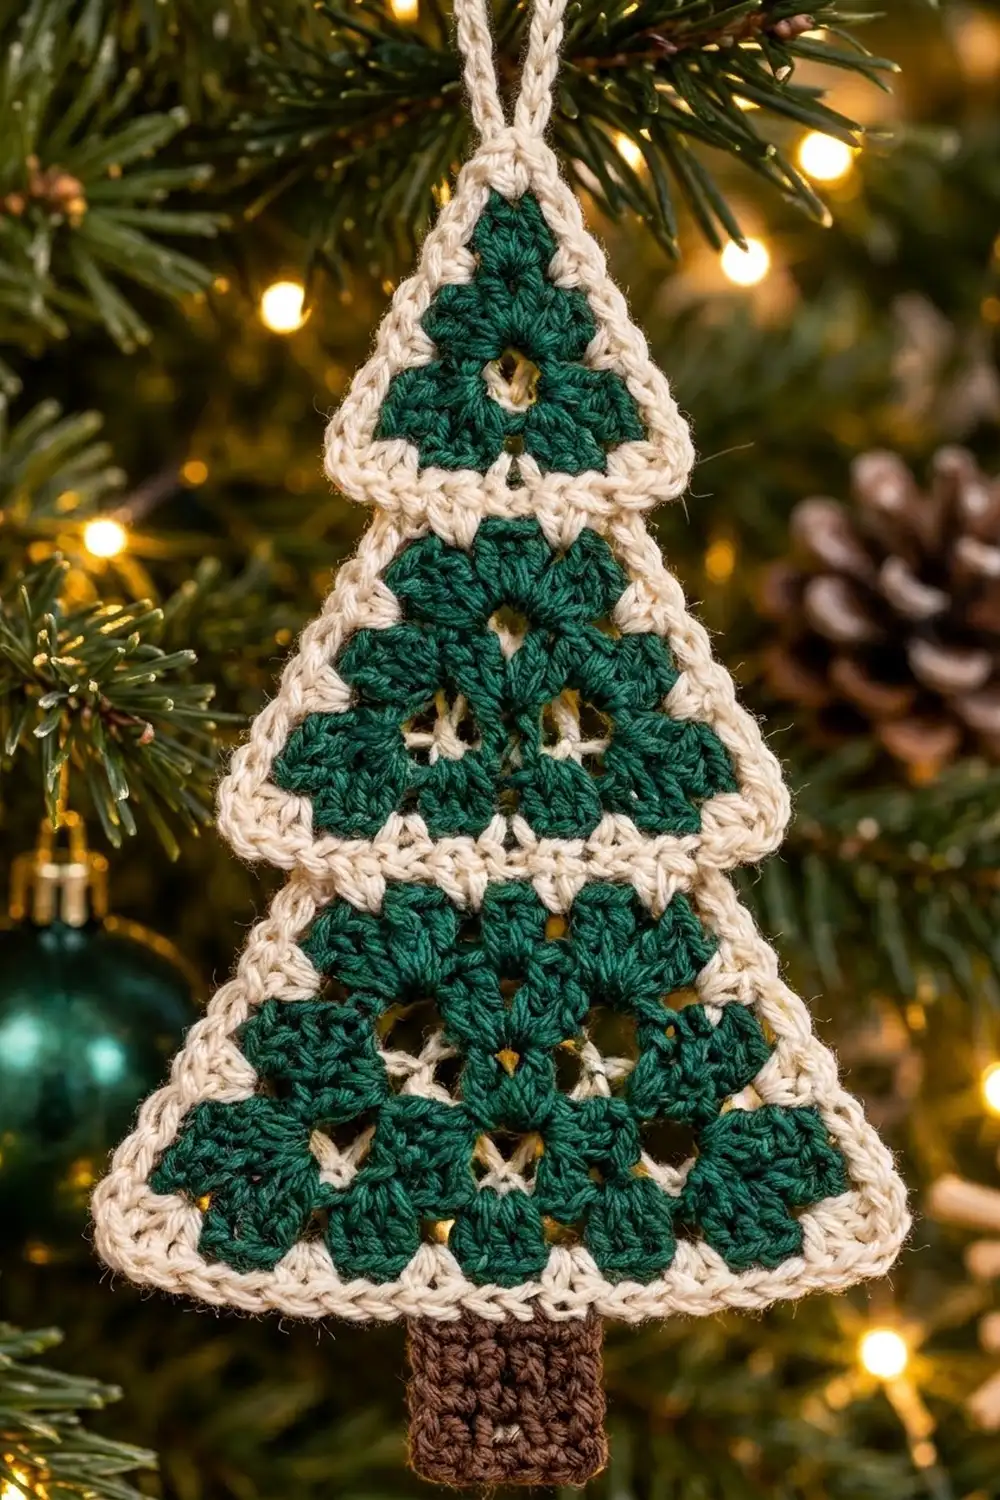
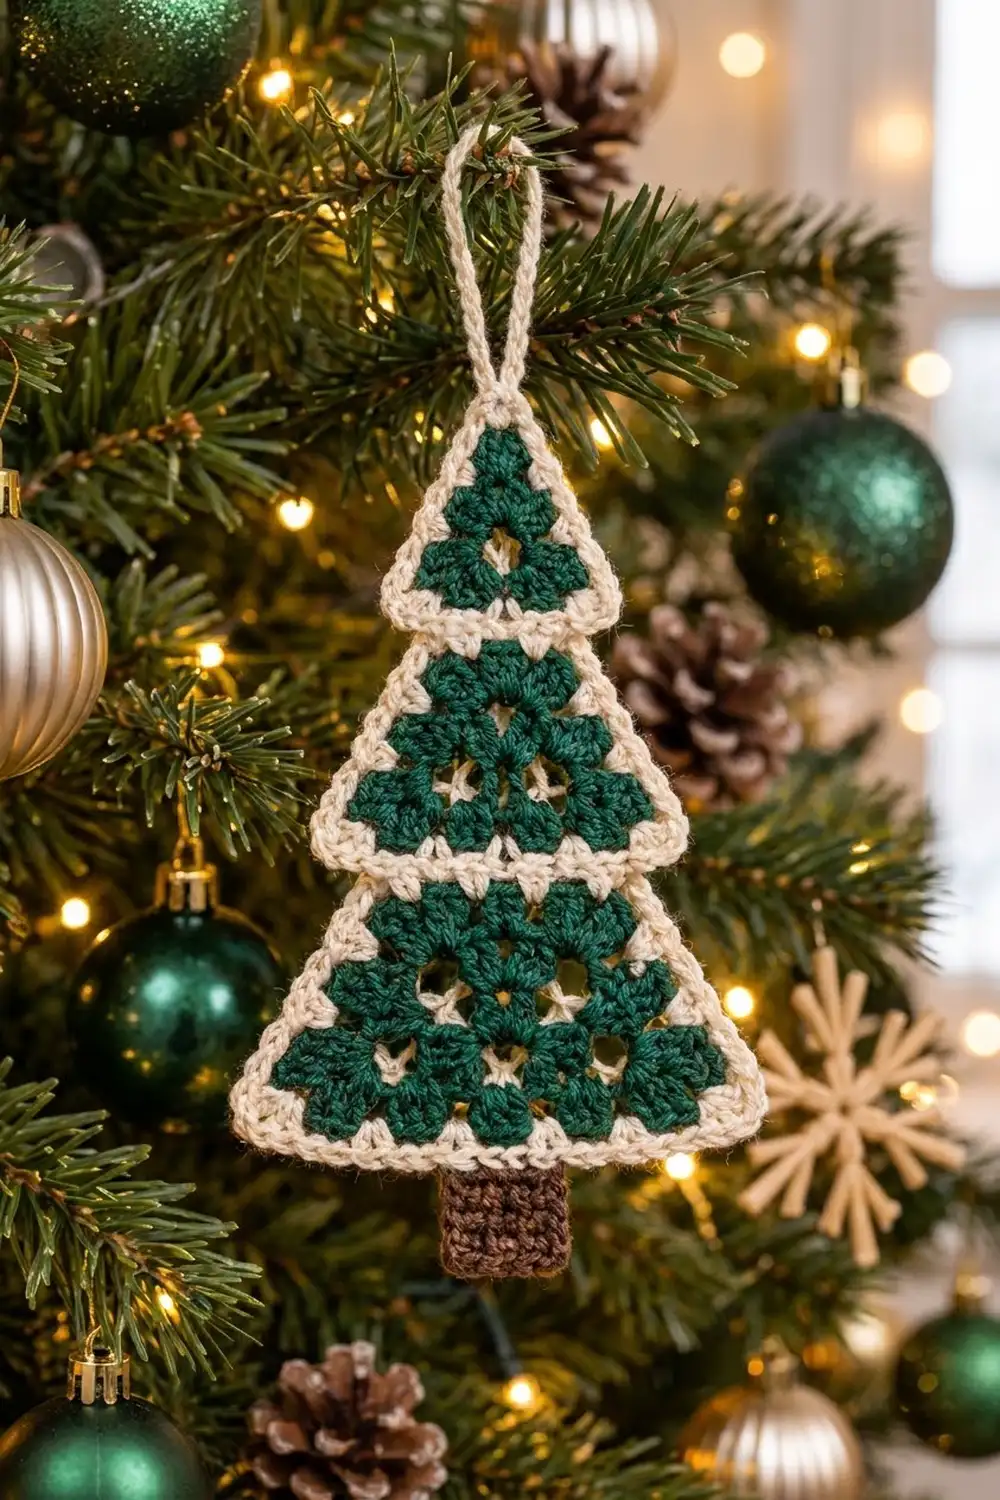
The Evergreen Tiers ornament is a small Christmas tree made from three granny triangles in deep forest green. Each tier has a crisp, beaded cream edge, and a short brown trunk sits at the bottom. A cream loop at the tip lets it hang straight from a branch.
The colors are classic: forest green for the tree, warm cream for the edges and the loop, and chocolate brown for the trunk. The open granny clusters let tree lights shine through. The cream outline keeps each tier easy to see against dark needles.
This pattern uses US crochet terms. The finished ornament is 4.5 in (11.4 cm) wide at the widest point and 7.35 in (18.7 cm) tall from the top tip to the bottom of the trunk. The hanging loop adds about 1.25 in (3.2 cm) above that.
Construction is simple. You make three green granny triangles in three sizes (2, 3 and 4 rounds), edge each one with two rounds of cream and crochet a small brown trunk. Then you overlap the tiers, sew them together, attach the trunk and add the loop.
Finished Size and Construction
- Finished size: 4.5 in (11.4 cm) wide x 7.35 in (18.7 cm) tall, plus a 1.25 in (3.2 cm) loop
- Skill level: Easy
- Terminology: US crochet terms
- Yarn weight: DK (light worsted, category 3)
- Hook: 3.5 mm (E-4)
- Number of pieces: 4 separate pieces (3 triangles and 1 trunk), plus a loop worked directly onto the top tier
- Layout: 3 tiers stacked vertically with the smallest on top. Each upper tier overlaps the tier below by 1.25 in (3.2 cm). The trunk is centered below the bottom tier.
- Piece size (side length, after border): small 2.5 in (6.4 cm), medium 3.5 in (8.9 cm), large 4.5 in (11.4 cm)
- Size before border: small 2 in (5.1 cm), medium 3 in (7.6 cm), large 4 in (10.2 cm)
- Border depth: about 0.25 in (0.6 cm), which adds 0.5 in (1.3 cm) to each side length
Order of work: make the green triangles, then work the cream border on each triangle, then join. The Border section comes later in this article, but you work it on each triangle before you join anything.
Materials
Choose a smooth DK cotton or cotton blend. Cotton shows the stitches clearly, keeps the triangle points sharp and does not fuzz on the tree. Acrylic DK also works, but block it gently so it doesn’t go limp.
Yarn (for one ornament):
- Forest green: 10 g, about 25 m
- Cream: 6 g, about 15 m
- Chocolate brown: 2 g, about 5 m
These quantities include a small safety margin. One standard 50 g ball of green makes about five ornaments.
Tools:
- 3.5 mm (E-4) crochet hook
- Tapestry needle
- Scissors
- Stitch markers (2 or 3)
- Ruler or tape measure
- Blocking mat and rust-proof pins
- Spray bottle with water
Abbreviations (US Terms)
- ch: chain
- sl st: slip stitch
- sc: single crochet
- dc: double crochet
- sp(s): space(s)
- rev sc: reverse single crochet
- [ ]: repeat the instructions inside the brackets as directed
Special stitch: reverse single crochet (rev sc, also called crab stitch). Work from left to right if you are right-handed. Insert the hook into the next stitch to the right, yarn over and pull up a loop. Yarn over again and pull through both loops. This twists each stitch and makes the beaded edge around every tier.
Gauge and Checkpoints
Gauge is measured as the length of one triangle side. Make the small triangle first, add its border and measure it before you make the other two.
- After Round 1: each side measures 1 in (2.5 cm)
- After Round 2: each side measures 2 in (5.1 cm)
- After Round 3: each side measures 3 in (7.6 cm)
- After Round 4: each side measures 4 in (10.2 cm)
- After the border: add 0.5 in (1.3 cm) to each side
Each green round adds 1 in (2.5 cm) to each side. The cream border gauge is about 11 sc along a 2.5 in (6.4 cm) side.
If your triangle is too big, go down to a 3.25 mm hook. If it is too small, go up to a 3.75 mm hook. A difference of about 0.1 in (0.3 cm) per side is fine. All three tiers change together, so the tree keeps its shape.
Granny Triangle (Make 3 in Green)
All three tiers use the same pattern. Stop after the round shown for each size:
- Small (top tier): work Rounds 1–2
- Medium (middle tier): work Rounds 1–3
- Large (bottom tier): work Rounds 1–4
The ch-3 at the start of each round counts as 1 dc. A “group” is 3 dc worked into the same space.
Round 1: With green, ch 4, sl st in the first ch to form a ring. Ch 3, 2 dc in ring, ch 2, [3 dc in ring, ch 2] twice, sl st in top of beginning ch-3. (9 dc in 3 groups, 3 ch-2 corner sps)
Round 2: Sl st in the next 2 dc and into the ch-2 corner sp. (Ch 3, 2 dc, ch 2, 3 dc) in the same corner sp, ch 1. [(3 dc, ch 2, 3 dc) in the next corner sp, ch 1] twice, sl st in top of beginning ch-3. (18 dc in 6 groups; 6 dc and 1 ch-1 sp per side; 3 ch-2 corners)
Small triangle: fasten off here. Each side measures 2 in (5.1 cm).
Round 3: Sl st in the next 2 dc and into the ch-2 corner sp. (Ch 3, 2 dc, ch 2, 3 dc) in the same corner sp, ch 1, 3 dc in the next ch-1 sp, ch 1. [(3 dc, ch 2, 3 dc) in the next corner sp, ch 1, 3 dc in the next ch-1 sp, ch 1] twice, sl st in top of beginning ch-3. (27 dc in 9 groups; 9 dc and 2 ch-1 sps per side; 3 ch-2 corners)
Medium triangle: fasten off here. Each side measures 3 in (7.6 cm).
Round 4: Sl st in the next 2 dc and into the ch-2 corner sp. (Ch 3, 2 dc, ch 2, 3 dc) in the same corner sp, ch 1, [3 dc in the next ch-1 sp, ch 1] twice. Then work this sequence twice: (3 dc, ch 2, 3 dc) in the next corner sp, ch 1, [3 dc in the next ch-1 sp, ch 1] twice. Sl st in top of beginning ch-3. (36 dc in 12 groups; 12 dc and 3 ch-1 sps per side; 3 ch-2 corners)
Large triangle: fasten off here. Each side measures 4 in (10.2 cm).
Count rule: a triangle with n rounds has 3 x n dc and (n – 1) ch-1 sps along each side, between the corner ch-2 sps. Weave in the green tails on the wrong side now, before the border covers the edge.
Trunk (Make 1 in Brown)
Foundation: With brown, ch 5.
Row 1: Sc in the 2nd ch from hook and in each ch across, turn. (4 sc)
Rows 2–7: Ch 1, sc in each sc across, turn. (4 sc)
Fasten off and leave an 8 in (20.3 cm) tail for sewing. The trunk measures about 0.75 in (1.9 cm) wide x 1.25 in (3.2 cm) long.
Make All Pieces
For one ornament you need:
- Green: 3 granny triangles (1 small, 1 medium, 1 large)
- Cream: a border on all 3 triangles, plus the loop
- Brown: 1 trunk
Layout, top to bottom:
        [ loop ]
      [  SMALL  ]
    [   MEDIUM    ]
  [     LARGE       ]
        [trunk]
Every tier points up. Each upper tier sits in front of the tier below and hides its tip.
Joining
Work the Border (next section) on all three triangles before you join them.
Method: Overlap the tiers and sew them with backstitch, using a cream tail and a tapestry needle.
- Lay the large tier flat, right side up. Place the medium tier on top so its bottom edge crosses the large tier 1.25 in (3.2 cm) below the large tier’s tip. Center it so the large tip is hidden behind the middle of the medium tier.
- Pin it in place. At that depth the large tier is only about 1.4 in (3.6 cm) wide, so the medium tier’s 3.5 in (8.9 cm) bottom edge covers it completely.
- Stitch-to-stitch logic: sew along the inner edge of the medium tier’s bottom border. Go through the base of each Border Round 1 sc and straight down into the large tier behind it. Sew only across the part that overlaps the large tier, about 6 sc. Keep the stitches in the cream so they don’t show.
- Repeat with the small tier over the medium tier, using the same 1.25 in (3.2 cm) overlap.
- Center the trunk behind the bottom edge of the large tier. Tuck 0.5 in (1.3 cm) of trunk behind the tier and leave 0.75 in (1.9 cm) showing. Whipstitch the top row of the trunk to the back of the large tier’s green fabric.
Tension advice: Pull each stitch just snug. If you pull too tight, the tier edges pucker and the bottom edges are no longer straight.
Size checkpoint: From the top tip to the bottom of the large tier, the tree measures 6.6 in (16.8 cm). That is the full small tier (2.15 in, 5.5 cm), plus 1.8 in (4.6 cm) of the medium tier, plus 2.65 in (6.7 cm) of the large tier. Add the 0.75 in (1.9 cm) of trunk for a total of 7.35 in (18.7 cm).
Hanging loop: Join cream with a sl st in the top corner sc of the small tier. Ch 12, then sl st in the same corner sc. Fasten off. The loop stands about 1.25 in (3.2 cm) tall.
Border
Border gauge: about 11 sc along a 2.5 in (6.4 cm) finished side, which is 4–4.5 sc per inch (1.6–1.8 sc per cm).
Work both rounds on each triangle. Join cream with a sl st in any ch-2 corner sp.
Border Round 1: Ch 1, 3 sc in the same corner sp. Sc in each dc and each ch-1 sp to the next corner, then 3 sc in the corner sp. Repeat this once more. Then sc in each dc and ch-1 sp back to the starting corner. Sl st in the first sc.
The middle sc of each 3-sc corner is the corner stitch. Counts:
- Small: 7 sc between corners per side; 11 sc per side including both corner stitches; 30 sc total
- Medium: 11 sc between corners per side; 15 sc per side including both corner stitches; 42 sc total
- Large: 15 sc between corners per side; 19 sc per side including both corner stitches; 54 sc total
Border Round 2: Ch 1, rev sc in each sc around, sl st in the first rev sc. Fasten off and weave in the ends.
- Small: 30 worked 1-per-stitch + 0 added = 30 rev sc
- Medium: 42 worked 1-per-stitch + 0 added = 42 rev sc
- Large: 54 worked 1-per-stitch + 0 added = 54 rev sc
Why the math works: each side of an n-round triangle has 3n dc and (n – 1) ch-1 sps. So Round 1 puts 4n – 1 sc between the corners. Add the 2 corner stitches and each side has 4n + 3 sc. The total is 3 x (4n – 1) + 9 corner sc = 12n + 6. For n = 2, 3 and 4, that gives 30, 42 and 54. Each extra green round adds exactly 4 sc per side and 1 in (2.5 cm) of length. That keeps the border gauge at roughly 4 sc per inch on every tier, so the edges lie flat without ruffling or cupping.
Final Blocking
- Lightly mist the finished ornament with water until it is damp but not soaked.
- Lay it face up on a blocking mat.
- Pin the three points of each tier first. Check that the large tier’s bottom edge measures 4.5 in (11.4 cm).
- Pin the bottom edges of the small and medium tiers straight and level at 2.5 in (6.4 cm) and 3.5 in (8.9 cm).
- Check the total height: 7.35 in (18.7 cm) from the top tip to the bottom of the trunk.
- Pin the trunk straight and centered.
- Let it dry completely, usually 6–12 hours.
- Unpin it. If the points relax, add a light spray of fabric stiffener and pin it again.
Final Quality-Control Checklist
- The small, medium and large tiers measure 2.5 in (6.4 cm), 3.5 in (8.9 cm) and 4.5 in (11.4 cm) per side
- Border Round 1 counts are 30, 42 and 54 sc
- Every corner has a clear 3-sc point
- Each tier overlaps the one below by 1.25 in (3.2 cm), and no green tip shows
- The tiers are centered on one vertical line
- 0.75 in (1.9 cm) of trunk shows below the large tier
- The loop is attached at the exact top point, and the ornament hangs straight
- All tails are woven in on the back
Troubleshooting
Triangle curls or cups: the ch-2 corners are too tight. Chain more loosely, or go up half a hook size for the corner chains only.
Triangle ruffles: the dc are too loose or too tall. Go down a hook size.
Border count is off: check that you worked 1 sc in each ch-1 sp and 3 sc in each corner, not 2 or 4.
Crab stitch edge looks flat: twist the hook fully toward you as you go, and don’t skip any stitches.
Ornament tilts when hung: the loop is off center or a tier has shifted. Reattach the loop at the true top point.
Trunk stitches show on the front: sew only into the back layer of the large tier’s fabric.
Care
Spot clean with cool water and mild soap, then reshape the ornament and dry it flat. Store it flat in tissue paper so the points stay crisp.
Final Notes
The measurements build in a simple chain. Each green round adds 1 in (2.5 cm) per side, which gives triangles of 2 in (5.1 cm), 3 in (7.6 cm) and 4 in (10.2 cm). The cream border adds 0.5 in (1.3 cm), for tiers of 2.5 in (6.4 cm), 3.5 in (8.9 cm) and 4.5 in (11.4 cm). Overlap them by 1.25 in (3.2 cm) to get a 6.6 in (16.8 cm) tree. Add the trunk and the finished ornament measures 7.35 in (18.7 cm). Check your first small triangle carefully, and the rest will fall into place.
Happy crocheting!