

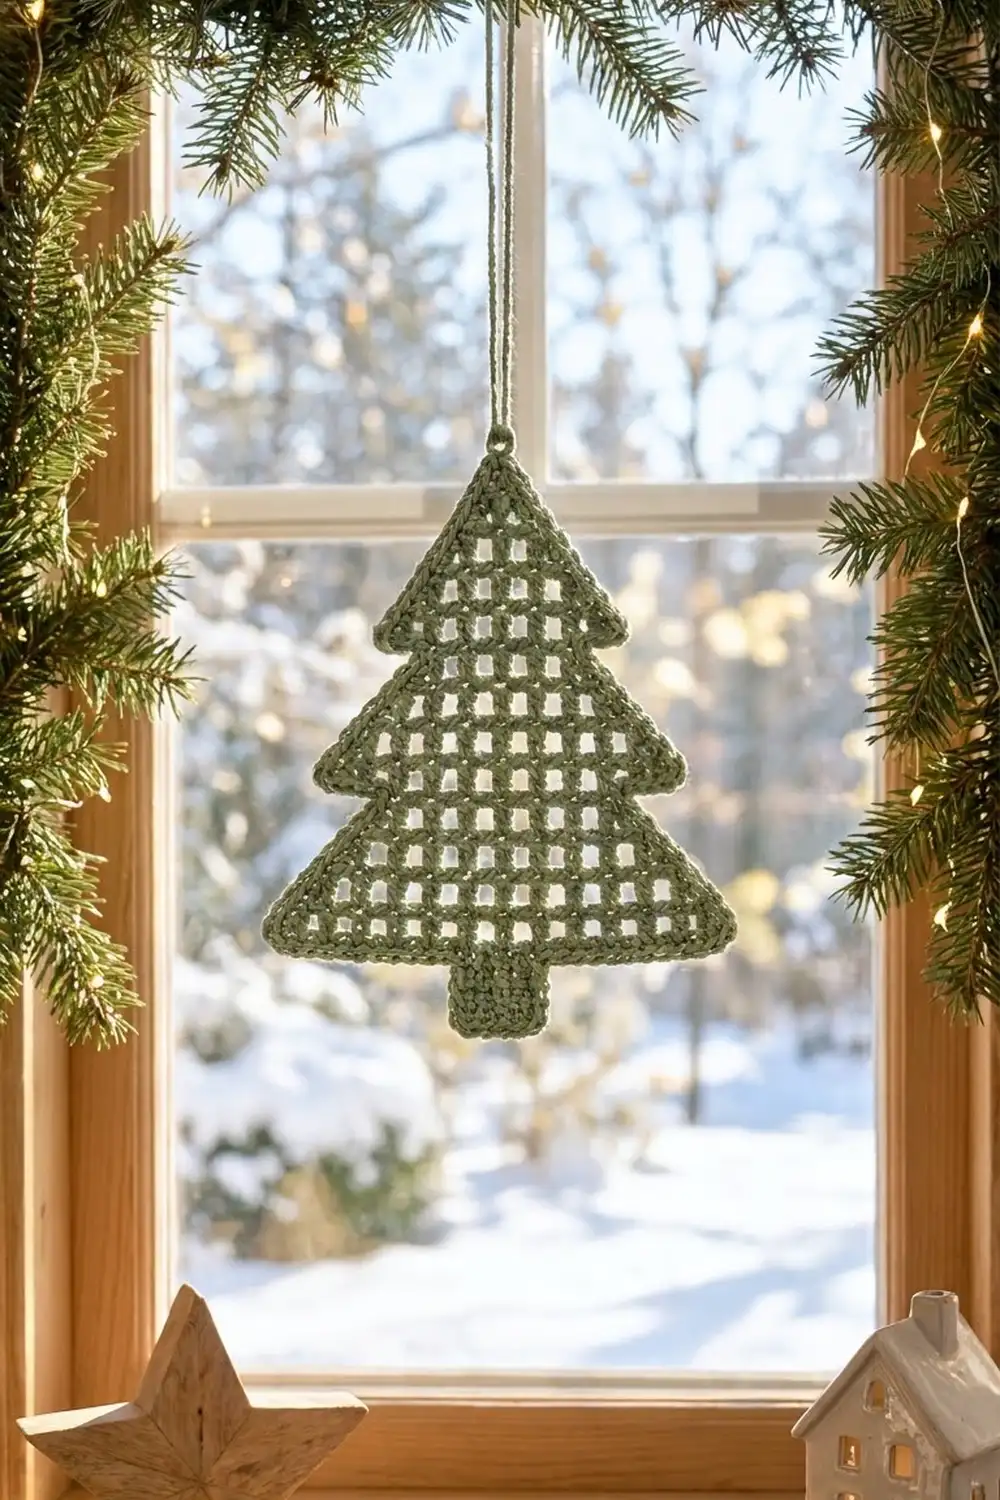
The Evergreen Window Tree is a flat crochet ornament with an open grid. The mesh lets light through, so it looks like a little stained-glass window when you hang it in front of glass. It has three stepped tiers, a solid trunk and a crisp single crochet outline.
The sample is worked in a soft sage green cotton. One color keeps the look calm and Scandinavian, and it lets the grid stand out. The pattern also works well in deep pine, cream or frosted blue.
All instructions use US crochet terms. The finished ornament measures 5.6 in (14.2 cm) wide by 6.9 in (17.5 cm) tall, not counting the hanging loop.
You work the tree body bottom-up in filet rows, starting from a foundation chain. Decreases and two increase rows shape the stepped tiers. Then you work the trunk into the underside of the foundation chain and finish with one border round that also makes the hanging loop.
Finished Size and Construction
- Finished size: 5.6 in (14.2 cm) wide × 6.9 in (17.5 cm) tall
- Skill level: Intermediate (filet increases and decreases)
- Terminology: US
- Yarn weight: DK (#3), cotton or cotton blend
- Hook: 3.5 mm (E-4)
- Number of pieces: 1
- Layout: single standalone ornament
- Piece size before border: 5.2 in (13.2 cm) wide × 6.5 in (16.5 cm) tall (5.5 in / 14.0 cm of body plus 1.0 in / 2.5 cm of trunk)
- Border depth: 0.2 in (0.5 cm) on every edge
Materials
Yarn: Use a smooth DK cotton with good stitch definition, so the mesh stays square and open. Fuzzy or very loose yarns blur the grid.
- Sage green: 15 g (36 m)
The quantity includes a margin for your gauge swatch and weaving in ends. A single ornament uses less than this.
Tools:
– 3.5 mm (E-4) crochet hook
– Tapestry needle
– Scissors
– 2 stitch markers
– Blocking mat and rust-proof pins
– Spray starch (optional, for crisp ornaments)
– 8 in (20.3 cm) of jute twine or thin ribbon for hanging (optional)
Abbreviations (US Terms)
- ch – chain
- sl st – slip stitch
- sc – single crochet
- dc – double crochet
- dtr – double treble crochet
- sk – skip
- sp – space
- st(s) – stitch(es)
- rep – repeat
- RS – right side
Mesh: one dc plus one ch-1 sp. A row of M meshes has (2 × M) + 1 stitches, because the row ends with a closing dc. The ch-3 turning chain at the start of a row always counts as the first dc.
Special stitches:
- Decrease 1 mesh at both ends (dec row): Turn. Sl st in the first 3 sts (edge dc, ch-1 sp, next dc), then ch 3 (counts as dc). Work the row as given, stop at the second-to-last dc, and leave the last ch-1 sp and the edge stitch unworked.
- Start increase (start-inc): Ch 6 and turn. Dc in the dc at the base of the ch-6. The 6 chains act as 2 base ch + 3 ch for the new edge dc + 1 ch for the space, which adds 1 mesh.
- End increase (end-inc): Ch 1, then work a dtr into the same stitch as the last dc made. The extra wraps of the dtr act as the base of the new mesh, which adds 1 mesh.
Gauge and Checkpoints
Gauge: 10 meshes = 4 in (10.2 cm) wide and 8 rows = 4 in (10.2 cm) tall in filet mesh. That works out to 5 sts per inch across a row. Each mesh is 0.4 in (1.0 cm) wide and each row is 0.5 in (1.3 cm) tall.
Use your first ornament as the test piece. Measure after Row 1, before you commit to more rows.
Checkpoints:
– After Row 1: 5.2 in (13.2 cm) wide
– After Row 3: 1.5 in (3.8 cm) tall
– After Row 4: 4.4 in (11.2 cm) wide at the overhang
– After Row 6: 3.0 in (7.6 cm) tall
– After Row 11: 5.5 in (14.0 cm) tall
– Trunk: 1.0 in (2.5 cm) wide × 1.0 in (2.5 cm) long
– After the border: 5.6 in (14.2 cm) × 6.9 in (17.5 cm)
If Row 1 is too wide (over 5.4 in / 13.7 cm), go down to a 3.25 mm hook. If it is too narrow (under 5.0 in / 12.7 cm), go up to a 3.75 mm hook. If your rows are too tall, wrap the dc loops more snugly. Short rows can be eased longer during blocking.
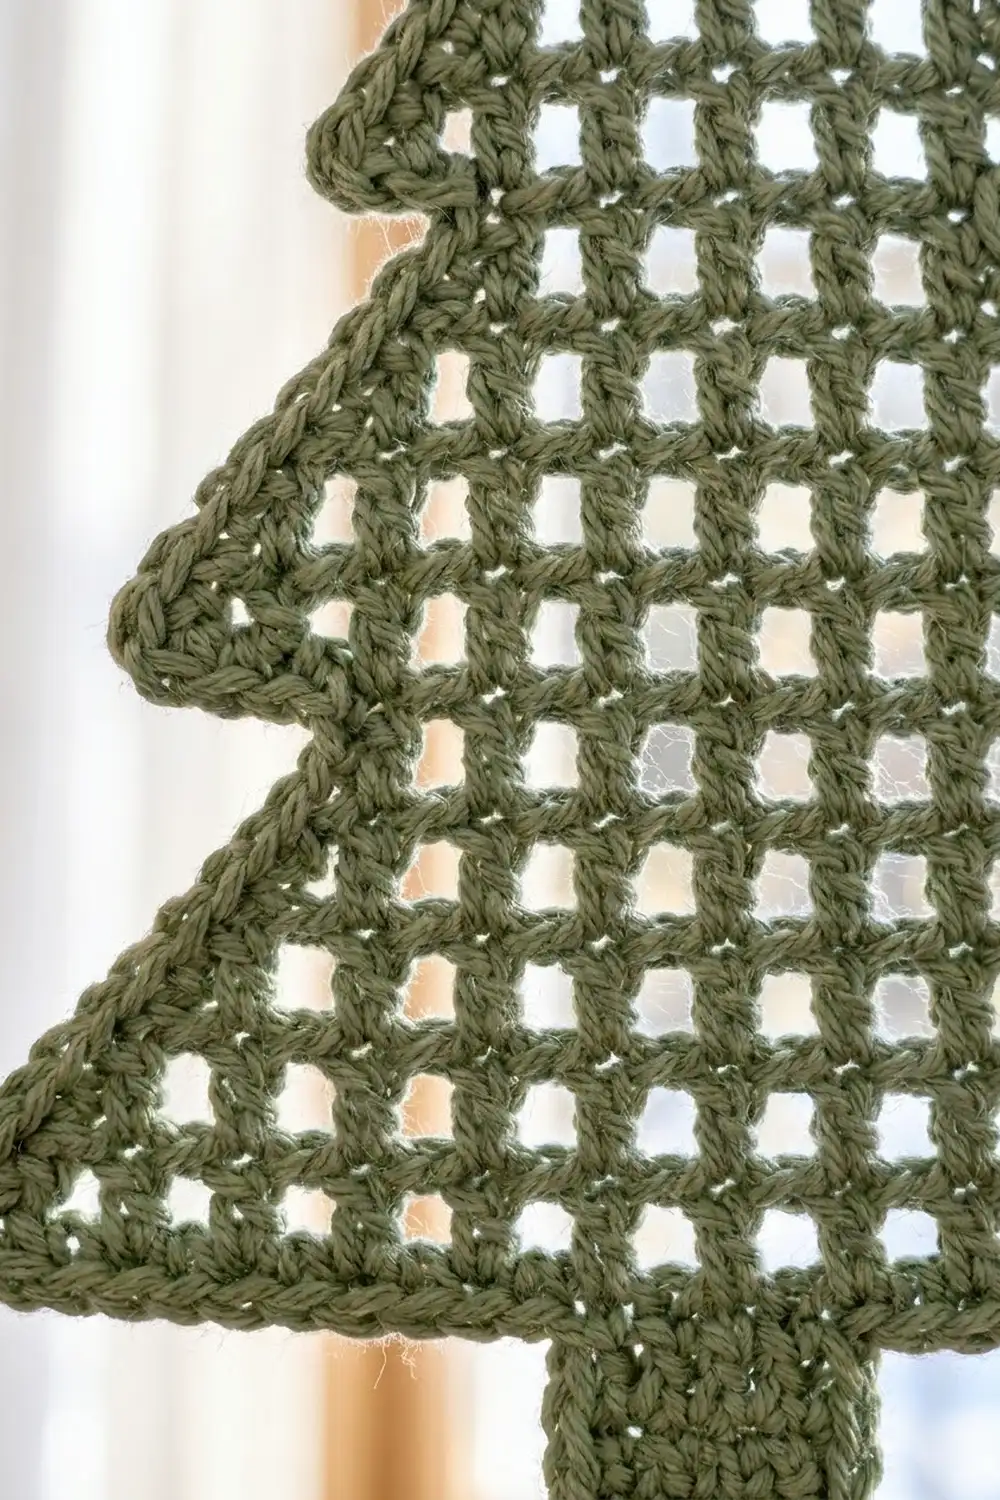
Tree Body
You work the body back and forth in rows, bottom to top. Each tier narrows by 1 mesh at both ends on every row. At the start of a new tier, the row grows by 1 mesh at both ends, which creates the overhang.
Foundation: Ch 30.
Row 1: Dc in the 6th ch from hook. The skipped chains count as dc, ch-1 sp and 1 base ch. Ch 1, sk next ch, dc in next ch; rep from * across. 13 meshes (27 sts: 14 dc + 13 ch-1 sps).*
Check: 1 mesh from the first dc + 12 repeats = 13 meshes, and 2 × 13 + 1 = 27 sts.
Tier 1
Row 2 (dec row): Turn, sl st in the first 3 sts, ch 3 (counts as dc). (Ch 1, sk ch-1 sp, dc in next dc) 11 times. Leave the last mesh unworked. 11 meshes (23 sts).
Row 3 (dec row): Turn, sl st in the first 3 sts, ch 3. (Ch 1, sk ch-1 sp, dc in next dc) 9 times. Leave the last mesh unworked. 9 meshes (19 sts).
Checkpoint: the piece is 1.5 in (3.8 cm) tall.
Tier 2
Row 4 (increase row): Start-inc: ch 6, turn, dc in the dc at the base of the ch-6. (Ch 1, sk ch-1 sp, dc in next dc) 9 times. End-inc: ch 1, dtr in the same st as the last dc. 11 meshes (23 sts).
Count: 1 new mesh + 9 meshes over Row 3 + 1 new mesh = 11. Row 4 sticks out 1 mesh past Row 3 on each side, which makes the tier step.
Row 5 (dec row): Turn, sl st in the first 3 sts, ch 3. (Ch 1, sk ch-1 sp, dc in next dc) 9 times. Leave the last mesh unworked. 9 meshes (19 sts).
Row 6 (dec row): Work as Row 5, with 7 repeats. 7 meshes (15 sts).
Checkpoint: the piece is 3.0 in (7.6 cm) tall.
Tier 3
Row 7 (increase row): Start-inc: ch 6, turn, dc in the dc at the base of the ch-6. (Ch 1, sk ch-1 sp, dc in next dc) 7 times. End-inc: ch 1, dtr in the same st as the last dc. 9 meshes (19 sts).
Row 8 (dec row): Work as Row 5, with 7 repeats. 7 meshes (15 sts).
Row 9 (dec row): Work as Row 5, with 5 repeats. 5 meshes (11 sts).
Row 10 (dec row): Work as Row 5, with 3 repeats. 3 meshes (7 sts).
Row 11 (dec row): Turn, sl st in the first 3 sts, ch 3, ch 1, sk ch-1 sp, dc in next dc. 1 mesh (3 sts).
Fasten off. Checkpoint: the body is 5.5 in (14.0 cm) tall and 5.2 in (13.2 cm) wide at the base.
Mesh counts by row: 13, 11, 9 | 11, 9, 7 | 9, 7, 5, 3, 1.
Trunk
You work the trunk into the underside of the foundation chain, so it hangs centered below Row 1.
Hold the body upside down, with the foundation edge on top. The foundation has 27 stitch positions, one for each st of Row 1. Count 11 positions in from the right-hand corner and place a marker in the 12th. Also mark the 16th position, so 11 positions stay free on each side.
Trunk Row 1: Join yarn with a sl st in the marked 12th position. Ch 3 (counts as dc), then dc in the next 4 positions, ending in the 16th. 5 dc.
Trunk Row 2: Ch 3, turn, dc in the next 4 sts. 5 dc.
Do not fasten off. The trunk measures 1.0 in (2.5 cm) wide × 1.0 in (2.5 cm) long. Continue straight into the border.
Border
Border gauge: 5 sc = 1 in (2.5 cm) along a straight edge. That matches the body’s 5 sts per inch, so you work 1 sc into each stitch along horizontal edges. Each row-end post is 0.5 in (1.3 cm) tall and gets 2 sc. This sits slightly under the straight-edge rate, which keeps the stepped diagonal sides firm instead of wavy.
Placement rules:
– Post: 2 sc around each row-end post (the side of an edge dc, turning chain or dtr).
– Ledge: 2 sc on each ledge, meaning the 2 unworked sts at the top of a row where the next row is narrower.
– Overhang: 2 sc into the base of each overhang (the underside of the chains or dtr wraps from a start-inc or end-inc).
– Corners: 3 sc into each outer corner stitch. Inner corners get nothing extra.
Border Round: Ch 1, turn. Work the sections below in order.
- Trunk bottom: 3 sc in the first st, sc in the next 3 sts, 3 sc in the last st. 9 sc.
- Trunk side: 2 sc around each of the 2 trunk row-end posts. 4 sc.
- Bottom ledge: Work along the foundation underside to the outer corner: sc in the next 10 positions, 3 sc in the corner position. 13 sc.
- First diagonal side: Work from Row 1 up to Row 11. 42 sc.
- Rows 1 and 2: post, then ledge.
- Row 3: post only.
- Row 4: overhang, post, ledge.
- Row 5: post, then ledge.
- Row 6: post only.
- Row 7: overhang, post, ledge.
- Rows 8–10: post, then ledge.
- Row 11: post.
- Apex: Sc in the edge dc, then (sc, ch 10, sc) in the ch-1 sp, then sc in the last dc. 4 sc plus the ch-10 hanging loop.
- Second diagonal side: Mirror the first side from Row 11 down to Row 1. 42 sc.
- Bottom ledge: 3 sc in the corner position, then sc in the next 10 positions up to the trunk. 13 sc.
- Trunk side: 2 sc around each of the 2 trunk row-end posts. 4 sc.
Sl st to the first sc. 131 sc total, plus the hanging loop. Fasten off.
Why the math works:
– Each diagonal side: 11 posts × 2 = 22, plus 8 ledges × 2 = 16 (Rows 1, 2, 4, 5, 7, 8, 9 and 10), plus 2 overhangs × 2 = 4. 22 + 16 + 4 = 42.
– Each bottom ledge: 11 positions, with the corner position worked 3 times: 10 + 3 = 13. Two ledges of 11 plus the trunk’s 5 makes all 27 foundation positions.
– Total: 9 + 4 + 13 + 42 + 4 + 42 + 13 + 4 = 131.
The border adds 0.2 in (0.5 cm) on each edge. Width: 5.2 + 0.4 = 5.6 in (14.2 cm). Height: 6.5 + 0.4 = 6.9 in (17.5 cm).
Final Blocking
- Weave in all ends along the border, not across the open mesh, so they don’t show when light shines through.
- Wet the ornament fully in cool water and gently press out the excess. Don’t wring it.
- Lay it flat on the blocking mat with the RS up.
- Pin the apex, the two bottom corners and the trunk corners first, to 5.6 in (14.2 cm) wide and 6.9 in (17.5 cm) tall.
- Pin the 4 overhang points so each tier sticks out evenly on both sides.
- Push a pin through a few meshes on each row to square them to about 0.4 in (1.0 cm) wide × 0.5 in (1.3 cm) tall.
- Spray with starch if you’d like a stiff ornament.
- Let it dry completely before you unpin it.
- Thread twine through the hanging loop and knot it.
Final Quality-Control Checklist
- Row mesh counts match: 13, 11, 9, 11, 9, 7, 9, 7, 5, 3, 1.
- Both overhangs (Rows 4 and 7) stick out exactly 1 mesh on each side.
- The trunk is centered, with 11 free foundation positions on each side.
- The border has 131 sc, with 42 on each diagonal side.
- The finished size is 5.6 in (14.2 cm) × 6.9 in (17.5 cm).
- The ornament lies flat, with no ruffling along the diagonals.
- All ends are hidden inside the border.
- The hanging loop is centered at the apex and secure.
Troubleshooting
The tree leans to one side. You probably skipped a sl st or a repeat on one decrease row. Count meshes on every row against the list.
The mesh looks lopsided or squashed. Make sure you skip exactly one stitch under every ch-1, and that your ch-1s are no tighter than your dc.
The overhang chain looks loose. That’s normal before the border. The 2 sc worked into the base of the overhang pull it into shape. You can also make the ch-6 slightly tighter.
The diagonal sides ruffle. You’ve added extra sc to the posts. Stick to 2 sc per post.
The diagonal sides pull inward or cup. Work your border sc a little looser, or go up half a hook size for the border only.
The trunk is off-center. Pull out the trunk, recount the foundation positions from each corner and rejoin in position 12.
The finished piece is too big or too small. Check Row 1 against 5.2 in (13.2 cm) and change hook size as described in the gauge section.
Care
Hand wash in cool water and lay flat to dry. If you used starch, add it again after washing to keep the ornament crisp.
Final Notes
Everything in this ornament follows one chain of measurements. Each mesh is 0.4 in (1.0 cm) wide and each row is 0.5 in (1.3 cm) tall. Row 1 has 13 meshes, so the body base is 5.2 in (13.2 cm) wide. Eleven rows give a body 5.5 in (14.0 cm) tall, and the two-row trunk adds 1.0 in (2.5 cm), for 6.5 in (16.5 cm) before the border. The 131-sc border adds 0.2 in (0.5 cm) on every edge, which brings the ornament to 5.6 in (14.2 cm) × 6.9 in (17.5 cm).
If you check each stage against those numbers, every tree you make will match the last one.
Happy crocheting!