

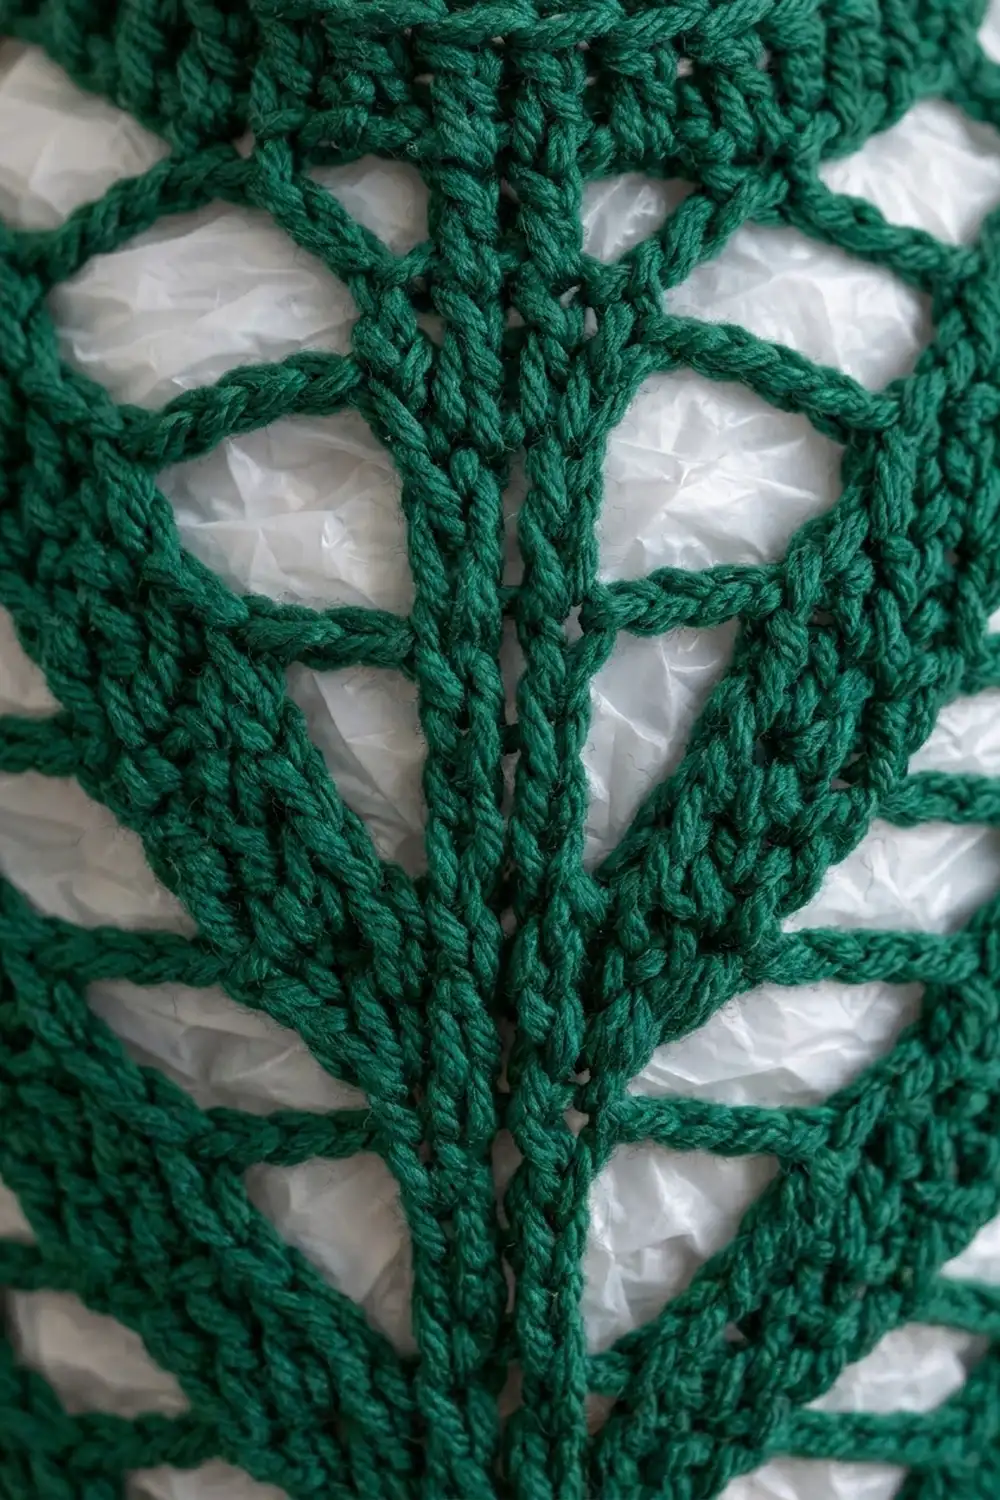
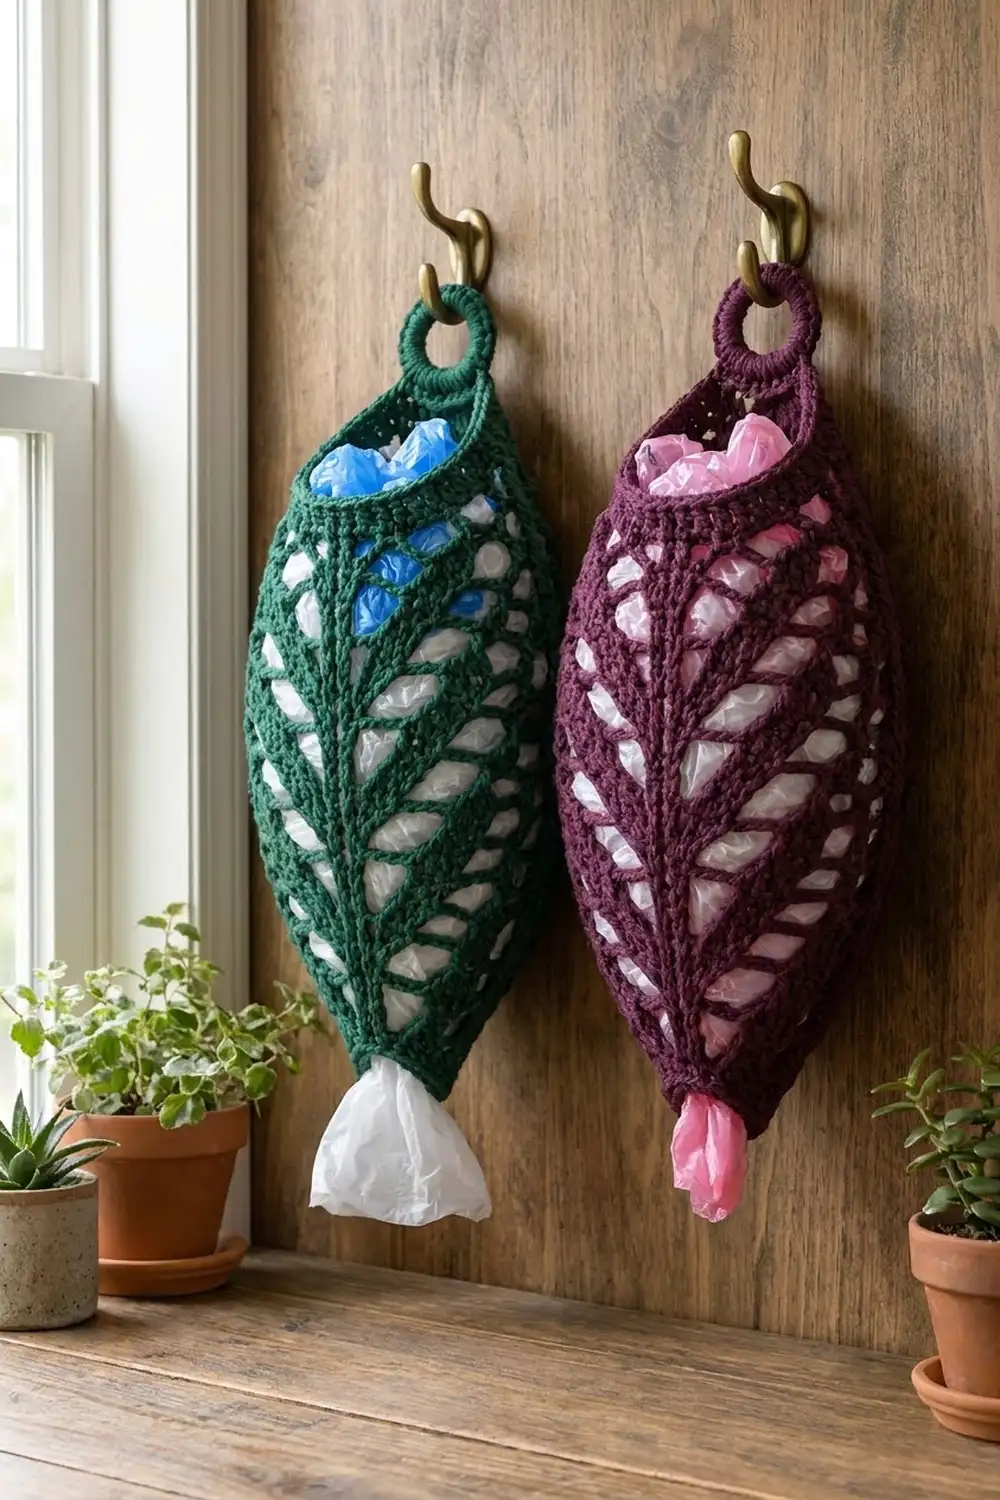
This grocery bag holder looks like a long leaf hanging on the wall. A thick spine runs down the center front and center back. Solid veins sweep up and away from it, and open almond-shaped windows sit between the veins so you can see the bags stored inside.
The sample is worked in deep forest green. It looks just as good in plum, sage, or any solid color that shows off the texture. A firm cotton or cotton blend works best because it holds the lace open and wears well near a busy kitchen door.
The pattern uses US crochet terms. The finished holder measures about 8.3 in (21.1 cm) wide when laid flat at its widest point. The body is 14.5 in (36.8 cm) tall, and the total length is about 17.25 in (43.8 cm) including the hanging ring.
The holder is worked in one piece from the bottom up. You start with a small solid cuff, then work a lace ripple in joined rounds that grows, stays straight, and tapers again. A solid rim finishes the top, and a short tab joins and covers the hanging ring without cutting the yarn.
Finished Size and Construction
- Finished size: 8.3 in (21.1 cm) wide flat × 14.5 in (36.8 cm) body height; about 17.25 in (43.8 cm) with the ring
- Skill level: Intermediate
- Terminology: US
- Yarn weight: Worsted (#4), cotton or cotton blend
- Hook: 5.0 mm (H-8)
- Number of pieces: 1, worked continuously (body, rim, tab, and ring cover)
- Layout: Vertical tube, with spines at center front and center back and side peaks at the left and right edges
- Bottom cuff: 5.7 in (14.5 cm) around, 2.9 in (7.4 cm) wide flat
- Size before rim: 13.5 in (34.3 cm) tall
- Rim depth: 1 in (2.5 cm)
- Top opening: 9.7 in (24.6 cm) around, 4.9 in (12.4 cm) wide flat
Materials
Yarn: Use a smooth worsted-weight cotton or cotton blend with good stitch definition. Fuzzy or very soft acrylic will blur the veins and let the windows sag.
- Main color (Forest Green, or Plum for the alternate): 100 g / 185 m (202 yd)
This quantity includes a margin of about 25% over what the sample used, so you have room for a gauge swatch and small adjustments.
Tools:
– 5.0 mm (H-8) crochet hook
– One 1.5 in (3.8 cm) metal or plastic ring
– 4 locking stitch markers
– Tapestry needle
– Scissors
– Tape measure
– Spray bottle and a towel or balloon (for blocking)
Abbreviations (US Terms)
- ch – chain
- sl st – slip stitch
- sc – single crochet
- hdc – half double crochet
- dc – double crochet
- sk – skip
- sp – space
- st(s) – stitch(es)
- rnd – round
- beg – beginning
Special stitch:
– dc3tog (spine decrease): *Yarn over, insert the hook in the next st, pull up a loop, yarn over, pull through 2 loops; repeat from * in each of the next 2 sts (4 loops on the hook), yarn over, and pull through all 4 loops. It always uses the last st before the spine, the spine st itself, and the first st after it. The finished dc3tog becomes the new spine.
Pattern terms:
– Peak: the ch-2 sp at each side edge.
– Stretch: the stitches between a peak and a spine. There are 4 stretches per round (A and B on the front, C and D on the back).
– Counting: every chain in a ch-3 window counts as 1 st. The ch-2 sps at the peaks are not counted as stitches.
– Beg ch-3 counts as a dc. Join every round with a sl st to the top of the beg ch (or the first sc). Do not turn; the right side faces you throughout.
Gauge and Checkpoints
- Single crochet in rounds: 14 sc × 16 rnds = 4 in (10.2 cm)
- Lace ripple: 14 sts (chains counted) × 8 rnds = 4 in (10.2 cm), so each lace round is about 0.5 in (1.3 cm) tall
Test first: Work Rnds 1–6 as your test piece, then flatten it and measure.
- After Rnd 4, the cuff should be 5.7 in (14.5 cm) around and 1 in (2.5 cm) tall.
- After Rnd 6, there are 22 sts plus two ch-2 peaks (26 width units). It should measure 7.4 in (18.8 cm) around, or 3.7 in (9.4 cm) wide flat.
If your piece is too big (more than 0.25 in / 0.6 cm over), go down one hook size. If it is too small, go up one hook size. Changing the hook keeps the stitch math intact, so don’t add or remove stitches.
Later checkpoints (height measured from the bottom edge):
– After Rnd 13: 5.5 in (14.0 cm) tall and 8.3 in (21.1 cm) wide flat
– After Rnd 22: 10 in (25.4 cm) tall
– After Rnd 29: 13.5 in (34.3 cm) tall
– After the rim: 14.5 in (36.8 cm) tall
Open-Round Stretch Sequences
Every even (open) round uses one of these sequences. “Stretch A” is worked from a peak toward a spine. “Stretch B” is the mirror image, worked from a spine toward the next peak. Stretch C repeats A, and D repeats B.
| Stretch size (n) | Stretch A (after the peak dc) | Stretch B (after the dc3tog) |
|---|---|---|
| 5 | ch 3, sk 3, dc in next | dc in next, ch 3, sk 3 |
| 7 | ch 3, sk 3, dc in next 3 | dc in next 3, ch 3, sk 3 |
| 9 | (ch 3, sk 3, dc in next) twice | (dc in next, ch 3, sk 3) twice |
| 11 | (ch 3, sk 3, dc in next) twice, dc in next 2 | dc in next 3, ch 3, sk 3, dc in next, ch 3, sk 3 |
| 13 | (ch 3, sk 3, dc in next) 3 times | (dc in next, ch 3, sk 3) 3 times |
Each sequence gives a stretch of exactly n sts (the peak dc plus the chains and dc). A ch-3 window always sits next to each peak, and a dc always sits next to each spine.
Open round, general method: Sl st into the first peak ch-2 sp, then ch 3, ch 2, dc in the same sp. Work Stretch A, dc3tog, work Stretch B*, then (dc, ch 2, dc) in the next ch-2 sp. Repeat from * to ** once, then sl st to the top of the beg ch-3.
Pattern
Bottom Cuff
Foundation: Ch 20 and join with a sl st to form a ring, taking care not to twist the chain.
Rnd 1: Ch 1, sc in each ch around, join. (20 sc)
Rnds 2–4: Ch 1, sc in each st around, join. (20 sc)
Place markers in sts 1, 6, 11, and 16:
– Sts 1 and 11 become the peaks (sides).
– Sts 6 and 16 become the spines (st 6 is center front, st 16 is center back).
Lace Body: Growth Section
Rnd 5 (solid setup, conversion round): Ch 3, ch 2, dc in st 1. Dc in sts 2–10. (dc, ch 2, dc) in st 11. Dc in sts 12–20, join.
Count: 20 sts worked 1 per st + 2 extra dc at the peaks = 22 sts. That is 4 stretches of 5 plus 2 spine dc, plus 2 ch-2 peaks. Move the spine markers up to the dc in sts 6 and 16.
Rnd 6 (open, n=5): Work an open round using the n=5 sequences. (22 sts)
Rnd 7 (solid growth):
1. Sl st into the ch-2 sp. Ch 3, 2 dc, ch 2, 3 dc in the same sp.
2. Dc in each st (including each chain) until 1 st remains before the spine, then dc3tog.
3. Dc in each st up to the next peak*. (3 dc, ch 2, 3 dc) in the ch-2 sp.
4. Repeat from * to ** once, then join.
Each stretch now has 7 sts: 3 peak dc + 4 carried over. Count: 30 sts.
Rnd 8 (open, n=7): (30 sts)
Rnd 9 (solid growth, as Rnd 7): (38 sts), stretches of 9
Rnd 10 (open, n=9): (38 sts)
Rnd 11 (solid growth): (46 sts), stretches of 11
Rnd 12 (open, n=11): (46 sts)
Rnd 13 (solid growth): (54 sts), stretches of 13
Checkpoint: 54 sts plus 4 peak chains = 58 units, which is 16.6 in (42.2 cm) around, or 8.3 in (21.1 cm) flat.
Lace Body: Straight Section
Solid regular round:
1. Sl st into the ch-2 sp. Ch 3, ch 2, dc in the same sp.
2. Dc in each st until 1 st remains before the spine, then dc3tog.
3. Dc in each st up to the next peak. (dc, ch 2, dc) in the ch-2 sp.
4. Repeat from * to ** once, then join. (54 sts)*
Rnds 14, 16, 18, 20, 22: Open round, n=13. (54 sts)
Rnds 15, 17, 19, 21: Solid regular round. (54 sts)
Because the spines lose 2 sts each round (dc3tog) and the peaks gain 2 each round, the count stays the same. That trade is what bends every band into the V-shaped veins.
Lace Body: Taper
Solid decrease round:
1. Sl st into the ch-2 sp. Ch 3, ch 2, dc in the same sp.
2. Dc3tog over the 3 chains of the next window. Dc in each st until 1 st remains before the spine, then dc3tog.
3. Dc in each st until 3 sts remain before the peak, then dc3tog over those 3 chains*. (dc, ch 2, dc) in the ch-2 sp.
4. Repeat from * to ** once, then join.
Each stretch loses 2 sts.
Rnd 23 (solid decrease): (46 sts), stretches of 11
Rnd 24 (open, n=11): (46 sts)
Rnd 25 (solid decrease): (38 sts), stretches of 9
Rnd 26 (open, n=9): (38 sts)
Rnd 27 (solid decrease): (30 sts), stretches of 7
Rnd 28 (open, n=7): (30 sts)
Rnd 29 (solid regular): (30 sts)
This round closes the last row of windows. Checkpoint: the piece is 13.5 in (34.3 cm) tall.
Border: Top Rim and Hanging Ring
Rim gauge: 14 sc = 4 in (10.2 cm), and 4 rnds = 1 in (2.5 cm).
Rnd 30 (leveling, conversion round):
1. Sl st into the ch-2 sp. Ch 1, 2 sc in the same sp.
2. Sc in the next 3, hdc in the next 2, dc in the next 2, dc in the spine, dc in the next 2, hdc in the next 2, sc in the next 3*. 2 sc in the next ch-2 sp.
3. Repeat from * to ** once, then join.
Count: 30 sts worked 1 per st + 4 extra sc in the 2 peak sps = 34 sts.
The taller stitches fill the dip at each spine, so the top edge comes out straight.
Rnds 31–33: Ch 1, sc in each st around, join. (34 sc) Do not fasten off.
Per side: The front and back each have 17 sts. Each half gets 1 of the 2 sc from each peak sp: 1 + 7 + 1 + 7 + 1 = 17. That makes 17 + 17 = 34, and there are no corner stitches to add because the rim is a tube. The opening measures 9.7 in (24.6 cm) around, or 4.9 in (12.4 cm) flat. The 2 sc per peak keep the rim from pulling in over the ch-2 sps, so the opening stays wide enough for a hand.
Tab: Counting from the beginning of Rnd 30, the back spine is st 27. Sl st across to st 25 of Rnd 33.
- Row 1: Ch 1, sc in sts 25–29, turn. (5 sc)
- Rows 2–3: Ch 1, sc in each st, turn. (5 sc) The tab is now 0.75 in (1.9 cm) tall.
- Row 4 (ring join): Hold the ring just above the tab. Ch 1, then work 5 sc, inserting the hook into each tab st and around the ring.
- Ring cover: Keep working sc around the ring only until it is covered, 19 sc. Sl st to the first sc of Row 4. (24 sc around the ring)
Push the stitches together as you go. If your ring is thicker or thinner, add or skip 1–2 sc so the cover lies flat without ruffling. Fasten off and weave in the ends.
The covered ring measures about 2.25 in (5.7 cm) across. Together, the tab and ring add about 2.75 in (7.0 cm), for a total length of about 17.25 in (43.8 cm).
Final Blocking
- Mist the holder until it is evenly damp. Don’t soak it.
- Stuff it firmly with a rolled towel, or insert a balloon inflated to about 8.3 in (21.1 cm) across.
- Line the spines up at the center front and center back, and the peaks along the sides.
- Gently tug each window open lengthwise with your fingertips so it forms an almond shape.
- Pat the rim and cuff into neat, even circles.
- Let it dry completely, then remove the stuffing.
Final Quality-Control Checklist
- [ ] The cuff is 20 sc and lies flat without flaring.
- [ ] Each spine is a single straight column of dc3tog stacked from Rnd 6 to Rnd 29.
- [ ] Every round has the stated count: 22, 30, 38, 46, 54, then back down to 30.
- [ ] Every window is a ch-3 and sits next to a peak.
- [ ] The rim is 34 sc with a level top edge.
- [ ] The tab is centered over the back spine.
- [ ] The ring is fully covered.
- [ ] The body measures 14.5 in (36.8 cm) tall and 8.3 in (21.1 cm) wide flat.
Troubleshooting
- The spine wanders to one side. The dc3tog is off center. Its middle leg must go into the previous spine st.
- The count is off by 2 after a round. A peak was worked as a single dc, or a growth round got the regular (dc, ch 2, dc) peak by mistake. Check the peak dc first.
- The windows look like round holes. Your tension is tight on the chains. Chain a little more loosely, or block more firmly.
- The top edge is wavy. Rnd 30 used the wrong heights. Rework it with dc at the spines and sc at the peaks.
- Bags fall out the bottom. Work 1–2 extra cuff rounds, or go down one hook size for the cuff only.
Care
Hand wash or machine wash cool on a gentle cycle. Reshape while damp and dry flat or stuffed. Avoid high heat, which can shrink cotton unevenly.
Final Notes
Each measurement builds on the one before it:
- The 20-st cuff measures 5.7 in (14.5 cm) around.
- Four growth rounds take it to 54 sts, or 8.3 in (21.1 cm) flat.
- Nine straight rounds bring the height to 10 in (25.4 cm).
- Three taper rounds bring it back to 30 sts at 13.5 in (34.3 cm).
- The 34-st rim finishes the body at 14.5 in (36.8 cm).
- The tab and ring bring the total to about 17.25 in (43.8 cm).
If your gauge matches at the Rnd 6 checkpoint, every number after it will follow. Fill it with bags, hang it by the door, and make a second one in plum for a matching pair.
Happy crocheting!