

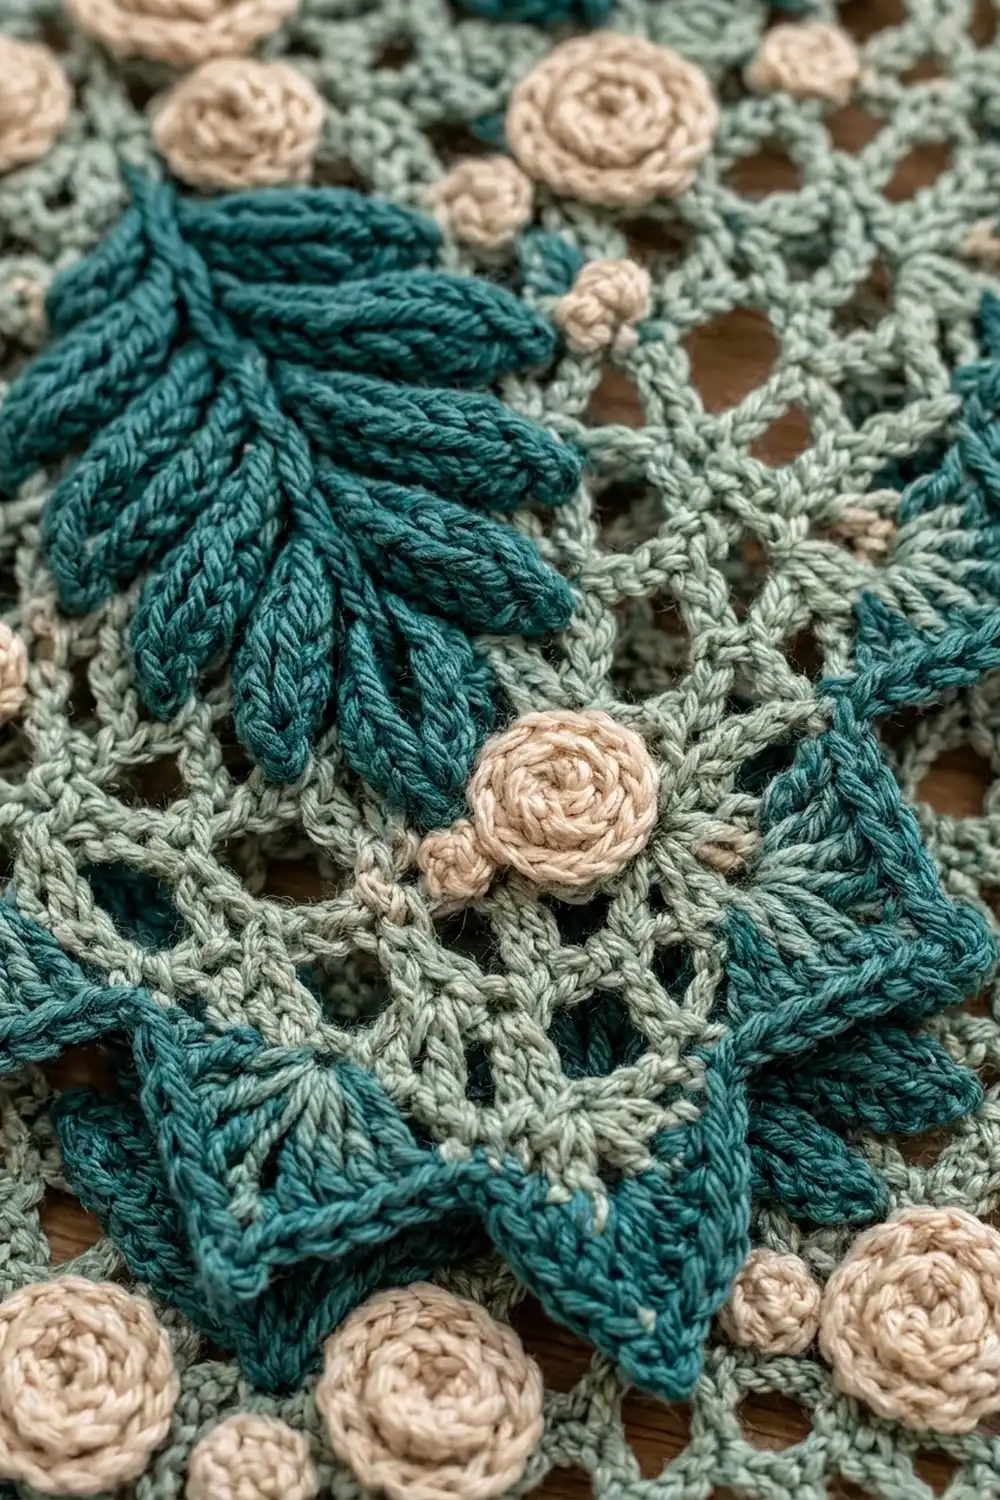
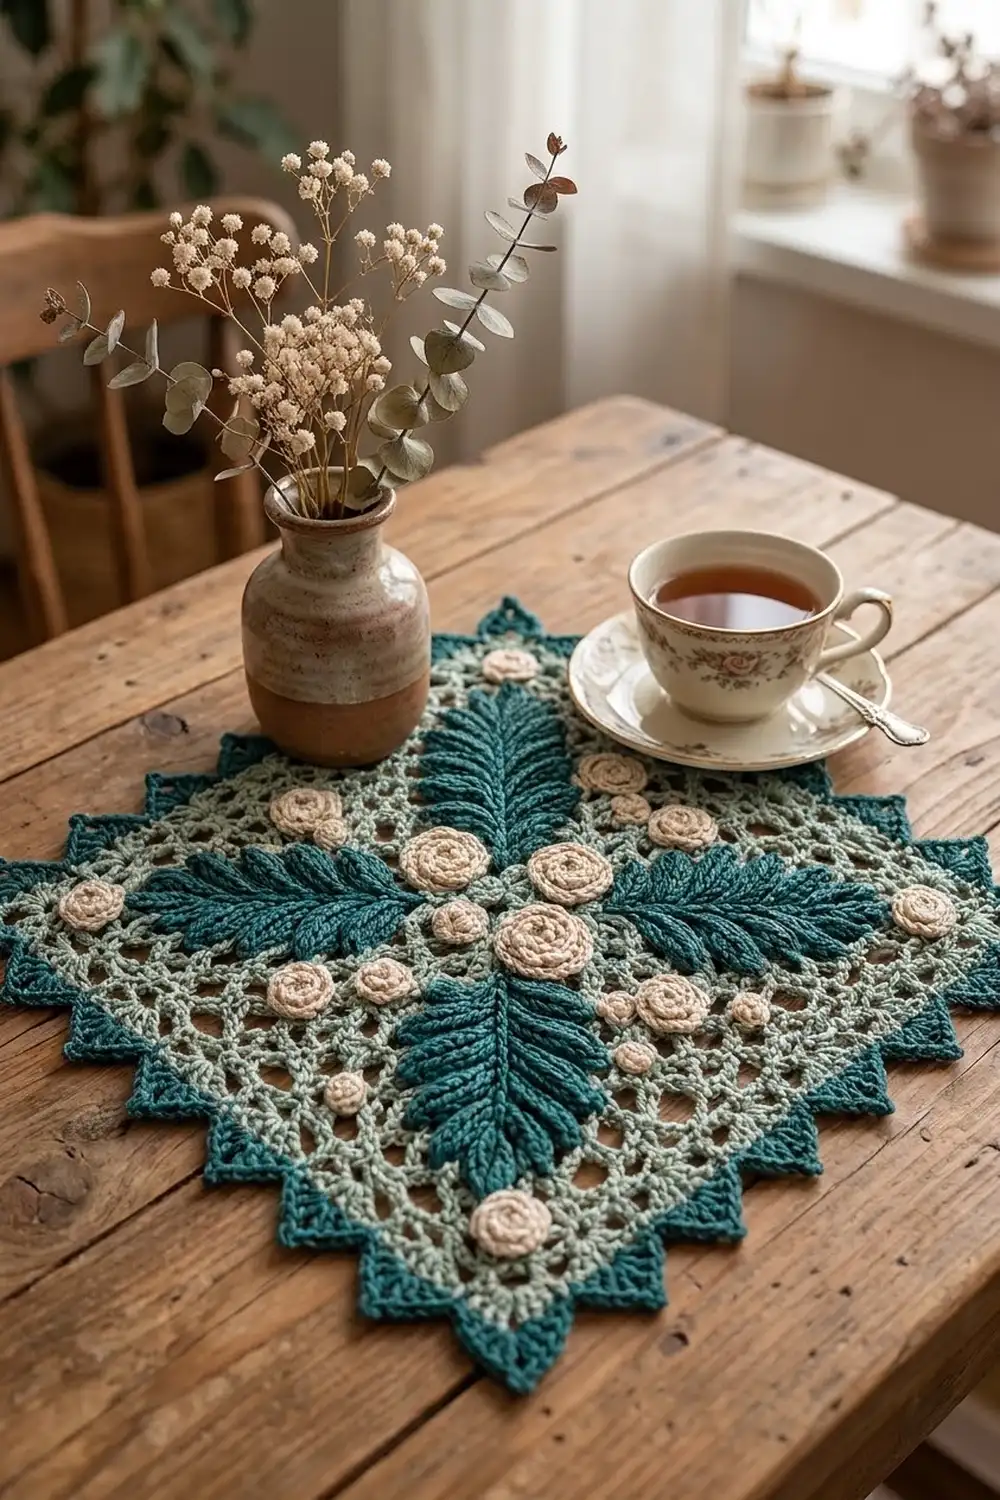
The Fern & Rosebud Lattice Doily is a single square lace piece with a soft, garden-like look. A sage-green open lattice forms the background. Four deep teal feathered fern leaves run along the diagonals toward the corners, and cream rolled roses gather at the center and sit between the leaves.
The palette uses three quiet colors: sage for the mesh, dark teal for the leaves and the pointed border, and warm cream for the roses. The leaves and roses are separate appliqués sewn on top of the mesh, so they stand up from the surface with a raised, textured look. A row of teal triangular points frames all four sides.
This pattern uses US crochet terms. The finished doily measures 10 in x 10 in (25.4 cm x 25.4 cm) after blocking, including the border.
The construction is simple. First you work the sage lattice square in rows. Next you add a sage single crochet edging and two teal border rounds. Then you make 4 fern leaves and 17 roses, sew them on, and block the whole piece.
Finished Size and Construction
- Finished size: 10 in x 10 in (25.4 cm x 25.4 cm)
- Skill level: Intermediate
- Terminology: US crochet terms
- Yarn weight: Sport (#2), cotton or cotton blend
- Hook: 3.5 mm (E-4)
- Number of pieces: 1 square doily, plus 21 small appliqués sewn onto it
- Layout: single square; leaves on the diagonals, roses at the center and between the leaves
- Lattice square size: 8 in x 8 in (20.3 cm x 20.3 cm)
- Size before border points: 8.5 in x 8.5 in (21.6 cm x 21.6 cm), after edging Rounds 1–2
- Border depth: 1 in (2.5 cm) per side in total
Materials
Choose a smooth sport-weight cotton, mercerized or matte, with good stitch definition. The leaflets and roses need crisp stitches to read clearly. The quantities below assume about 155 m per 50 g (3.1 m per g).
- Color A – Sage green (lattice and edging Round 1): 30 g, about 93 m
- Color B – Dark teal (leaves and border Rounds 2–3): 35 g, about 109 m
- Color C – Cream (roses): 10 g, about 31 m
All quantities include a margin of roughly 15–20% for gauge swatching and sewing tails.
Tools:
- 3.5 mm (E-4) crochet hook
- Tapestry needle
- Scissors
- 4–6 locking stitch markers
- Rustproof pins and a blocking mat
- Spray bottle and a ruler or tape measure
Abbreviations (US Terms)
- ch – chain
- sl st – slip stitch
- sc – single crochet
- hdc – half double crochet
- dc – double crochet
- tr – treble crochet
- sk – skip
- st(s) – stitch(es)
- sp – space
- rep – repeat
Special stitches
- Small leaflet: ch 5, sc in 2nd ch from hook, hdc in next ch, dc in next ch, hdc in last ch (4 sts).
- Large leaflet: ch 6, sc in 2nd ch from hook, hdc in next ch, dc in next 2 ch, hdc in last ch (5 sts).
- Point: sc in next st, ch 4, sc in 2nd ch from hook, hdc in next ch, dc in next ch, sk next 3 sts.
Gauge and Checkpoints
Lattice gauge: 4 ch-5 loops = 2 in (5.1 cm) across, and 21 rows = 8 in (20.3 cm) tall, lightly blocked.
Border gauge: about 6 sc = 1 in (2.5 cm).
Test the lattice first: work Rows 1–5, then measure 4 loops across. Check these points as you go:
- After Row 1: 16 loops measure 8 in (20.3 cm) wide.
- After Row 11: height is about 4.25 in (10.8 cm).
- After Row 21: 8 in x 8 in (20.3 cm x 20.3 cm).
- After edging Round 1: about 8.25 in (21.0 cm) per side.
- After edging Round 2: 8.5 in (21.6 cm) per side.
- After Round 3 and blocking: 10 in (25.4 cm) per side.
If your square is too big, go down 0.5 mm in hook size. If it’s too small, go up 0.5 mm. Don’t change the stitch counts, because the border math depends on them.
Lattice Square
With Color A, ch 66.
Row 1: Sc in 2nd ch from hook, *ch 5, sk 3 ch, sc in next ch; rep from * 15 more times, turn. (16 ch-5 loops; 17 sc)
Row 2: Ch 5 (counts as dc + ch 2), sc in first ch-5 loop, *ch 5, sc in next ch-5 loop; rep from * 14 more times, ch 2, dc in last sc, turn. (15 full loops + 2 half loops)
Row 3: Ch 1, sc in first dc, *ch 5, sc in next ch-5 loop; rep from * 14 more times, ch 5, sc in 3rd ch of turning ch-5, turn. (16 ch-5 loops)
Rows 4–21: Rep Rows 2–3 nine more times. Don’t fasten off.
You now have 21 rows:
- Row 1 and Row 21 are sc-ended rows.
- 10 rows (Rows 2, 4 … 20) end in a dc.
- 9 rows (Rows 3, 5 … 19) end in a sc.
Each loop sits on the diagonal, which gives the open diamond lattice. Keep your ch-5 loops even. Loose or tight loops show clearly once the leaves are on top.
Border
The border has three rounds. A corner st is the middle sc of a 3-sc corner group. “Between corners” means the sts between two corner sts.
Round 1 (Color A): Ch 1. Don’t turn again; you are already facing the top edge.
- Top: 3 sc in first sc (corner), 3 sc in each of the next 16 loops (48 sc), 3 sc in last sc (corner).
- Side 1: Working in the row ends of Rows 20 down to 2, work 3 sc in each dc-row end (10 x 3 = 30 sc) and 2 sc in each sc-row end (9 x 2 = 18 sc). (48 sc)
- Bottom: 3 sc in the end of Row 1 (corner). Working in the foundation ch, work 3 sc in each of the 16 groups of skipped ch (48 sc), then 3 sc in the last foundation ch (corner).
- Side 2: Work as Side 1 along Rows 2 up to 20. (48 sc)
Sl st to first sc. Fasten off Color A.
Round 1 count: 48 + 2 (one side sc from each corner group) = 50 sts between corners on every side. Total: 4 x 50 + 4 corner sts = 204 sts.
Round 2 (Color B): Join B in any corner st. Ch 1, *3 sc in corner st, sc in each of next 50 sts; rep from * 3 more times. Sl st to first sc.
Round 2 count: 50 + 2 = 52 sts between the new corner sts on each side. Total: 4 x 52 + 4 = 212 sts. If you count one corner st plus the 52 sts after it, each side segment has 53 sts.
Round 3 (Color B, points): Sl st into next st (the corner st).
- Corner point: In the corner st, work (sc, ch 5, sc in 2nd ch from hook, hdc in next ch, dc in next ch, tr in next ch, sc in same corner st).
- Side points: Work the Point 13 times.
Rep the corner point and 13 side points 3 more times. Sl st to first sc. Fasten off.
Round 3 count: Each side segment uses 1 corner st + (13 x 4) = 53 sts. 4 x 53 = 212, which matches Round 2 exactly. That gives 13 side points plus 1 corner point per side, 56 points in total.
Why the math works: The lattice has 16 loops across and 21 rows. These numbers were chosen so that 3 sc per loop (48) equals 3 sc per dc-row end plus 2 sc per sc-row end (30 + 18 = 48). That way every side starts equal. Round 2 adds 2 sts per side at the corners, giving 52, and 52 divides evenly by the 4-st point repeat.
Fern Leaves (Make 4)
With Color B, ch 26, leaving a 12 in (30.5 cm) tail for sewing.
Tip leaflet: Sc in 2nd ch from hook, hdc in next ch, dc in next 2 ch, hdc in next ch. (5 sts; 20 ch remain for the spine)
Side A (working down the spine toward the stem):
- *Sl st in next ch, small leaflet, sl st in same spine ch, sl st in next ch; rep from * 3 more times. (4 small leaflets)
- *Sl st in next ch, large leaflet, sl st in same spine ch, sl st in next ch; rep from * 3 more times. (4 large leaflets)
- Sl st in each of last 4 ch. (stem)
Side B: Ch 1 and rotate the leaf to work in the opposite loops of the foundation ch.
- Sl st in each of first 4 ch. (stem)
- *Sl st in next ch, large leaflet, sl st in same spine ch, sl st in next ch; rep from * 3 more times.
- *Sl st in next ch, small leaflet, sl st in same spine ch, sl st in next ch; rep from * 3 more times.
- Sl st at the base of the tip leaflet. Fasten off, leaving a 6 in (15.2 cm) tail.
Each leaf has 17 leaflets: 1 at the tip and 8 on each side, getting smaller from the stem to the tip. The sl sts on both sides of the spine form a raised central rib. Press the leaflets with your fingers so they lean toward the tip like a feather.
Finished leaf: about 4 in (10.2 cm) long and 2.25 in (5.7 cm) wide.
Rolled Roses (Make 17)
All roses use Color C. Leave a 10 in (25.4 cm) tail on each one.
Large rose (make 1): Ch 22. 2 hdc in 3rd ch from hook and in each ch across. (40 hdc)
Medium rose (make 4): Ch 17. 2 hdc in 3rd ch from hook and in each ch across. (30 hdc)
Small rose (make 12): Ch 12. 2 hdc in 3rd ch from hook and in each ch across. (20 hdc)
The doubled sts make the strip ruffle and curl. Starting at the first end, roll the strip into a tight spiral with the right side out. Use the tail to stitch through all layers at the base 3–4 times so the spiral holds.
Finished diameters: large 1.25 in (3.2 cm), medium 1 in (2.5 cm), small 0.75 in (1.9 cm).
Placing and Sewing the Appliqués
Lay the doily right side up and mark the center with a stitch marker.
- Leaves: Place one leaf on each diagonal. Put the stem end about 0.5 in (1.3 cm) from the center, with the tip pointing to a corner about 1 in (2.5 cm) short of the edging. Pin the spine first.
- Large rose: Center it over the 4 leaf stems so the stems are hidden.
- Medium roses: Place one on each horizontal and vertical axis, about 1.25 in (3.2 cm) from the center, between the leaf bases.
- Small roses: Place 3 in each space between two leaves. Put one on the axis about 3 in (7.6 cm) from the center, then one on each side of it about 0.75 in (1.9 cm) away, nestled against the leaflets.
Sew each leaf with small running stitches along the spine, catching the lattice sc behind it. Tack each leaflet tip with one stitch so it stays flat but raised. Sew each rose around its base with 6–8 small stitches. Weave all tails into the leaves or roses, not the open mesh, where they would show.
Final Blocking
- Soak the doily in cool water for 10 minutes, then press the water out in a towel. Don’t wring it.
- Lay it right side up on a blocking mat.
- Pin the 4 corner points first to form a 10 in x 10 in (25.4 cm x 25.4 cm) square.
- Pin the tip of every side point, keeping 13 even points between the corners.
- Check that the lattice area measures 8 in (20.3 cm) per side and the loops form even diamonds.
- Shape each leaf with your fingers so the leaflets fan evenly. Push the roses up into rounded domes.
- Let the doily dry completely, 12–24 hours, before unpinning.
Final Quality-Control Checklist
- The lattice has 16 loops across and 21 rows.
- Edging Round 1 has 50 sts between corners and 204 sts in total.
- Round 2 has 52 sts between corners and 212 sts in total.
- Each side has 13 side points plus 1 corner point.
- The finished size is 10 in x 10 in (25.4 cm x 25.4 cm).
- Each leaf has 17 leaflets, getting smaller from stem to tip.
- There are 17 roses: 1 large, 4 medium, 12 small.
- The leaves sit on the diagonals, with the stems hidden under the center rose.
- No tails show through the open mesh.
Troubleshooting
- Edges ripple after Round 1: There are too many sc on the row ends. Recount: 3 per dc-row end and 2 per sc-row end.
- Edges pull in: Your row-end sts are too tight. Work them a little looser, or go up 0.5 mm for Round 1 only.
- Points don’t fit the last side: Your Round 2 count is off. You need exactly 52 sts between corners.
- Points curl: Block firmly and pin each tip.
- Leaves twist: Your spine sl sts are too tight. Work them loosely, and block the leaf flat before sewing.
- Leaflets look uneven: Check that each leaflet starts and ends in the same spine ch.
- Roses unroll: Stitch through every layer at the base, not just the outer one.
- Lattice looks square, not diamond-shaped: Stretch it diagonally while it’s wet.
Care
Hand wash in cool water with mild soap and dry flat, reshaping the points and leaves. Don’t hang it to dry, because the open lattice can stretch.
Final Notes
The measurement chain is short and reliable:
- 16 loops and 21 rows give an 8 in (20.3 cm) lattice square.
- Edging Round 1 sets 50 sts between corners at about 8.25 in (21.0 cm).
- Round 2 brings that to 52 sts at 8.5 in (21.6 cm).
- Round 3 turns those 52 sts into 13 points per side, adding 0.75 in (1.9 cm) per side for a blocked size of 10 in x 10 in (25.4 cm x 25.4 cm).
Check each step, and the leaves and roses will settle neatly into place.
Happy crocheting!