
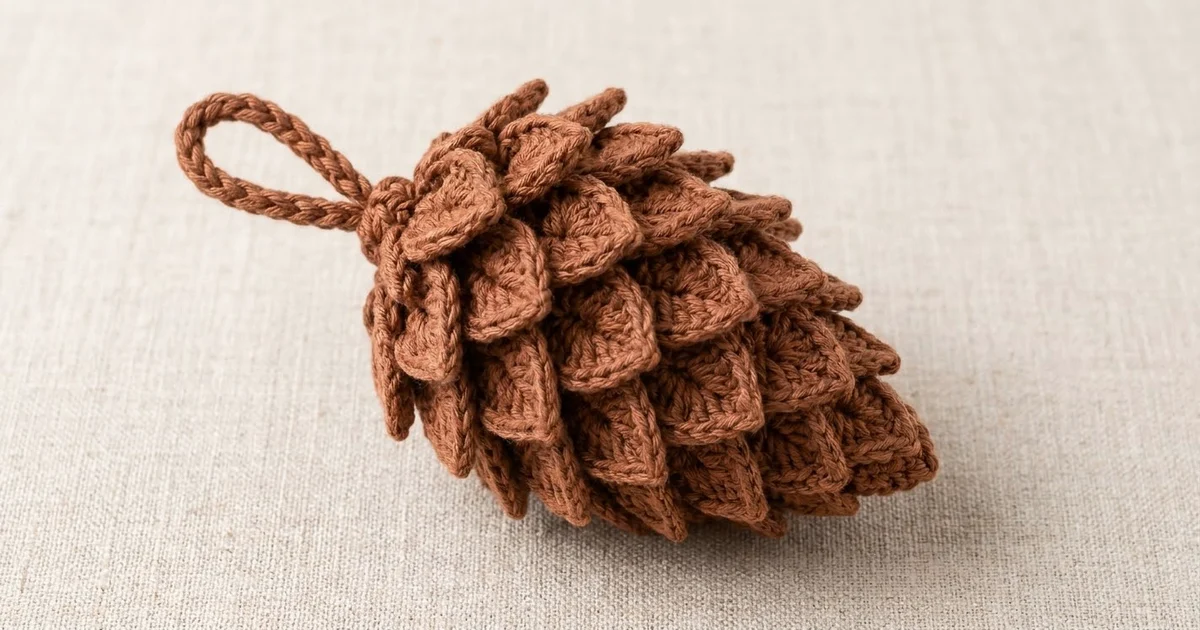
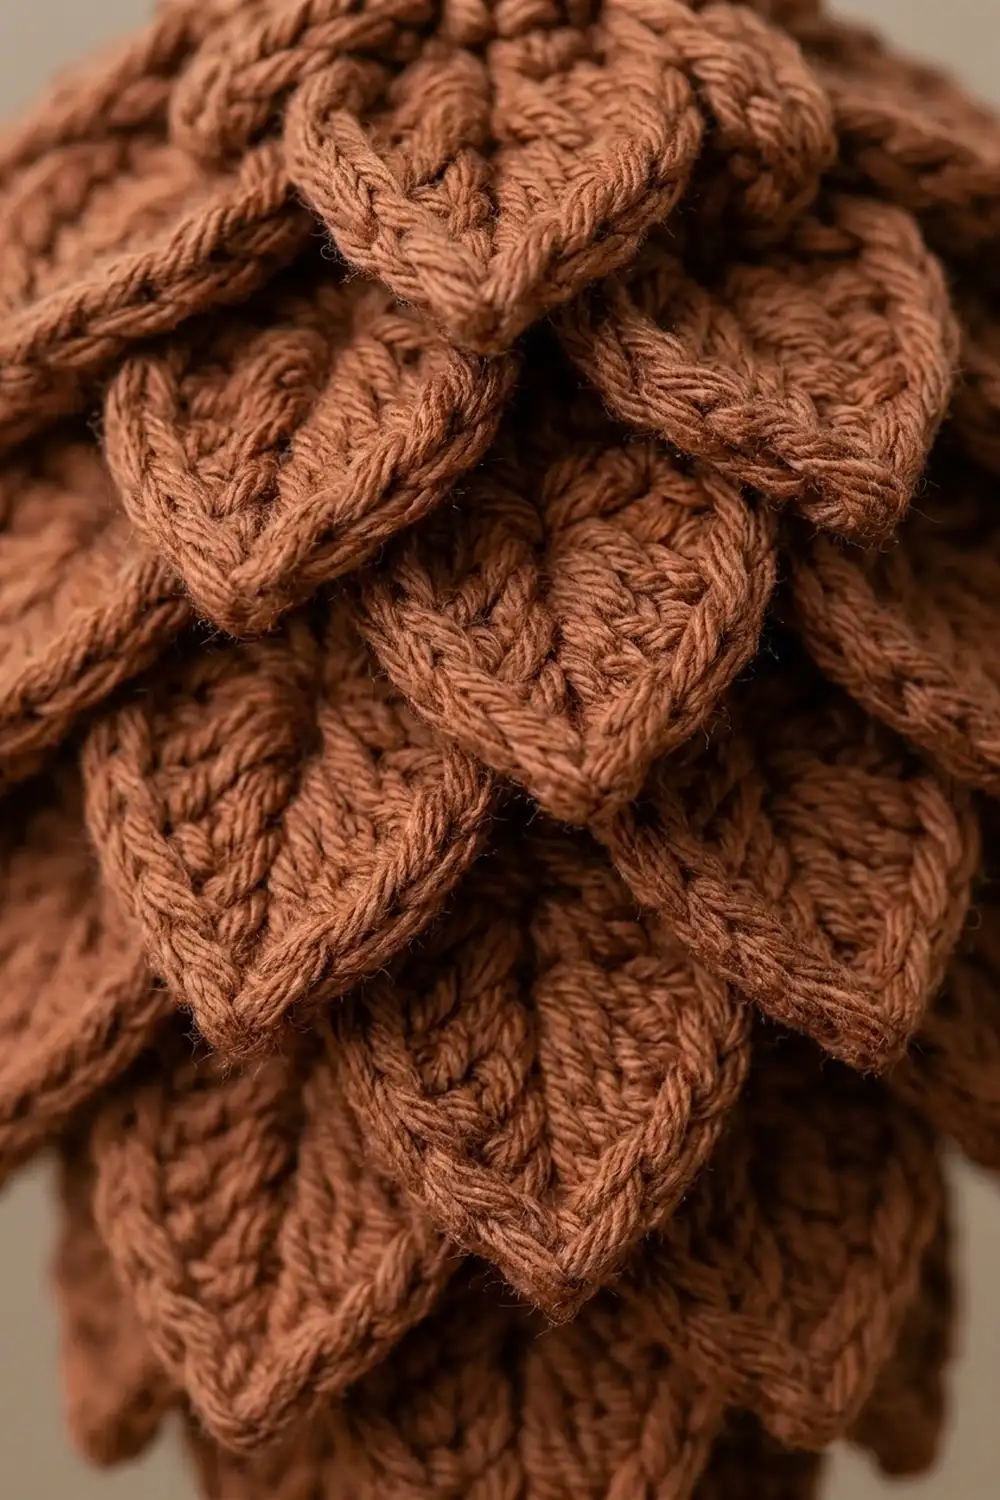
This little pinecone makes a cozy, natural-looking ornament for the tree. It is covered in overlapping, pointed scales that look like small leaves. Each scale has a fanned shape with a sharp picot tip. The tiers are staggered so that every scale sits between two scales of the tier above it.
The ornament uses one warm chestnut-brown yarn. With only one color, the texture does the work, and the shadows between the scales make it look like a real cone. A small cinched knob sits at the top, and a cord loop with a braided look makes it easy to hang.
This pattern uses US crochet terms. The finished ornament is about 3.25 in (8.3 cm) wide and 4.5 in (11.4 cm) tall from the top knob to the tip. The hanging loop adds about 2.5 in (6.4 cm), so the whole ornament is about 7 in (17.8 cm) long.
The construction is simple. You work from the top down in joined rounds, starting with a small collar ring. Single crochet body rounds shape the cone. Every third round is a scale round worked in the front loops. The next body round is worked in the back loops, behind the scales. To finish, you stuff the cone, close the tip, close the top into a knob and work the hanging cord.
Finished Size and Construction
- Finished size: 3.25 in (8.3 cm) wide x 4.5 in (11.4 cm) tall, plus a 2.5 in (6.4 cm) loop
- Skill level: Intermediate
- Terminology: US crochet terms
- Yarn weight: Worsted (#4)
- Hook: 4.0 mm (US G-6)
- Number of pieces: 1 (the cone, top knob and loop are all worked as one piece)
- Layout: One stuffed 3D cone with 10 tiers of scales
- Piece size: The body is 8 in (20.3 cm) around at its widest point, about 2.55 in (6.5 cm) across without the scales
- Size before border: 4.5 in (11.4 cm) tall, with an open top 1.25 in (3.2 cm) across
- Border depth: Top knob about 0.25 in (0.6 cm); hanging loop 2.5 in (6.4 cm)
Materials
Choose a smooth worsted-weight yarn that shows stitches clearly. Cotton, a cotton blend or a firm acrylic all work well. Avoid fuzzy or brushed yarns, because they blur the edges of the scales and the picot points.
- Yarn, chestnut brown: 30 g, about 60 m (66 yd)
- Hook: 4.0 mm (US G-6)
- Fiberfill stuffing: about 5 g
- Stitch markers: 2
- Tapestry needle
- Scissors
- Pins for blocking (optional)
All quantities include a margin of about 20 percent. The ornament itself uses about 25 g, so one 50 g ball is more than enough.
Abbreviations (US Terms)
- ch = chain
- sl st = slip stitch
- sc = single crochet
- hdc = half double crochet
- dc = double crochet
- tr = treble crochet
- inc = 2 sc in the same stitch
- sc2tog = single crochet 2 together
- FLO = front loop only
- BLO = back loop only
- st(s) = stitch(es)
- rnd(s) = round(s)
Special stitch: Scale (worked over 3 sts, all in FLO)
(Hdc, dc) in FLO of the first st; (tr, ch 3, sl st in 3rd ch from hook, tr) in FLO of the second st; (dc, hdc) in FLO of the third st.
Each scale uses exactly 3 sts of the round below. It has 6 stitches plus a picot, which gives a pointed leaf shape with the tip in the center. Work the scales side by side, with no stitches between them.
Picot: The ch 3 and the sl st into the 3rd ch from the hook make a small closed point at the top of the scale.
Gauge and Checkpoints
Gauge: 18 sc and 20 rnds = 4 in (10.2 cm) in sc worked in joined rounds. That is 4.5 sts and 5 rnds per 1 in (2.5 cm).
Work the collar first (Rnds 1 to 3) and use it as your gauge test. Lay it flat and measure it.
Checkpoint 1, after Rnd 3: The flattened collar measures 2 in (5.1 cm) across, so it is 4 in (10.2 cm) around. The three rounds are about 0.6 in (1.5 cm) tall.
Checkpoint 2, after Rnd 13 (Tier 4): The body at 36 sts measures 8 in (20.3 cm) around. Measured across the scales, the cone is about 3.25 in (8.3 cm) wide.
Checkpoint 3, after Rnd 30: The stuffed cone measures about 4.5 in (11.4 cm) from the collar edge to the tip of the last scale.
If your piece is too big: Change to a 3.5 mm (US E-4) hook. Loose gauge makes the scales floppy and lets stuffing show between the tiers.
If your piece is too small: Change to a 4.5 mm (US 7) hook. Very tight stitches make the scales curl upward instead of lying down.
Each scale should hang about 0.75 in (1.9 cm) long. Each tier has 2 body rounds, which add 0.4 in (1.0 cm) of height. So each tier covers the top 0.35 in (0.9 cm) of the tier below it, and that overlap creates the layered look.
Pattern
Joining body rounds: End each body round with a sl st into the first sc. Then ch 1, which does not count as a stitch. Place a marker in the first st of each body round.
Scale rounds: Work each scale round in the FLO of the body round you just finished. End it with a sl st into the first hdc. Then fold the scales down toward you and sl st in the BLO of the first st of that same body round. Work the next body round in its BLO, behind the scales.
Staggering: On odd-numbered tiers, start the first scale in the first st of the round. On even-numbered tiers, sl st in the FLO of the first st, then start the first scale in the 2nd st. The final (dc, hdc) of the last scale goes into the FLO of that first st. This shifts every second tier by 1 st, so the points fall between the scales above.
Collar
Rnd 1: Leave an 8 in (20.3 cm) tail. Ch 18 and join with a sl st into the first ch, taking care not to twist the chain. Ch 1, sc in each ch around, join. (18 sc)
Rnd 2: Ch 1, sc in each st around, join. (18 sc)
Rnd 3: Ch 1, sc in each st around, join. (18 sc)
Tier 1
Rnd 4 (scales, FLO of Rnd 3): Work a Scale over every 3 sts around. (6 scales, 18 sts used)
Tier 2
Rnd 5 (BLO of Rnd 3): Ch 1, sc in the next 2 sts, inc in the next st; repeat from * 6 times, join. (24 sc)
Rnd 6: Ch 1, sc in each st around, join. (24 sc)
Rnd 7 (scales, FLO of Rnd 6, staggered): Work a Scale over every 3 sts around. (8 scales, 24 sts used)
Tier 3
Rnd 8 (BLO of Rnd 6): Ch 1, sc in the next 3 sts, inc; repeat 6 times, join. (30 sc)
Rnd 9: Ch 1, sc around, join. (30 sc)
Rnd 10 (scales, FLO of Rnd 9): Work a Scale over every 3 sts around. (10 scales, 30 sts used)
Tier 4
Rnd 11 (BLO of Rnd 9): Ch 1, sc in the next 4 sts, inc; repeat 6 times, join. (36 sc)
Rnd 12: Ch 1, sc around, join. (36 sc)
Rnd 13 (scales, FLO of Rnd 12, staggered): Work a Scale over every 3 sts around. (12 scales, 36 sts used)
Measure for Checkpoint 2 now.
Tier 5
Rnd 14 (BLO of Rnd 12): Ch 1, sc in each st around, join. (36 sc)
Rnd 15: Ch 1, sc around, join. (36 sc)
Rnd 16 (scales, FLO of Rnd 15): Work a Scale over every 3 sts around. (12 scales, 36 sts used)
Tier 6
Rnd 17 (BLO of Rnd 15): Ch 1, sc in the next 4 sts, sc2tog; repeat 6 times, join. (30 sc)
Rnd 18: Ch 1, sc around, join. (30 sc)
Rnd 19 (scales, FLO of Rnd 18, staggered): Work a Scale over every 3 sts around. (10 scales, 30 sts used)
Tier 7
Rnd 20 (BLO of Rnd 18): Ch 1, sc in the next 3 sts, sc2tog; repeat 6 times, join. (24 sc)
Rnd 21: Ch 1, sc around, join. (24 sc)
Rnd 22 (scales, FLO of Rnd 21): Work a Scale over every 3 sts around. (8 scales, 24 sts used)
Tier 8
Rnd 23 (BLO of Rnd 21): Ch 1, sc in the next 2 sts, sc2tog; repeat 6 times, join. (18 sc)
Rnd 24: Ch 1, sc around, join. (18 sc)
Rnd 25 (scales, FLO of Rnd 24, staggered): Work a Scale over every 3 sts around. (6 scales, 18 sts used)
Stuff the cone firmly through the bottom opening. Push the stuffing up into the widest part so the tiers stay rounded.
Tier 9
Rnd 26 (BLO of Rnd 24): Ch 1, sc in the next st, sc2tog; repeat 6 times, join. (12 sc)
Rnd 27: Ch 1, sc around, join. (12 sc)
Rnd 28 (scales, FLO of Rnd 27): Work a Scale over every 3 sts around. (4 scales, 12 sts used)
Add a little more stuffing.
Tier 10 (Tip)
Rnd 29 (BLO of Rnd 27): Ch 1, sc2tog 6 times, join. (6 sc)
Rnd 30 (scales, FLO of Rnd 29, staggered): Work a Scale over every 3 sts around. (2 scales, 6 sts used)
Fasten off, leaving a 10 in (25.4 cm) tail. Weave the tail through the BLO of the 6 sts of Rnd 29 and pull it tight to close the tip. Secure the tail and hide the end inside the cone.
Stitch count summary: The body rounds go 18, 24, 30, 36, 36, 30, 24, 18, 12, 6. The scale tiers go 6, 8, 10, 12, 12, 10, 8, 6, 4, 2, for 78 scales in total. Each scale round uses every stitch of its body round, at 3 sts per scale.
Border: Top Closure and Hanging Loop
On this ornament, the “border” is the finish at the top: a two-round closure that makes the knob, and a cord loop worked straight from it. The edge is a single circle, so there are no sides or corners to count.
Border gauge: Sl st cord: 6 sts = 1 in (2.5 cm).
Hold the cone upside down so the collar opening faces you. Join the yarn in any of the remaining loops of the Rnd 1 foundation chain.
Closure Rnd 1: Ch 1, sc2tog over each pair of foundation loops around, join. (9 sts: 18 loops worked 2 at a time)
Closure Rnd 2: Ch 1, sc2tog 4 times, sc in the last st, join. (5 sts: 4 sc2tog + 1 sc)
Thread the 8 in (20.3 cm) starting tail from Rnd 1 through the front loops of the 5 sts and pull it tight. This closes the top into a small round knob about 0.25 in (0.6 cm) high.
Hanging loop: From the joining st, ch 31. Sl st in the back bump of the 2nd ch from the hook and in the back bump of each ch across. (30 sl sts) Sl st into the st you started from to close the loop. Fasten off and weave in the end.
Why the math works: The collar has 18 sts around a 4 in (10.2 cm) circle. Cutting that to 9 sts and then 5 sts closes the opening quickly, so it pulls into a knob instead of a flat cap. The cord has 30 sl sts at 6 sts per 1 in (2.5 cm), so it is 5 in (12.7 cm) long. Folded in half, it makes a 2.5 in (6.4 cm) loop.
Final Blocking
- Check that all ends are woven in and that the tip and top are closed tightly.
- Mist the ornament lightly with water until it is damp but not wet.
- Starting with Tier 1, smooth each scale down with your fingers so it lies flat over the tier below.
- Gently pinch each picot point to sharpen it.
- Roll the cone between your palms to even out the shape.
- Hang it by the loop to dry. Gravity helps the scales settle downward.
- Once it is dry, measure again: 3.25 in (8.3 cm) wide and 4.5 in (11.4 cm) tall.
If you used acrylic yarn, you can steam block instead. Hold the iron 1 in (2.5 cm) above the ornament and never let it touch the yarn.
Final Quality-Control Checklist
- 10 tiers of scales, 78 scales in total
- Every tier is staggered so its points sit between the scales above
- Every scale has a clear, closed picot tip
- No gaps between scales where stuffing shows through
- Stuffing is firm and even, with no lumps
- The tip is closed tightly with no hole
- The top knob is round and secure
- The hanging loop is 2.5 in (6.4 cm) long and firmly attached
- The cone is about 3.25 in (8.3 cm) wide and 4.5 in (11.4 cm) tall
- All ends are hidden inside the cone
Troubleshooting
Scales curl upward. Your tension is too tight, or your tr stitches are too short. Go up one hook size for the scale rounds only.
Scales line up instead of staggering. You missed the 1-st shift on an even-numbered tier. Check that Rnds 7, 13, 19, 25 and 30 start in the 2nd st.
Stitch count is off after a scale round. Each scale must use exactly 3 sts. Count the scales: there should be one third as many scales as stitches in the body round.
Gaps between tiers. Your body rounds may be too tall. Keep them snug, or go down a hook size for the body rounds.
Back loops are hard to find. Fold the scales all the way down toward you before you start the next body round.
Cone looks lumpy. Add stuffing in small pieces and shape the cone after each addition.
Loop twists. Work every sl st into the back bump only, and keep your tension even.
Care
Spot clean with a damp cloth and mild soap, then reshape the ornament and let it air dry. Store it in a box with tissue paper so the scales don’t get crushed.

Final Notes
Here is how the measurements build. The 18-st collar measures 4 in (10.2 cm) around. Shaping grows the body to 36 sts and 8 in (20.3 cm), then tapers it back to 6 sts at the tip. Twenty body rounds at 5 rnds per 1 in (2.5 cm) give 4 in (10.2 cm) of body. The last tier of scales hangs below the body and the knob sits on top, which brings the cone to about 4.5 in (11.4 cm). The 30-st cord adds a 2.5 in (6.4 cm) loop, for about 7 in (17.8 cm) in total.
Make one for your own tree, or make several to fill a gift box. Happy crocheting!