

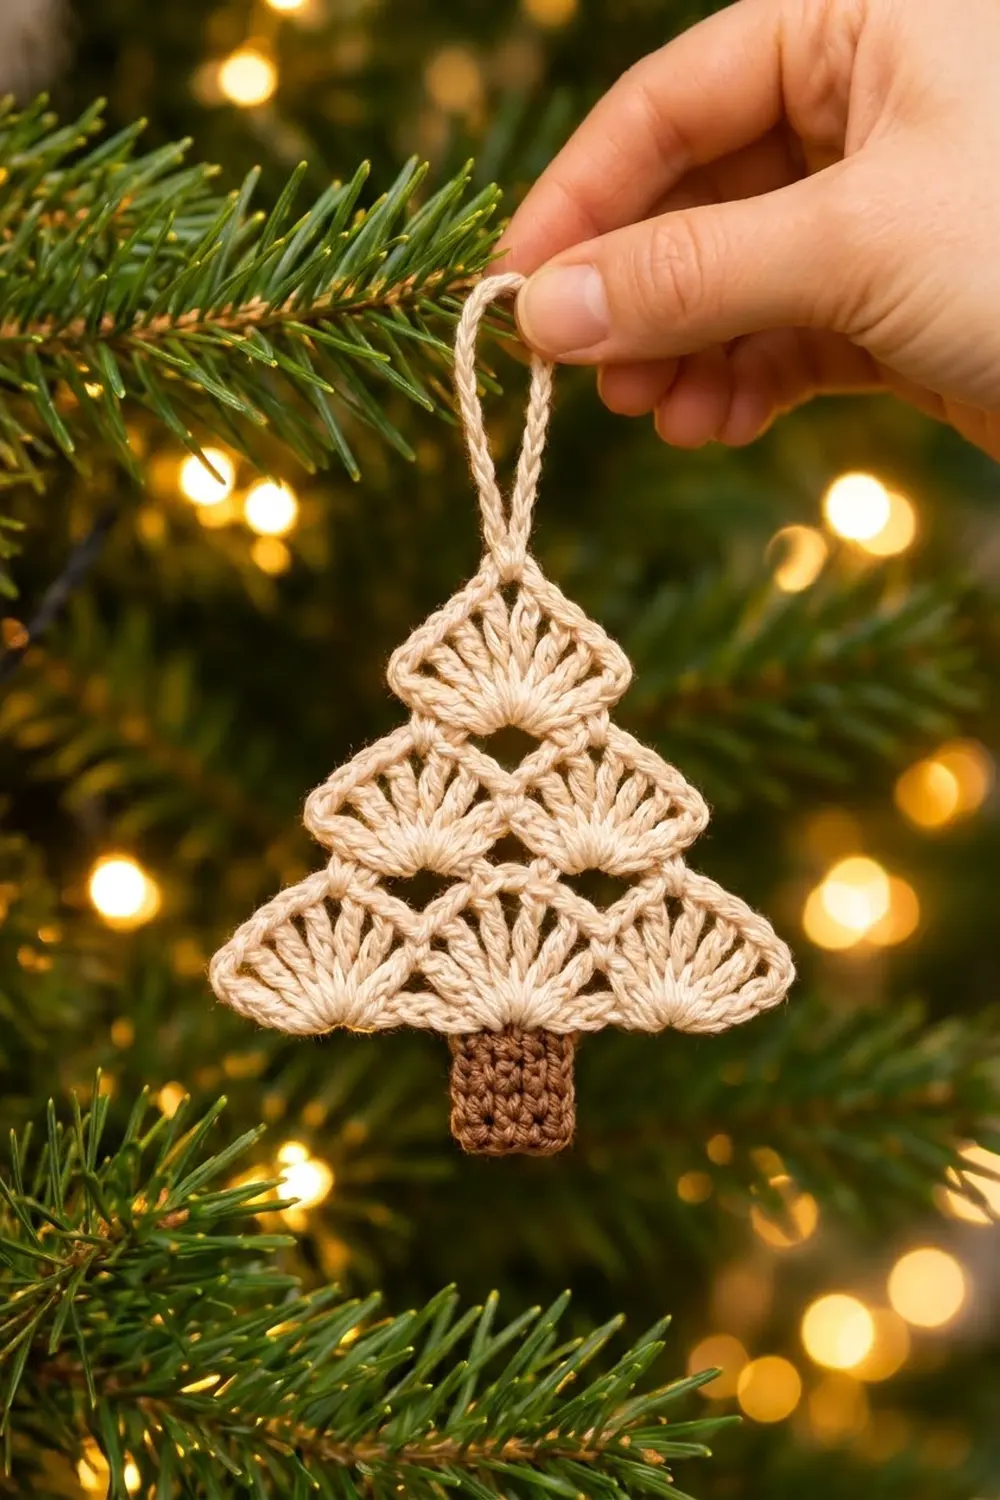
This ornament is a small lacy Christmas tree made of six shell fans stacked in three tiers. The bottom tier has three fans, the middle tier has two and the top tier has one. A neat brown trunk sits under the bottom tier and a chain loop at the top lets it hang. The look is soft and Scandinavian, and the cream cotton shows up well on dark green branches.
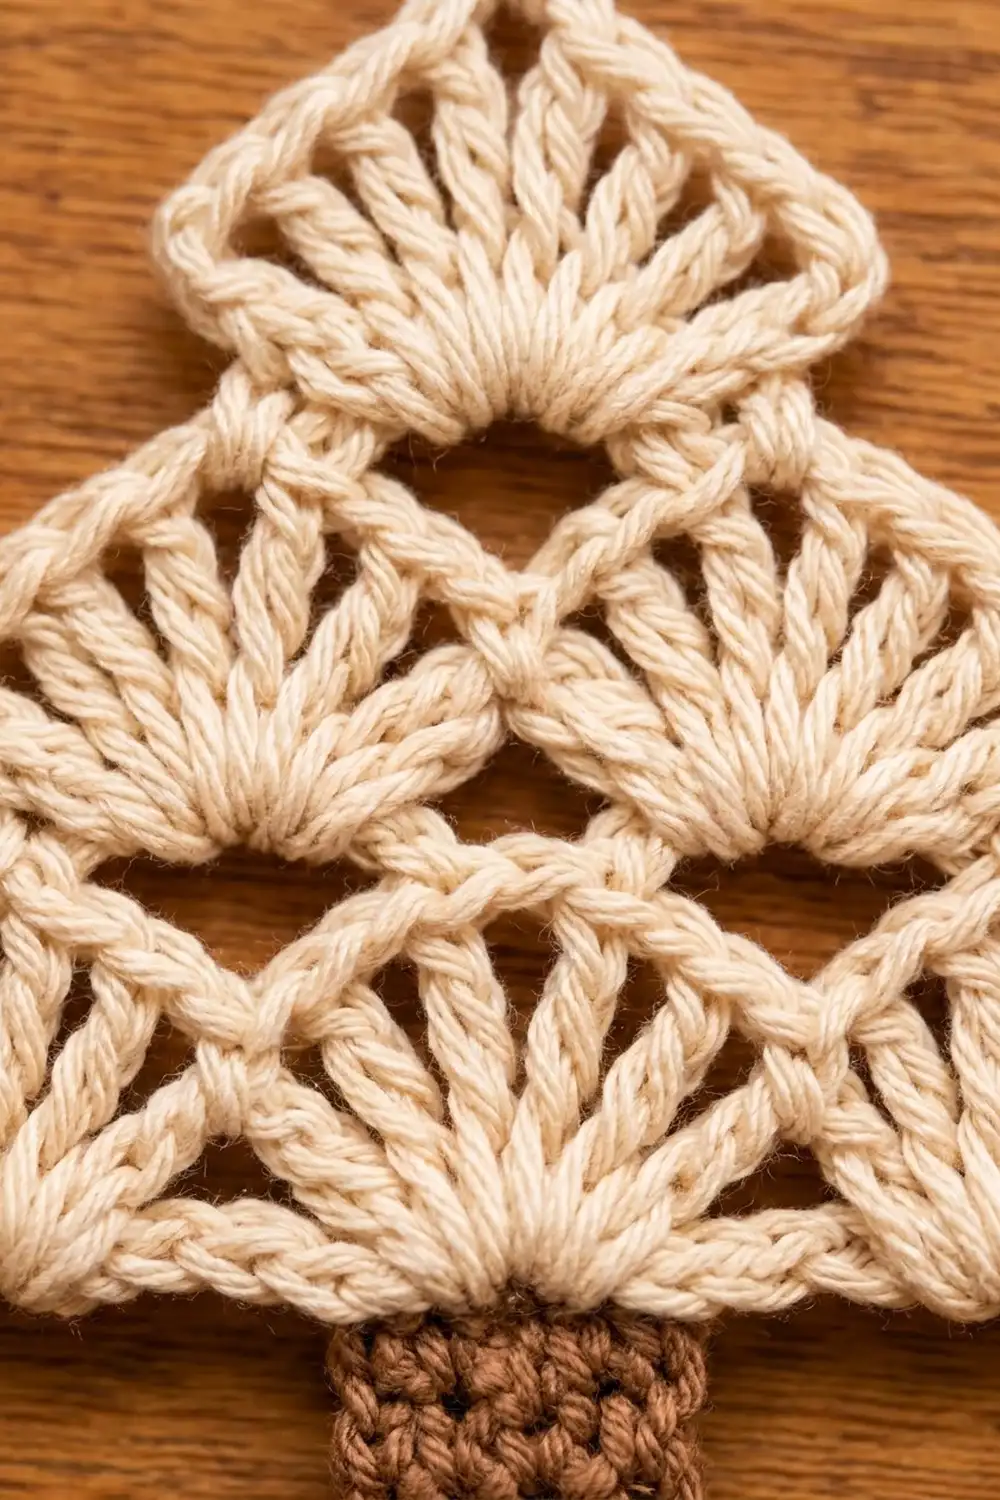
You need only two colors: ivory or cream for the tree and a warm brown for the trunk. Each fan is a semicircle of double crochet edged with small chain arcs. That edging gives the tree its scalloped outline and leaves little triangular windows between the tiers.
The pattern uses US crochet terms. The finished ornament is about 4.5 in (11.4 cm) wide and 4.25 in (10.8 cm) tall, not counting the hanging loop. With the loop it is about 6.25 in (15.9 cm) tall.
The ornament is one piece and you won’t need to sew anything together. You crochet the trunk first in rows. Then you join the cream yarn to the top of the trunk and build the tree upward, one tier at a time. Each tier takes three rows: base loops, fans and an outline. The hanging loop is chained at the very end.
Finished Size and Construction
- Finished size: 4.5 in (11.4 cm) wide × 4.25 in (10.8 cm) tall, plus a 2 in (5.1 cm) loop
- Skill level: Easy / Advanced Beginner
- Terminology: US crochet terms
- Yarn weight: DK / light worsted (weight 3) cotton
- Hook: 3.5 mm (US E-4)
- Number of pieces: 1
- Layout: fans in 3 tiers of 3, 2 and 1, centered over a single crochet trunk
- Piece size: 4.5 in × 4.25 in (11.4 cm × 10.8 cm)
- Size before border: each fan is about 1.4 in (3.6 cm) wide before its outline row, and the bottom tier is about 4.25 in (10.8 cm) wide
- Border depth: about 0.125 in (0.3 cm) on every fan edge, built in as the outline rows
Materials
Use a smooth mercerized or combed cotton in DK weight. Cotton gives crisp stitch definition and holds the fan shape after blocking. Acrylic also works, but the fans will be softer and may need light starch.
- Color A, Ivory/Cream (tree and loop): 8 g, about 18 m (20 yd)
- Color B, Brown (trunk): 3 g, about 7 m (8 yd)
Tools:
– 3.5 mm (US E-4) crochet hook
– Tapestry needle
– Scissors
– Rustproof pins and a foam blocking mat
– Spray bottle with water
– Optional: fabric stiffener or spray starch
These quantities include a margin of about 25% for a gauge swatch and weaving in ends.
Abbreviations (US Terms)
- ch – chain
- sl st – slip stitch
- sc – single crochet
- dc – double crochet
- sk – skip
- st(s) – stitch(es)
- sp – space
- RS – right side
Special stitch – Fan: Work 9 dc into the same chain loop. When a fan begins a row, the ch 3 counts as the first dc, followed by 8 dc in the same loop.
Outline arc: ch 3, sk 1 dc, sc in next dc. Each fan gets 4 outline arcs.
Gauge and Checkpoints
Single crochet gauge (trunk): 12 sc and 13 rows = 2 in (5.1 cm) square.
Fan gauge: one 9-dc fan is about 1.4 in (3.6 cm) wide before its outline row and about 1.5 in (3.8 cm) wide after it.
Make the trunk and the bottom tier first, then measure before going on. This is your gauge test, because the whole tree is sized from those first few rows.
Checkpoints:
– After the trunk (Row 8): 1 in (2.5 cm) wide × 1.25 in (3.2 cm) tall
– After Row 3 (bottom tier): 4.5 in (11.4 cm) wide; 2.5 in (6.4 cm) total height from the trunk bottom
– After Row 6 (middle tier): middle tier 3 in (7.6 cm) wide; 3.5 in (8.9 cm) total height
– After Row 9 (top tier): top fan 1.5 in (3.8 cm) wide; 4.25 in (10.8 cm) total height
If your piece is too big: go down to a 3.25 mm (US D-3) hook, or chain more tightly in the base loops. Loose base loops make the fans spread wider.
If your piece is too small: go up to a 3.75 mm (US F-5) hook. Also check that you’re not pulling the dc stitches tight in each fan.
Trunk
Work with Color B.
Foundation: Ch 7.
Row 1: Sc in 2nd ch from hook and in each ch across, turn. (6 sc)
Rows 2–8: Ch 1 (does not count as a st), sc in each st across, turn. (6 sc)
The trunk is now a solid rectangle 6 sts wide and 8 rows tall, about 1 in × 1.25 in (2.5 cm × 3.2 cm). Fasten off and leave a 4 in (10.2 cm) tail.
Turn the trunk so that the last row is at the top and the RS faces you. Number the 6 sts of the top row 1 to 6, starting from the corner where you’ll join the new yarn.
Tier 1 – Bottom Tier (3 Fans)
Change to Color A.
Row 1 (base loops): Join Color A with a sl st in st 1.
– Ch 7, sl st in the same st. This is the first side loop, and it lies flat to the outside.
– Ch 5, sk sts 2–5, sl st in st 6. This is the center loop, arched over the trunk.
– Ch 7, sl st in the same st. This is the second side loop.
You now have 3 chain loops in a horizontal line. The side loops reach out past both trunk edges, so the bottom tier is much wider than the trunk.
Row 2 (fans): Turn.
– Sl st into the second side loop (the one just made), ch 3 (counts as dc), work 8 dc in the same loop (9 dc).
– Sl st in st 6 of the trunk.
– Work 9 dc in the center loop.
– Sl st in st 1 of the trunk.
– Work 9 dc in the first side loop.
(27 dc: 3 fans of 9 dc each, plus 2 anchoring sl sts)
The fans open upward from their loops like three half-circles side by side. They should measure about 4.25 in (10.8 cm) across.
Row 3 (outline): Turn. Ch 1.
– Sc in first dc of fan, (ch 3, sk 1 dc, sc in next dc) 4 times
– Repeat from * to * for the next 2 fans. Skip the sl sts between fans.
(15 sc and 12 ch-3 arcs in total: each fan has 5 sc and 4 arcs)
At each joint between two fans you have two sc side by side: one on the last dc of the first fan and one on the first dc of the next fan. This makes a small V-dip that defines the scallops.
Checkpoint: the tier measures 4.5 in (11.4 cm) wide.
Tier 2 – Middle Tier (2 Fans)
On this tier, label the three bottom fans A, B and C in the order you meet them on Row 4. Label each fan’s arcs 1 to 4 in working order.
Row 4 (base loops): Turn.
– Sl st in each of next 3 ch, next sc, next 3 ch, next sc. (8 sl sts; you are now at the start of arc A3.)
– Sc in arc A3, ch 5, sc in arc B2. This first loop skips arcs A4 and B1, so it bridges the joint between fans A and B.
– Ch 2, sc in arc B3.
– Ch 5, sc in arc C2. This second loop skips arcs B4 and C1, bridging the joint between fans B and C.
(4 sc, 2 ch-5 loops, 1 ch-2 sp)
Arc A3 mirrors arc C2, so the two loops sit symmetrically over the bottom tier. The chain bridges hold the middle fans above the joints and leave the small triangular openings you see in the finished tree.
Row 5 (fans): Turn.
– Sl st into first ch-5 loop, ch 3 (counts as dc), 8 dc in the same loop (9 dc).
– Sl st in ch-2 sp.
– 9 dc in next ch-5 loop.
(18 dc: 2 fans of 9 dc each)
Row 6 (outline): Turn. Ch 1.
– Sc in first dc of fan, (ch 3, sk 1 dc, sc in next dc) 4 times
– Repeat from * to * once more.
(10 sc and 8 ch-3 arcs in total)
Checkpoint: the middle tier measures 3 in (7.6 cm) wide, and the tree is 3.5 in (8.9 cm) tall so far.
Tier 3 – Top Fan
Label the two middle fans D and E in the order you meet them on Row 7.
Row 7 (base loop): Turn.
– Sl st in each of next 3 ch, next sc, next 3 ch, next sc (8 sl sts).
– Sc in arc D3, ch 5, sc in arc E2. This loop skips arcs D4 and E1.
(2 sc, 1 ch-5 loop)
Row 8 (fan): Turn. Sl st into the ch-5 loop, ch 3 (counts as dc), 8 dc in the same loop. (9 dc)
Row 9 (outline): Turn. Ch 1, sc in first dc, (ch 3, sk 1 dc, sc in next dc) 4 times. (5 sc, 4 ch-3 arcs)
The middle sc of this row sits on the 5th dc, which is the top of the fan. That sc becomes the point of the tree.
Hanging Loop
Don’t turn after Row 9. Work back along the outline: sl st in each of next 3 ch, next sc, next 3 ch, next sc. (8 sl sts; you are now in the center sc on the 5th dc.)
Ch 30, sl st in the same center sc. Fasten off.
The loop stands about 2 in (5.1 cm) tall. When the ornament hangs, the loop pulls the top fan into the pointed shape.
Border
This tree has no separate border round. The three outline rows (Rows 3, 6 and 9) are the border, and they make the scalloped edge in the photo.
Border gauge: each ch-3 arc covers 2 dc and is about 0.375 in (1 cm) wide. It adds about 0.125 in (0.3 cm) of depth past the fan edge.
Counts per section:
– Bottom tier edge: 12 arcs (4 per fan × 3 fans) and 15 sc
– Middle tier edge: 8 arcs (4 per fan × 2 fans) and 10 sc
– Top fan edge: 4 arcs and 5 sc
Why the math works: each fan has 9 dc. The outline places an sc on dc 1, 3, 5, 7 and 9, which is 5 sc on the odd stitches. The 4 even stitches are each skipped under a ch-3 arc. So 5 sc + 4 arcs covers exactly 9 dc, with no leftover stitch at either end.
The arcs are numbered 1 to 4 on every fan, which keeps the next tier’s base loops in fixed positions. A loop from arc 3 of one fan to arc 2 of the next always skips arcs 4 and 1, and those are the two arcs on either side of the joint. That’s why every upper fan sits exactly over a joint.
Final Blocking
- Weave in all ends. Run the Color A tail through the trunk’s top stitches, and the trunk’s Color B tail down its side edge.
- Lay the ornament RS up on a blocking mat.
- Pin the trunk straight: 1 in (2.5 cm) wide and 1.25 in (3.2 cm) tall.
- Pin the two outer corners of the bottom tier 4.5 in (11.4 cm) apart, level with each other.
- Pin each fan open at its center arc, making sure the dc rays spread evenly.
- Pin the top point so the tree is 4.25 in (10.8 cm) tall from the trunk bottom to the point.
- Gently pull each triangular opening between the tiers open with a pin.
- Mist with water until damp but not soaked. For a firmer ornament, brush on a light coat of diluted fabric stiffener instead.
- Leave it to dry completely, about 6–12 hours, before taking out the pins.
- Pin the hanging loop straight up for the last hour, so it dries without a twist.
Final Quality-Control Checklist
- The trunk has 6 sc in each of its 8 rows, with straight sides.
- The bottom tier has 3 fans of 9 dc each.
- The middle tier has 2 fans, each centered over a bottom-tier joint.
- The top fan is centered over the middle-tier joint.
- Each fan has 4 outline arcs and 5 sc.
- Small triangular openings show between the tiers.
- The trunk is centered under the middle bottom fan.
- The width is 4.5 in (11.4 cm) and the height is 4.25 in (10.8 cm).
- The hanging loop rises from the exact top point and is about 2 in (5.1 cm) tall.
- All ends are woven in securely and hidden.
Troubleshooting
Fans curl or cup instead of lying flat. The base loop is too short for 9 dc. Add 1 ch to that loop, or use a larger hook for the fan rows only.
Fans ruffle. The base loop is too long, or your dc stitches are loose. Remove 1 ch from the loop, or tighten your tension.
The middle tier is off center. Count your 8 sl sts at the start of Row 4 again, and check that you worked into arcs A3, B2, B3 and C2.
The trunk is lopsided. Check that both ends of the center loop are anchored in the trunk’s corner stitches (st 1 and st 6).
The top isn’t pointed. Make sure the hanging loop is joined in the center sc on the 5th dc, not in an arc.
The ornament is floppy. Block with fabric stiffener, or switch to a firmer mercerized cotton.
Care
Hand wash in cool water with mild soap, press out the water in a towel and lay flat to dry. If you used stiffener, reshape and pin it while damp, then reapply stiffener if needed.
Final Notes
Everything in this ornament is sized from a few measurements. The trunk is 6 sc × 8 rows, about 1 in × 1.25 in (2.5 cm × 3.2 cm). Each fan is 9 dc, about 1.4 in (3.6 cm) wide, and grows to 1.5 in (3.8 cm) with its outline. Three outlined fans make the 4.5 in (11.4 cm) bottom tier, two make the 3 in (7.6 cm) middle tier and one makes the top. The three tiers and the trunk add up to 4.25 in (10.8 cm) in height, and the 2 in (5.1 cm) loop brings the total to 6.25 in (15.9 cm).
If your trunk and bottom tier match the checkpoints, the rest of the tree will fall into place. Make one for every branch, or tie one onto a gift.
Happy crocheting!