

This doorway curtain has a cream filet-mesh header band and twelve cream beaded cords. Each cord carries ten mini stockings. The stockings alternate deep burgundy and forest green, each with a ribbed cream cuff, and small natural wooden beads sit between them along the cords.
The style is cozy and natural: matte cotton, warm wood, and three classic holiday colors. The stockings form a checkerboard, so no two neighbors match side to side or top to bottom. The curtain hangs from a wooden rod by thirteen folded tabs.
The pattern uses US crochet terms. The finished curtain measures about 37.2 in (94.5 cm) wide and about 70.9 in (180.1 cm) long from the top of the header to the bottom bead, not counting the tabs.
Construction: work the header in rows of solid and mesh double crochet. Chain the cords with the beads already threaded on, and make 120 flat stockings, each started from a magic ring. Sew the stockings to the cords. A two-round sc border goes around the header, and its second round attaches the cord tops. Tabs are worked off the top edge last.
Finished Size and Construction
- Finished size: about 37.2 in x 70.9 in (94.5 cm x 180.1 cm)
- Skill level: Easy-intermediate
- Terminology: US
- Yarn weight: Worsted (#4) cotton
- Hook: 4.0 mm (G-6)
- Number of pieces: 1 header, 12 cords, 120 stockings (60 burgundy, 60 green)
- Layout: 12 cords x 10 stockings, checkerboard colors
- Stocking size: about 2 in (5.1 cm) wide x 3 in (7.6 cm) tall
- Header before border: 36.25 in x 3 in (92.1 cm x 7.6 cm)
- Border depth: about 0.45 in (1.1 cm) per side, 2 rounds
- Cord length: 67 in (170.2 cm)
Materials
Choose a smooth, mercerized or matte worsted cotton. Cotton holds the stocking shape, doesn’t stretch much on long cords, and won’t fuzz against the beads. These amounts are based on yarn with about 170 m per 100 g.
- Cream: 250 g, about 425 m (header, border, tabs, cords, cuffs)
- Burgundy: 90 g, about 153 m (60 stockings)
- Forest green: 90 g, about 153 m (60 stockings)
All quantities include a margin of roughly 20–35% for swatching, tails, and gauge differences.
Tools:
- 4.0 mm (G-6) crochet hook
- 132 natural wooden beads, 12 mm, with holes at least 4 mm (add a few spares)
- Tapestry needle
- Big-eye beading needle or dental floss threader (for loading beads)
- Stitch markers
- Measuring tape and scissors
- Blocking mats and rust-proof pins
- Wooden curtain rod up to 1 in (2.5 cm) in diameter
Abbreviations (US Terms)
- ch – chain
- sl st – slip stitch
- sc – single crochet
- dc – double crochet
- BLO – back loop only
- sp – space
- st(s) – stitch(es)
- rep – repeat
Special stitch – bead chain: Slide one pre-threaded bead up against the hook, then yarn over and pull through so the bead is locked inside that chain.
Gauge and Checkpoints
- Double crochet: 16 dc and 8 rows = 4 in (10.2 cm)
- Single crochet: 16 sc and 18 rows = 4 in (10.2 cm)
- Cord: 4 ch = 1 in (2.5 cm), measured after the sl st return row
Make one stocking before anything else, and check it against these numbers:
- After Rnd 1: circle 1.25 in (3.2 cm) across
- After Rnd 2: foot 1.75 in (4.4 cm) wide
- After Leg Row 4: leg 1.5 in (3.8 cm) wide and 0.9 in (2.3 cm) tall
- Finished: 2 in (5.1 cm) wide x 3 in (7.6 cm) tall
If the stocking is too big, go down a hook size. If it’s too small, go up one. If only the cord gauge is off, change the hook for the cords alone so the beads stay 6.5 in (16.5 cm) apart.
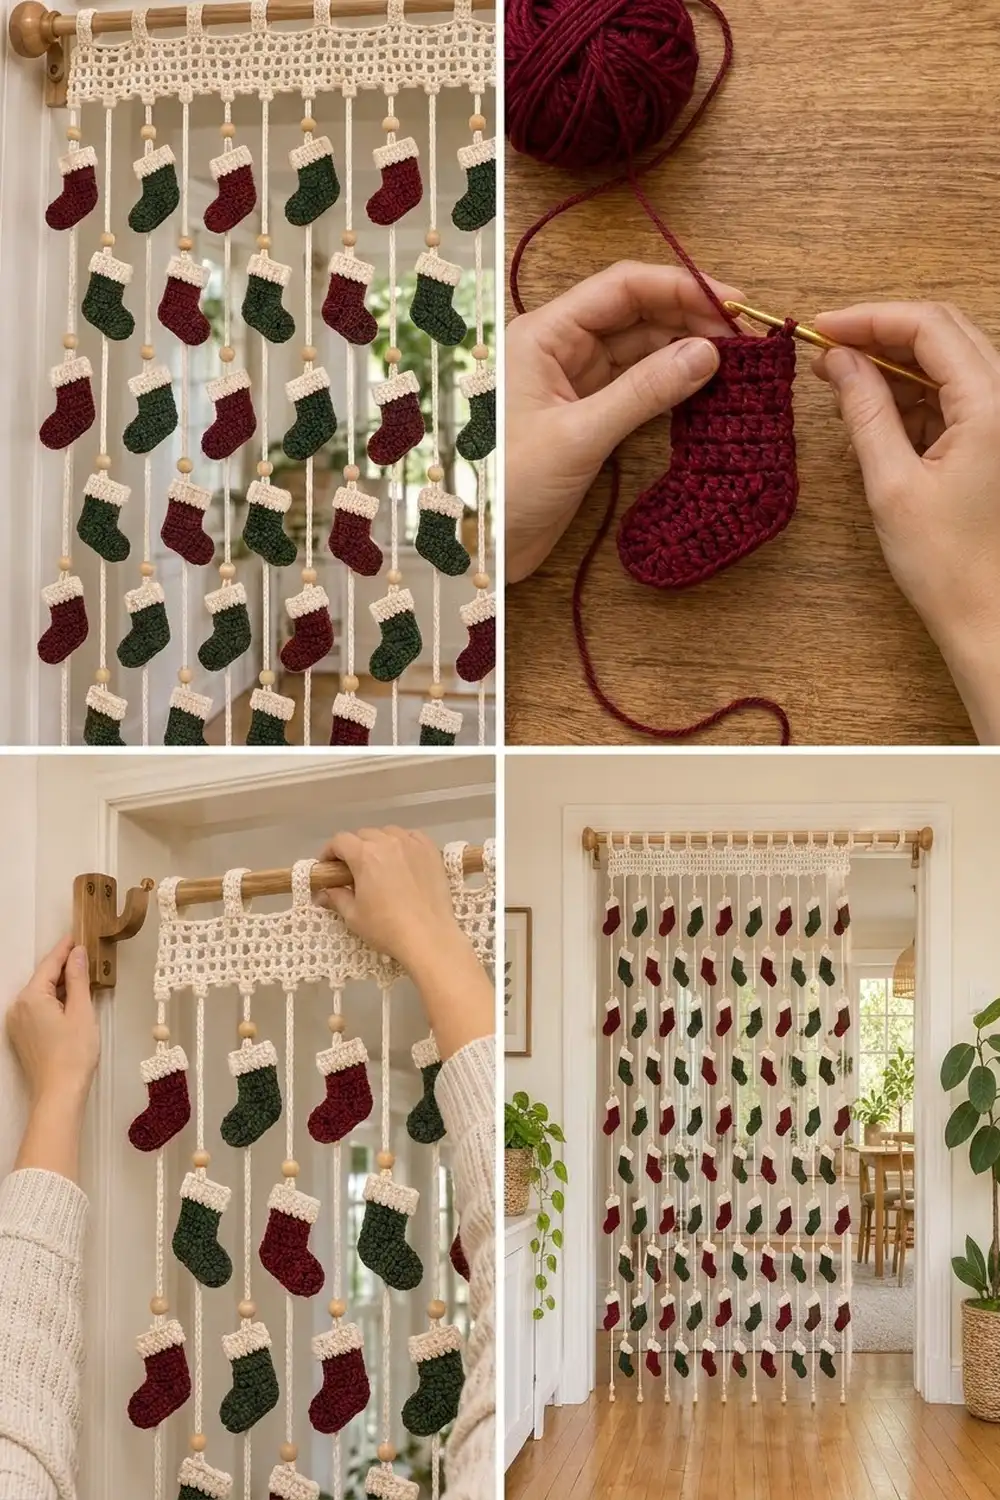
Stocking (make 120)
Work 60 stockings in burgundy and 60 in forest green. The cuffs are cream.
Rnd 1: With body color, make a magic ring. Ch 2 (does not count as a st), work 12 dc in the ring, then sl st to the first dc. Pull the ring closed. (12 dc)
Rnd 2: Ch 1. Sc in the same st as the join and in the next 5 dc to make the leg base. Sc in the next 2 dc for the heel, then 2 sc in each of the next 4 dc for the toe. Sl st to the first sc. (16 sc = 12 sts worked 1-per-stitch + 4 extra)
The 4 toe increases push one side of the circle outward to make the toe, and the magic-ring center stays visible in the foot.
Leg Row 1: Ch 1. Do not turn. Sc in the same st as the join and in the next 5 sc, which are the 6 leg-base sts. (6 sc)
Leg Rows 2–4: Ch 1, turn, sc in each st across. (6 sc)
Fasten off the body color.
Cuff Row 1: Join cream in the first st. Ch 1, 2 sc in the first st, sc in the next 4 sts, 2 sc in the last st. (8 sc = 6 worked 1-per-stitch + 2 extra)
Cuff Rows 2–3: Ch 1, turn, sc in BLO of each st across. (8 sc)
Fasten off and leave a 12 in (30.5 cm) cream tail for sewing. Weave in the other ends.
Turn the stocking so the toe points right. That side is the front, and all stockings face the same way.
Cord (make 12)
Use your beading needle to thread 11 wooden beads onto the cream yarn before you start. Leave an 8 in (20.3 cm) starting tail. That end is the top of the cord.
Chain:
- Ch 4 to make the top 1 in (2.5 cm) above the first bead. (4 ch)
- Make 1 bead chain for bead 1. This is ch 5.
- Ch 25, then make 1 bead chain. Rep from * 9 more times. (10 segments of 26 ch = 260 ch; beads 2–11 placed)
- Ch 3 for the bottom tail, which is 0.75 in (1.9 cm). (3 ch)
Total: 4 + 1 + 260 + 3 = 268 ch. Bead k sits on ch 5 + 26(k – 1), so bead 10 is on ch 239 and bead 11 is on ch 265.
Return row: Sl st in the back bump of the 2nd ch from the hook, then sl st in the back bump of each ch up to the top. (267 sl st) At each bead, work behind it so the bead stays on the front of the cord.
Fasten off at the top and weave the working end into the cord, keeping the 8 in (20.3 cm) starting tail free for later.
Checkpoint: The cord measures 67 in (170.2 cm), and the beads are 6.5 in (16.5 cm) apart.
Make All Pieces
- Header: 1, in cream (instructions below)
- Cords: 12, in cream, with 11 beads each (132 beads)
- Burgundy stockings (B): 60
- Green stockings (G): 60
Lay the cords side by side. Stockings hang under beads 1–10, numbered from the top. Bead 11 is the end bead.
Cord:     1  2  3  4  5  6  7  8  9 10 11 12
Bead 1:   B  G  B  G  B  G  B  G  B  G  B  G
Bead 2:   G  B  G  B  G  B  G  B  G  B  G  B
Bead 3:   B  G  B  G  B  G  B  G  B  G  B  G
Bead 4:   G  B  G  B  G  B  G  B  G  B  G  B
Bead 5:   B  G  B  G  B  G  B  G  B  G  B  G
Bead 6:   G  B  G  B  G  B  G  B  G  B  G  B
Bead 7:   B  G  B  G  B  G  B  G  B  G  B  G
Bead 8:   G  B  G  B  G  B  G  B  G  B  G  B
Bead 9:   B  G  B  G  B  G  B  G  B  G  B  G
Bead 10:  G  B  G  B  G  B  G  B  G  B  G  B
Each cord carries 5 B and 5 G, so the totals come to 60 + 60 = 120.
Header
Foundation: With cream, ch 147.
Row 1 (solid): Dc in the 4th ch from the hook and in each ch across. The skipped 3 ch count as the first dc. (145 dc = 1 + 144)
Row 2 (mesh): Ch 4, turn. This counts as dc + ch 1. Skip the next st and dc in the next st. Ch 1, skip 1 st, dc in the next st. Rep from * across, ending with a dc in the top of the turning ch. (73 dc + 72 ch-1 sps = 145 sts)
Rows 3–5 (mesh): Ch 4, turn. Skip the first ch-1 sp and dc in the next dc. Ch 1, dc in the next dc. Rep from * across, ending in the 3rd ch of the turning ch. (73 dc + 72 ch-1 sps = 145 sts)
Row 6 (solid): Ch 3, turn. This counts as dc. Dc in each ch-1 sp and each dc across, ending in the 3rd ch of the turning ch. (145 dc)
Do not fasten off.
Checkpoint: The header measures 36.25 in (92.1 cm) wide x 3 in (7.6 cm) tall, with 72 open mesh squares in each mesh row. Row 1 is the top edge.
Joining
The stockings go onto the cords before the cords go onto the header.
- Lay one cord flat with bead 1 at the top. Put the first stocking from the grid right side up behind the cord. Its cuff top should sit 0.5 in (1.3 cm), or 2 ch, below bead 1.
- Thread the cream cuff tail. Find the center of the cuff top, which is cuff stitches 4 and 5. Whipstitch those 2 stitches to the 2 cord chains directly behind them, going through both the cord and the cuff 3 times.
- Run the tail down inside the leg and tack the center of Leg Row 2 to the cord with 1 stitch so the stocking can’t spin. Knot it and weave it in.
- Rep under beads 2–10. That leaves 3 in (7.6 cm) of open cord between the bottom of one stocking and the next bead.
Tension: Make the stitches snug, not tight. If you pull too hard, the cord bunches and the 6.5 in (16.5 cm) bead spacing shrinks.
Checkpoint: Every cord still measures 67 in (170.2 cm), with 10 stockings and 1 end bead below the last stocking.
Border
The border uses the sc gauge: 4 sc per inch along the long edges and 2 sc per dc row on the short edges. The per-side counts below are the stitches between corner spaces. The corners are listed separately.
Rnd 1: Continue from Row 6 and work around the header:
- Work 1 sc in each dc across the bottom edge, then ch 1 at the corner.
- Work 2 sc in each row-end down the short side, then ch 1 at the corner.
- Work 1 sc in the base of each Row 1 st across the top, then ch 1 at the corner.
- Work 2 sc in each row-end down the other short side, then ch 1 at the corner.
- Sl st to the first sc.
Counts for Rnd 1:
- Bottom: 145 sc
- Short sides: 12 sc each (6 rows x 2)
- Top: 145 sc
- Total: 314 sc + 4 corner ch-1 sps
Rnd 2 (attaches the cords): Ch 1 and sc in each sc along the bottom. The cord positions are stitches 7, 19, 31, 43, 55, 67, 79, 91, 103, 115, 127, and 139 (7 + 12k). At each one:
- Sc in the st.
- Ch 1.
- Put your hook through the top ch of a cord (both strands) and sl st.
- Ch 1.
- Sc again in the same header st.
Hang the cords in grid order, 1 to 12. Work (sc, ch 1, sc) in each corner sp, and 1 sc in each sc along the sides and top. Sl st to the first sc.
Counts for Rnd 2:
- Bottom: 157 sc = 145 worked 1-per-stitch + 12 extra, plus 12 joining sl sts
- Short sides: 12 sc each
- Top: 145 sc
- Corners: 2 sc each, 8 total
- Total: 334 sc
Fasten off. Weave each cord’s top tail up into the header and knot it on the back.
Why the math works: The cords sit 12 stitches apart, which is 3 in (7.6 cm) at 4 sc per inch. Stitch 7 has 6 stitches before it and stitch 139 has 6 after it, so each outer cord sits 1.5 in (3.8 cm) in from the header’s edge. On the short sides, 2 sc per dc row gives 12 sc. At 4 sc per inch, that’s 3 in, the same as the header height, so the ends stay flat.
Tabs (make 13): Use the 145 top sc from Rnd 2. Tabs go on stitches 1–5, 11–15, 23–27, 35–39, 47–51, 59–63, 71–75, 83–87, 95–99, 107–111, 119–123, 131–135, and 141–145. Check the gaps: there are 2 end gaps of 5 sts and 10 inner gaps of 7 sts, and 13 x 5 + 2 x 5 + 10 x 7 = 145.
For each tab, join cream in the first st, ch 1, and sc in 5 sts. Then work 15 more rows of ch 1, turn, sc across. (5 sc x 16 rows) Each tab is about 1.25 in (3.2 cm) wide and 3.5 in (8.9 cm) long.
Fold each tab to the back and whipstitch its last row along Rnd 1 to make the rod loop.
Checkpoint: The header measures 37.2 in (94.5 cm) wide x 3.9 in (9.9 cm) tall.
Final Blocking
- Lay the header face down on the mats.
- Pin the header to 37.2 in x 3.9 in (94.5 cm x 9.9 cm). Line up the mesh rows straight and open each square.
- Mist the header with water until it’s damp, and leave it until it’s fully dry.
- Pin the stockings flat in sections with the toes pointing right. Mist them and let them dry.
- Hang the curtain on its rod and let the cords hang for 24 hours so they relax to their full length.
Final Quality-Control Checklist
- 12 cords, each 67 in (170.2 cm) long, with 11 beads
- 120 stockings: 60 burgundy and 60 green, matching the grid
- All toes point right
- Cords are 3 in (7.6 cm) apart and attached on header stitches 7 + 12k
- Every cuff sits 0.5 in (1.3 cm) below its bead
- 13 tabs on the stitches listed above, all sewn securely
- Header measures 37.2 in x 3.9 in (94.5 cm x 9.9 cm)
- All ends woven in, with no knots showing on the front
Troubleshooting
- Stocking cups or ruffles: Your Rnd 2 tension is off. Check that the round has exactly 16 sc, and loosen or tighten your sc.
- Toe points the wrong way: Flip the stocking over. The piece is flat and looks the same on both sides.
- Cords twist: Steam them lightly and let them hang. The sl st return row keeps twisting to a minimum.
- Beads won’t slide: Use a floss threader, or choose beads with 5 mm holes.
- Header ripples at the bottom: You’ve worked more than 1 extra sc at some cord positions. Recount to 157.
- Tabs too tight on the rod: Add 2 rows to each tab.
Care
Spot clean, or hand wash in cool water and lay flat to dry. Don’t machine dry, because the wooden beads can crack.
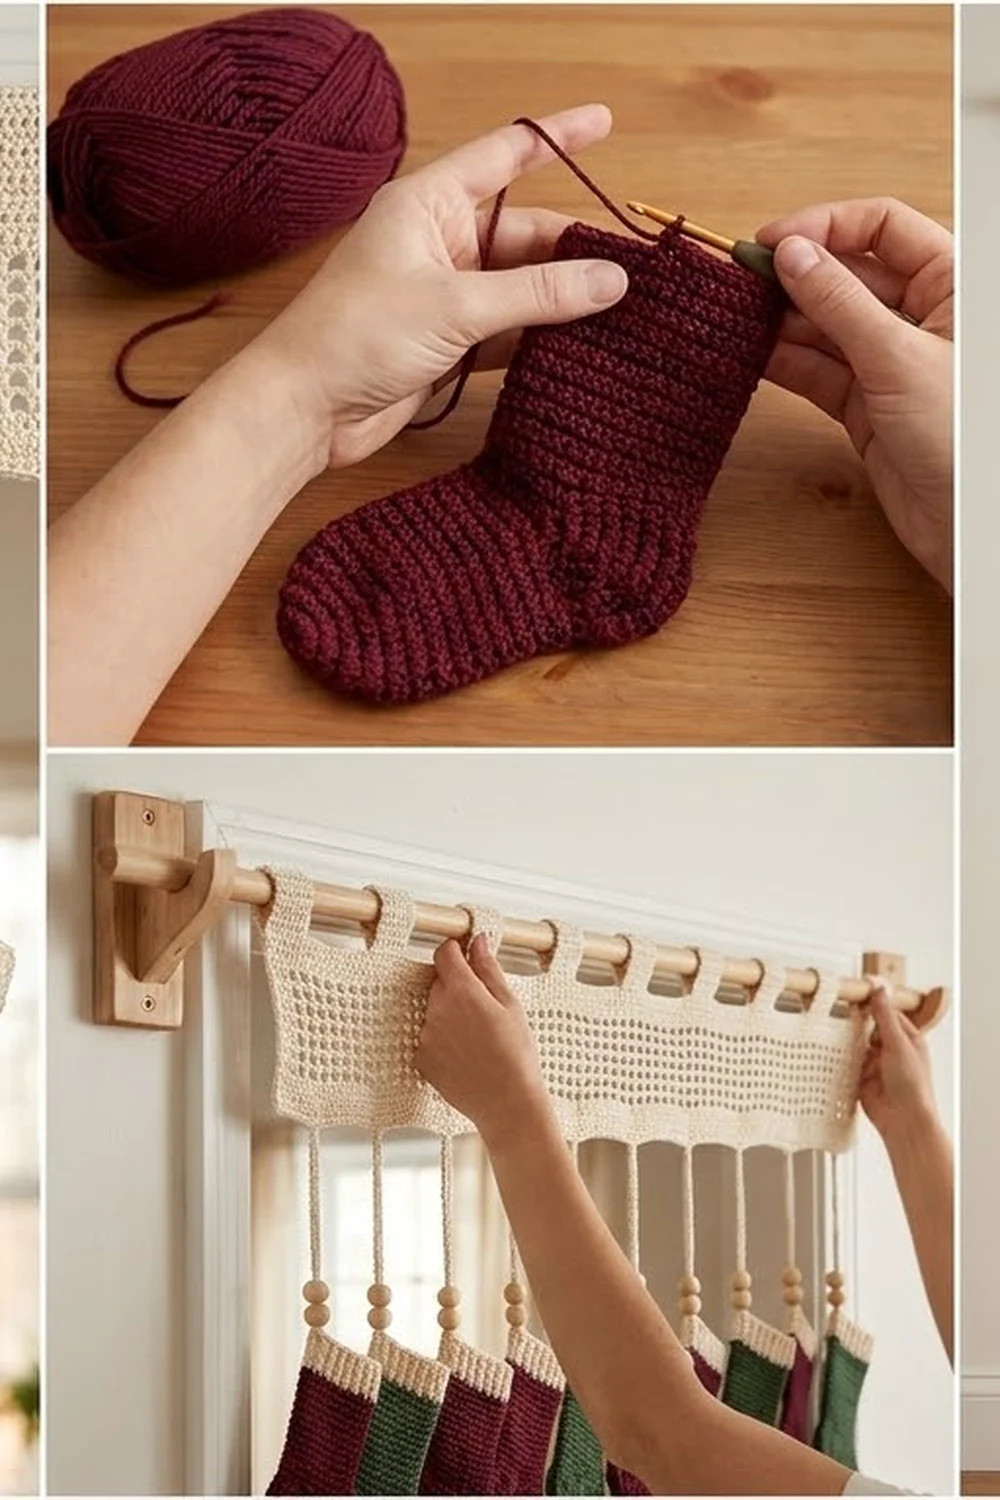
Final Notes
Each measurement depends on the one before it. A 3 in (7.6 cm) stocking makes the 6.5 in (16.5 cm) bead spacing work. Ten of those spacings, plus the top and bottom ends, make each 67 in (170.2 cm) cord. Twelve cords set 3 in (7.6 cm) apart fit the 145-stitch header, which comes to 37.2 in (94.5 cm) wide with its border. Check your gauge early and count at each checkpoint, and the curtain will hang straight.
Happy crocheting!