

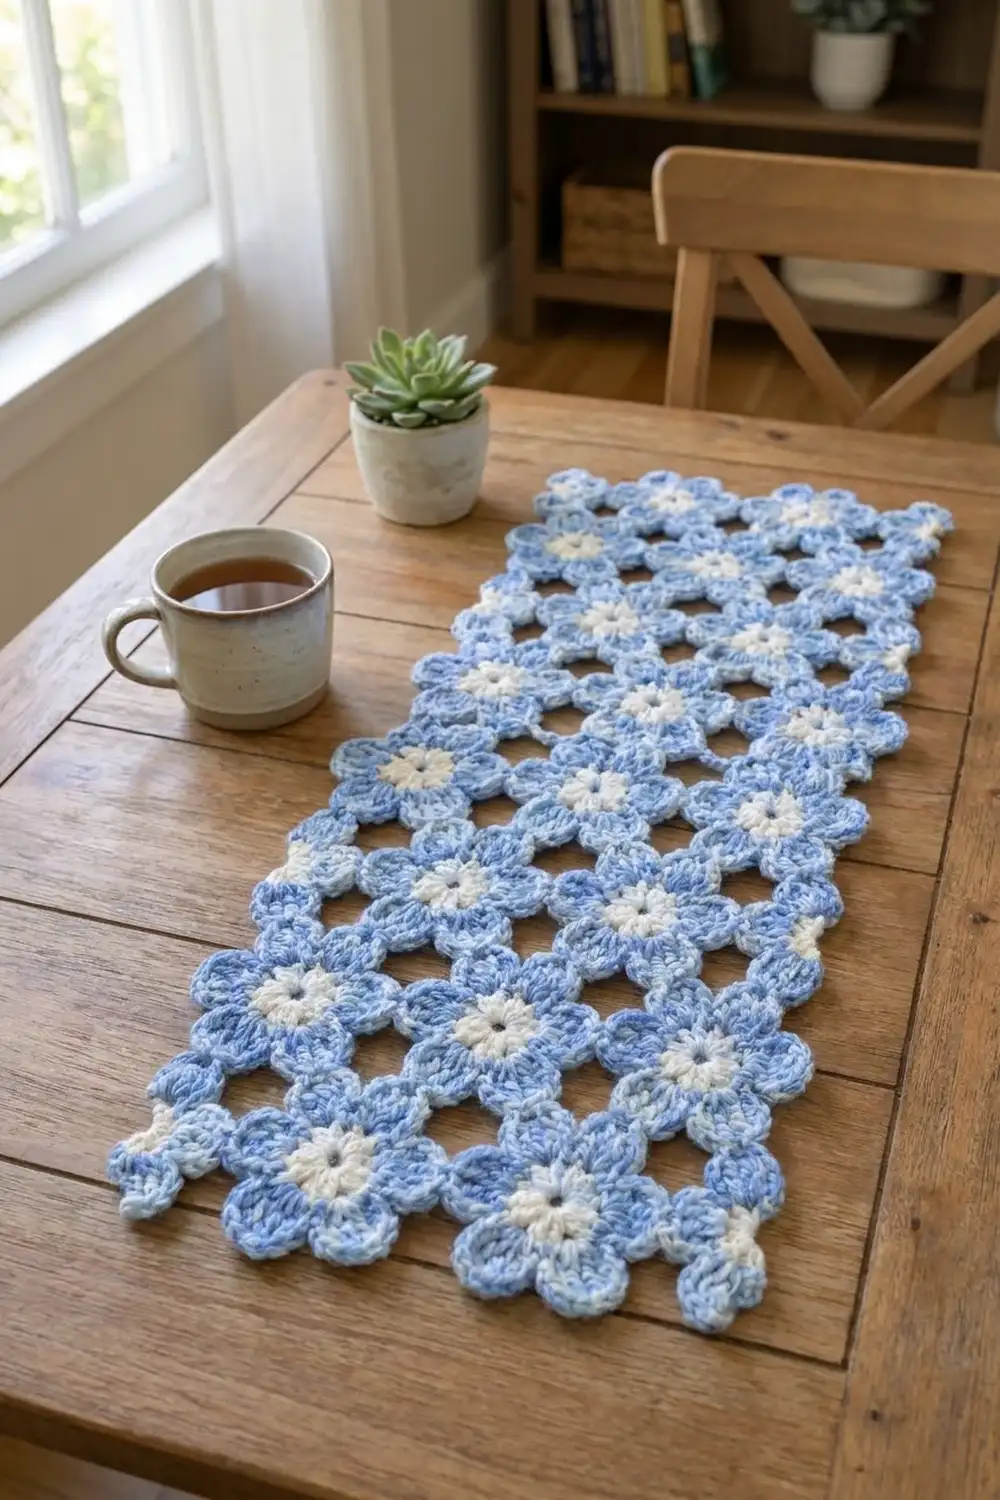
This little lace panel is made from eighteen five-petal flowers joined into a light, open lattice. Each flower has a small cream center and soft, rounded blue petals. Where the petal tips meet, small star-shaped openings form between the flowers, which gives the piece an airy, fresh look.
The colors are simple: a variegated light-to-medium blue for the petals and a warm cream for the centers. The blue shifts gently from flower to flower, so no two blooms look exactly alike. The style is cottage-garden and a little vintage. It works well as a dresser scarf, a tray mat or a small display piece.
The pattern uses US crochet terms. After blocking, the finished panel measures about 8.5 x 16.5 in (21.6 x 41.9 cm) from petal tip to petal tip.
The panel is made join-as-you-go. You make one complete flower, then join each new flower to its neighbors with slip stitches through the petal tips during the last round. There is no separate seaming and no added border. The free petals around the outside form the scalloped edge.
Finished Size and Construction
- Finished size: 8.5 x 16.5 in (21.6 x 41.9 cm)
- Skill level: Advanced beginner
- Terminology: US crochet terms
- Yarn weight: Worsted (#4)
- Hook: 5.0 mm (H-8)
- Number of pieces: 18 flowers, joined into one panel
- Layout: 3 flowers wide x 6 flowers tall
- Piece size: one flower is 3 in (7.6 cm) wide and 2.75 in (7.0 cm) tall
- Flower spacing: 2.75 in (7.0 cm) center to center, in both directions
- Size before border: 8.5 x 16.5 in (21.6 x 41.9 cm)
- Border depth: 0 in (0 cm), because the petal scallops are the edge
Materials
Choose a smooth, soft worsted yarn in cotton or a cotton blend. Cotton shows the petal shaping clearly and blocks crisply. For the petals, a variegated or self-shading blue with light and medium tones gives the gentle color movement in this design. A solid light blue also works if you prefer a calmer look.
- Color A (cream), centers: 10 g / 18 m (about 20 yd)
- Color B (variegated blue), petals: 40 g / 72 m (about 79 yd)
These amounts assume a worsted yarn of about 180 m per 100 g. They include a margin of roughly 30 percent for swatching and tails.
If your variegated yarn has long color runs, pull Round 2 for each flower from a different point in the ball. This spreads the light and dark sections evenly across the panel and stops patches of one shade from forming.
Tools:
- 5.0 mm (H-8) crochet hook
- Tapestry needle
- Scissors
- Stitch marker
- Rust-proof pins and a blocking mat
- Spray bottle
- Ruler or tape measure
Abbreviations (US Terms)
- ch – chain
- sl st – slip stitch
- sc – single crochet
- hdc – half double crochet
- dc – double crochet
- sp – space
- st(s) – stitch(es)
Special stitches:
- Petal: In the indicated ch-3 sp, work (sc, hdc, 2 dc, ch 2, 2 dc, hdc, sc). Each petal has 8 sts plus 1 ch-2 tip.
- Joining petal: In the indicated ch-3 sp, work (sc, hdc, 2 dc, ch 1, sl st in the ch-2 tip of the neighboring petal, ch 1, 2 dc, hdc, sc). The ch 1, sl st, ch 1 replaces the ch-2 tip, and the petal still has 8 sts.
- Double joining petal: In the indicated ch-3 sp, work (sc, hdc, 2 dc, ch 1, sl st in the first neighboring ch-2 tip, ch 1, sl st in the second neighboring ch-2 tip, ch 1, 2 dc, hdc, sc). The petal still has 8 sts.
Gauge and Checkpoints
Make one full flower before you start the panel. This is your gauge swatch, and it can become Flower 1 if it measures correctly.
- After Round 1: the cream center measures 0.75 in (1.9 cm) across.
- After Round 2: the blue ring measures 1.25 in (3.2 cm) across.
- After Round 3: lightly pressed flat, the flower measures 3 in (7.6 cm) wide from the Petal 2 tip to the Petal 4 tip, and 2.75 in (7.0 cm) tall from the Petal 3 tip down to the valley between Petals 1 and 5.
If your flower is larger than 3 in (7.6 cm) wide, go down a hook size to 4.5 mm (US 7). If it is smaller, go up to 5.5 mm (I-9). A difference of only 0.25 in (0.6 cm) per flower adds up to about 0.75 in (1.9 cm) across the width and 1.5 in (3.8 cm) down the length, so it’s worth checking.
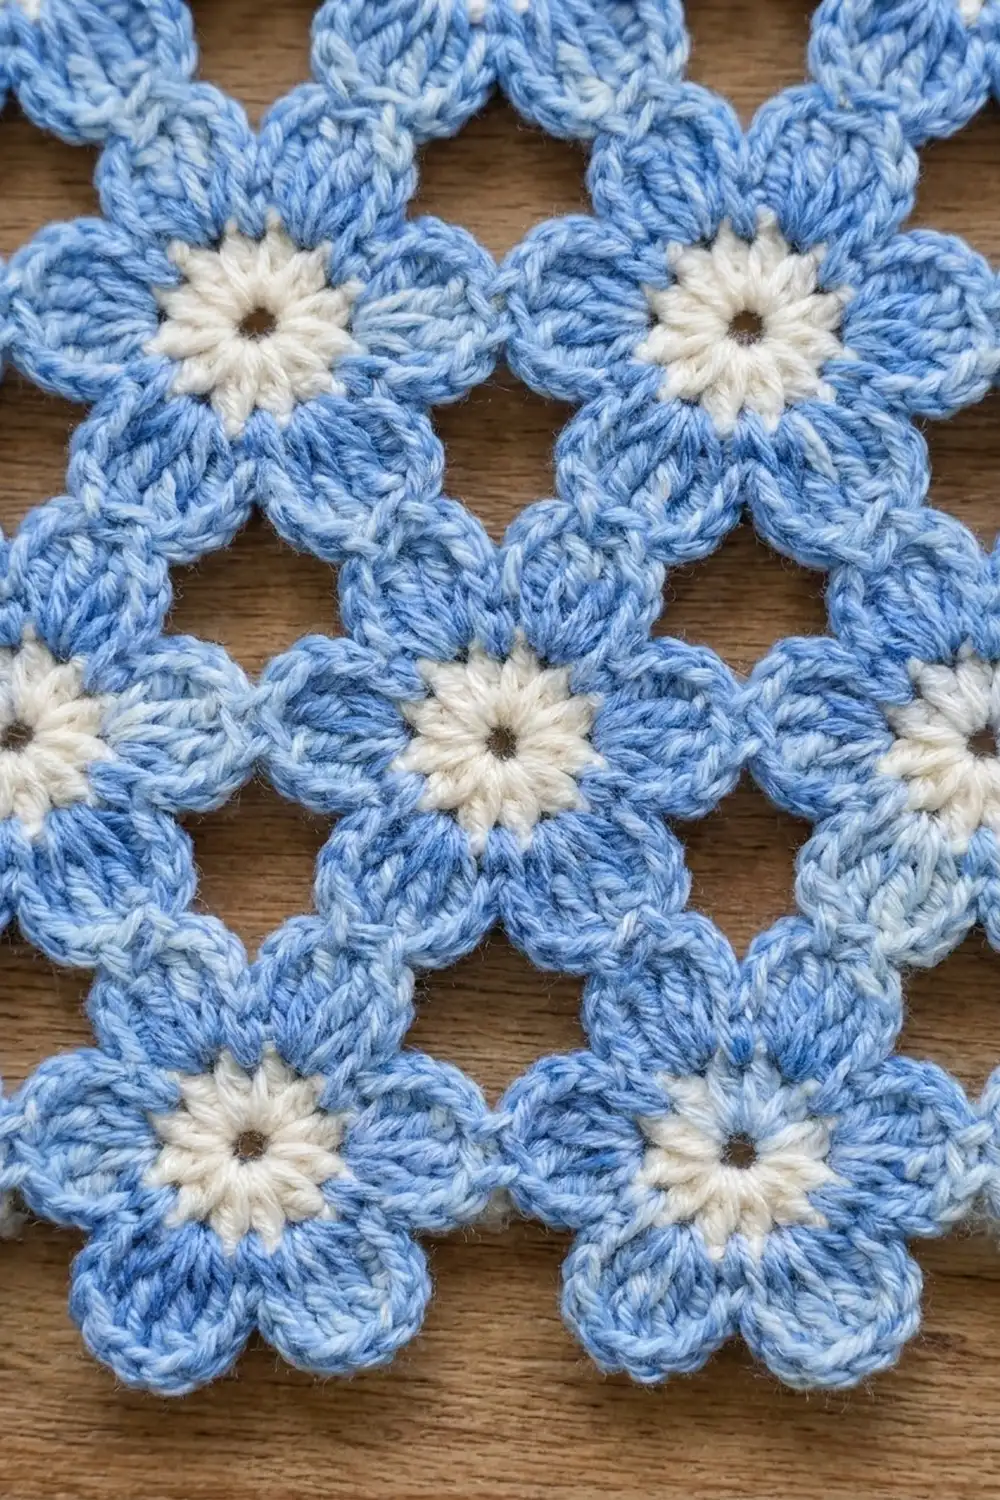
Flower Motif
Work every flower the same way through Round 2. In Round 3, only the petals that join to a neighbor change.
Round 1 (Color A): Make a magic ring. Ch 1, then work 10 sc in the ring. Pull the ring closed and sl st to the first sc. (10 sc) Fasten off Color A.
Round 2 (Color B): Join Color B with a sl st in any sc. Ch 1, sc in the same st, ch 3, skip the next sc. (Sc in the next sc, ch 3, skip the next sc) 4 times. Sl st to the first sc. (5 sc and 5 ch-3 sps)
Round 3 (Color B): Sl st into the first ch-3 sp. (Work 1 Petal in this ch-3 sp, sl st in the next sc of Round 2, then move to the next ch-3 sp) 5 times. The last sl st goes into the first sc of Round 2. (5 petals: 40 petal sts + 5 sl sts = 45 sts, plus 5 ch-2 tips) Fasten off and weave in the ends.
The sl st between petals pulls each valley in close to the center ring. This makes the petals look rounded and separate instead of running together.
Work over the Color A tail in Round 2 to hide it. Fewer ends to weave in later means a tidier back.
Naming the Petals
Work the rounds counterclockwise with the right side facing you. Number the petals in the order you make them in Round 3. Hold the flower so the petals sit like this:
- Petal 1: lower right
- Petal 2: upper right
- Petal 3: top
- Petal 4: upper left
- Petal 5: lower left
Hold every flower in the panel this way, with Petal 3 pointing to the top of the panel. When you start Round 3 on a new flower, put a marker in the first ch-3 sp so you can see where Petal 1 will sit.
Make All Pieces
You need 18 flowers in total:
- Color A: 18 centers (Round 1)
- Color B: 18 petal sets (Rounds 2 and 3)
You can make all 18 centers and all 18 Round 2 rings first. Then work Round 3 one flower at a time, in layout order, so each new flower joins as you go.
Layout grid (3 wide x 6 tall), with working order:
Row 1:   F1   F2   F3
Row 2:   F4   F5   F6
Row 3:   F7   F8   F9
Row 4:   F10  F11  F12
Row 5:   F13  F14  F15
Row 6:   F16  F17  F18
Joining
All joins happen in Round 3. You only replace a petal’s ch-2 tip with the join sequence. Work every other stitch exactly as written.
Flower 1: Work Round 3 as written, with no joins.
Flowers 2 and 3 (rest of Row 1): Work Petals 1, 2 and 3 as written. Work Petal 4 as a Joining petal into Petal 2 of the flower on the left. Work Petal 5 as written.
Flowers 4, 7, 10, 13 and 16 (left column): Work Petals 1 and 2 as written. Work Petal 3 as a Double joining petal: the first sl st goes into Petal 1 of the flower above, and the second goes into Petal 5 of the flower above. Work Petals 4 and 5 as written.
All other flowers: Work Petals 1 and 2 as written. Work Petal 3 as a Double joining petal into Petals 1 and 5 of the flower above. Work Petal 4 as a Joining petal into Petal 2 of the flower on the left. Work Petal 5 as written.
Stitch-to-stitch logic: Every join is one sl st into one ch-2 tip. No stitches are added or removed, so each flower keeps its 45 sts. A horizontal join links one petal to one petal. A vertical join links the top petal of the lower flower to both lower petals of the flower above. This draws the three tips into a neat point and keeps the columns straight.
Join count check:
- Horizontal joins: 2 per row x 6 rows = 12
- Vertical joins: 3 per row gap x 5 gaps = 15, each using 2 sl sts
Tension advice: Make the ch 1 on each side of a join the same size as a normal ch. If you pull the join tight, the petal tips pucker and the openings close up. If the chains are loose, the panel stretches and loses its shape.
Size checkpoint: After Row 2, the panel should measure 8.5 in (21.6 cm) wide and 5.5 in (14.0 cm) tall. Each new row adds 2.75 in (7.0 cm) of height.
Border: The Petal Edge
This design has no added border rounds. The free petals around the outside make the scalloped edge, so the border depth is 0 in (0 cm). The size before and after the border is the same.
Border gauge: One edge scallop is one free petal. Along the sides, the scallops sit 2.75 in (7.0 cm) apart, which matches the flower spacing.
Free petals per side:
- Top edge: 3 scallops (Petal 3 of F1, F2 and F3)
- Bottom edge: 6 scallops (Petals 1 and 5 of F16, F17 and F18)
- Left edge: 6 scallops (Petal 4 of F1, F4, F7, F10, F13 and F16)
- Right edge: 6 scallops (Petal 2 of F3, F6, F9, F12, F15 and F18)
Total free petals: 3 + 6 + 6 + 6 = 21.
Why the math works: The panel has 18 x 5 = 90 petals. The horizontal joins use 12 x 2 = 24 petals. The vertical joins use 15 x 3 = 45 petals. 90 – 24 – 45 = 21 free petals, which matches the edge count above. If you find a free petal anywhere else, a join was missed.
Width: 2 spacings x 2.75 in (7.0 cm) + one flower width of 3 in (7.6 cm) = 8.5 in (21.6 cm).
Length: 5 spacings x 2.75 in (7.0 cm) + one flower height of 2.75 in (7.0 cm) = 16.5 in (41.9 cm). Each flower is shorter than it is wide because its bottom is a valley between two petals, not a tip.
Final Blocking
- Weave in all ends along the back of the petals, not across the open spaces.
- Lay the panel right side up on a blocking mat.
- Pin the four corners first, to 8.5 x 16.5 in (21.6 x 41.9 cm).
- Pin every free petal tip on all four sides (21 pins in total), keeping the spacing even.
- Gently open each star-shaped space with your fingers so the joins lie flat.
- Spray with water until the panel is damp but not soaked.
- Let it dry completely, at least 6 hours, before you take out the pins.
Final Quality-Control Checklist
- 18 flowers in a 3 x 6 layout
- Every flower has a cream center of 10 sc
- Every flower has 5 petals of 8 sts each
- 12 horizontal joins and 15 vertical joins
- 21 free petals on the outside edge
- Panel measures 8.5 x 16.5 in (21.6 x 41.9 cm)
- No ends showing across the openings
Troubleshooting
- Petals look flat or pointed: Make sure you work the sl st into the Round 2 sc between petals.
- Hole in the center: Pull the magic ring tighter before the sl st, then secure the tail with a few stitches on the back.
- Columns lean to one side: A vertical join went into only one petal of the flower above. Each Petal 3 joins to both Petal 1 and Petal 5.
- Panel is too wide: Your flowers are too big. Remake them with a smaller hook.
- Joins pucker: Loosen the ch 1 on each side of the sl st.
- Wrong petal joined: Undo back to the join, check the petal names and work it again.
Care
Hand wash in cool water with a mild soap, then press out the water in a towel. Lay flat to dry, pinning the petal tips if needed.
Final Notes
The whole panel depends on one chain of measurements. A 0.75 in (1.9 cm) center becomes a 1.25 in (3.2 cm) ring, then a 3 in (7.6 cm) flower. The flowers sit 2.75 in (7.0 cm) apart, which gives a finished panel of 8.5 x 16.5 in (21.6 x 41.9 cm). Check each stage as you go and the panel will come out the right size.
Happy crocheting!