

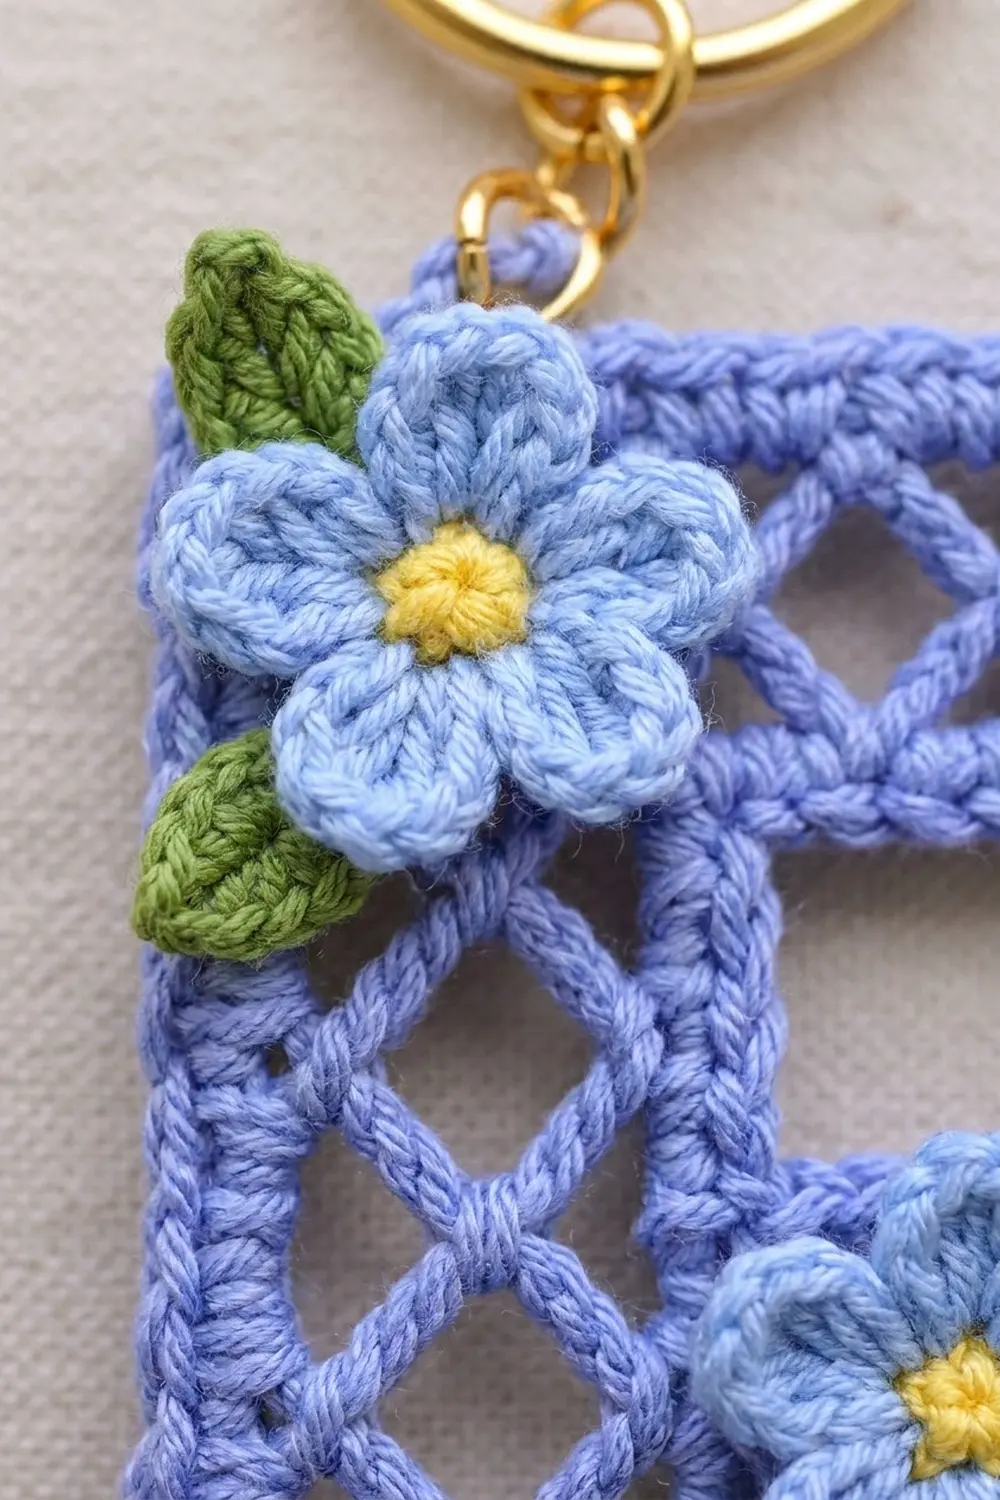
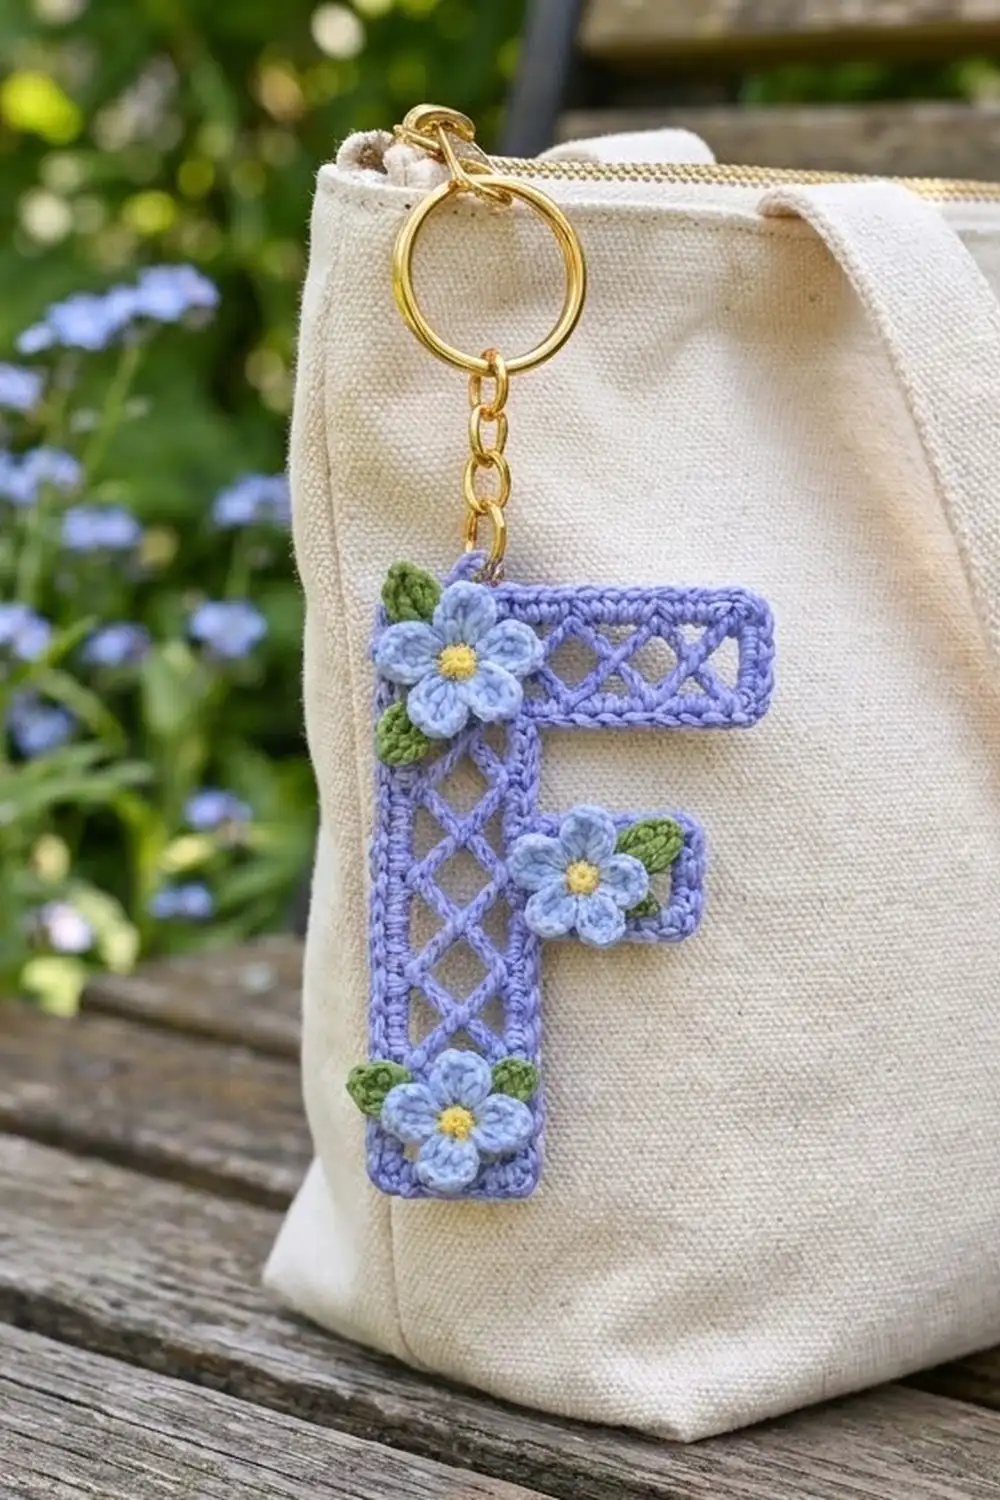
This little letter F is light and airy, with a crisp edge. An open diamond lattice fills the letter shape, and a solid periwinkle frame holds it all neatly in place. Three tiny forget-me-nots with sunny yellow centers and fresh green leaves add the finishing touch.
The palette is soft and springlike: periwinkle for the letter, pale blue petals, yellow centers and leaf green. Gold hardware makes it a cheerful bag charm, zipper pull or initial gift.
The pattern uses US crochet terms. The finished letter measures 3.2 in (8.1 cm) wide by 4.9 in (12.4 cm) tall.
You crochet the stem first as a strip of net mesh. Then you work both arms straight off the stem’s right edge, so the letter is one continuous piece. Two rounds of single crochet frame the outline. Last, you block the letter, sew on the flowers and leaves, and add the ring.
Finished Size and Construction
- Finished size: 3.2 in (8.1 cm) wide x 4.9 in (12.4 cm) tall
- Skill level: Intermediate (you need to pick up stitches along row-ends and shape inside corners)
- Terminology: US
- Yarn weight: #1 super fine / size 3 cotton crochet thread
- Hook: 2.0 mm
- Number of pieces: 1 letter body, plus 3 flower appliqués and 4 leaf appliqués
- Layout: Single piece; no joining of pieces
- Stem size before border: 0.9 in (2.3 cm) x 4.5 in (11.4 cm)
- Letter size before border: 2.8 in (7.1 cm) x 4.5 in (11.4 cm)
- Border depth: 0.2 in (0.5 cm), made of 2 rounds
Materials
Use a smooth, mercerized cotton thread. It gives the lattice clean lines and the border crisp corners. Avoid fuzzy fibers, because they blur the diamonds. The amounts below assume about 4 m per gram.
- Periwinkle (main color): 10 g, about 40 m
- Light blue (petals): 3 g, about 12 m
- Yellow (centers): 1 g, about 4 m
- Leaf green: 1 g, about 4 m
All quantities include a safety margin of roughly 25%.
Tools:
– 2.0 mm crochet hook (plus 1.75 mm and 2.25 mm hooks for adjusting gauge)
– Small tapestry needle
– 4 locking stitch markers
– Rust-proof pins and a gridded blocking board
– Spray bottle
– Ruler
– Gold split ring, 1 in (2.5 cm)
– Short gold chain, about 1.5 in (3.8 cm), with 2 jump rings
– Small pliers
Abbreviations (US Terms)
- ch – chain
- sl st – slip stitch
- sc – single crochet
- hdc – half double crochet
- dc – double crochet
- st(s) – stitch(es)
- sk – skip
- sp – space
- tch – turning chain
- RS – right side
- sc2tog – insert hook in next st or row-end and pull up a loop; insert hook in the following st or row-end and pull up a loop; yarn over and pull through all 3 loops.
- sc3tog – work as sc2tog, but pull up a loop in 3 places, then yarn over and pull through all 4 loops.
- Magic ring – an adjustable loop that you pull tight after the first round.
Row-end rule: Wherever these instructions tell you to work along net row-ends, follow this rule. In each group of 4 net rows, work 2 sc in the first row-end, 3 sc in the second, 2 sc in the third and 2 sc in the fourth. That gives exactly 9 sc for every 4 rows. Treat each solid sc pick-up row-end as 1 sc.
Gauge and Checkpoints
- Solid sc gauge: 10 sc and 10 sc rows = 1 in (2.5 cm).
- Net gauge: a strip 9 sts wide (2 loops) by 4 net rows measures 0.9 in x 0.9 in (2.3 cm x 2.3 cm).
The stem works as your test piece. Measure it at each checkpoint below:
- After stem Row 4: 0.9 in x 0.9 in (2.3 cm x 2.3 cm)
- After stem Row 20: 0.9 in x 4.5 in (2.3 cm x 11.4 cm)
- After the middle arm: it reaches 1.9 in (4.8 cm) from the stem’s left edge
- After the top arm: it reaches 2.8 in (7.1 cm)
- After border Rnd 1: 3.0 in x 4.7 in (7.6 cm x 11.9 cm)
- After border Rnd 2: 3.2 in x 4.9 in (8.1 cm x 12.4 cm)
If your work is too big, change to a 1.75 mm hook. If it is too small, change to a 2.25 mm hook. Either way, rework the first 4 rows before you continue. A strip that is too tall but the right width usually means your ch-5 loops are loose. Tighten your chains rather than changing hooks.
Letter Body
Stem
Use periwinkle. Mark the side facing you on Row 1 as the RS.
Foundation: Ch 10.
Row 1 (Net A): Sc in 2nd ch from hook, [ch 5, sk 3 ch, sc in next ch] twice, turn. (3 sc, 2 ch-5 loops)
Row 2 (Net B): Ch 5 (counts as dc + ch 2), sc in first ch-5 loop, ch 5, sc in next ch-5 loop, ch 2, dc in last sc, turn. (2 dc, 2 ch-2 sps, 2 sc, 1 ch-5 loop)
Row 3 (Net A): Ch 1, sc in first dc, ch 5, sc in next ch-5 loop, ch 5, sc in 3rd ch of tch, turn. (3 sc, 2 ch-5 loops)
Rows 4–20: Repeat Rows 2–3, ending with a Row 2 (Net B) on Row 20. All even rows are Net B and all odd rows are Net A.
Do not fasten off. Pull up a long loop, slip it onto a marker and set the stem aside for the border.
The stem now has 20 net rows. That is 5 groups of 4 rows, each 0.9 in (2.3 cm) tall, for a total of 4.5 in (11.4 cm).
Place markers on the right edge between Rows 8 and 9, and between Rows 16 and 17.
Middle Arm
Row 1: With the RS facing, join periwinkle at the right edge at the bottom of Row 9. Ch 1. Following the row-end rule, work across the row-ends of Rows 9–12 (2, 3, 2, 2), turn. (9 sc)
Row 2 (Net A): Ch 1, sc in first sc, [ch 5, sk 3 sc, sc in next sc] twice, turn. (3 sc, 2 ch-5 loops)
Rows 3–5: Work Net B, Net A, Net B, exactly as on the stem.
Fasten off. The arm extends 1 in (2.5 cm) from the stem: 0.1 in (0.3 cm) for the pick-up row plus 0.9 in (2.3 cm) for 4 net rows. It now reaches 1.9 in (4.8 cm).
Top Arm
Row 1: With the RS facing, join periwinkle at the bottom of Row 17. Ch 1. Following the row-end rule, work across the row-ends of Rows 17–20 (2, 3, 2, 2), turn. (9 sc)
Rows 2–9: Alternate Net A and Net B, starting with Net A and ending with Net B on Row 9.
Fasten off. This arm extends 1.9 in (4.8 cm): 0.1 in for the pick-up row plus 1.8 in (4.6 cm) for 8 net rows. The letter now measures 2.8 in x 4.5 in (7.1 cm x 11.4 cm).
Rows 13–16 of the stem stay open between the arms. That is a 0.9 in (2.3 cm) gap before the border.
Forget-Me-Not Flower (make 3)
Rnd 1: With yellow, make a magic ring. Work 10 sc in the ring, sl st to the first sc and fasten off. (10 sc)
Rnd 2: Join light blue in any sc. [(hdc, 2 dc, hdc) in next sc, sl st in next sc] 5 times. Fasten off, leaving a 6 in (15.2 cm) tail for sewing. (5 petals; 25 sts)
The flower measures about 0.8 in (2.0 cm) across.
Leaf (make 4)
With green, ch 6. Sl st in 2nd ch from hook, sc in next ch, hdc in next ch, sc in next ch, sl st in last ch. (5 sts)
Fasten off, leaving a 6 in (15.2 cm) tail. Each leaf is about 0.5 in (1.3 cm) long.
Border
Border gauge: 10 sc = 1 in (2.5 cm). Each round adds 0.1 in (0.3 cm) to every outer edge.
Placements on each edge of the letter:
– Into each sc or foundation-chain free loop: 1 sc
– Along net row-ends: use the row-end rule
– Into a Net B top edge (stem top and both arm tips): 1 sc in each dc, 1 sc in each ch-2 sp, 1 sc in each sc and 3 sc in the ch-5 loop, for 9 sc
Corner types: The F has 7 outer corners and 3 inner corners. The inner corners are under the top arm, above the middle arm and under the middle arm. In the tables, side counts exclude the corner stitches, which are listed separately.
Rnd 1: With the RS facing, put the stem’s live loop back on the hook. Ch 1, then work 1 corner sc at the top-left corner (C1). Then work counterclockwise around the letter.
- At each outer corner, work 1 extra corner sc.
- At each inner corner, sc2tog. Use the last placement of one side and the first placement of the next.
| Side | Placements available | Rnd 1 sc | Rnd 2 sc |
|---|---|---|---|
| Left edge of stem | 45 | 45 | 47 |
| Bottom of stem | 9 | 9 | 11 |
| Lower right of stem | 18 | 17 | 17 |
| Underside of middle arm | 10 | 9 | 9 |
| Tip of middle arm | 9 | 9 | 11 |
| Top of middle arm | 10 | 9 | 9 |
| Gap between arms | 9 | 7 | 5 |
| Underside of top arm | 19 | 18 | 18 |
| Tip of top arm | 9 | 9 | 11 |
| Top edge (stem 9 + top arm 19) | 28 | 28 | 30 |
Sl st to the first sc to finish Rnd 1.
- Rnd 1 total: 160 side sts + 7 corner sc + 3 sc2tog = 170 sts
- In placement terms, that is the 166 placements worked once each, plus 7 corner sc added, minus 3 merged by the sc2togs.
Rnd 2: Ch 1. Work 3 sc in each outer corner sc. Work sc3tog at each inner corner, over the st before the sc2tog, the sc2tog itself and the st after it. Work 1 sc in every other st. Sl st to the first sc.
- Rnd 2 total: 168 side sts + 7 corner centers + 3 sc3tog = 178 sts
- That is 170 sts + 14 sts added at outer corners − 6 sts removed at inner corners.
Fasten off and weave in all ends.
Why the math works: Every round sits one stitch further out from the letter. On a straight side, the round needs the same number of stitches as the side below it. An outer corner has to stretch around the point, so each one needs 2 more stitches every round. An inner corner gets squeezed, so each one needs 2 fewer. Here, 7 outer corners minus 3 inner corners leaves 4, so the round grows by 4 x 2 = 8 stitches each time (170 to 178).
The table also checks itself:
– The top edge equals the bottom edge plus the underside of the top arm: 30 + 2 corner centers = 32 sts = 3.2 in (8.1 cm).
– The left edge is 47 + 2 = 49 sts = 4.9 in (12.4 cm).
– After the border, the gap between the arms shows 5 sts, or 0.5 in (1.3 cm).
Final Blocking
- Lightly spray the letter with water until it is damp but not dripping.
- Lay it RS up on the grid board. Pin the left edge straight to 4.9 in (12.4 cm) and the top edge to 3.2 in (8.1 cm).
- Pin the remaining outer corners. The bottom of the stem and both arm tips should each be 1.3 in (3.3 cm) wide.
- Set one pin into each inner corner to keep it sharp.
- Nudge the lattice with a fingertip until the diamonds sit evenly, about 0.4 in (1.0 cm) wide.
- Let it dry completely before you unpin.
- Sew on the flowers with their tails, stitching around each yellow center and catching the base of each petal.
- Top flower: centered 0.4 in (1.0 cm) in from the top and left edges, with a leaf behind it at the upper left.
- Middle flower: centered on the middle arm, with a leaf peeking out on its right side.
- Bottom flower: centered on the stem 0.5 in (1.3 cm) above the bottom edge, with a leaf on each side.
- Tuck each leaf’s straight end under its flower and tack it down at the base and tip.
- Open a jump ring with the pliers and slip it through both border rounds at the top-left corner. Attach the chain, then add the second jump ring and the split ring.
Final Quality-Control Checklist
- [ ] The letter measures 3.2 in x 4.9 in (8.1 cm x 12.4 cm).
- [ ] The stem, both arm tips and the bottom each measure 1.3 in (3.3 cm).
- [ ] Border Rnd 2 has 178 sts.
- [ ] All 7 outer corners are square and all 3 inner corners are sharp.
- [ ] The diamonds look even, with no twisted loops.
- [ ] The flowers lie flat, and the leaves don’t stick out past the border more than intended.
- [ ] The jump rings are fully closed.
- [ ] All ends are woven in and trimmed.
Troubleshooting
- The lattice looks floppy: Your chains are too loose. Chain on the shaft of the hook, not the tip.
- An arm tilts up or down: You probably spread the pick-up stitches unevenly. Rework Row 1 using the 2-3-2-2 row-end rule.
- The border ruffles: You added extra stitches along the row-ends. Recount each side against the table.
- An inner corner gapes: Make sure Rnd 2 uses a sc3tog that is centered on the sc2tog below it.
- An outer corner looks rounded: Work the 3-sc corner group firmly, then re-pin it while blocking.
- The flowers cup: Rnd 2 is too tight. Work the petals with a slightly looser tension.
Care
Remove the hardware before washing. Hand wash in cool water, press out the moisture in a towel and dry flat, pinned to shape.
Final Notes
The measurement chain is simple. A strip 9 stitches wide by 4 net rows tall measures 0.9 in (2.3 cm) square, and everything else builds on that. The stem is 0.9 in x 4.5 in (2.3 cm x 11.4 cm). The arms bring the letter to 2.8 in (7.1 cm) wide. Border Rnd 1 brings it to 3.0 in x 4.7 in (7.6 cm x 11.9 cm), and Rnd 2 to 3.2 in x 4.9 in (8.1 cm x 12.4 cm). If each checkpoint matches, the finished F will too.
Happy crocheting!