
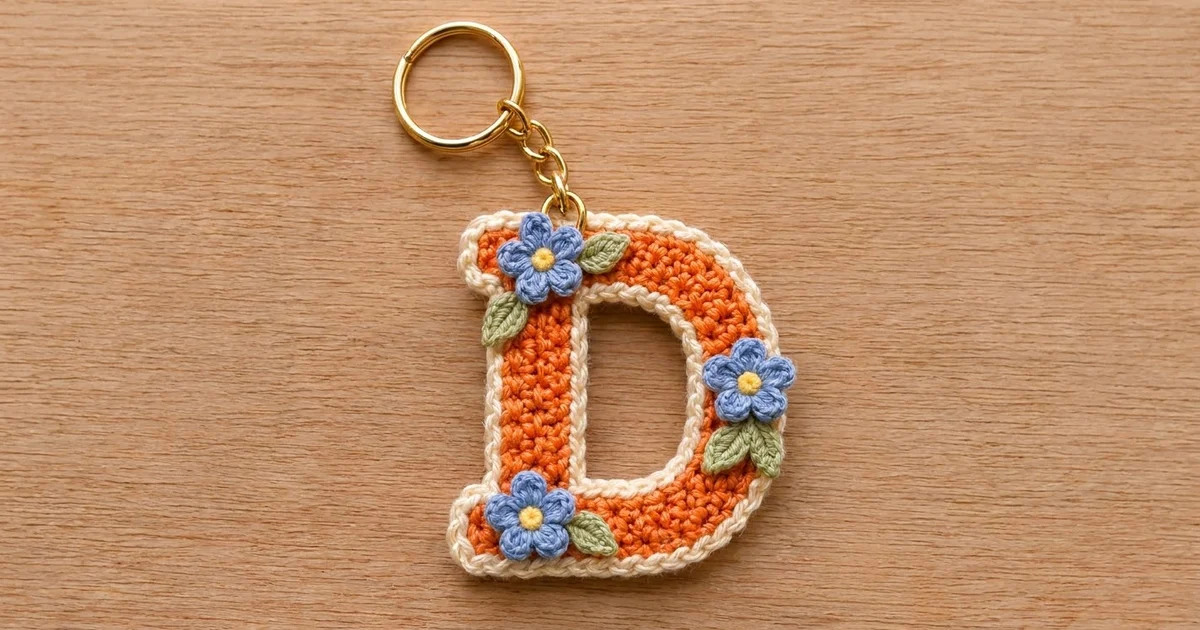
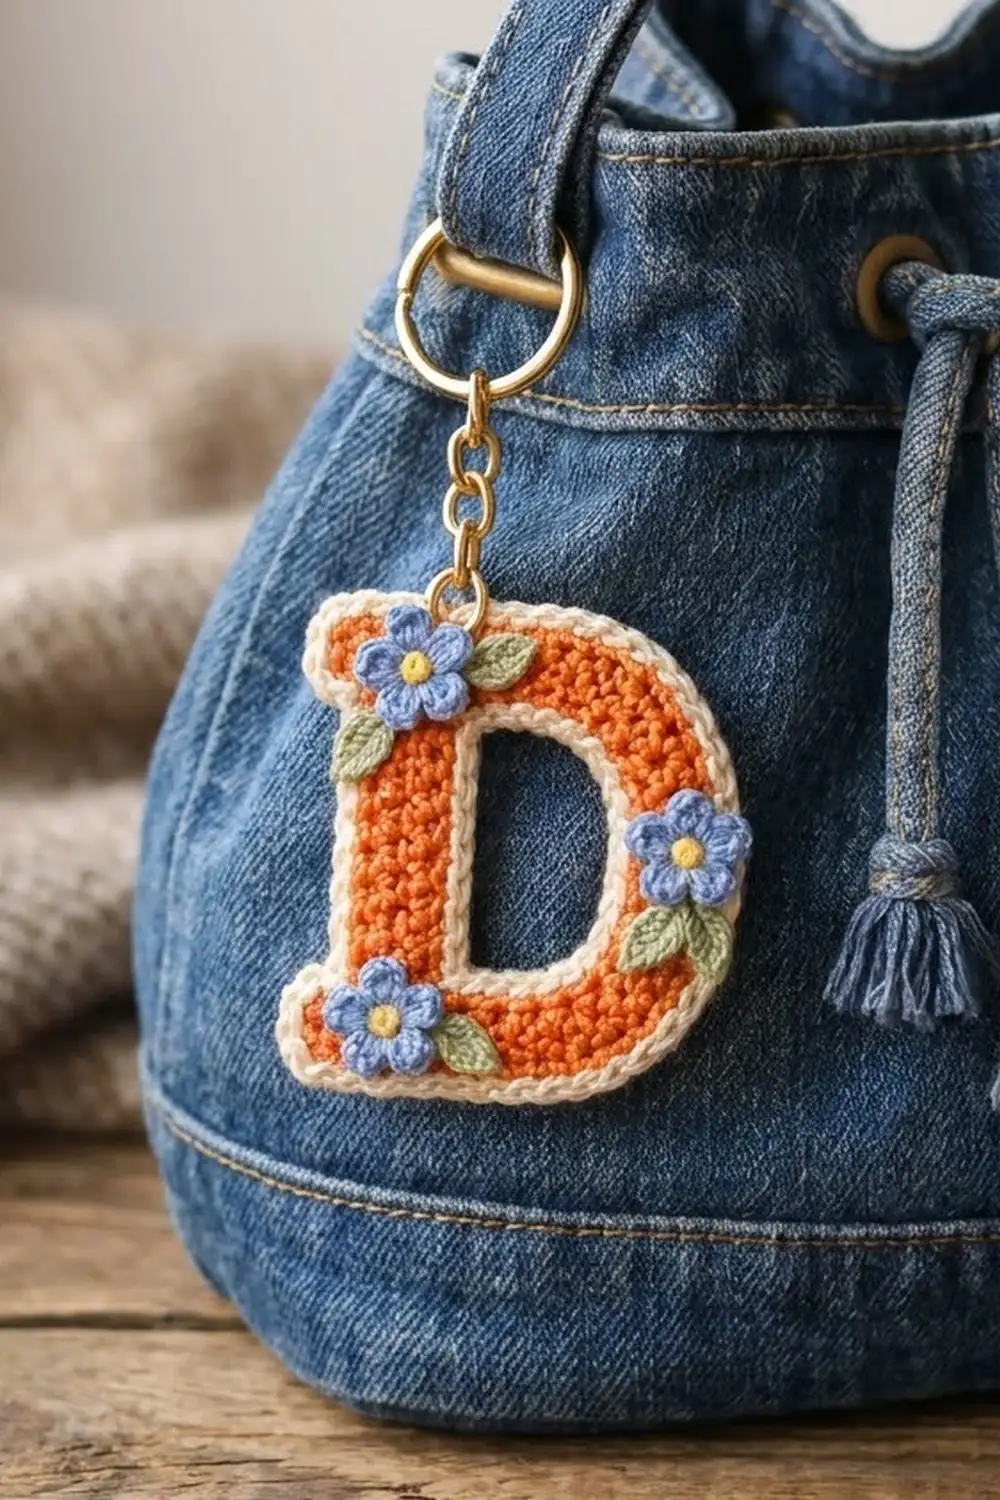
This Forget-Me-Not Letter D Keychain is a small, sturdy initial charm. A bright orange capital “D” gets a cream rope-twist edge and three tiny blue flowers with sage leaves. It looks good on a bag strap, a pencil case zipper, or a set of keys, and it makes a quick personal gift.
The palette is simple: warm orange for the letter, cream for the outline, periwinkle blue for the petals, yellow for the flower centers, and sage green for the leaves. The style is clean and slightly retro. The letter has small square serifs, and the outlines look like they were piped on.
This pattern uses US crochet terms. The finished letter measures about 3.25 in (8.3 cm) wide by 3.5 in (8.9 cm) tall, not counting the hardware. The key ring and chain add about 2 in (5.1 cm) above the letter.
Construction is all flat work. You crochet the letter in single crochet rows from the bottom up. The stem and the bowl are worked as two separate columns around the counter, then joined across the top bar. A cream border goes around the outside and a single rope round goes around the counter. Last, you sew on the flowers and leaves and attach the hardware.
Finished Size and Construction
- Finished size: 3.25 in (8.3 cm) wide x 3.5 in (8.9 cm) tall
- Skill level: Easy-intermediate (shaping, rejoining yarn, reverse sc)
- Terminology: US
- Yarn weight: Sport / #2 cotton
- Hook: 2.5 mm (US B-1 or C-2)
- Number of pieces: 1 letter, plus 3 flowers and 5 leaves to sew on
- Layout: Single letter, no joining
- Letter body size before border: 2.75 in (7.0 cm) wide x 3 in (7.6 cm) tall
- Border depth: about 0.25 in (0.6 cm) on the outer edge
- Counter (hole) after trim: about 0.5 in (1.3 cm) x 1.75 in (4.4 cm)
Materials
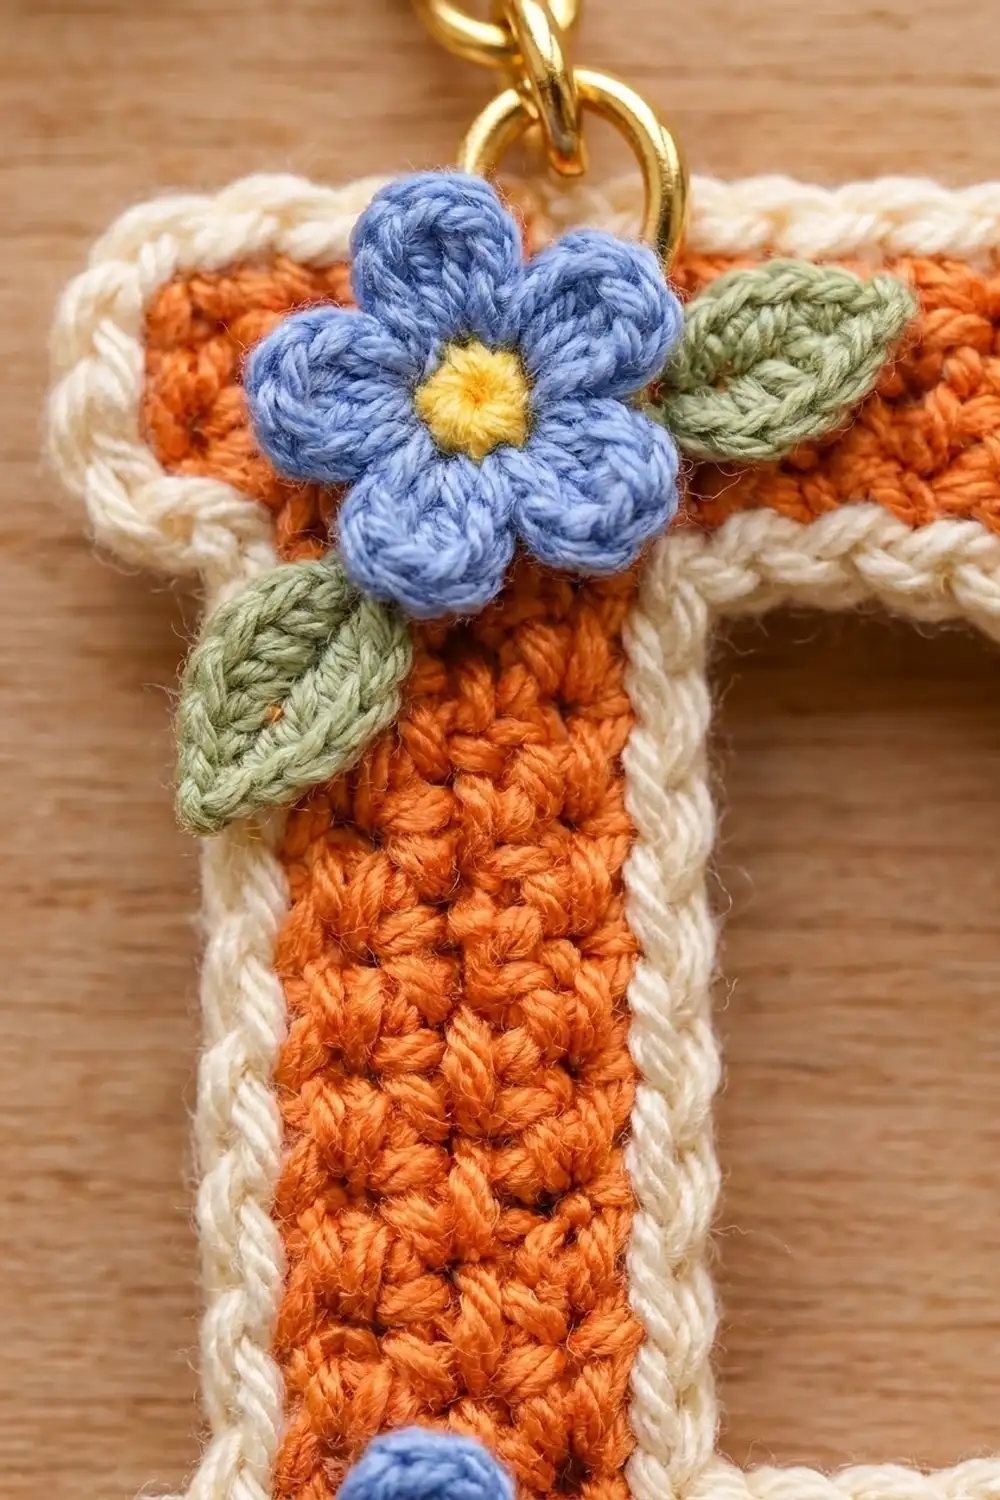
Use a smooth mercerized or matte cotton in sport weight. Cotton keeps the letter firm and holds the stitch definition shown in the photo. Avoid fuzzy or very stretchy yarns, because the letter needs to keep its shape on a key ring.
- Color A, orange: 5 g, about 16 m
- Color B, cream: 4 g, about 12 m
- Color C, periwinkle blue: 2 g, about 6 m
- Color D, yellow: 1 g, about 3 m
- Color E, sage green: 1 g, about 3 m
Tools:
- 2.5 mm crochet hook
- Tapestry needle
- 2 stitch markers
- Scissors
- 1 split key ring, about 1 in (2.5 cm) across, with a short gold chain
- 1 jump ring, 8 mm, plus 2 pairs of flat-nose pliers
- Optional: fabric glue or felt backing for extra stiffness
All quantities include a small margin for swatching and tails.
Abbreviations (US Terms)
- ch: chain
- sl st: slip stitch
- sc: single crochet
- hdc: half double crochet
- dc: double crochet
- sc2tog: single crochet 2 together
- inc: 2 sc in the same stitch
- st(s): stitch(es)
- RS: right side
Special stitch: reverse single crochet (rev sc, “crab stitch”). Work from left to right (if you are right-handed). Insert the hook into the next stitch to the right, yarn over, pull up a loop, yarn over, and pull through both loops. This makes the twisted rope edge.
Edge names: In this pattern, the serif edge is the left side of the letter (the one with the stem) and the curve edge is the right side (the bowl).
Gauge and Checkpoints
Gauge: 22 sc and 24 rows = 4 in (10.2 cm) in sc rows. That works out to 5.5 sc and 6 rows per 1 in (2.5 cm).
The letter itself is your test piece. Work Rows 1–3 and measure before you go on.
- After Row 3: the bottom bar is 14 sts, about 2.5 in (6.4 cm) wide.
- After Row 15 (stem): the stem is about 2.5 in (6.4 cm) tall from the foundation.
- After Row 18: the body is 2.75 in (7.0 cm) wide x 3 in (7.6 cm) tall.
- After the border: the letter is 3.25 in (8.3 cm) x 3.5 in (8.9 cm).
If Row 3 measures more than 2.5 in (6.4 cm), go down to a 2.25 mm hook. If it measures under 2.4 in (6.1 cm), go up to a 2.75 mm hook. Tight stitches are better than loose ones here, because the letter should feel firm and look solid.
Letter Body
Work with Color A. Ch 1 at the start of each row does not count as a stitch.
Bottom Bar (Rows 1–3)
The slip knot end of the chain is the serif edge.
Row 1: Ch 13. Sc in the 2nd ch from the hook and in each ch across. (12 sc)
You end at the serif edge.
Row 2 (growth): Ch 1, turn. Sc in each st to the last st, inc in the last st (curve edge). (13 sc)
Row 3 (growth): Ch 1, turn. Inc in the first st (curve edge), sc in each st across. (14 sc)
You end at the serif edge. Check the 2.5 in (6.4 cm) width now.
Imagine the 14 stitches of Row 3 as columns 1–14, with column 1 at the serif edge. Columns 1–2 form the bottom serif. Columns 3–7 carry the stem. Columns 8–11 sit under the counter. Columns 12–14 carry the bowl.
Stem (Rows 4–15)
Row 4: Turn, but do not ch. Sl st in the first 3 sts. Ch 1, sc in the same st as the last sl st and in the next 4 sts. (5 sc)
Leave the remaining 7 sts unworked. The sl sts over columns 1–2 make the flat top of the bottom serif.
Rows 5–15: Ch 1, turn, sc in each st across. (5 sc)
You end at the serif edge. Do not fasten off. Pull up a long loop, take out the hook, and put a stitch marker in the loop to hold it.
Bowl (Rows 4–15)
Row 4: Find the 7 unworked sts of Row 3. Skip the 4 sts next to the stem (columns 8–11). Join Color A with a sl st in the 5th st (column 12). Ch 1, sc in the same st and in the next st, inc in the last st (curve edge). (4 sc)
The increase pushes the bowl out one column past the bottom bar. This is what starts the curve.
Rows 5–15: Ch 1, turn, sc in each st across. (4 sc)
You end at the counter side. Fasten off and leave a 4 in (10.2 cm) tail.
The open space between the stem and the bowl is the counter: 4 sts wide and 12 rows tall, about 0.75 in (1.9 cm) x 2 in (5.1 cm) before the trim.
Top Bar (Rows 16–18)
Put the held stem loop back on your hook.
Row 16 (joining row): Ch 3. Sc in the 2nd ch from the hook and the next ch (2 sc, top serif). Sc in each of the 5 stem sts. Ch 4 across the counter. Sc in the first 2 bowl sts, sc2tog over the last 2 bowl sts. (2 + 5 + 4 + 3 = 14 sts)
Row 17: Ch 1, turn. Sc2tog, sc in the next st, sc in each of the 4 ch, sc in each of the 5 stem sts, sc in the 2 serif sts. (1 + 1 + 4 + 5 + 2 = 13 sc)
Row 18: Ch 1, turn. Sc in each st to the last 2 sts, sc2tog. (12 sc)
Rows 16–18 (14, 13, 12) mirror Rows 3, 2, 1 (14, 13, 12), so the bowl curves the same way at the top and bottom. Fasten off and weave in all orange tails.
Checkpoint: 2.75 in (7.0 cm) wide x 3 in (7.6 cm) tall.
Flowers (Make 3)
Center: With Color D, make a magic ring. Ch 1, 5 sc in the ring, pull it closed, and join with a sl st to the first sc. (5 sc) Fasten off Color D.
Petals: Join Color C in any sc. In each sc around, work (sl st, ch 2, 2 dc, ch 2, sl st). (5 petals) Fasten off and leave an 8 in (20.3 cm) tail for sewing.
Each flower measures about 0.75 in (1.9 cm) across.
Leaves (Make 5)
With Color E, ch 6. Sl st in the 2nd ch from the hook, sc in the next ch, hdc in the next ch, sc in the next ch, (sl st, ch 1, sl st) in the last ch. Then work along the other side of the chain: sc in the next ch, hdc in the next ch, sc in the next ch, sl st in the next ch (the tip). Fasten off and leave a 6 in (15.2 cm) tail.
Each leaf is about 0.6 in (1.5 cm) long, with a point at the tip.
Border
Border gauge: Work 1 sc in each stitch along the top and bottom and 1 sc in each row end along the sides. Rows are slightly shorter than sc are wide (6 rows vs 5.5 sc per inch), so the side edges get a little extra fullness. That gently rounds the bowl instead of cupping it.
Outer Border
Rnd 1 (sc): With the RS facing, join Color B in the bottom-left corner (Row 1, column 1, on the foundation side).
- Bottom edge: 3 sc in the corner, sc in the next 10 foundation ch, 2 sc in the last ch. (3 + 10 + 2 = 15 sc)
- Curve edge: 1 sc in each row end of Rows 1–18. (18 sc)
- Top edge: 2 sc in the first st of Row 18, sc in the next 10 sts, 3 sc in the last st (top-left corner). (2 + 10 + 3 = 15 sc)
- Serif edge: 1 sc in each row end of Rows 18–16 (3). Then 2 sc in the underside of the outer serif ch, and 1 sc in the underside of the next ch. 1 sc in each stem row end of Rows 15–4 (12). Then 1 sc in the sl st over column 2, 2 sc in the sl st over column 1, and 1 sc in each row end of Rows 3–1 (3). (3 + 2 + 1 + 12 + 1 + 2 + 3 = 24 sc)
Join with a sl st to the first sc. (15 + 18 + 15 + 24 = 72 sc)
The corner stitches are counted only once, inside the side they belong to. The 3-sc groups make the two sharp outer serif corners. The 2-sc groups round the bowl ends and the small inner serif corners. The inner (concave) corners next to the stem get no extra stitches, so they stay crisp.
Rnd 2 (rev sc): Ch 1. Work rev sc in each st around. (72 rev sc) Join and fasten off.
Counter Trim
Rnd 1 (rev sc): With the RS facing, join Color B at the bottom-left corner of the counter. Work rev sc directly into the orange edge as follows:
- 4 rev sc in the unworked Row 3 sts (bottom)
- 12 rev sc in the bowl row ends
- 4 rev sc in the underside of the Row 16 ch (top)
- 12 rev sc in the stem row ends
Join. (4 + 12 + 4 + 12 = 32 rev sc) Fasten off.
The counter is 4 sts by 12 rows, so 1 st per stitch and 1 st per row end follows the opening exactly. No extra stitches means the rectangle stays square and does not pucker.
Final Blocking
- Weave in all tails except the sewing tails on the flowers and leaves.
- Lightly spray the letter with water until it is damp.
- Pin it flat on a blocking mat at 3.25 in (8.3 cm) x 3.5 in (8.9 cm).
- Square the stem edge with a ruler, then ease the bowl into a smooth curve with your fingers.
- Pin the counter open to about 0.5 in (1.3 cm) x 1.75 in (4.4 cm).
- Let it dry completely.
- Sew on the flowers. Place one over the top-left serif corner so it overlaps the border, one on the right side of the bowl at about mid-height, and one over the bottom-left serif corner.
- Tuck the leaves halfway under the flowers and sew them down: 2 at the top flower (one right, one lower-left), 2 under the bowl flower, and 1 to the right of the bottom flower.
- Open the jump ring with pliers. Pass it through the top edge just inside Border Rnd 1, above the stem (about column 6). Hook on the chain and close the ring tightly.
Final Quality-Control Checklist
- Row stitch counts were 12, 13, 14 / 5 and 4 / 14, 13, 12.
- The body measured 2.75 in (7.0 cm) x 3 in (7.6 cm) before the border.
- Outer Rnd 1 has 72 sc and Rnd 2 has 72 rev sc.
- The counter trim has 32 rev sc and the counter lies flat.
- The serifs are square and the bowl is smoothly rounded.
- The flowers and leaves are sewn on securely, with no loose petals.
- The jump ring is fully closed and goes through two layers of stitches.
Troubleshooting
The letter cups or curls. Your border is too tight. Redo Rnd 1 with a hook 0.25 mm larger.
The border ruffles. You probably added extra stitches at the corners. Recount each side: 15, 18, 15, 24.
There is a gap where the counter meets the top bar. Pull the Row 16 chain snug, and close the gap with the Color A tail when weaving in.
The bowl looks boxy. Block it harder into a curve, or work the bowl Row 4 increase and the Row 16 decrease firmly.
The flowers flop. Add a stitch through the center of each flower, then a small tack at the tip of each petal.
The jump ring pulls out. Move it lower so it goes through Rnd 1 and the top row of Row 18.
Care
Hand wash in cool water, press out the water in a towel, and dry flat. Keep metal hardware dry to protect the gold finish.
Final Notes
The measurement chain is simple. Row 3 measures 2.5 in (6.4 cm), the finished body measures 2.75 in (7.0 cm) x 3 in (7.6 cm), and the 72-stitch two-round border adds about 0.25 in (0.6 cm) per side, for a finished letter of 3.25 in (8.3 cm) x 3.5 in (8.9 cm). If you hit each checkpoint, the border counts will fit without guesswork. The flowers and leaves then turn a plain initial into a little gift. For other letters, keep the same gauge, border math, and flower placement.
Happy crocheting!