
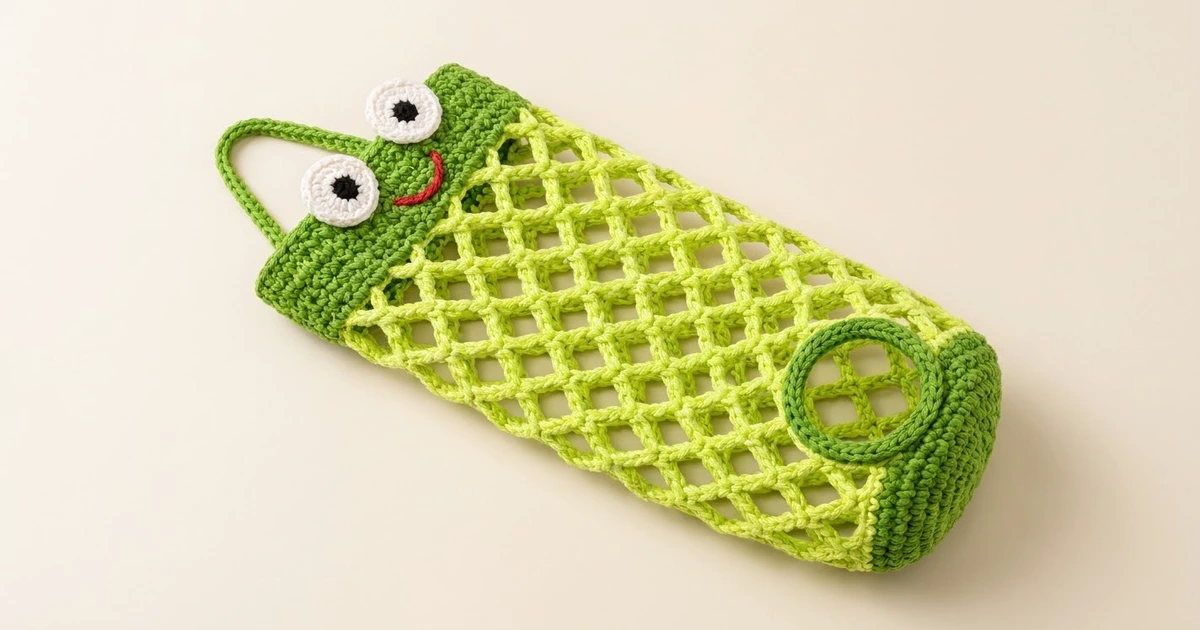
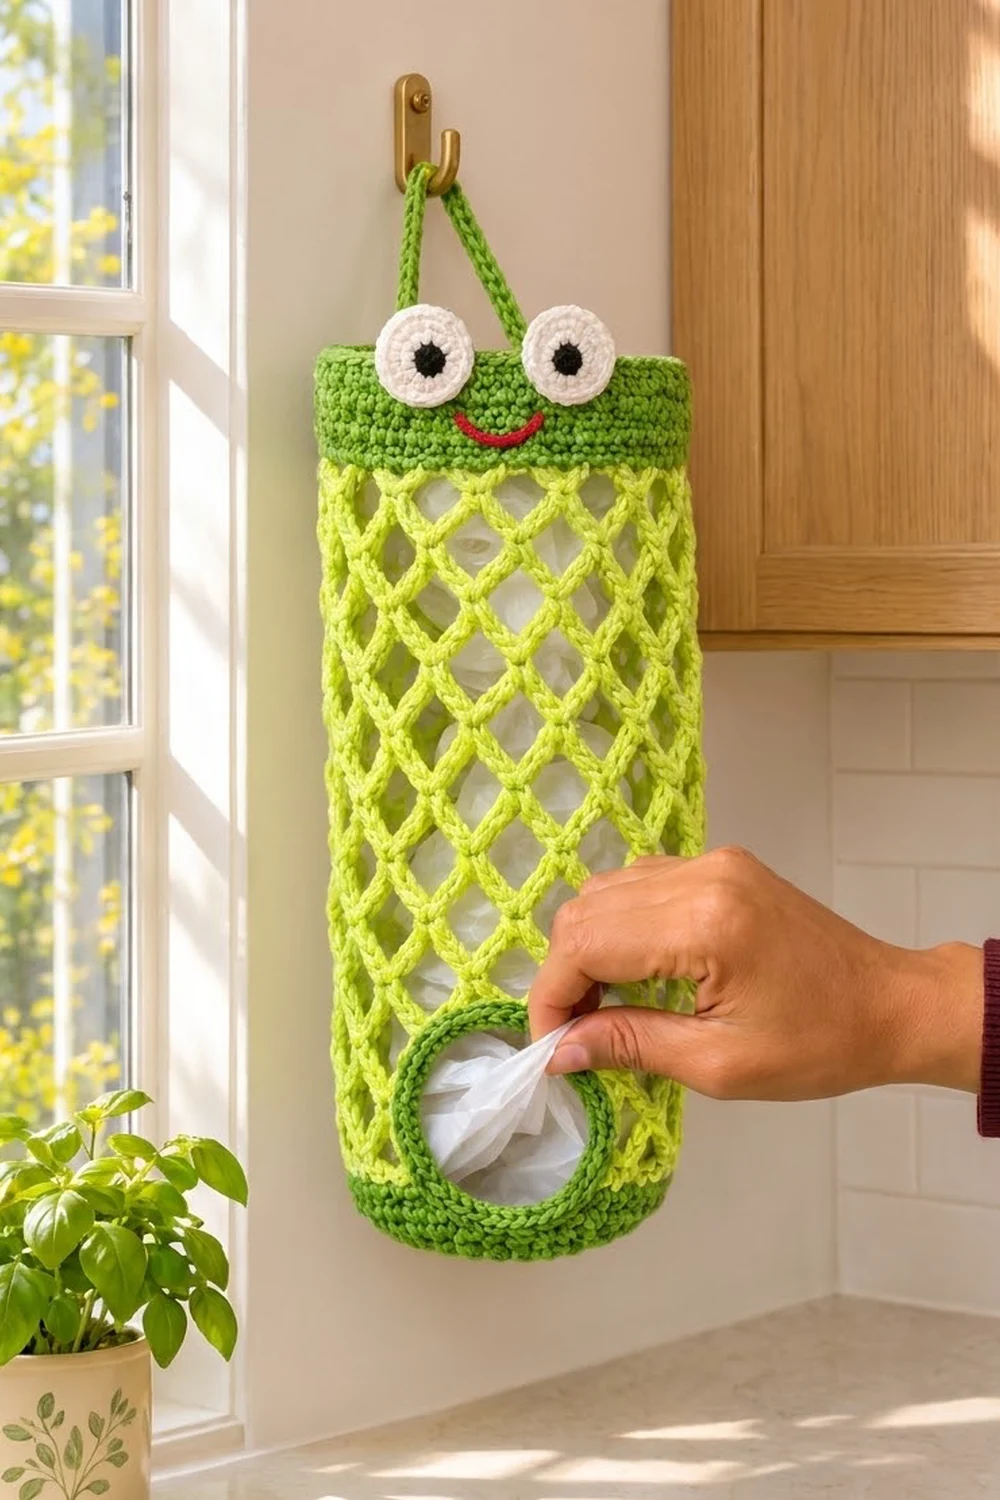
Freddie is a cheerful frog that hangs on a hook and keeps all your plastic bags in one tidy place. You stuff bags in through the top and pull them out one at a time through a round opening near the bottom.
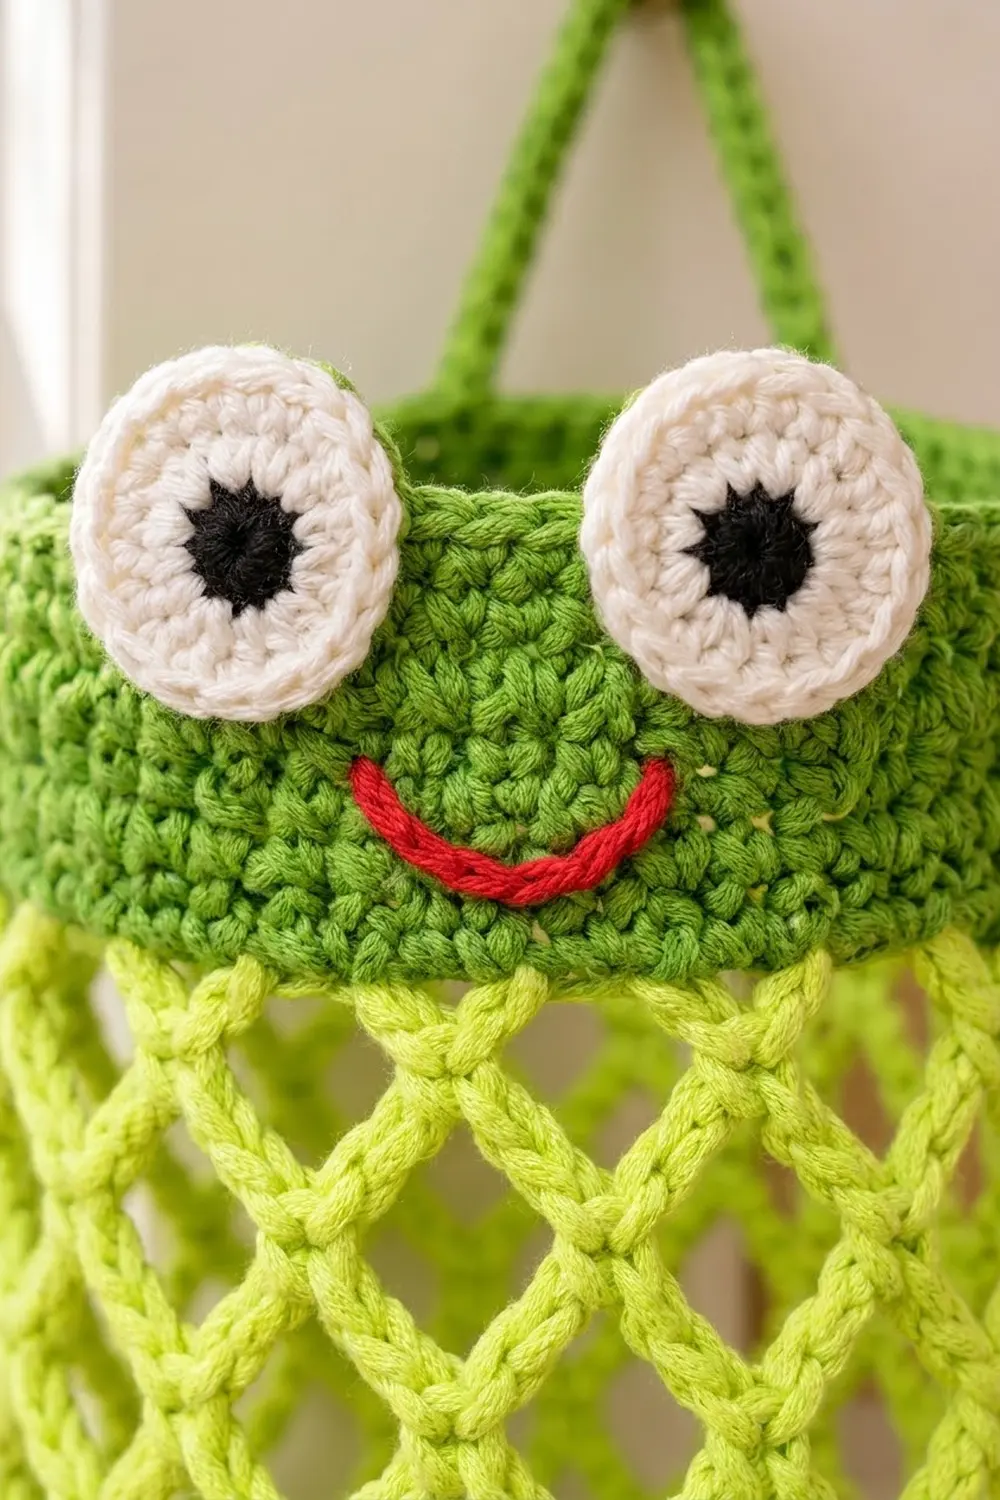
The body is an airy diamond mesh in bright lime green, so you can see how many bags are left. Solid grass-green bands frame the top and bottom. The top band carries the face: two big white eyes with black pupils and a red stitched smile. A grass-green ring edges the dispensing hole, and a matching strap hangs the holder.
This pattern uses US crochet terms. The finished holder is about 18 in (45.7 cm) tall and 7.5 in (19.1 cm) wide when flat, with a circumference of 15 in (38.1 cm).
The holder is made from the bottom up in one piece. First you crochet a flat circular base, then a short solid wall. Next comes the mesh, with three back-and-forth rows that leave the dispensing opening. The top band is solid single crochet. The eyes and strap are small separate pieces that you sew on at the end.
Finished Size and Construction
- Finished size: 18 in (45.7 cm) tall × 7.5 in (19.1 cm) wide flat; 15 in (38.1 cm) around
- Skill level: Easy–Intermediate
- Terminology: US
- Yarn weight: Worsted (#4), cotton or cotton blend
- Hook: 5.0 mm (H-8)
- Number of pieces: 1 body, plus 2 eye appliqués and 1 strap
- Layout: Vertical tube; face at the top front, dispensing opening at the bottom front
- Base size: 4.8 in (12.2 cm) across
- Size before the top band: 15 in (38.1 cm) tall
- Top band (border) depth: 3 in (7.6 cm)
Materials
Use a smooth worsted-weight cotton. Cotton holds its shape when the holder is full and doesn’t stretch out on the hook the way acrylic can. Any colors work, but strong contrast between the mesh and the bands gives the frog look.
- Grass green (A): 80 g / 160 m (bands, base, opening ring, strap)
- Lime green (B): 50 g / 100 m (mesh body)
- White (C): 5 g / 10 m (eyes)
- Black (D): 2 g / 4 m (pupils)
- Red (E): 1 g / 2 m (smile embroidery)
Tools: 5.0 mm (H-8) hook, tapestry needle, 4 stitch markers, scissors, tape measure, and rust-proof pins for blocking.
All yarn amounts include a margin of about 20% for gauge swatching and differences in tension.
Abbreviations (US Terms)
- ch – chain
- sc – single crochet
- sl st – slip stitch
- sk – skip
- st(s) – stitch(es)
- BLO – back loop only
- MR – magic ring
- rnd – round
- ch-5 loop – the space under a chain of 5
Special stitch – Mesh loop: ch 5, sc in the next ch-5 loop. Each round of mesh loops is offset by half a loop from the round below, which makes the diamond pattern.
Gauge and Checkpoints
- Solid sc: 16 sc × 16 rnds = 4 in (10.2 cm)
- Mesh: one ch-5 loop is about 1 in (2.5 cm) wide; one mesh round is about 0.75 in (1.9 cm) tall when lightly stretched lengthwise
Test with the base first. It is your gauge swatch.
Checkpoints:
- After base Rnd 5, the circle measures 2.4 in (6.1 cm) across.
- After base Rnd 10, it measures 4.8 in (12.2 cm) across.
- After Rnd 16 (the wall), the wall stands 1.5 in (3.8 cm) tall.
- After Mesh Rnd 10, the mesh measures 7.5 in (19.1 cm) tall.
- After Mesh Rnd 18, the whole body measures 15 in (38.1 cm) tall.
- After the top band, the holder measures 18 in (45.7 cm) tall.
If the piece is too big, go down one hook size. If it is too small, go up one size. Don’t change the stitch counts: the base and the top band both depend on 60 stitches around.
Pattern
Base (Color A)
Work in continuous rounds. Use a stitch marker to mark the first stitch of each round.
- Rnd 1: 6 sc in MR. (6)
- Rnd 2: 2 sc in each st around. (12)
- Rnd 3: (sc, 2 sc in next st) 6 times. (18)
- Rnd 4: (sc in next 2 sts, 2 sc in next st) 6 times. (24)
- Rnd 5: (sc in next 3 sts, 2 sc in next st) 6 times. (30) Checkpoint: 2.4 in (6.1 cm).
- Rnd 6: (sc in next 4 sts, 2 sc in next st) 6 times. (36)
- Rnd 7: (sc in next 5 sts, 2 sc in next st) 6 times. (42)
- Rnd 8: (sc in next 6 sts, 2 sc in next st) 6 times. (48)
- Rnd 9: (sc in next 7 sts, 2 sc in next st) 6 times. (54)
- Rnd 10: (sc in next 8 sts, 2 sc in next st) 6 times. (60) Checkpoint: 4.8 in (12.2 cm).
Bottom Wall (Color A)
- Rnd 11: sc in BLO of each st around. (60) This makes the fold between the base and the side wall.
- Rnds 12–16: sc in each st around. (60)
Sl st in the next st to finish the round evenly. Fasten off A. Checkpoint: the wall is 1.5 in (3.8 cm) tall.
Mesh Body with Dispensing Opening (Color B)
Every mesh round has 15 loops: 60 sts ÷ 4 sts per loop = 15.
Mesh Rnd 1: Join B in any st. Ch 1, sc in the same st. (Ch 5, sk 3 sts, sc in next st) 14 times. Ch 5, sk the last 3 sts, sl st in the first sc. (15 loops)
Place markers in loops 13, 14 and 15. These three loops form the bottom edge of the opening, and the opening marks the front of the holder.
Opening rows: Work back and forth over 12 of the loops. This leaves a gap above the marked loops.
- Row 2: Sl st in the next 3 ch to reach the center of loop 1. Ch 1, sc in loop 1, (ch 5, sc in next loop) 11 times, ending in loop 12. (12 sc, 11 loops) Turn.
- Row 3: Ch 5 (this is the turning loop), sc in the first ch-5 loop, (ch 5, sc in next loop) 10 times. (11 sc, 11 loops including the turning loop) Turn.
- Row 4: Repeat Row 3. (11 sc, 11 loops) Don’t turn.
Bridge: Ch 20. Sl st in the 3rd ch of Row 4’s turning ch-5. You are now working in rounds again.
Mesh Rnd 5: Ch 1, sc in the same st. (Ch 5, sc in next loop of Row 4) 10 times, giving 11 sc across Row 4. Ch 5, sc in the 3rd ch of the bridge, (ch 5, sk 4 ch, sc in next ch) 3 times, placing sc in bridge ch 8, 13 and 18. Ch 5, sl st in the first sc. (11 + 4 = 15 sc, 15 loops)
Mesh Rnds 6–18: Sl st in the next 3 ch to reach the loop center. Ch 1, sc in the same loop, (ch 5, sc in next loop) 14 times, ch 5, sl st in the first sc. (15 loops)
Checkpoints: 7.5 in (19.1 cm) of mesh after Mesh Rnd 10; 15 in (38.1 cm) total body height after Mesh Rnd 18. Fasten off B.
Dispensing Opening Ring (Color A)
The opening measures about 3.5 in (8.9 cm) wide × 2.25 in (5.7 cm) tall before the edging.
- Ring Rnd 1: Join A at one bottom corner of the opening.
- Work 4 sc in each of the marked loops 13, 14 and 15 (12 sc).
- Work 2 sc in each of the 3 row-ends up that side (6 sc).
- Work 12 sc evenly across the underside of the 20-ch bridge (12 sc).
- Work 2 sc in each of the 3 row-ends down the other side (6 sc).
- Sl st in the first sc. (36)
- Ring Rnds 2–3: Ch 1, sc in each st around, sl st in the first sc. (36)
Fasten off. Working 12 sc across 20 bridge chains pulls the top edge in a little, so the opening rounds out. The finished ring is about 0.75 in (1.9 cm) wide, and the opening inside it is about 2.75 in (7.0 cm) across.
Eyes (Make 2)
- Rnd 1 (D): 6 sc in MR, sl st in the first sc. (6) Fasten off D.
- Rnd 2 (C): Join C. Ch 1, 2 sc in each st around. (12)
- Rnd 3: (sc, 2 sc in next st) 6 times, sl st in the first sc. (18)
Fasten off, leaving a 12 in (30.5 cm) tail. Each eye is 1.5 in (3.8 cm) across.
Strap (Color A)
- Row 1: Ch 51. Sc in the 2nd ch from the hook and in each ch across. (50)
- Row 2: Ch 1, turn, sc in each st across. (50)
Fasten off, leaving long tails. The strap is 12.5 in (31.8 cm) long and 0.5 in (1.3 cm) wide.
Border: Top Band (Color A)
Border gauge: 16 sc = 4 in (10.2 cm). Once flattened, the band has 30 sts across the front and 30 across the back.
- Rnd T1 (conversion): Join A in any sc of Mesh Rnd 18. Ch 1, (sc in the sc, 3 sc in next ch-5 loop) 15 times, sl st in the first sc. This gives 15 sc worked one into each existing sc, plus 45 sc worked into the loops (15 loops × 3), for 60 total.
- Rnds T2–T12: sc in each st around. (60)
Sl st in the next st and fasten off. Checkpoint: the band is 3 in (7.6 cm) deep, and the holder is 18 in (45.7 cm) tall.
Why the math works: The base finished with 60 sts. Each mesh loop covers 4 of those stitches. Rnd T1 puts back exactly 4 sts per loop (1 + 3), so the band is again 60 sts, or 15 in (38.1 cm) around. That means the tube stays straight from bottom to top, with no flaring or pinching. With the holder flat, 60 ÷ 2 = 30 sts per side, which gives the 7.5 in (19.1 cm) width.
Face and strap:
- Flatten the holder with the opening centered on the front.
- Sew the eyes onto the band 0.25 in (0.6 cm) below the top edge, with 1 in (2.5 cm) between them.
- With E, backstitch a curved smile 1.5 in (3.8 cm) wide, centered 0.25 in (0.6 cm) below the eyes.
- Overlap each strap end 1 in (2.5 cm) on the inside of the band at the side folds, and whipstitch it in place. The loop rises about 3.75 in (9.5 cm) above the rim.
Final Blocking
- Weave in all ends, running each tail through solid stitches for at least 2 in (5.1 cm).
- Spray the holder lightly with water until it is damp but not soaked.
- Slide a rolled towel inside so the tube is 15 in (38.1 cm) around.
- Gently stretch the mesh lengthwise until the body measures 15 in (38.1 cm) from base to band.
- Shape the opening ring into a circle and pin it in place.
- Flatten the eyes with your fingers so they sit smoothly.
- Leave the holder to dry completely, then remove the towel.
Final Quality-Control Checklist
- Total height is 18 in (45.7 cm); flat width is 7.5 in (19.1 cm).
- Every mesh round has 15 loops, and the diamonds line up evenly.
- The base and the top band each have 60 sts.
- The opening is centered on the front and sits right above the bottom wall.
- The ring lies flat and the opening is about 2.75 in (7.0 cm) across.
- The eyes are level and the smile is centered.
- The strap is secure and carries the holder’s weight when full.
Troubleshooting
- The mesh leans or spirals: Check that you sl st to the loop center at the start of every round.
- The opening is too small: Use ch 22 for the bridge and work 14 sc across it in Ring Rnd 1, then 38 sc in Ring Rnds 2–3.
- The top band flares: Your tension is too loose. Work Rnds T2–T12 with a 4.5 mm hook.
- The base cups upward: You may have skipped an increase. Recount each round.
- The bag pulls the ring out of shape: Add a fourth round of sc to the ring.
Care
Hand wash in cool water and lay flat to dry, reshaping the mesh while it’s damp. Don’t tumble dry.
Final Notes
All the measurements build on each other. The base is 60 sts and 4.8 in (12.2 cm) across. The wall adds 1.5 in (3.8 cm). Eighteen mesh rounds of 15 loops add 13.5 in (34.3 cm), for 15 in (38.1 cm) before the band. The 3 in (7.6 cm) top band brings the holder to 18 in (45.7 cm). Check your gauge at each stage, and Freddie will hang straight and dispense neatly.
Happy crocheting!