

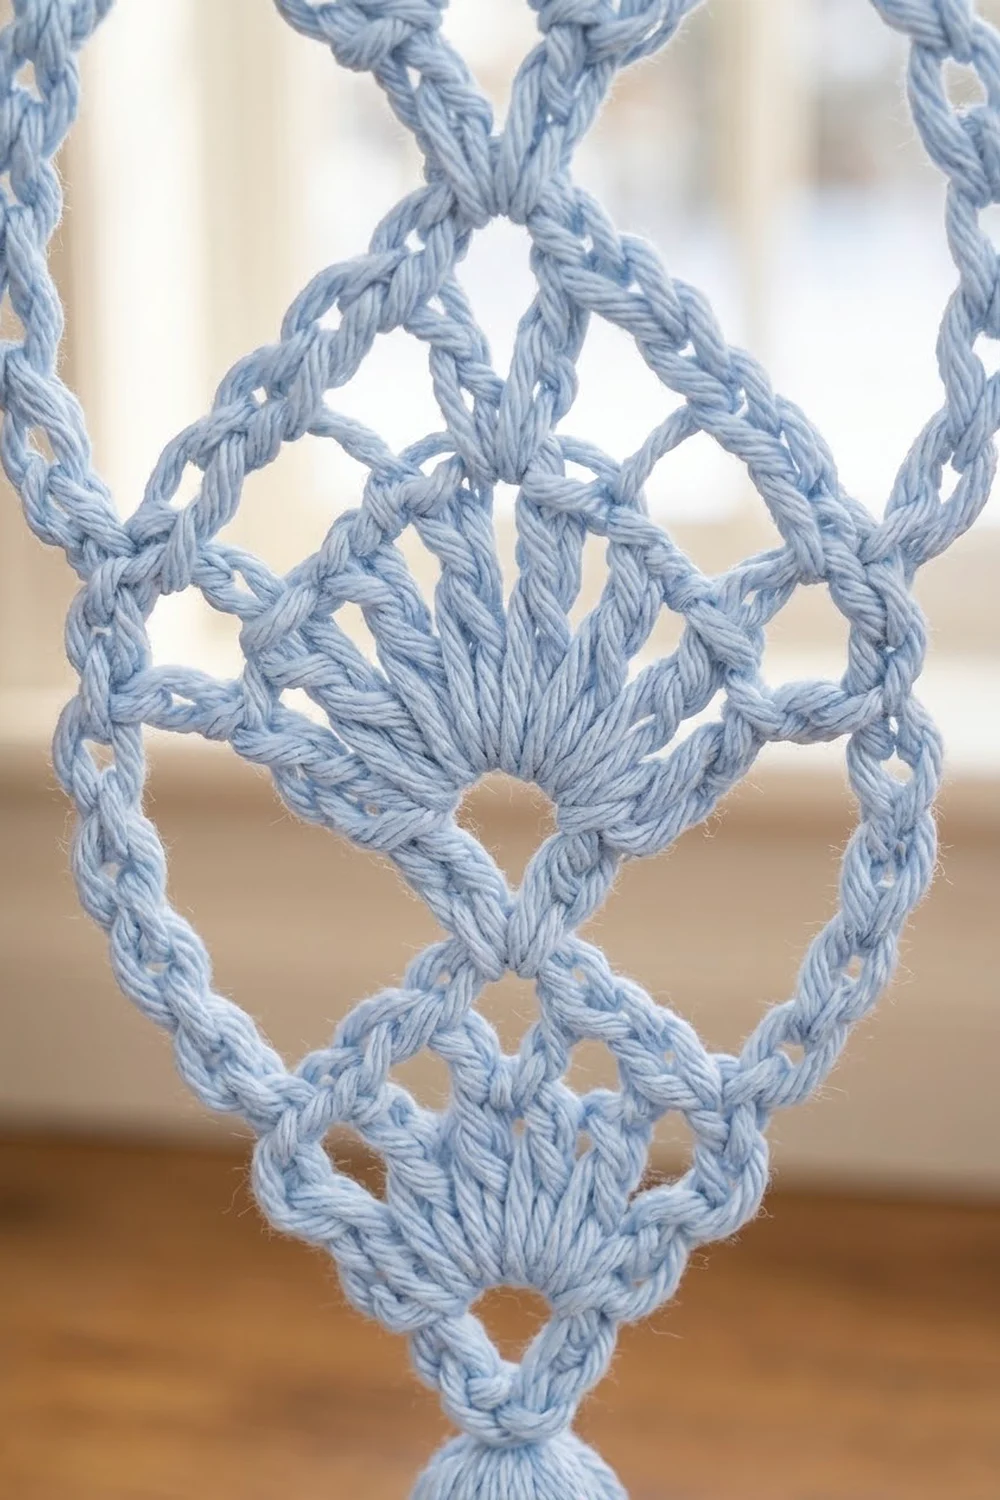
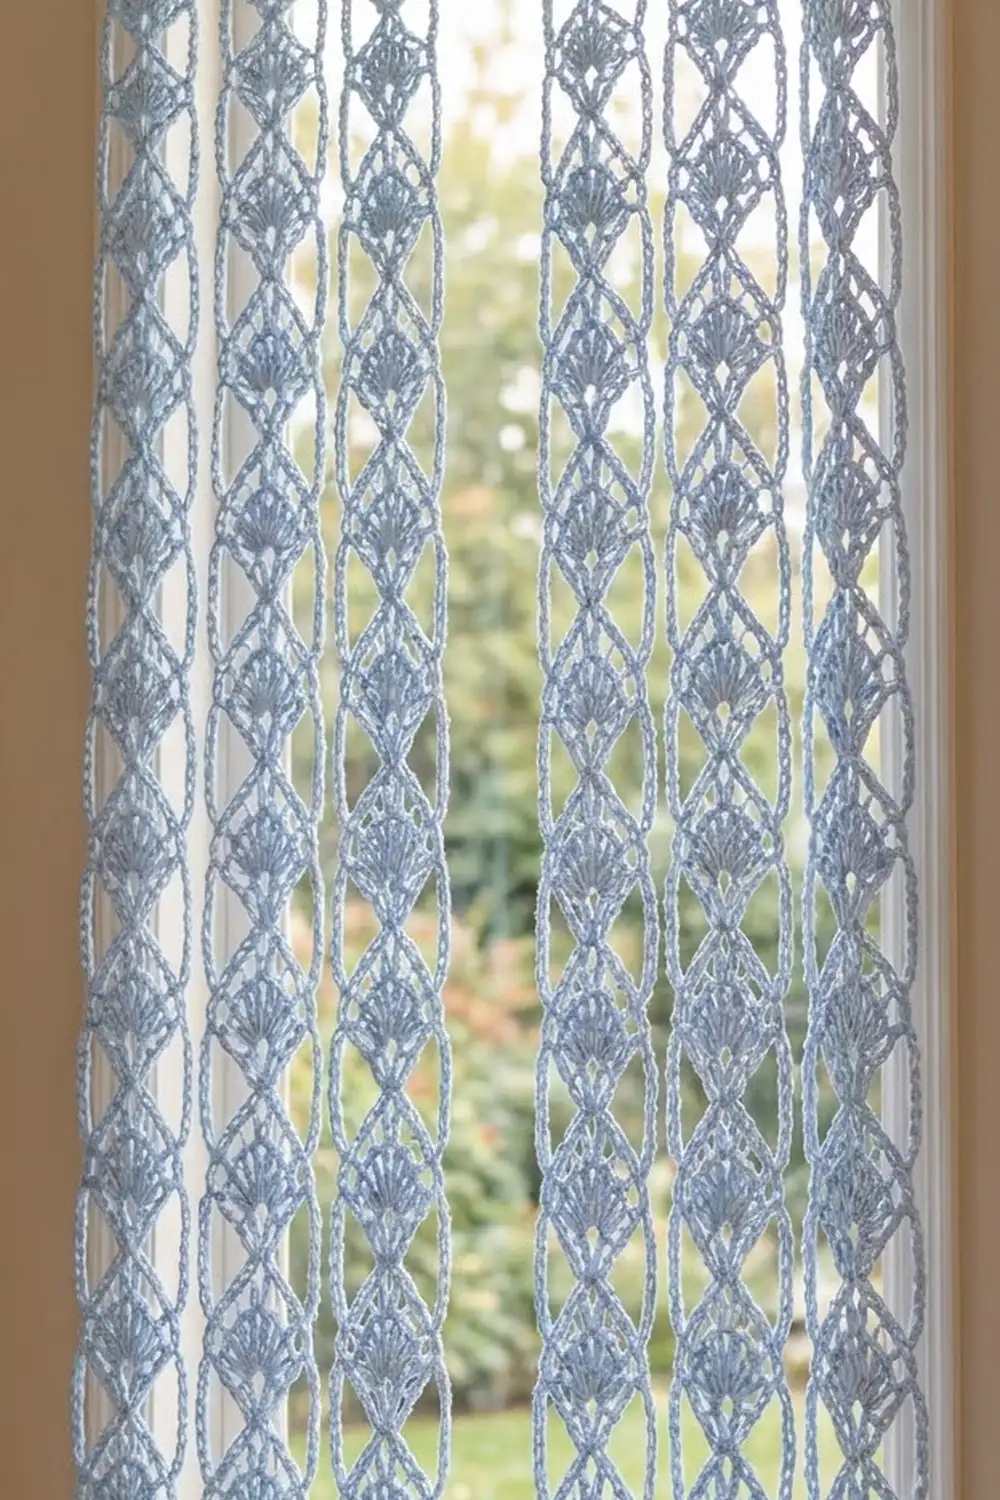
This curtain is made of long lace strips that hang loose from a rod, like a beaded door curtain. Each strip is a chain of pointed oval motifs, and each motif holds a small shell fan that opens upward from the bottom tip. With one tassel at the bottom of every strip, the curtain looks light and wintry and lets plenty of daylight through.
The sample uses one color, a pale powder blue, in DK-weight cotton. Cotton gives a crisp stitch outline and hangs straight. The pattern uses US crochet terms.
Each finished strip is 72 in (182.9 cm) of joined motifs. With the hanging loop and tassel added, it measures 78 in (198.1 cm) from the rod to the tassel tip. Each panel has 5 strips. Hung 1.5 in (3.8 cm) apart, one panel is 19.75 in (50.2 cm) wide.
Here is how it’s made. You crochet a small motif in two short rows and two rounds. From the second motif on, you join each new motif to the one before it during its last round. Sixteen motifs make one strip. Then you add a hanging loop at the top and a tassel at the bottom.
Finished Size and Construction
- Motif size: 2.75 in (7.0 cm) wide x 4.5 in (11.4 cm) tall, tip to tip
- Strip length (motifs only, “size before border”): 72 in (182.9 cm)
- Strip with hanging loop: 74 in (188.0 cm)
- Strip with loop and tassel: 78 in (198.1 cm)
- Panel width (5 strips, hung 1.5 in / 3.8 cm apart): 19.75 in (50.2 cm)
- Skill level: Intermediate
- Terminology: US
- Yarn weight: DK (3), cotton
- Hook: 4.0 mm (G-6)
- Number of pieces: 160 motifs (16 per strip x 10 strips), plus 10 tassels
- Layout: 2 panels, each 5 strips across x 16 motifs down
- Edge finish depth: 2 in (5.1 cm) hanging loop at the top, 4 in (10.2 cm) tassel at the bottom
Materials
Yarn: DK-weight cotton or a cotton blend, about 115 m per 50 g. Choose a smooth, mercerized or combed cotton so the fans and rope-like frames show clearly. A fuzzy or splitty yarn will blur the lace.
- Pale powder blue: 400 g (about 920 m / 1,006 yd), or 8 balls of 50 g
How the yarn is used:
– Motifs: about 2 g (4.5 m) each, 720 m in total
– Tassels: about 7.5 m each, 75 m in total
– Hanging loops: about 1 m each, 10 m in total
That comes to about 805 m. The 920 m recommended includes a margin of roughly 14% for gauge differences and swatching.
Tools:
– 4.0 mm (G-6) crochet hook
– Tapestry needle
– Scissors
– Stiff card cut to 4.5 in (11.4 cm) tall, for the tassels
– Tape measure
– Blocking mats and rust-proof pins
– Spray bottle
– Curtain rod, at least 0.5 in (1.3 cm) narrower around than the hanging loop
Abbreviations (US Terms)
- ch – chain
- sl st – slip stitch
- sc – single crochet
- dc – double crochet
- sp – space
- st(s) – stitch(es)
- rep – repeat
- RS – right side
Special stitch – Tip picot loop: Ch 4, then sl st in the 4th ch from the hook. This makes a small closed loop at the top point of the motif.
Special technique – Tip join: Work this in place of a ch-3 at a tip. Ch 1, sl st into the bottom ch-3 tip loop of the previous motif, then ch 1.
Gauge and Checkpoints
Base gauge: 20 sc = 4 in (10.2 cm) when worked over a chain, and 5 ch = 1 in (2.5 cm), on a 4.0 mm hook.
Make one complete motif before you start the strips, and pin it out to block. This single motif is your gauge test.
Checkpoints for that test motif:
– After Row 1, the fan measures 1.75 in (4.4 cm) across the open edge.
– After Row 2, the fan measures 2.25 in (5.7 cm) across.
– After Round 3, the chain frame measures about 4.25 in (10.8 cm) from tip to tip, lying relaxed.
– After Round 4, blocked, the motif measures 2.75 in (7.0 cm) x 4.5 in (11.4 cm).
If the motif is too big: Go down to a 3.75 mm hook. If only the frame is too long, tighten your chains in Round 3.
If the motif is too small: Go up to a 4.5 mm hook. If the frame cups, loosen your chains in Round 3.
Every 0.25 in (0.6 cm) of extra motif height adds 4 in (10.2 cm) over 16 motifs, so get the gauge right before you go on.
Motif Pattern
Your first motif for each strip is worked exactly as written below. Every later motif follows the same steps but uses the tip join in Round 4 (see Joining).
Foundation: Ch 4, then sl st into the first ch to form a ring.
Row 1 (fan): Ch 3 (counts as dc), then work 8 dc into the ring. Turn.
(9 dc)
The dc spread into a half circle, with the ring at the bottom. That ring becomes the motif’s bottom point.
Row 2 (fan edge): Ch 1, sc in the first dc. Ch 2, sc in the next dc. Rep from * 7 more times, working the last sc into the top of the turning ch-3. Do not turn.
(9 sc, 8 ch-2 sps)
The last sc of this row is Corner A. The first sc of this row is Corner B.
Round 3 (chain frame): Ch 12 for the upper-left arc. Make 1 tip picot loop for the top point. Ch 12 for the upper-right arc. Sc in Corner B.
Ch 10 for the lower-right arc. Work (sc, ch 3, sc) around the foundation ring at the base of the fan, between the turning ch and the first dc. This forms the bottom ch-3 tip loop. Ch 10 for the lower-left arc, then sl st in Corner A.
(2 ch-12 arcs, 2 ch-10 arcs, 1 top picot loop, 1 bottom ch-3 loop)
The upper arcs are longer because they have to reach from the fan’s corners up to the top point. The lower arcs only have to wrap down around the fan to the ring.
Round 4 (rope edging): Ch 1, sc in Corner A. Then work, in order:
– 14 sc in the ch-12 arc
– (2 sc, ch 3, 2 sc) in the top picot loop
– 14 sc in the next ch-12 arc
– sc in Corner B
– 12 sc in the ch-10 arc
– sc in the next sc
– (2 sc, ch 3, 2 sc) in the bottom ch-3 sp
– sc in the next sc
– 12 sc in the last ch-10 arc
Sl st to the first sc to join. Fasten off and weave in the ends.
(64 sc, 2 ch-3 tip loops)
Stitch check: 1 + 14 + 4 + 14 + 1 + 12 + 1 + 4 + 1 + 12 = 64 sc.
Packing 14 sc onto each 12-ch arc, and 12 sc onto each 10-ch arc, makes the frame firm and rope-like. It also pulls the frame into a pointed oval instead of a circle.
Make All Pieces
You need 160 motifs: 16 per strip x 10 strips. All of them are pale powder blue.
Make them as joined strips rather than loose motifs. Each strip is 1 plain motif followed by 15 joined motifs.
Panel layout (repeat for the second panel), where each M is one motif:
Strip:   1    2    3    4    5
Row 1    M    M    M    M    M   <- hanging loops above
Row 2    M    M    M    M    M
Row 3    M    M    M    M    M
...      .    .    .    .    .
Row 15   M    M    M    M    M
Row 16   M    M    M    M    M   <- tassels below
Each panel has 5 strips x 16 motifs = 80 motifs, so two panels need 160 motifs.
Joining
Method: Join-as-you-go, tip to tip, during Round 4.
Work Motif 2 the same as Motif 1 through Round 3. In Round 4, work up to the top picot loop. There, work: 2 sc, tip join (ch 1, sl st into Motif 1’s bottom ch-3 tip loop, ch 1), 2 sc. Finish the round as written.
Stitch-to-stitch logic: The ch 1 + sl st + ch 1 takes the place of the ch-3 tip loop. So the sc count stays at 64, and the strip gets no extra stitches. The only place two motifs touch is the joined tip. That narrow point is what gives the pinched, crossed lattice look between motifs.
Repeat this for Motifs 3 to 16, always joining the new motif’s top tip to the bottom tip of the motif above it. Leave the bottom ch-3 loop of Motif 16 unjoined. The tassel will hang from it.
Tension advice: Keep the joining sl st at the same tension as your chains. If it’s too tight, the tips pucker and the strip shortens. If it’s too loose, the motifs swing apart and the strip twists.
Lay the strip flat every few motifs and check that all the fans open in the same direction. If you work one motif from the wrong side, it shows straight away.
Size checkpoints:
– 2 joined motifs: 9 in (22.9 cm)
– 3 joined motifs: 13.5 in (34.3 cm)
– 8 joined motifs: 36 in (91.4 cm)
– 16 joined motifs: 72 in (182.9 cm)
Each motif adds 4.5 in (11.4 cm), because the joined tips sit on top of each other rather than adding length.
Border
This design has no border around the outside. The strips hang free, so the only edge finishing is a hanging loop at the top of each strip and a tassel at the bottom.
Border gauge: 20 sc = 4 in (10.2 cm), the same as Round 4.
Hanging loop (top of Motif 1):
Round 1: Join yarn with a sl st into the top ch-3 tip loop of Motif 1. Ch 14, then sl st back into the same tip loop.
(1 ch-14 loop)
Round 2: Ch 1, work 20 sc into the ch-14 loop, then sl st to the first sc to join. Fasten off.
(20 sc)
Why the math works: At border gauge, 20 sc measure 4 in (10.2 cm) around the loop. Folded flat, the loop is 2 in (5.1 cm) long. That’s enough to fit around a rod up to about 3.5 in (8.9 cm) around, with room for the strip to slide. Fitting 20 sc onto 14 ch makes the loop firm, so it keeps its shape under the weight of the strip.
Tassel (bottom of Motif 16):
- Wrap yarn 30 times around the 4.5 in (11.4 cm) card. Each wrap uses about 9 in (22.9 cm), or roughly 6.9 m per tassel.
- Thread a 12 in (30.5 cm) tie through the top of the wraps. Pass it through Motif 16’s bottom ch-3 tip loop and knot it tightly.
- Cut the wraps at the bottom edge of the card.
- About 0.5 in (1.3 cm) below the top, wrap a 12 in (30.5 cm) strand 6 times around to form the rounded head. Knot it and bury the ends inside the tassel.
- Trim the tassel to 4 in (10.2 cm).
Total strip length: 2 in (5.1 cm) loop + 72 in (182.9 cm) of motifs + 4 in (10.2 cm) tassel = 78 in (198.1 cm).
Final Blocking
- Wet-block each strip in sections. Pin the first 3 or 4 motifs at a time.
- Spray each motif until it is damp, but not soaking.
- Pin the top and bottom tips first so the motif measures 4.5 in (11.4 cm) tall.
- Pin both side corners (Corners A and B) so the motif measures 2.75 in (7.0 cm) wide.
- Pin the middle of each fan spoke outward so the fan opens evenly.
- Leave the motifs to dry fully, then move on to the next section.
- Steam the tassels lightly, comb them with your fingers, and trim any uneven strands.
- Hang the finished strips for 24 hours before you make any final adjustments. Cotton relaxes slightly once it hangs.
Final Quality-Control Checklist
- Every motif has 9 dc in the fan and 64 sc in Round 4.
- All the fans open upward, toward the hanging loop.
- Each strip has 16 motifs and measures 72 in (182.9 cm) without the loop and tassel.
- Every tip join is secure, with no gaps or twisting.
- The hanging loops are the same size, with 20 sc each.
- The tassels are 4 in (10.2 cm) long with matching heads.
- The 10 strips are within 0.5 in (1.3 cm) of each other in length.
- All ends are woven in through the sc frames, not through the lace.
Troubleshooting
The motif is round instead of pointed: Your Round 3 chains are too tight. Loosen them, or check that you worked 14 and 12 sc into the arcs rather than fewer.
The frame ruffles: You have too many sc on an arc, or your chains are too loose. Recount Round 4 against the 64-sc total.
The fan won’t lie flat: Work the dc in Row 1 a little looser, or block the spokes more firmly.
The strip spirals when hung: At least one motif was joined from the wrong side. Undo that join and rework it with the RS facing you.
The strips are different lengths: Your tension at the joins varies. Block all the strips to the same per-motif height of 4.5 in (11.4 cm).
The tassel head slips: Wrap the neck more tightly and knot it twice before burying the ends.
Care
Hand wash in cool water, roll the strips in a towel, and dry them flat, then reblock if needed. Don’t wring or tumble dry, because that distorts the lace points.
Final Notes
Every measurement in this curtain builds on the one before it. If your gauge is 20 sc = 4 in (10.2 cm), each motif comes out at 2.75 in x 4.5 in (7.0 x 11.4 cm). Sixteen joined motifs then make a 72 in (182.9 cm) strip. Adding the 2 in (5.1 cm) loop and 4 in (10.2 cm) tassel brings it to 78 in (198.1 cm), and five strips hung 1.5 in (3.8 cm) apart make a 19.75 in (50.2 cm) panel.
Check your test motif carefully, keep the joins even, and the whole curtain will hang straight and match.
Happy crocheting!